Getting Started
Page 3
...printer for use with a computer...8 Setting up the printer for use without a computer or network (standalone 9 Installing the printer software...13 Installing the optional XPS driver (Windows Vista users only 13 Using the printer 15 Understanding the printer...15 Understanding the parts ...of the printer ...15 Understanding the printer software...16 Using the Macintosh printer software...17 Performing basic printer functions...18 Making a copy...18 Printing a photo or selected photos...19 Scanning a document ...
...printer for use with a computer...8 Setting up the printer for use without a computer or network (standalone 9 Installing the printer software...13 Installing the optional XPS driver (Windows Vista users only 13 Using the printer 15 Understanding the printer...15 Understanding the parts ...of the printer ...15 Understanding the printer software...16 Using the Macintosh printer software...17 Performing basic printer functions...18 Making a copy...18 Printing a photo or selected photos...19 Scanning a document ...

Getting Started
Page 4
... (Ethernet) network ...36 Connecting the printer directly to the computer with a USB cable 37 Troubleshooting 38 Setup troubleshooting...38 Power button is not lit ...38 Software does not install...38 Page does not print...40 Wireless troubleshooting...41 Check your security keys...41 Wireless setup program cannot communicate with the printer...
... (Ethernet) network ...36 Connecting the printer directly to the computer with a USB cable 37 Troubleshooting 38 Setup troubleshooting...38 Power button is not lit ...38 Software does not install...38 Page does not print...40 Wireless troubleshooting...41 Check your security keys...41 Wireless setup program cannot communicate with the printer...
Getting Started
Page 5
... a Macintosh operating system. To access the Mac Help: 1 From the Finder desktop, double-click the Lexmark 9500 Series folder. 2 Double-click the printer Help icon. It installs with the printer software. It installs with the printer software. Introduction Finding information about the printer Publications See the For Quick Setup sheet Initial setup instructions...
... a Macintosh operating system. To access the Mac Help: 1 From the Finder desktop, double-click the Lexmark 9500 Series folder. 2 Double-click the printer Help icon. It installs with the printer software. It installs with the printer software. Introduction Finding information about the printer Publications See the For Quick Setup sheet Initial setup instructions...

Getting Started
Page 8
... Setting up the printer for the install screen to communicate. Wait several seconds for use with a computer or as a standalone device. Your security software may notify you have inserted the Windows CD and the install screen does not appear automatically, click Start ª Run, and then type D:\setup....exe, where D is the letter of your CD or DVD drive. • If you that Lexmark software is trying to communicate with your computer system. Always allow these programs to appear. Setting up the printer This chapter explains how to set up...
... Setting up the printer for the install screen to communicate. Wait several seconds for use with a computer or as a standalone device. Your security software may notify you have inserted the Windows CD and the install screen does not appear automatically, click Start ª Run, and then type D:\setup....exe, where D is the letter of your CD or DVD drive. • If you that Lexmark software is trying to communicate with your computer system. Always allow these programs to appear. Setting up the printer This chapter explains how to set up...
Getting Started
Page 9
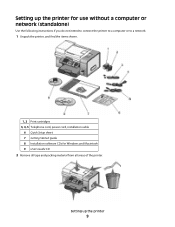
Setting up the printer 9 Setting up the printer for use without a computer or network (standalone) Use the following instructions if you do not intend to connect the printer to a computer or to a network. 1 Unpack the printer, and find the items shown. 1, 2 Print cartridges 3, 4, 5 Telephone cord, power cord, installation cable 6 Quick Setup sheet 7 Getting Started guide 8 Installation software CDs for Windows and Macintosh 9 User's Guide CD 2 Remove all tape and packing material from all areas of the printer.
Setting up the printer 9 Setting up the printer for use without a computer or network (standalone) Use the following instructions if you do not intend to connect the printer to a computer or to a network. 1 Unpack the printer, and find the items shown. 1, 2 Print cartridges 3, 4, 5 Telephone cord, power cord, installation cable 6 Quick Setup sheet 7 Getting Started guide 8 Installation software CDs for Windows and Macintosh 9 User's Guide CD 2 Remove all tape and packing material from all areas of the printer.
Getting Started
Page 13
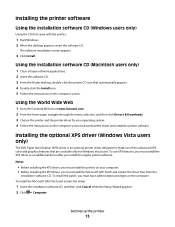
...lexmark.com. 2 From the home page, navigate through the menu selection, and then click Drivers & Downloads. 3 Choose the printer and the printer driver for Windows Vista users. To install the patch, you must install the Microsoft QFE Patch and extract the driver files from the installation software... users only) The XML Paper Specification (XPS) driver is an optional printer driver designed to download the driver and install the printer software. The software installation screen appears. 3 Click Install. To use of the advanced XPS color and graphics features that came with the printer: 1 ...
...lexmark.com. 2 From the home page, navigate through the menu selection, and then click Drivers & Downloads. 3 Choose the printer and the printer driver for Windows Vista users. To install the patch, you must install the Microsoft QFE Patch and extract the driver files from the installation software... users only) The XML Paper Specification (XPS) driver is an optional printer driver designed to download the driver and install the printer software. The software installation screen appears. 3 Click Install. To use of the advanced XPS color and graphics features that came with the printer: 1 ...
Getting Started
Page 14
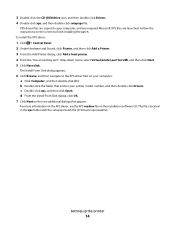
... the CD-ROM drive icon, and then double-click Drivers. 4 Double-click xps, and then double-click setupxps file. Follow the instructions on the installation software CD. The Install From Disk dialog appears. 6 Click Browse, and then navigate to your computer: a Click Computer, and then double-click (C:). XPS driver files are...
... the CD-ROM drive icon, and then double-click Drivers. 4 Double-click xps, and then double-click setupxps file. Follow the instructions on the installation software CD. The Install From Disk dialog appears. 6 Click Browse, and then navigate to your computer: a Click Computer, and then double-click (C:). XPS driver files are...
Getting Started
Page 15
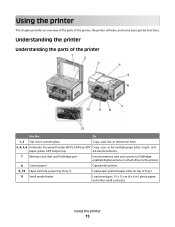
Understanding the printer Understanding the parts of the printer, the printer software, and some basic printer functions. Using the printer This chapter provides an overview of the parts of the printer Use the To 1, 2 Top cover, scanner ...
Understanding the printer Understanding the parts of the printer, the printer software, and some basic printer functions. Using the printer This chapter provides an overview of the parts of the printer Use the To 1, 2 Top cover, scanner ...
Getting Started
Page 16
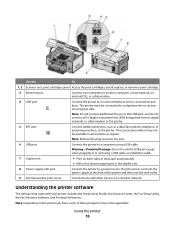
... in all countries or regions. Using the printer 16 Use the To 1, 2 Scanner unit, print cartridge carrier Access the print cartridges; Understanding the printer software The software that came with other devices on the printer you have, some of the printer and then into the power supply at the back of these.... install, replace, or remove a print cartridge. 3 Ethernet port Connect your printer includes the Productivity Studio, the Solution Center, the Fax Setup Utility, the Fax Solutions Software, and Printing Preferences.
... in all countries or regions. Using the printer 16 Use the To 1, 2 Scanner unit, print cartridge carrier Access the print cartridges; Understanding the printer software The software that came with other devices on the printer you have, some of the printer and then into the power supply at the back of these.... install, replace, or remove a print cartridge. 3 Ethernet port Connect your printer includes the Productivity Studio, the Solution Center, the Fax Setup Utility, the Fax Solutions Software, and Printing Preferences.
Getting Started
Page 17
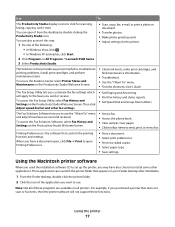
...document. • Select print preferences. • Print two-sided copies. • Select paper type. • Save settings. The Fax Solutions Software lets you may have a document open it this way: 1 Do one of the application you purchased a printer that controls the printing function and...icon of the following: • In Windows Vista, click . • In Windows XP and earlier, click Start. 2 Click Programs or All Programs ªLexmark 9500 Series. 3 Select Productivity Studio. • Scan, copy, fax, e-mail, or print a photo or document. • Transfer photos. • ...
...document. • Select print preferences. • Print two-sided copies. • Select paper type. • Save settings. The Fax Solutions Software lets you may have a document open it this way: 1 Do one of the application you purchased a printer that controls the printing function and...icon of the following: • In Windows Vista, click . • In Windows XP and earlier, click Start. 2 Click Programs or All Programs ªLexmark 9500 Series. 3 Select Productivity Studio. • Scan, copy, fax, e-mail, or print a photo or document. • Transfer photos. • ...
Getting Started
Page 28
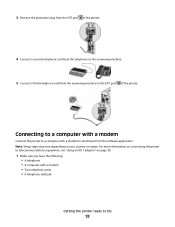
... jack Getting the printer ready to fax 28 For more information on connecting the printer to the answering machine. 5 Connect a third telephone cord from the software application.
... jack Getting the printer ready to fax 28 For more information on connecting the printer to the answering machine. 5 Connect a third telephone cord from the software application.
Getting Started
Page 35
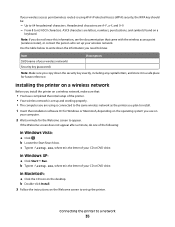
... letter of the printer. • Your wireless network is connected to the same wireless network as the printer you plan to install. 1 Insert the installation software CD for the Welcome screen to a network 35 In Macintosh: a Click the CD icon on a wireless network, make sure that came with the wireless access...
... letter of the printer. • Your wireless network is connected to the same wireless network as the printer you plan to install. 1 Insert the installation software CD for the Welcome screen to a network 35 In Macintosh: a Click the CD icon on a wireless network, make sure that came with the wireless access...
Getting Started
Page 36
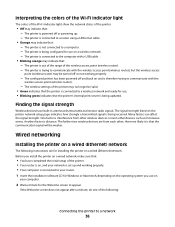
... devices are for installing the printer on the printer network setup page indicates how strongly a transmitted signal is connected to your router. 1 Insert the installation software CD for Windows or Macintosh, depending on the operating system you install the printer on a wired network, make sure that the printer's internal print server...
... devices are for installing the printer on the printer network setup page indicates how strongly a transmitted signal is connected to your router. 1 Insert the installation software CD for Windows or Macintosh, depending on the operating system you install the printer on a wired network, make sure that the printer's internal print server...
Getting Started
Page 37
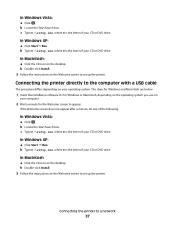
... XP: a Click Start ª Run. b Locate the Start Search box. In Windows Vista: a Click . The steps for Windows and Macintosh are below. 1 Insert the installation software CD for the Welcome screen to appear. b Double-click Install. 3 Follow the instructions on the Welcome screen to set up the printer. In Macintosh a Click...
... XP: a Click Start ª Run. b Locate the Start Search box. In Windows Vista: a Click . The steps for Windows and Macintosh are below. 1 Insert the installation software CD for the Welcome screen to appear. b Double-click Install. 3 Follow the instructions on the Welcome screen to set up the printer. In Macintosh a Click...
Getting Started
Page 38
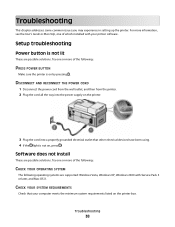
... printer. 2 Plug the cord all the way into the power supply on the printer. 3 Plug the cord into a properly grounded electrical outlet that your printer software. Software does not install These are possible solutions. Troubleshooting 38 Troubleshooting This chapter addresses some common issues you may experience in setting up the printer. CHECK...
... printer. 2 Plug the cord all the way into the power supply on the printer. 3 Plug the cord into a properly grounded electrical outlet that your printer software. Software does not install These are possible solutions. Troubleshooting 38 Troubleshooting This chapter addresses some common issues you may experience in setting up the printer. CHECK...
Getting Started
Page 39
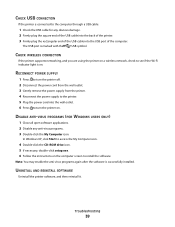
... connected to the printer. 5 Plug the power cord into the USB port of the computer. UNINSTALL AND REINSTALL SOFTWARE Uninstall the printer software, and then reinstall it. CHECK USB CONNECTION If the printer is successfully installed. The USB port is on . In Windows XP, click ...exe. 6 Follow the instructions on the computer screen to turn the printer on . DISABLE ANTI-VIRUS PROGRAMS (FOR WINDOWS USERS ONLY) 1 Close all open software applications. 2 Disable any obvious damage. 2 Firmly plug the square end of the USB cable into the back of the printer. 3 Firmly plug the ...
... connected to the printer. 5 Plug the power cord into the USB port of the computer. UNINSTALL AND REINSTALL SOFTWARE Uninstall the printer software, and then reinstall it. CHECK USB CONNECTION If the printer is successfully installed. The USB port is on . In Windows XP, click ...exe. 6 Follow the instructions on the computer screen to turn the printer on . DISABLE ANTI-VIRUS PROGRAMS (FOR WINDOWS USERS ONLY) 1 Close all open software applications. 2 Disable any obvious damage. 2 Firmly plug the square end of the USB cable into the back of the printer. 3 Firmly plug the ...
Getting Started
Page 41
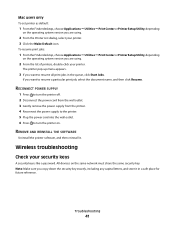
... system version you are using . 2 From the list of printers, double-click your security keys A security key is like a password. REMOVE AND REINSTALL THE SOFTWARE Uninstall the printer software, and then reinstall it in the queue, click Start Jobs. To resume print jobs: 1 From the Finder desktop, choose Applications ª Utilities ª...
... system version you are using . 2 From the list of printers, double-click your security keys A security key is like a password. REMOVE AND REINSTALL THE SOFTWARE Uninstall the printer software, and then reinstall it in the queue, click Start Jobs. To resume print jobs: 1 From the Finder desktop, choose Applications ª Utilities ª...
Getting Started
Page 42
...USB symbol. 3 Firmly plug the square end of the USB cable into the USB port on the back of the printer. 4 Cancel the software installation. 5 Do one or more of the following: CHECK POWER Make sure the light is marked with the printer during installation These are A-F,... the following : • In Windows Vista, click . • In Windows XP and earlier, click Start. 6 Click Programs or All Programs ªLexmark 9500 Series. 7 Click Wireless Configuration Utility. 8 Follow the instructions on the computer screen. ASCII characters are A-F, a-f, and 0-9. Try one of the computer...
...USB symbol. 3 Firmly plug the square end of the USB cable into the USB port on the back of the printer. 4 Cancel the software installation. 5 Do one or more of the following: CHECK POWER Make sure the light is marked with the printer during installation These are A-F,... the following : • In Windows Vista, click . • In Windows XP and earlier, click Start. 6 Click Programs or All Programs ªLexmark 9500 Series. 7 Click Wireless Configuration Utility. 8 Follow the instructions on the computer screen. ASCII characters are A-F, a-f, and 0-9. Try one of the computer...
Getting Started
Page 46
.... CHECK MAC ADDRESS If your network uses MAC address filtering, make sure that you include the MAC address of which installed with your printer software. This will allow the printer to operate on page 41 MOVE YOUR COMPUTER AND/OR PRINTER Move the computer and/or printer closer to the...) Windows users only • If you do not know the SSID of the wireless network, launch the wireless utility of which installed with your printer software. If you are not using a unique network name, consult the documentation for your wireless access point (wireless router) to learn how to set a new ...
.... CHECK MAC ADDRESS If your network uses MAC address filtering, make sure that you include the MAC address of which installed with your printer software. This will allow the printer to operate on page 41 MOVE YOUR COMPUTER AND/OR PRINTER Move the computer and/or printer closer to the...) Windows users only • If you do not know the SSID of the wireless network, launch the wireless utility of which installed with your printer software. If you are not using a unique network name, consult the documentation for your wireless access point (wireless router) to learn how to set a new ...
Getting Started
Page 48
... printer does not print These are stored. CHECK WI-FI INDICATOR LIGHT Make sure the Wi-Fi indicator light is not installed, insert the installation software CD into your computer. 3 Follow the instructions on the computer screen. CHECK CABLE • Make sure the power cable is not connected. Try one of...
... printer does not print These are stored. CHECK WI-FI INDICATOR LIGHT Make sure the Wi-Fi indicator light is not installed, insert the installation software CD into your computer. 3 Follow the instructions on the computer screen. CHECK CABLE • Make sure the power cable is not connected. Try one of...


