
User's Guide
Page 3
... the parts of the printer 16 Standalone setup...18 Understanding the printer software 23 Understanding the control panel...26 Using the control panel...26 Navigating the control panel menus ...27 Saving settings...28 Installing the printer software......Wireless networking...35 Finding IP addresses...35 Assigning an IP address...36 Configure IP address...36 Finding the signal strength ...36 Installing the printer on a network...36 Sharing the printer on a network ...36 Configure network printers ...37 Types of wireless networks ...38 Tips for using network adapters ...38 Advanced wireless setup...
... the parts of the printer 16 Standalone setup...18 Understanding the printer software 23 Understanding the control panel...26 Using the control panel...26 Navigating the control panel menus ...27 Saving settings...28 Installing the printer software......Wireless networking...35 Finding IP addresses...35 Assigning an IP address...36 Configure IP address...36 Finding the signal strength ...36 Installing the printer on a network...36 Sharing the printer on a network ...36 Configure network printers ...37 Types of wireless networks ...38 Tips for using network adapters ...38 Advanced wireless setup...
User's Guide
Page 8
... Checking your network name (Windows users only 115 Ping the access point ...115 Ping the printer ...116 Run the Wireless Setup Utility (Windows users only 116 Changing wireless settings after installation 116 Resetting an internal wireless print server to factory default settings 117 Check printer ports (Windows users only 117 Print troubleshooting...117 Partial...
... Checking your network name (Windows users only 115 Ping the access point ...115 Ping the printer ...116 Run the Wireless Setup Utility (Windows users only 116 Changing wireless settings after installation 116 Resetting an internal wireless print server to factory default settings 117 Check printer ports (Windows users only 117 Print troubleshooting...117 Partial...
User's Guide
Page 39
...Center, click Connect to a Network. 3 In the Connect to a Network dialog, click Set up a wireless ad-hoc (computer-to use a wireless access point (wireless router). As part of the setup: a Create a network name or SSID for that the computer is called an infrastructure network. Note: WEP ...to set up menu, click it. Advanced wireless setup Creating an ad hoc wireless network using Windows The recommended way to set up your wireless network is already enabled. 4 Right-click the Wireless Network Connection icon. 5 Click Properties. 6 Click the Wireless Networks tab. If you created in your...
...Center, click Connect to a Network. 3 In the Connect to a Network dialog, click Set up a wireless ad-hoc (computer-to use a wireless access point (wireless router). As part of the setup: a Create a network name or SSID for that the computer is called an infrastructure network. Note: WEP ...to set up menu, click it. Advanced wireless setup Creating an ad hoc wireless network using Windows The recommended way to set up your wireless network is already enabled. 4 Right-click the Wireless Network Connection icon. 5 Click Properties. 6 Click the Wireless Networks tab. If you created in your...
User's Guide
Page 40
... and then click the Refresh network list button. 21 Click Programs or All Programs ΠLexmark 4800 Series. 22 Click Wireless Setup Utility. Make sure you copy it when running the wireless setup. a Click the network to be prompted to connect the printer to the computer again using Windows... 1 Click Programs or All Programs ΠLexmark 4800 Series. 2 Click Wireless Setup. 3 Follow the instructions on the status of the setup process. 23 Follow the prompts on the computer screen. 24 Store your computer to recognize the new...
... and then click the Refresh network list button. 21 Click Programs or All Programs ΠLexmark 4800 Series. 22 Click Wireless Setup Utility. Make sure you copy it when running the wireless setup. a Click the network to be prompted to connect the printer to the computer again using Windows... 1 Click Programs or All Programs ΠLexmark 4800 Series. 2 Click Wireless Setup. 3 Follow the instructions on the status of the setup process. 23 Follow the prompts on the computer screen. 24 Store your computer to recognize the new...
User's Guide
Page 110
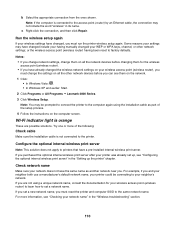
...or more information, see them on all the network devices before you can see "Checking your network name" in the "Wireless troubleshooting" section. 110 Run the wireless setup again If your printer was already set up the printer" chapter. If you set a network name. If you purchased ... 1 Click: • In Windows Vista: . • In Windows XP and earlier: Start. 2 Click Programs or All Programs Œ Lexmark 4800 Series. 3 Click Wireless Setup. If you . Wi-Fi indicator light is not connected to the access point (router) by an Ethernet cable, the connection may not include ...
...or more information, see them on all the network devices before you can see "Checking your network name" in the "Wireless troubleshooting" section. 110 Run the wireless setup again If your printer was already set up the printer" chapter. If you set a network name. If you purchased ... 1 Click: • In Windows Vista: . • In Windows XP and earlier: Start. 2 Click Programs or All Programs Œ Lexmark 4800 Series. 3 Click Wireless Setup. If you . Wi-Fi indicator light is not connected to the access point (router) by an Ethernet cable, the connection may not include ...
User's Guide
Page 112
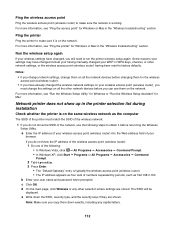
..." section Ping the printer Ping the printer to make sure the network is working. e Write down exactly, including any other network devices before rerunning the Wireless Setup Utility. For more information, see them down the SSID, security type, and the security keys if they are stored. Some reasons your settings may have...
..." section Ping the printer Ping the printer to make sure the network is working. e Write down exactly, including any other network devices before rerunning the Wireless Setup Utility. For more information, see them down the SSID, security type, and the security keys if they are stored. Some reasons your settings may have...
User's Guide
Page 113
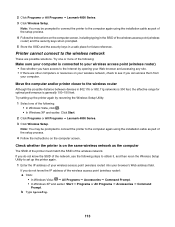
... : • In Windows Vista, click . • In Windows XP and earlier: Click Start. 2 Click Programs or All Programs Œ Lexmark 4800 Series. 3 Click Wireless Setup. 2 Click Programs or All Programs Œ Lexmark 4800 Series. 3 Click Wireless Setup. Note: You may be prompted to connect the printer to set up the printer again by opening your browser...
... : • In Windows Vista, click . • In Windows XP and earlier: Click Start. 2 Click Programs or All Programs Œ Lexmark 4800 Series. 3 Click Wireless Setup. 2 Click Programs or All Programs Œ Lexmark 4800 Series. 3 Click Wireless Setup. Note: You may be prompted to connect the printer to set up the printer again by opening your browser...

User's Guide
Page 114
...of the printer. 4 Cancel the software installation. 5 Click Programs or All Programs Œ Lexmark 4800 Series. 114 Note: If you set up your wireless network. Wireless Setup Utility cannot communicate with the wireless network, or contact the person who set your security keys A security key is like a ... port of digits (0-9) and letters (A-F). This is determined by periods, such as 192.168.0.100. Check your wireless access point (wireless router) to your wireless access point (wireless router). • If you do not know how to make sure you entered the correct key. All devices...
...of the printer. 4 Cancel the software installation. 5 Click Programs or All Programs Œ Lexmark 4800 Series. 114 Note: If you set up your wireless network. Wireless Setup Utility cannot communicate with the wireless network, or contact the person who set your security keys A security key is like a ... port of digits (0-9) and letters (A-F). This is determined by periods, such as 192.168.0.100. Check your wireless access point (wireless router) to your wireless access point (wireless router). • If you do not know how to make sure you entered the correct key. All devices...
User's Guide
Page 115
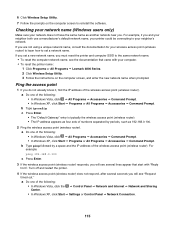
...network near you and your neighbor both use a manufacturer's default network name, your printer could be connecting to reinstall the software. 6 Click Wireless Setup Utility. 7 Follow the prompts on the computer screen, and enter the new network name when prompted. Ping the access point 1 If ... name, consult the documentation for your computer. • To reset the printer name: 1 Click Programs or All Programs Œ Lexmark 4800 Series. 2 Click Wireless Setup Utility. 3 Follow the instructions on the computer screen to your network does not have the same name as four sets of the...
...network near you and your neighbor both use a manufacturer's default network name, your printer could be connecting to reinstall the software. 6 Click Wireless Setup Utility. 7 Follow the prompts on the computer screen, and enter the new network name when prompted. Ping the access point 1 If ... name, consult the documentation for your computer. • To reset the printer name: 1 Click Programs or All Programs Œ Lexmark 4800 Series. 2 Click Wireless Setup Utility. 3 Follow the instructions on the computer screen to your network does not have the same name as four sets of the...
User's Guide
Page 116
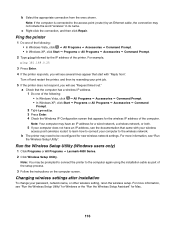
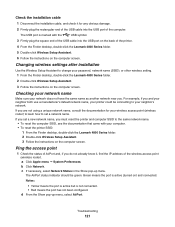
... (Windows users only) 1 Click Programs or All Programs Œ Lexmark 4800 Series. 2 Click Wireless Setup Utility. For more information, see "Run the Wireless Setup Utility". Ping the printer 1 Do one of the following : • In Windows Vista, click Œ All Programs Œ ... example, ping 192.168.0.25 3 Press Enter. 4 If the printer responds, you will see "Run the Wireless Setup Utility" for Windows or the "Run the Wireless Setup Assistant" for new wireless network settings. b Select the appropriate connection from ". c Right-click the connection, and then click Repair. a...
... (Windows users only) 1 Click Programs or All Programs Œ Lexmark 4800 Series. 2 Click Wireless Setup Utility. For more information, see "Run the Wireless Setup Utility". Ping the printer 1 Do one of the following : • In Windows Vista, click Œ All Programs Œ ... example, ping 192.168.0.25 3 Press Enter. 4 If the printer responds, you will see "Run the Wireless Setup Utility" for Windows or the "Run the Wireless Setup Assistant" for new wireless network settings. b Select the appropriate connection from ". c Right-click the connection, and then click Repair. a...

User's Guide
Page 173
... an image 81 reverse page order 47 right cartridge error 149 right cartridge incorrect 149 right cartridge missing 149 rotating photo 67 run the Wireless Setup Utility (Windows) 116 S safety information 2 saving a scanned image 89 saving and deleting print settings 55 Scan menu 88 scan and... changing 65 security information 30 security keys 106 settings are not saved 127 settings, saving 28 Setup menu Change Printer Default Settings submenu 56 Paper Handling submenu 44 setup troubleshooting cannot print from digital camera using PictBridge 133 incorrect language appears on display 101 page does...
... an image 81 reverse page order 47 right cartridge error 149 right cartridge incorrect 149 right cartridge missing 149 rotating photo 67 run the Wireless Setup Utility (Windows) 116 S safety information 2 saving a scanned image 89 saving and deleting print settings 55 Scan menu 88 scan and... changing 65 security information 30 security keys 106 settings are not saved 127 settings, saving 28 Setup menu Change Printer Default Settings submenu 56 Paper Handling submenu 44 setup troubleshooting cannot print from digital camera using PictBridge 133 incorrect language appears on display 101 page does...

User's Guide
Page 175
... photos do not print from memory card across wireless network 141 ping printer (Windows) 116 ping wireless access point (Windows) 115 printer cannot connect to wireless network 113 run Wireless Setup Utility (Windows) 116 wireless network printer does not print 107 wireless printer is no longer working 111 Wireless Setup Utility cannot communicate with printer during installation 114 Wi...
... photos do not print from memory card across wireless network 141 ping printer (Windows) 116 ping wireless access point (Windows) 115 printer cannot connect to wireless network 113 run Wireless Setup Utility (Windows) 116 wireless network printer does not print 107 wireless printer is no longer working 111 Wireless Setup Utility cannot communicate with printer during installation 114 Wi...
User's Guide (Mac)
Page 3
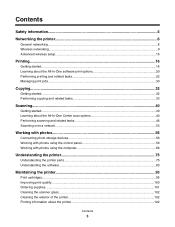
Contents Safety information...5 Networking the printer 6 General networking...6 Wireless networking...9 Advanced wireless setup...15 Printing...16 Getting started...16 Learning about the All-In-One software print options 20 Performing printing and related tasks 22 Managing print jobs......
Contents Safety information...5 Networking the printer 6 General networking...6 Wireless networking...9 Advanced wireless setup...15 Printing...16 Getting started...16 Learning about the All-In-One software print options 20 Performing printing and related tasks 22 Managing print jobs......

User's Guide (Mac)
Page 14
... Add. The Printer Browser closes, and the printer is not connected to a wireless network. For more information, see "Run the Wireless Setup Assistant" on your wireless network. Related topics: • "Changing wireless settings after installation" on page 121 Tips for using a USB cable. -...secure. • Make sure the computer is turned on your wireless network. Select this option: - You need to modify the wireless settings of the printer's MAC address. 6 Run the Wireless Setup Assistant to a wireless network. Networking the printer 14 The Printer Browser dialog appears....
... Add. The Printer Browser closes, and the printer is not connected to a wireless network. For more information, see "Run the Wireless Setup Assistant" on your wireless network. Related topics: • "Changing wireless settings after installation" on page 121 Tips for using a USB cable. -...secure. • Make sure the computer is turned on your wireless network. Select this option: - You need to modify the wireless settings of the printer's MAC address. 6 Run the Wireless Setup Assistant to a wireless network. Networking the printer 14 The Printer Browser dialog appears....

User's Guide (Mac)
Page 15
...a name for your ad hoc network, and then click OK. 7 Insert the CD for Macintosh to run the wireless setup. 8 From the Finder desktop, double-click the Lexmark 4800 Series Installer icon. 9 Double-click the Install icon. 10 Click Continue. 11 Follow the instructions on the computer... printer to an existing ad hoc wireless network using Mac The recommended way to use on that network. Advanced wireless setup Creating an ad hoc wireless network using Mac 1 From the Finder desktop, double-click the Lexmark 4800 Series folder. 2 Double-click Wireless Setup Assistant. 3 Follow the instructions on ...
...a name for your ad hoc network, and then click OK. 7 Insert the CD for Macintosh to run the wireless setup. 8 From the Finder desktop, double-click the Lexmark 4800 Series Installer icon. 9 Double-click the Install icon. 10 Click Continue. 11 Follow the instructions on the computer... printer to an existing ad hoc wireless network using Mac The recommended way to use on that network. Advanced wireless setup Creating an ad hoc wireless network using Mac 1 From the Finder desktop, double-click the Lexmark 4800 Series folder. 2 Double-click Wireless Setup Assistant. 3 Follow the instructions on ...
User's Guide (Mac)
Page 115
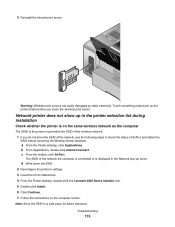
...for Macintosh. 4 From the Finder desktop, double-click the Lexmark 4800 Series Installer icon. 5 Double-click Install. 6 Click Continue. 7 Follow the instructions on the same wireless network as the printer frame before rerunning the Wireless Setup Assistant. Network printer does not show up menu. Touch ...something metal such as the computer The SSID of the printer must match the SSID of the wireless network. 1 If you do...
...for Macintosh. 4 From the Finder desktop, double-click the Lexmark 4800 Series Installer icon. 5 Double-click Install. 6 Click Continue. 7 Follow the instructions on the same wireless network as the printer frame before rerunning the Wireless Setup Assistant. Network printer does not show up menu. Touch ...something metal such as the computer The SSID of the printer must match the SSID of the wireless network. 1 If you do...

User's Guide (Mac)
Page 116
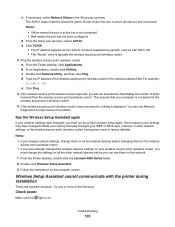
...the network is working These are pointing straight up. Run the wireless setup again If your wireless settings have changed include your having manually changed , you experiment with different angles for your wireless access point (wireless router) to make sure it is generally 100-150 feet....work best if they are possible solutions. Try one or more information, see "Checking your wireless access point (wireless router) is not positioned too closely to run the printer wireless setup again. Reboot the computer Turn off and restart the computer. For more information, see "Power...
...the network is working These are pointing straight up. Run the wireless setup again If your wireless settings have changed include your having manually changed , you experiment with different angles for your wireless access point (wireless router) to make sure it is generally 100-150 feet....work best if they are possible solutions. Try one or more information, see "Checking your wireless access point (wireless router) is not positioned too closely to run the printer wireless setup again. Reboot the computer Turn off and restart the computer. For more information, see "Power...

User's Guide (Mac)
Page 117
... on all the other computers or resources on your wireless network, check to see "Run the Wireless Setup Utility" for Windows or "Run the Wireless Setup Assistant" for optimal performance is typically the wireless access point (wireless router). 2 Enter your wireless access point (wireless router), you must match the SSID of AirPort and... • If you do not know the SSID of the network, use the following steps to obtain it, and then rerun the Wireless Setup Assistant to set up menu. 4 Write down the SSID, security type and the security keys if they are stored. b Click Network...
... on all the other computers or resources on your wireless network, check to see "Run the Wireless Setup Utility" for Windows or "Run the Wireless Setup Assistant" for optimal performance is typically the wireless access point (wireless router). 2 Enter your wireless access point (wireless router), you must match the SSID of AirPort and... • If you do not know the SSID of the network, use the following steps to obtain it, and then rerun the Wireless Setup Assistant to set up menu. 4 Write down the SSID, security type and the security keys if they are stored. b Click Network...
User's Guide (Mac)
Page 120
...click Applications. For example: 10.168.0.100 e Click Ping. 3 If the wireless access point (wireless router) responds, you must change them on your wireless access point (wireless router), you must run the printer wireless setup again. Try one or more of numbers separated by periods, such as 192....other network devices before changing them on the network. 1 From the Finder desktop, double-click the Lexmark 4800 Series folder. 2 Double-click Wireless Setup Assistant. 3 Follow the instructions on all the network devices before you can use Network Diagnostics to factory defaults...
...click Applications. For example: 10.168.0.100 e Click Ping. 3 If the wireless access point (wireless router) responds, you must change them on your wireless access point (wireless router), you must run the printer wireless setup again. Try one or more of numbers separated by periods, such as 192....other network devices before changing them on the network. 1 From the Finder desktop, double-click the Lexmark 4800 Series folder. 2 Double-click Wireless Setup Assistant. 3 Follow the instructions on all the network devices before you can use Network Diagnostics to factory defaults...
User's Guide (Mac)
Page 121
...the USB cable into the USB port on the back of the printer. 4 From the Finder desktop, double-click the Lexmark 4800 Series folder. 5 Double-click Wireless Setup Assistant. 6 Follow the instructions on the computer screen. Notes: • Yellow means the port is active but is... not already know it for your computer. • To reset the printer SSID: 1 From the Finder desktop, double-click the Lexmark 4800 Series folder. 2 Double-click Wireless Setup Assistant. 3 Follow the instructions on the computer screen. b Click Network. a Click Apple menu Œ System Preferences. Check the...
...the USB cable into the USB port on the back of the printer. 4 From the Finder desktop, double-click the Lexmark 4800 Series folder. 5 Double-click Wireless Setup Assistant. 6 Follow the instructions on the computer screen. Notes: • Yellow means the port is active but is... not already know it for your computer. • To reset the printer SSID: 1 From the Finder desktop, double-click the Lexmark 4800 Series folder. 2 Double-click Wireless Setup Assistant. 3 Follow the instructions on the computer screen. b Click Network. a Click Apple menu Œ System Preferences. Check the...


