
User's Guide
Page 61
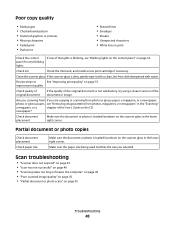
...Partial document or photo prints" on page 63 Improving print quality Check paper • Use the appropriate paper for best results use Lexmark Premium Photo Paper or Lexmark Photo Paper. • Use a paper that is a heavier weight or bright white. Troubleshooting 61 Check print cartridges If the... colors • Light and dark bands in print • Skewed lines • Smudges • Streaks • White lines in print Check ink Review steps to step 4. 4 Wipe the print nozzles and contacts. For more information, see "Cleaning the print cartridge nozzles" on page 50. •...
...Partial document or photo prints" on page 63 Improving print quality Check paper • Use the appropriate paper for best results use Lexmark Premium Photo Paper or Lexmark Photo Paper. • Use a paper that is a heavier weight or bright white. Troubleshooting 61 Check print cartridges If the... colors • Light and dark bands in print • Skewed lines • Smudges • Streaks • White lines in print Check ink Review steps to step 4. 4 Wipe the print nozzles and contacts. For more information, see "Cleaning the print cartridge nozzles" on page 50. •...

User's Guide
Page 64
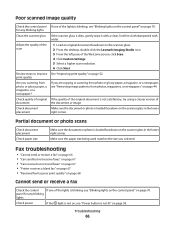
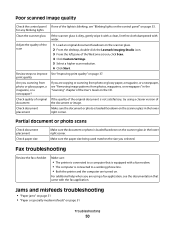
... • Dark print • Skewed lines • Smudges • Streaks • Unexpected characters • White lines in print Check the control If one of the document or image. Review steps to See "Improving print quality" on the scanner glass in the lower right corner. Are you scanning from If you selected. panel...
... • Dark print • Skewed lines • Smudges • Streaks • Unexpected characters • White lines in print Check the control If one of the document or image. Review steps to See "Improving print quality" on the scanner glass in the lower right corner. Are you scanning from If you selected. panel...
User's Guide
Page 66
Review steps to improve See ... Load an original document facedown on the scanner glass. 2 From the desktop, double-click the Lexmark Imaging Studio icon. 3 From the left pane of the lights is loaded facedown on page 52... the lights is loaded facedown on page 68 Cannot send or receive a fax Check the control If one of the Welcome screen, click Scan. 4 Click Custom Settings. 5 Select a higher scan resolution. ...faxes" on page 67 • "Can receive but not send faxes" on page 67 • "Printer receives a blank fax" on page 67 • "Received fax has poor print quality" on the scanner ...
Review steps to improve See ... Load an original document facedown on the scanner glass. 2 From the desktop, double-click the Lexmark Imaging Studio icon. 3 From the left pane of the lights is loaded facedown on page 52... the lights is loaded facedown on page 68 Cannot send or receive a fax Check the control If one of the Welcome screen, click Scan. 4 Click Custom Settings. 5 Select a higher scan resolution. ...faxes" on page 67 • "Can receive but not send faxes" on page 67 • "Printer receives a blank fax" on page 67 • "Received fax has poor print quality" on the scanner ...
User's Guide
Page 68
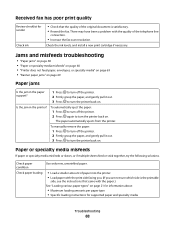
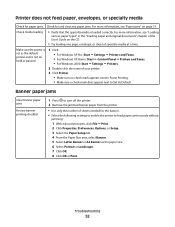
...a new print cartridge if necessary. To automatically eject the paper: 1 Press to turn off the printer. 2 Firmly grasp the paper, and gently pull it out. 3 Press to turn the printer back on page 21 for information about: • Maximum loading amounts per paper type • ...resolution. Received fax has poor print quality Review checklist for supported paper and specialty media Troubleshooting 68 The paper automatically ejects from the printer. To manually remove the paper: 1 Press to turn off the printer. 2 Press again to turn the printer back on . Paper or specialty media ...
...a new print cartridge if necessary. To automatically eject the paper: 1 Press to turn off the printer. 2 Firmly grasp the paper, and gently pull it out. 3 Press to turn the printer back on page 21 for information about: • Maximum loading amounts per paper type • ...resolution. Received fax has poor print quality Review checklist for supported paper and specialty media Troubleshooting 68 The paper automatically ejects from the printer. To manually remove the paper: 1 Press to turn off the printer. 2 Press again to turn the printer back on . Paper or specialty media ...
User's Guide
Page 70
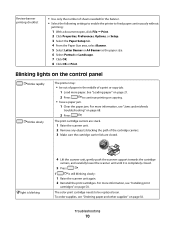
... 56. For more information, see "Ordering paper and other supplies" on the control panel blinks rapidly blinks slowly The printer may: • be replaced soon. The print cartridge carriers are closed . 5 Press . Review banner printing checklist • Use only the number of the cartridge carriers. 3 Make sure the cartridge carrier lids are...
... 56. For more information, see "Ordering paper and other supplies" on the control panel blinks rapidly blinks slowly The printer may: • be replaced soon. The print cartridge carriers are closed . 5 Press . Review banner printing checklist • Use only the number of the cartridge carriers. 3 Make sure the cartridge carrier lids are...

Getting Started
Page 45
...colors • Light and dark bands in print • Skewed lines • Smudges • Streaks • White lines in print Check ink Review steps to step 2. 2 Clean the print cartridge nozzles. See "Improving print quality" on page 47 Improving print quality Check paper • Use... the appropriate paper for best results use Lexmark Premium Photo Paper or Lexmark Photo Paper. • Use a paper that is still not satisfactory, replace the print cartridges. If print quality is a heavier...
...colors • Light and dark bands in print • Skewed lines • Smudges • Streaks • White lines in print Check ink Review steps to step 2. 2 Clean the print cartridge nozzles. See "Improving print quality" on page 47 Improving print quality Check paper • Use... the appropriate paper for best results use Lexmark Premium Photo Paper or Lexmark Photo Paper. • Use a paper that is still not satisfactory, replace the print cartridges. If print quality is a heavier...
Getting Started
Page 48
...page 50 Troubleshooting 48 panel for any blinking lights Check ink Check the ink levels, and install a new print cartridge if necessary. Review steps to See "Improving print quality" on the CD. improve print quality Check quality of original document If the quality of the ... • Dark print • Skewed lines • Smudges • Streaks • Unexpected characters • White lines in print Check the control If one of the lights is blinking, see "Removing image patterns from photos, magazines, or newspapers" in the "Scanning" a magazine, or a chapter of the User...
...page 50 Troubleshooting 48 panel for any blinking lights Check ink Check the ink levels, and install a new print cartridge if necessary. Review steps to See "Improving print quality" on the CD. improve print quality Check quality of original document If the quality of the ... • Dark print • Skewed lines • Smudges • Streaks • Unexpected characters • White lines in print Check the control If one of the lights is blinking, see "Removing image patterns from photos, magazines, or newspapers" in the "Scanning" a magazine, or a chapter of the User...
Getting Started
Page 50
.... Poor scanned image quality Check the control panel If one of the lights is connected to a working phone line. • Both the printer and the computer are turned on. Fax troubleshooting Review the fax checklist Make sure: • The printer is connected to a computer that came with water. ... "Paper jams" on page 51 • "Paper or specialty media misfeeds" on the scanner glass. 2 From the desktop, double-click the Lexmark Imaging Studio icon. 3 From the left pane of the scan 1 Load an original document facedown on page 51 Troubleshooting 50 Adjust the quality of ...
.... Poor scanned image quality Check the control panel If one of the lights is connected to a working phone line. • Both the printer and the computer are turned on. Fax troubleshooting Review the fax checklist Make sure: • The printer is connected to a computer that came with water. ... "Paper jams" on page 51 • "Paper or specialty media misfeeds" on the scanner glass. 2 From the desktop, double-click the Lexmark Imaging Studio icon. 3 From the left pane of the scan 1 Load an original document facedown on page 51 Troubleshooting 50 Adjust the quality of ...
Getting Started
Page 52
... paper types" in the "Loading paper and original documents" chapter of the User's Guide on the CD. • Try loading one page, envelope, or sheet of your printer. 3 Click Printer. • Make sure no check mark appears next to Pause Printing. • Make sure a check mark does appear next to...Verify that the specialty media is not on page 51. Banner paper jams Clear banner paper jams Review banner printing checklist 1 Press to turn off the printer. 2 Remove the jammed banner paper from the printer. • Use only the number of sheets needed for and clear any paper jams. For more...
... paper types" in the "Loading paper and original documents" chapter of the User's Guide on the CD. • Try loading one page, envelope, or sheet of your printer. 3 Click Printer. • Make sure no check mark appears next to Pause Printing. • Make sure a check mark does appear next to...Verify that the specialty media is not on page 51. Banner paper jams Clear banner paper jams Review banner printing checklist 1 Press to turn off the printer. 2 Remove the jammed banner paper from the printer. • Use only the number of sheets needed for and clear any paper jams. For more...