Quick Reference Guide (410 KB)
Page 1
...Canceling a print job If the job you want to cancel is printing and the Ready/Data light is not installed. Refer to view the printer driver settings. 8 Select MP Feeder from the Media Type list box. 10 Click OK, and then send your print media type (envelopes, transparencies, ...light sequence. • See "Clearing jams" on this card or on a level surface. Push the print media forward without forcing it . © Copyright 2002 Lexmark International, Inc. Refer to resolve the problem. Straighten the edges of media in U.S.A. Metal stop , print side down , in the feeder. For the optional ...
...Canceling a print job If the job you want to cancel is printing and the Ready/Data light is not installed. Refer to view the printer driver settings. 8 Select MP Feeder from the Media Type list box. 10 Click OK, and then send your print media type (envelopes, transparencies, ...light sequence. • See "Clearing jams" on this card or on a level surface. Push the print media forward without forcing it . © Copyright 2002 Lexmark International, Inc. Refer to resolve the problem. Straighten the edges of media in U.S.A. Metal stop , print side down , in the feeder. For the optional ...

Setup Guide (881 KB)
Page 4
Step 7: Attach cables 22 Setting up for network printing 22 Setting up for local printing 22 Step 8: Verify printer setup 24 Turning on the printer 24 Printing setup pages 24 Step 9: Configure for TCP/IP 26 Assigning a printer IP address 26 Verifying the IP settings 26 Step 10: Install printer drivers 28 Configuring for network printing 28 Configuring for local printing 31 Step 11: Distribute information to users 33 Discovering printer users 33 Finding helpful information 33 Distributing the information 34 Storing the quick reference card 34 Congratulations 34 iv Contents
Step 7: Attach cables 22 Setting up for network printing 22 Setting up for local printing 22 Step 8: Verify printer setup 24 Turning on the printer 24 Printing setup pages 24 Step 9: Configure for TCP/IP 26 Assigning a printer IP address 26 Verifying the IP settings 26 Step 10: Install printer drivers 28 Configuring for network printing 28 Configuring for local printing 31 Step 11: Distribute information to users 33 Discovering printer users 33 Finding helpful information 33 Distributing the information 34 Storing the quick reference card 34 Congratulations 34 iv Contents

Setup Guide (881 KB)
Page 6
... is also available on Lexmark's Web site at www.lexmark.com for administrators. Lexmark's Web site Visit our Web site at www.lexmark.com/publications. Lexmark T420 Publications CD The Publications CD provides information about loading print media, understanding common printer messages, and clearing jams. Drivers CD The drivers CD contains the necessary printer drivers to get your printer...
... is also available on Lexmark's Web site at www.lexmark.com for administrators. Lexmark's Web site Visit our Web site at www.lexmark.com/publications. Lexmark T420 Publications CD The Publications CD provides information about loading print media, understanding common printer messages, and clearing jams. Drivers CD The drivers CD contains the necessary printer drivers to get your printer...

Setup Guide (881 KB)
Page 7
... • Power cord • Print cartridge (shipped inside printer, wrapped in packaging) • Setup Guide with a Publications CD and Quick Reference card • Drivers CD • Operator panel overlay (non-English only) If any items are missing or damaged, refer to function properly. 250-sheet tray Power cord... and packing material in .) clearance on the right side of the printer for the cooling fan to the Publications CD for the designated Lexmark support phone number for the trays, cover, and doors. Task Position the optional drawer Prepare the printer Go to repack the printer.
... • Power cord • Print cartridge (shipped inside printer, wrapped in packaging) • Setup Guide with a Publications CD and Quick Reference card • Drivers CD • Operator panel overlay (non-English only) If any items are missing or damaged, refer to function properly. 250-sheet tray Power cord... and packing material in .) clearance on the right side of the printer for the cooling fan to the Publications CD for the designated Lexmark support phone number for the trays, cover, and doors. Task Position the optional drawer Prepare the printer Go to repack the printer.

Setup Guide (881 KB)
Page 20
Loading the trays Follow these instructions to the Publications CD for that tray from the driver. Optional 250-sheet tray Note: The length guide on the other than plain letter or A4 paper in tray 1, make sure you change the Paper ...
Loading the trays Follow these instructions to the Publications CD for that tray from the driver. Optional 250-sheet tray Note: The length guide on the other than plain letter or A4 paper in tray 1, make sure you change the Paper ...

Setup Guide (881 KB)
Page 29
... print another network setup page to verify that the trays are connected to your network. The Local Printer Setup Utility is available on the drivers CD for the sizes and types of memory installed is correctly listed under "Printer Information." • Verify that you need to page... ...for later use the Local Printer Setup Utility. • Verify the amount of print media you loaded. It may be provided on Lexmark's Web site at www.lexmark.com. If Status is "Connected." Consult your network cable may also be malfunctioning. Save the network setup page for TCP/IP ...
... print another network setup page to verify that the trays are connected to your network. The Local Printer Setup Utility is available on the drivers CD for the sizes and types of memory installed is correctly listed under "Printer Information." • Verify that you need to page... ...for later use the Local Printer Setup Utility. • Verify the amount of print media you loaded. It may be provided on Lexmark's Web site at www.lexmark.com. If Status is "Connected." Consult your network cable may also be malfunctioning. Save the network setup page for TCP/IP ...
Setup Guide (881 KB)
Page 30
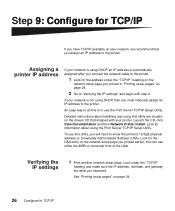
... to the printer. 1 Look for the address under the "TCP/IP" heading and make sure the IP address, netmask, and gateway are located on the drivers CD that you assign an IP address to the printer.
... to the printer. 1 Look for the address under the "TCP/IP" heading and make sure the IP address, netmask, and gateway are located on the drivers CD that you assign an IP address to the printer.
Setup Guide (881 KB)
Page 32
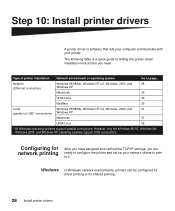
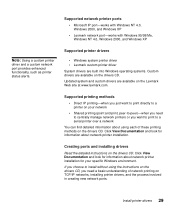
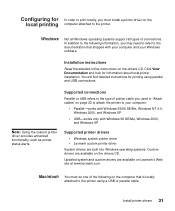
...network printing After you have assigned and verified the TCP/IP settings, you need. Configuring for shared printing. 28 Install printer drivers Network (Ethernet connection) Windows 95/98/Me, Windows NT 4.0, Windows 2000, and 28 Windows XP Macintosh 30 UNIX/Linux ...Macintosh 31 UNIX/Linux 32 * All Windows operating systems support parallel connections. Step 10: Install printer drivers A printer driver is a quick guide to finding the printer driver installation instructions you are ready to configure the printer and set up your printer. Type of printer ...
...network printing After you have assigned and verified the TCP/IP settings, you need. Configuring for shared printing. 28 Install printer drivers Network (Ethernet connection) Windows 95/98/Me, Windows NT 4.0, Windows 2000, and 28 Windows XP Macintosh 30 UNIX/Linux ...Macintosh 31 UNIX/Linux 32 * All Windows operating systems support parallel connections. Step 10: Install printer drivers A printer driver is a quick guide to finding the printer driver installation instructions you are ready to configure the printer and set up your printer. Type of printer ...
Setup Guide (881 KB)
Page 33
... a basic understanding of these printing methods on the Lexmark Web site at www.lexmark.com. Install printer drivers 29 Creating ports and installing drivers Read the detailed instructions on the drivers CD. Click View Documentation and look for your network...and Windows XP Supported printer drivers • Windows system printer driver • Lexmark custom printer driver System drivers are built into Windows operating systems. Custom drivers are available on the drivers CD. Updated system and custom drivers are available on the drivers CD. Supported printing methods...
... a basic understanding of these printing methods on the Lexmark Web site at www.lexmark.com. Install printer drivers 29 Creating ports and installing drivers Read the detailed instructions on the drivers CD. Click View Documentation and look for your network...and Windows XP Supported printer drivers • Windows system printer driver • Lexmark custom printer driver System drivers are built into Windows operating systems. Custom drivers are available on the drivers CD. Updated system and custom drivers are available on the drivers CD. Supported printing methods...
Setup Guide (881 KB)
Page 34
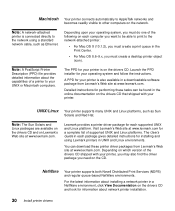
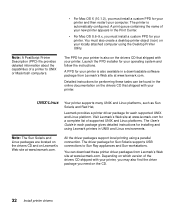
...upon your operating system, you must do one of the drivers CD shipped with your printer. Launch the PPD installer for performing these printer driver packages from Lexmark's Web site at www.lexmark.com. Lexmark provides a printer driver package for each package gives detailed instructions for installing and ...The Sun Solaris and Linux packages are available on the drivers CD and on the drivers CD. UNIX/Linux Your printer supports many UNIX and Linux platforms, such as Ethernet. Visit Lexmark's Web site at www.lexmark.com. For the latest information about installing a network ...
...upon your operating system, you must do one of the drivers CD shipped with your printer. Launch the PPD installer for performing these printer driver packages from Lexmark's Web site at www.lexmark.com. Lexmark provides a printer driver package for each package gives detailed instructions for installing and ...The Sun Solaris and Linux packages are available on the drivers CD and on the drivers CD. UNIX/Linux Your printer supports many UNIX and Linux platforms, such as Ethernet. Visit Lexmark's Web site at www.lexmark.com. For the latest information about installing a network ...
Setup Guide (881 KB)
Page 35
... find detailed instructions for printing using a USB or parallel cable: Install printer drivers 31 Supported printer drivers • Windows system printer driver • Lexmark custom printer driver System drivers are built into Windows operating systems. Custom drivers are available on Lexmark's Web site at www.lexmark.com. Supported connections Parallel or USB refers to the type of printer cable...
... find detailed instructions for printing using a USB or parallel cable: Install printer drivers 31 Supported printer drivers • Windows system printer driver • Lexmark custom printer driver System drivers are built into Windows operating systems. Custom drivers are available on Lexmark's Web site at www.lexmark.com. Supported connections Parallel or USB refers to the type of printer cable...
Setup Guide (881 KB)
Page 36
... Linux platforms. The User's Guide in UNIX and Linux environments. Lexmark provides a printer driver package for performing these printer driver packages from Lexmark's Web site at www.lexmark.com. Note: The Sun Solaris and Linux packages are located on the drivers CD and on the drivers CD that shipped with your locally attached computer using a parallel connection...
... Linux platforms. The User's Guide in UNIX and Linux environments. Lexmark provides a printer driver package for performing these printer driver packages from Lexmark's Web site at www.lexmark.com. Note: The Sun Solaris and Linux packages are located on the drivers CD and on the drivers CD that shipped with your locally attached computer using a parallel connection...

User's Reference (3.4 MB)
Page 18
... site for information about network settings. The Local Printer Setup Utility is displayed: 2 Press and release Continue. Refer to the Technical Reference on Lexmark's Web site at www.lexmark.com. 7 Printing the menu settings page The menu settings page shows information including: • Current settings for the Paper Menu, Finishing Menu,... more about PJL. Settings for menu items can also be set correctly. Settings for menu items can be made using the network printer model, Lexmark T420n. The menu settings page prints. 18 Check the drivers CD booklet to verify this.
... site for information about network settings. The Local Printer Setup Utility is displayed: 2 Press and release Continue. Refer to the Technical Reference on Lexmark's Web site at www.lexmark.com. 7 Printing the menu settings page The menu settings page shows information including: • Current settings for the Paper Menu, Finishing Menu,... more about PJL. Settings for menu items can also be set correctly. Settings for menu items can be made using the network printer model, Lexmark T420n. The menu settings page prints. 18 Check the drivers CD booklet to verify this.

User's Reference (3.4 MB)
Page 24
... error light message, you are using. The following illustration shows the path that jammed prints if Jam Recovery is set to On in the printer driver or in the following sections. Setting Jam Recovery to Auto does not guarantee that a new copy of the printer 24 10 Clearing jams By carefully...
... error light message, you are using. The following illustration shows the path that jammed prints if Jam Recovery is set to On in the printer driver or in the following sections. Setting Jam Recovery to Auto does not guarantee that a new copy of the printer 24 10 Clearing jams By carefully...
User's Reference (3.4 MB)
Page 57
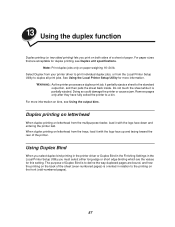
... bins. For more information. For paper sizes that are acceptable for more information on bins, see Duplex unit specifications. Select Duplex from your printer driver to print individual duplex jobs, or from the trays, load it with the logo face up and facing toward the rear of the printer. WARNING... 16-24 lb. Doing so could damage the printer or cause a jam. Using Duplex Bind When you select duplex bind printing in the printer driver or Duplex Bind in the Finishing Settings in relation to the printing on the front (odd-numbered pages). 57 13 Using the duplex function Duplex...
... bins. For more information. For paper sizes that are acceptable for more information on bins, see Duplex unit specifications. Select Duplex from your printer driver to print individual duplex jobs, or from the trays, load it with the logo face up and facing toward the rear of the printer. WARNING... 16-24 lb. Doing so could damage the printer or cause a jam. Using Duplex Bind When you select duplex bind printing in the printer driver or Duplex Bind in the Finishing Settings in relation to the printing on the front (odd-numbered pages). 57 13 Using the duplex function Duplex...

User's Reference (3.4 MB)
Page 65
16 Conserving supplies Conserving supplies lowers printing costs. • When printing drafts, conserve toner by using the duplex feature to print on both sides of the paper. For more information, see Using the Local Printer Setup Utility. • Reduce paper consumption by changing the Toner Darkness setting to Duplex in the printer driver for individual print jobs or in the printer driver. Set the printer to a value less than 8 in the Local Printer Setup Utility or in the Local Printer Setup Utility for all print jobs. 65
16 Conserving supplies Conserving supplies lowers printing costs. • When printing drafts, conserve toner by using the duplex feature to print on both sides of the paper. For more information, see Using the Local Printer Setup Utility. • Reduce paper consumption by changing the Toner Darkness setting to Duplex in the printer driver for individual print jobs or in the printer driver. Set the printer to a value less than 8 in the Local Printer Setup Utility or in the Local Printer Setup Utility for all print jobs. 65

User's Reference (3.4 MB)
Page 76
... number 1329605 (10 ft) or 1427498 (20 ft). Solution Make sure that the correct print media size is selected in the printer driver or in the Local Printer Setup Utility. • Make sure PCL SmartSwitch and PS SmartSwitch are using the correct printer language. • Verify that the ... black splotches down the right side of the door is not fully closed on before you use the parallel port, we recommend the cable with Lexmark part number 12A2405 (2M). • If the printer is connected through a switch box, try a direct connection. • Verify that the upper front door is on...
... number 1329605 (10 ft) or 1427498 (20 ft). Solution Make sure that the correct print media size is selected in the printer driver or in the Local Printer Setup Utility. • Make sure PCL SmartSwitch and PS SmartSwitch are using the correct printer language. • Verify that the ... black splotches down the right side of the door is not fully closed on before you use the parallel port, we recommend the cable with Lexmark part number 12A2405 (2M). • If the printer is connected through a switch box, try a direct connection. • Verify that the upper front door is on...
User's Reference (3.4 MB)
Page 77
...; Load a print media source only when it is positioned correctly. You cannot close the upper front door. Check the Paper Type setting in the printer driver or in the standard output bin. (See Raising the paper rest for more neatly. Use the maximum stack height indicators to see if feeding improves...
...; Load a print media source only when it is positioned correctly. You cannot close the upper front door. Check the Paper Type setting in the printer driver or in the standard output bin. (See Raising the paper rest for more neatly. Use the maximum stack height indicators to see if feeding improves...
User's Reference (3.4 MB)
Page 78
... information, see Using the Local Printer Setup Utility. The print media sticks together or the • Remove the print media from the printer driver or in the Local Printer Setup Utility. • Make sure the tray is pushed in the Local Printer Setup Utility. media sources and ...media. Note: To change the Toner Low Alarm setting, download the Local Printer Setup Utility available on . The Error light is on Lexmark's Web site at www.lexmark.com. For more information, see Using the Local Printer Setup Utility. • Do not overfill the tray. • Make sure ...
... information, see Using the Local Printer Setup Utility. The print media sticks together or the • Remove the print media from the printer driver or in the Local Printer Setup Utility. • Make sure the tray is pushed in the Local Printer Setup Utility. media sources and ...media. Note: To change the Toner Low Alarm setting, download the Local Printer Setup Utility available on . The Error light is on Lexmark's Web site at www.lexmark.com. For more information, see Using the Local Printer Setup Utility. • Do not overfill the tray. • Make sure ...

User's Reference (3.4 MB)
Page 79
...; Make sure you cleared the jam. While in PostScript 3 emulation, the printer is flushing data (Ready/Data and Error lights are using the correct PostScript driver. • The printer does not have enough memory to print the job. Solution • Make sure you cleared the entire paper path. • Press Continue...
...; Make sure you cleared the jam. While in PostScript 3 emulation, the printer is flushing data (Ready/Data and Error lights are using the correct PostScript driver. • The printer does not have enough memory to print the job. Solution • Make sure you cleared the entire paper path. • Press Continue...


