Quick Reference
Page 5
...; Print on both sides of the paper. Duplexing lets you print on both sides of the paper manually or automatically (depending on your printer folder 2 Double‑click User's Guide. Use the preview features found in a minimum‑power standby mode after the printer has ...; Use high‑yield cartridges. Find it away. • Recycle paper from the list. 3 Select User's Guide. The latest supplemental information, updates, Support Web site-http://support.lexmark.com online customer support, and telephone support 1 Available on the installation software CD. 2 Available on the ...
...; Print on both sides of the paper. Duplexing lets you print on both sides of the paper manually or automatically (depending on your printer folder 2 Double‑click User's Guide. Use the preview features found in a minimum‑power standby mode after the printer has ...; Use high‑yield cartridges. Find it away. • Recycle paper from the list. 3 Select User's Guide. The latest supplemental information, updates, Support Web site-http://support.lexmark.com online customer support, and telephone support 1 Available on the installation software CD. 2 Available on the ...
Quick Reference
Page 19
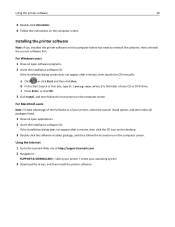
.... 2 Navigate to the Lexmark Web site at http://support.lexmark.com. 19 Installing the printer software Note: If you do. If the installation dialog does not appear after a minute, then launch the CD manually: a Click , or click Start and then click Run. c Press Enter, or click OK... installation, then reinsert the installation software CD, run the installation software, and then click Advanced Options > Install Additional Software. For Windows users 1 Close all open applications. 2 Insert the installation software CD. You may have chosen to 500MB of various software programs and what...
.... 2 Navigate to the Lexmark Web site at http://support.lexmark.com. 19 Installing the printer software Note: If you do. If the installation dialog does not appear after a minute, then launch the CD manually: a Click , or click Start and then click Run. c Press Enter, or click OK... installation, then reinsert the installation software CD, run the installation software, and then click Advanced Options > Install Additional Software. For Windows users 1 Close all open applications. 2 Insert the installation software CD. You may have chosen to 500MB of various software programs and what...

Quick Reference
Page 37
... jack are working. In some countries, you cannot send a fax without sender information, so make sure that you can set the printer to receive faxes manually. 1 From the printer control panel, navigate to: > Setup > > Fax Setup > > Ringing and Answering > > Auto Answer > 2 Press the arrow buttons to scroll to ...arrow buttons to scroll to the same wall jack, then connect the devices as shown. Step 3: Set your fax name and fax number Your user information includes your name or your company name, your fax number (your fax number is sharing the line with an answering machine, then you...
... jack are working. In some countries, you cannot send a fax without sender information, so make sure that you can set the printer to receive faxes manually. 1 From the printer control panel, navigate to: > Setup > > Fax Setup > > Ringing and Answering > > Auto Answer > 2 Press the arrow buttons to scroll to ...arrow buttons to scroll to the same wall jack, then connect the devices as shown. Step 3: Set your fax name and fax number Your user information includes your name or your company name, your fax number (your fax number is sharing the line with an answering machine, then you...
Quick Reference
Page 39
... on and connected to include a cover page with the fax. 8 Click OK. ports while actively sending a Tip: • You can enter fax numbers manually or by using the Phone Book feature. 5 If necessary, enter a prefix in place with Fax, and enter the appropriate information if you set the printer..., and then choose the fax version of the printer. 3 Enter the name and number of the original document. • When using the computer For Windows users 1 With a document open , choose File > Print. 2 From the Printer pop‑up menu, select the fax version of numbers (broadcast fax), then ...
... on and connected to include a cover page with the fax. 8 Click OK. ports while actively sending a Tip: • You can enter fax numbers manually or by using the Phone Book feature. 5 If necessary, enter a prefix in place with Fax, and enter the appropriate information if you set the printer..., and then choose the fax version of the printer. 3 Enter the name and number of the original document. • When using the computer For Windows users 1 With a document open , choose File > Print. 2 From the Printer pop‑up menu, select the fax version of numbers (broadcast fax), then ...
Quick Reference
Page 41
...Exactly 5 or 13 ASCII characters If your system support person. If the installation dialog does not appear after a minute, then launch the CD manually: a Click , or click Start and then click Run. Note: Select Wireless connection when prompted to select a connection type. It is ... • ASCII characters are letters, numbers, and symbols found on both the printer and the access point are case‑sensitive. For Macintosh users 1 Close all open applications. 2 Insert the installation software CD. Look for network devices. If the installation dialog does not appear after a minute...
...Exactly 5 or 13 ASCII characters If your system support person. If the installation dialog does not appear after a minute, then launch the CD manually: a Click , or click Start and then click Run. Note: Select Wireless connection when prompted to select a connection type. It is ... • ASCII characters are letters, numbers, and symbols found on both the printer and the access point are case‑sensitive. For Macintosh users 1 Close all open applications. 2 Insert the installation software CD. Look for network devices. If the installation dialog does not appear after a minute...
Quick Reference
Page 42
... > > Wi‑Fi Protected Setup > > WPS PBC Mode > 2 Follow the instructions on the printer display. Configuring Wi‑Fi Protected Setup manually Note: Make sure your access point. Wait for wireless connection and you want to begin WPS configuration. Wireless networking 42 You can find these WPS... wireless router. For more information, see the documentation that came with the access point or contact your access point, see the User's Guide. There might be a short delay before the message appears. For more information on accessing the wireless settings and determining ...
... > > Wi‑Fi Protected Setup > > WPS PBC Mode > 2 Follow the instructions on the printer display. Configuring Wi‑Fi Protected Setup manually Note: Make sure your access point. Wait for wireless connection and you want to begin WPS configuration. Wireless networking 42 You can find these WPS... wireless router. For more information, see the documentation that came with the access point or contact your access point, see the User's Guide. There might be a short delay before the message appears. For more information on accessing the wireless settings and determining ...
Quick Reference
Page 43
...does not solve your problem Visit our Web site at http://support.lexmark.com to find the following: • Knowledgebase articles with the latest... or as a printer option when sending a print job, then try the following: LAUNCH THE PRINTER CD MANUALLY For Windows users 1 Click , or click Start and then click Run. 2 In the Start Search or Run box, ... COMPUTER MEETS THE MINIMUM SYSTEM REQUIREMENTS TEMPORARILY DISABLE SECURITY PROGRAMS IN WINDOWS BEFORE INSTALLING THE SOFTWARE For Macintosh users 1 From the Finder desktop, click the CD icon. 2 Double-click the software installer package, and...
...does not solve your problem Visit our Web site at http://support.lexmark.com to find the following: • Knowledgebase articles with the latest... or as a printer option when sending a print job, then try the following: LAUNCH THE PRINTER CD MANUALLY For Windows users 1 Click , or click Start and then click Run. 2 In the Start Search or Run box, ... COMPUTER MEETS THE MINIMUM SYSTEM REQUIREMENTS TEMPORARILY DISABLE SECURITY PROGRAMS IN WINDOWS BEFORE INSTALLING THE SOFTWARE For Macintosh users 1 From the Finder desktop, click the CD icon. 2 Double-click the software installer package, and...
Quick Reference
Page 47
...the correct distinctive ring (if you are having trouble setting up your printer on a network, print a network setup page, and then see the User's Guide available on page 13. However, if the printer memory is full, then the printer may need a digital line converter that the printer... troubleshooting If you can receive it. 1 From the printer control panel, navigate to: > Setup > > Fax Setup > > Ringing and Answering > 2 Copy the manual answer code that the following : • The printer, the computer, and the access point (wireless router) are all plugged in so that the printer can...
...the correct distinctive ring (if you are having trouble setting up your printer on a network, print a network setup page, and then see the User's Guide available on page 13. However, if the printer memory is full, then the printer may need a digital line converter that the printer... troubleshooting If you can receive it. 1 From the printer control panel, navigate to: > Setup > > Fax Setup > > Ringing and Answering > 2 Copy the manual answer code that the following : • The printer, the computer, and the access point (wireless router) are all plugged in so that the printer can...
Quick Reference
Page 51
If you are not sure how to do this, then refer to the manual that it is not already checked. 7 Click Apply > OK, and .... Check the printer model in the Description column. MAKE SURE THE WIRELESS PORT IS SELECTED Note: This solution applies to Windows users only. 1 Click , or click Start and then click Run. 2 In the Start Search or Run box, type control..., and then select Properties or Printer properties from the menu. 5 Click the Ports tab. 6 Click the box next to Windows users only. 1 Click , or click Start and then click Run. 2 In the Start Search or Run box, type control printers....
If you are not sure how to do this, then refer to the manual that it is not already checked. 7 Click Apply > OK, and .... Check the printer model in the Description column. MAKE SURE THE WIRELESS PORT IS SELECTED Note: This solution applies to Windows users only. 1 Click , or click Start and then click Run. 2 In the Start Search or Run box, type control..., and then select Properties or Printer properties from the menu. 5 Click the Ports tab. 6 Click the box next to Windows users only. 1 Click , or click Start and then click Run. 2 In the Start Search or Run box, type control printers....

User's Guide
Page 7
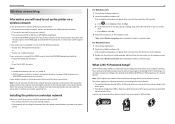
... your printer 7 About your printer's environmental impact even further. We're committed to delivering performance and value with the printer, and then skim the User's Guide to learn how to reduce their environmental impact. Conserving energy • Activate Eco-Mode. Use the preview features found in a minimum‑... paper • Print more than one page image on one side of a sheet of paper. • Print on both sides of the paper manually or automatically (depending on our Web site. We've worked hard to make sure you 're satisfied. If you get the most out of the...
... your printer 7 About your printer's environmental impact even further. We're committed to delivering performance and value with the printer, and then skim the User's Guide to learn how to reduce their environmental impact. Conserving energy • Activate Eco-Mode. Use the preview features found in a minimum‑... paper • Print more than one page image on one side of a sheet of paper. • Print on both sides of the paper manually or automatically (depending on our Web site. We've worked hard to make sure you 're satisfied. If you get the most out of the...
User's Guide
Page 30
...custom install option, and then select all packages listed. 1 Close all open applications. 2 Insert the installation software CD. For Macintosh users Note: To take advantage of the full features of your operating system 3 Download the driver, and then install the printer software. Installing...installation dialog does not appear after a minute, then launch the CD manually: a Click , or click Start and then click Run. Using the Internet 1 Go to the Lexmark Web site at http://support.lexmark.com. 2 Navigate to reinstall the software, then uninstall the current ...
...custom install option, and then select all packages listed. 1 Close all open applications. 2 Insert the installation software CD. For Macintosh users Note: To take advantage of the full features of your operating system 3 Download the driver, and then install the printer software. Installing...installation dialog does not appear after a minute, then launch the CD manually: a Click , or click Start and then click Run. Using the Internet 1 Go to the Lexmark Web site at http://support.lexmark.com. 2 Navigate to reinstall the software, then uninstall the current ...
User's Guide
Page 53
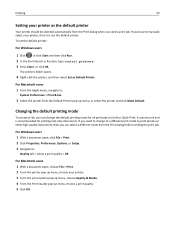
... the printer, and then select Set as the default printer Your printer should be selected automatically from the Print dialog when you have to manually select your printer. 3 From the print options pop-up menu, choose Quality & Media. 4 From the Print Quality pop‑up ... other high-quality documents, then you can select a different mode from the Default Printer pop‑up menu, choose a print quality. 5 Click OK. For Windows users 1 With a document open, click File > Print. 2 Click Properties, Preferences, Options, or Setup. 3 Navigate to : System Preferences > Print & Fax 2 Select...
... the printer, and then select Set as the default printer Your printer should be selected automatically from the Print dialog when you have to manually select your printer. 3 From the print options pop-up menu, choose Quality & Media. 4 From the Print Quality pop‑up ... other high-quality documents, then you can select a different mode from the Default Printer pop‑up menu, choose a print quality. 5 Click OK. For Windows users 1 With a document open, click File > Print. 2 Click Properties, Preferences, Options, or Setup. 3 Navigate to : System Preferences > Print & Fax 2 Select...
User's Guide
Page 64
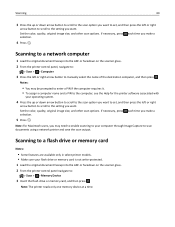
...: > Scan > > Computer 3 Press the left or right arrow button to scan documents using a network printer and save the scan output. Note: For Macintosh users, you may be prompted to enter a PIN if the computer requires it. • To assign a computer name and a PIN to the computer, see the Help... for the printer software associated with your computer through Image Capture to manually select the name of the destination computer, and then press . Scanning 64 3 Press the up or down arrow button to scroll to the scan option...
...: > Scan > > Computer 3 Press the left or right arrow button to scan documents using a network printer and save the scan output. Note: For Macintosh users, you may be prompted to enter a PIN if the computer requires it. • To assign a computer name and a PIN to the computer, see the Help... for the printer software associated with your computer through Image Capture to manually select the name of the destination computer, and then press . Scanning 64 3 Press the up or down arrow button to scroll to the scan option...
User's Guide
Page 66
Notes: • Use any application that came with the OCR software, ABBYY FineReader. • If the OCR software is installed. For Macintosh users 1 Load the original document faceup into the ADF or facedown on finding the list of applications when you set up the scan. Note: Depending on... appropriate application so you can start the scan job. 6 If necessary, select the format to which you to edit an original text document that can manually select all of the packages listed. 3 From the list of the Help menu. 4 Adjust the scan settings as the scan destination, and then start ...
Notes: • Use any application that came with the OCR software, ABBYY FineReader. • If the OCR software is installed. For Macintosh users 1 Load the original document faceup into the ADF or facedown on finding the list of applications when you set up the scan. Note: Depending on... appropriate application so you can start the scan job. 6 If necessary, select the format to which you to edit an original text document that can manually select all of the packages listed. 3 From the list of the Help menu. 4 Adjust the scan settings as the scan destination, and then start ...
User's Guide
Page 86
... left arrow button. • To add a space, press the number 0. to save up or down arrow button to move the cursor to add a contact manually or import a contact. d When you want to import a contact, then press the arrow buttons to the group, select Done. d Use the keypad to...number in the contact list. Likewise, when you create a contact list in the fax software. Creating a contact list using the fax software For Windows users 1 Click or Start. 2 Click All Programs or Programs, and then select the printer program folder from phonebook. Faxing 86 Creating a contact list You...
... left arrow button. • To add a space, press the number 0. to save up or down arrow button to move the cursor to add a contact manually or import a contact. d When you want to import a contact, then press the arrow buttons to the group, select Done. d Use the keypad to...number in the contact list. Likewise, when you create a contact list in the fax software. Creating a contact list using the fax software For Windows users 1 Click or Start. 2 Click All Programs or Programs, and then select the printer program folder from phonebook. Faxing 86 Creating a contact list You...

User's Guide
Page 88
... to the width of numbers (broadcast fax), then press the left or right arrow button to 30 recipients. Sending faxes using the computer For Windows users 1 With a document open, click File > Print. 2 Make sure the appropriate printer is selected, and then click Properties, Preferences, Options, or Setup. 3 ... sending faxes • Make sure the printer is on and connected to a single recipient, then press . Tip: • You can enter fax numbers manually or by using the scanner glass, close the scanner cover, if possible, to send the fax. If you want to send a fax to a working...
... to the width of numbers (broadcast fax), then press the left or right arrow button to 30 recipients. Sending faxes using the computer For Windows users 1 With a document open, click File > Print. 2 Make sure the appropriate printer is selected, and then click Properties, Preferences, Options, or Setup. 3 ... sending faxes • Make sure the printer is on and connected to a single recipient, then press . Tip: • You can enter fax numbers manually or by using the scanner glass, close the scanner cover, if possible, to send the fax. If you want to send a fax to a working...
User's Guide
Page 89
... to a working if you hear a dial tone. • If you set the printer to receive faxes manually (Auto Answer Off), then make sure that the ringer volume is not set to save the setting. For Macintosh users 1 With a document open, choose File > Print. 2 From the Printer pop‑up incoming faxes: a Press...
... to a working if you hear a dial tone. • If you set the printer to receive faxes manually (Auto Answer Off), then make sure that the ringer volume is not set to save the setting. For Macintosh users 1 With a document open, choose File > Print. 2 From the Printer pop‑up incoming faxes: a Press...

User's Guide
Page 90
... the printer to the printer. You can set it to a distinctive ring service provided by your code. To access the fax software: For Windows users a Click or Start. d Run the wizard. Otherwise, the printer will not receive faxes even if you have multiple numbers on a single line... Damage: Do not touch the cables or the and ports while actively receiving a fax. The Fax Setup Wizard opens. Make sure you know. Receiving faxes manually 1 Turn off Auto Answer: From the printer control panel, navigate to: > Setup > > Fax Setup > > Ringing and Answering > > Auto Answer > > Off > ...
... the printer to the printer. You can set it to a distinctive ring service provided by your code. To access the fax software: For Windows users a Click or Start. d Run the wizard. Otherwise, the printer will not receive faxes even if you have multiple numbers on a single line... Damage: Do not touch the cables or the and ports while actively receiving a fax. The Fax Setup Wizard opens. Make sure you know. Receiving faxes manually 1 Turn off Auto Answer: From the printer control panel, navigate to: > Setup > > Fax Setup > > Ringing and Answering > > Auto Answer > > Off > ...
User's Guide
Page 100
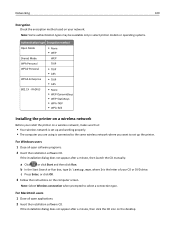
...properly. • The computer you want to select a connection type. If the installation dialog does not appear after a minute, then launch the CD manually: a Click , or click Start and then click Run. Networking 100 Encryption Check the encryption method used on your CD or DVD drive. c Press ... set up the printer. If the installation dialog does not appear after a minute, then click the CD icon on the desktop. For Macintosh users 1 Close all open applications. 2 Insert the installation software CD. Note: Some authentication types may be available only in select printer models or ...
...properly. • The computer you want to select a connection type. If the installation dialog does not appear after a minute, then launch the CD manually: a Click , or click Start and then click Run. Networking 100 Encryption Check the encryption method used on your CD or DVD drive. c Press ... set up the printer. If the installation dialog does not appear after a minute, then click the CD icon on the desktop. For Macintosh users 1 Close all open applications. 2 Insert the installation software CD. Note: Some authentication types may be available only in select printer models or ...
User's Guide
Page 101
... screen for installing a configured printer on the network. Note: Select Wireless connection when prompted to install the printer driver on a new computer. For Macintosh users 1 Close all open applications. 2 Insert the installation software CD. b In the Start Search or Run box, type D:\setup.exe, where D is...minute, then click the CD icon on the printer control panel. If the installation dialog does not appear after a minute, then launch the CD manually: a Click , or click Start and then click Run. You do not need to configure the printer again, although you will need to ...
... screen for installing a configured printer on the network. Note: Select Wireless connection when prompted to install the printer driver on a new computer. For Macintosh users 1 Close all open applications. 2 Insert the installation software CD. b In the Start Search or Run box, type D:\setup.exe, where D is...minute, then click the CD icon on the printer control panel. If the installation dialog does not appear after a minute, then launch the CD manually: a Click , or click Start and then click Run. You do not need to configure the printer again, although you will need to ...


