

Menu Map
Page 3
...messages that communicate the status of the up or down arrow buttons moves you how to another screen. Note: Each press of the printer or that indicate possible printer problems that rolls to perform a task like clearing a jam. 2 Select button ( ) • Opens a menu and displays ... the displayed menu item as the user default setting, it remains in any list. Settings chosen from a software program can also change or override the user default settings selected from the printer control panel. 3, 4, 5, 6 Navigation buttons Press the up or down arrow buttons to scroll through text...
...messages that communicate the status of the up or down arrow buttons moves you how to another screen. Note: Each press of the printer or that indicate possible printer problems that rolls to perform a task like clearing a jam. 2 Select button ( ) • Opens a menu and displays ... the displayed menu item as the user default setting, it remains in any list. Settings chosen from a software program can also change or override the user default settings selected from the printer control panel. 3, 4, 5, 6 Navigation buttons Press the up or down arrow buttons to scroll through text...
User Guide
Page 2
... Installing a 250‑ or 550‑sheet drawer ...25 Attaching cables...27 Verifying printer setup...28 Printing a menu settings page ...28 Printing a network setup page...29 Setting up the printer software...29 Installing printer software ...29 Updating available options in the printer driver 30 Setting up wireless printing...31 Information you will need to set up...
... Installing a 250‑ or 550‑sheet drawer ...25 Attaching cables...27 Verifying printer setup...28 Printing a menu settings page ...28 Printing a network setup page...29 Setting up the printer software...29 Installing printer software ...29 Updating available options in the printer driver 30 Setting up wireless printing...31 Information you will need to set up...
User Guide
Page 7
...Defective flash detected ...144 52 Not enough free space in flash memory for resources 144 53 Unformatted flash detected ...144 54 Standard network software error ...144 56 Standard parallel port disabled...144 56 Standard USB port disabled ...144 58 Too many flash options installed ...145 58 ...life warning ...145 84 Replace PC Kit ...145 88 Cartridge low ...145 1565 Emulation error, load emulation option 146 Solving basic printer problems...146 Printer control panel display is blank or displays only diamonds 146 Solving printing problems...146 Jobs do not print ...146 Confidential and other ...
...Defective flash detected ...144 52 Not enough free space in flash memory for resources 144 53 Unformatted flash detected ...144 54 Standard network software error ...144 56 Standard parallel port disabled...144 56 Standard USB port disabled ...144 58 Too many flash options installed ...145 58 ...life warning ...145 84 Replace PC Kit ...145 88 Cartridge low ...145 1565 Emulation error, load emulation option 146 Solving basic printer problems...146 Printer control panel display is blank or displays only diamonds 146 Solving printing problems...146 Jobs do not print ...146 Confidential and other ...
User Guide
Page 10
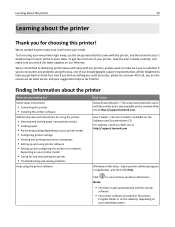
... paper • Performing printing depending on your printer model • Configuring printer settings • Viewing and printing documents and photos • Setting up and using printer software • Setting up and configuring the printer on a network, depending on track fast. ...Lexmark Web site at http://support.lexmark.com. To get back on your printer model • Caring for and maintaining the printer • Troubleshooting and solving problems Help using your new printer right away, use the setup materials that came with the printer software. • The printer software...
... paper • Performing printing depending on your printer model • Configuring printer settings • Viewing and printing documents and photos • Setting up and using printer software • Setting up and configuring the printer on a network, depending on track fast. ...Lexmark Web site at http://support.lexmark.com. To get back on your printer model • Caring for and maintaining the printer • Troubleshooting and solving problems Help using your new printer right away, use the setup materials that came with the printer software. • The printer software...

User Guide
Page 17
... in effect until new settings are saved or until factory defaults are restored. Settings chosen from a software program can also change or override the user default settings selected from the printer control panel. 3, 4, 5, 6 Navigation buttons Press the up or down arrow buttons to another... screen. Note: Each press of the printer or that indicate possible printer problems that must be resolved. Item Description 1 Display Shows messages that rolls to scroll through menus, menu items, or settings ...
... in effect until new settings are saved or until factory defaults are restored. Settings chosen from a software program can also change or override the user default settings selected from the printer control panel. 3, 4, 5, 6 Navigation buttons Press the up or down arrow buttons to another... screen. Note: Each press of the printer or that indicate possible printer problems that must be resolved. Item Description 1 Display Shows messages that rolls to scroll through menus, menu items, or settings ...
User Guide
Page 29
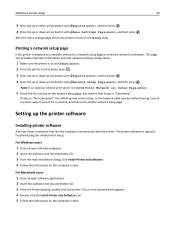
... information that automatically appears. 4 Double-click the Install Printer and Software icon. 5 Follow the instructions on the network setup page, and confirm that lets the computer communicate with the printer. The printer software is attached to a network, then print a network ...double-click the printer CD icon that aids network printing configuration. 1 Make sure the printer is installed, Print Network Setup Page appears. 5 Check the first section on the computer screen. Setting up the printer software Installing printer software A printer driver is software that Status is...
... information that automatically appears. 4 Double-click the Install Printer and Software icon. 5 Follow the instructions on the network setup page, and confirm that lets the computer communicate with the printer. The printer software is attached to a network, then print a network ...double-click the printer CD icon that aids network printing configuration. 1 Make sure the printer is installed, Print Network Setup Page appears. 5 Check the first section on the computer screen. Setting up the printer software Installing printer software A printer driver is software that Status is...
User Guide
Page 30
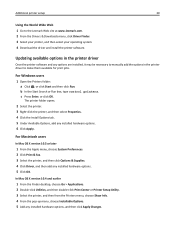
..., and then click Apply Changes. Updating available options in the printer driver to the Lexmark Web site at www.lexmark.com. 2 From the Drivers & Downloads menu, click Driver Finder. 3 Select your printer, and then select your operating system. 4 Download the driver and install the printer software. For Macintosh users In Mac OS X version 10.5 or later...
..., and then click Apply Changes. Updating available options in the printer driver to the Lexmark Web site at www.lexmark.com. 2 From the Drivers & Downloads menu, click Driver Finder. 3 Select your printer, and then select your operating system. 4 Download the driver and install the printer software. For Macintosh users In Mac OS X version 10.5 or later...

User Guide
Page 31
...Mode (or Network Mode)-The mode will not be set up the printer. Note: Using an unsecured wireless network is connected to the same wireless network where you want to communicate on the Software and Documentation CD. Encryption must be able to set for infrastructure ...networks. Additional printer setup 31 Setting up wireless printing Note: A Service Set Identifier (SSID) is a name ...
...Mode (or Network Mode)-The mode will not be set up the printer. Note: Using an unsecured wireless network is connected to the same wireless network where you want to communicate on the Software and Documentation CD. Encryption must be able to set for infrastructure ...networks. Additional printer setup 31 Setting up wireless printing Note: A Service Set Identifier (SSID) is a name ...
User Guide
Page 32
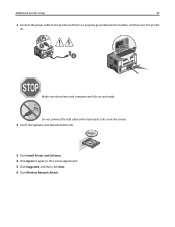
Additional printer setup 32 1 Connect the power cable to the printer and then to a properly grounded electrical outlet, and then turn the printer on. 1 2 Make sure the printer and computer are fully on the screen. 2 Insert the Software and Documentation CD. 3 Click Install Printer and Software. 4 Click Agree to agree to do so on and ready. Do not connect the USB cable until instructed to the License Agreement. 5 Click Suggested, and then click Next. 6 Click Wireless Network Attach.
Additional printer setup 32 1 Connect the power cable to the printer and then to a properly grounded electrical outlet, and then turn the printer on. 1 2 Make sure the printer and computer are fully on the screen. 2 Insert the Software and Documentation CD. 3 Click Install Printer and Software. 4 Click Agree to agree to do so on and ready. Do not connect the USB cable until instructed to the License Agreement. 5 Click Suggested, and then click Next. 6 Click Wireless Network Attach.

User Guide
Page 33
... 33 7 Temporarily connect a USB cable between the computer on the wireless network and the printer. 1 2 Note: After the printer is the recommended path to complete the software installation. Note: Basic is configured, the software will instruct you to disconnect the temporary USB cable so you want to customize your installation. 9 To allow other computers...
... 33 7 Temporarily connect a USB cable between the computer on the wireless network and the printer. 1 2 Note: After the printer is the recommended path to complete the software installation. Note: Basic is configured, the software will instruct you to disconnect the temporary USB cable so you want to customize your installation. 9 To allow other computers...
User Guide
Page 34
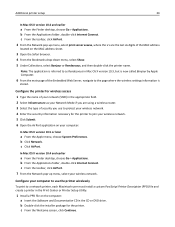
... X version 10.4 and earlier a From the Finder desktop, choose Go > Applications. Configure the printer for wireless access 1 Type the name of the MAC address located on the computer: a Insert the Software and Documentation CD in the CD or DVD drive. Configure your network (SSID) in Mac OS ...X version 10.3, but is stored. c From the Welcome screen, click Continue. b Double-click the installer package for the printer to as Rendezvous in the appropriate ...
... X version 10.4 and earlier a From the Finder desktop, choose Go > Applications. Configure the printer for wireless access 1 Type the name of the MAC address located on the computer: a Insert the Software and Documentation CD in the CD or DVD drive. Configure your network (SSID) in Mac OS ...X version 10.3, but is stored. c From the Welcome screen, click Continue. b Double-click the installer package for the printer to as Rendezvous in the appropriate ...

User Guide
Page 35
... Click Print & Fax. 3 Click +. 4 Click AppleTalk. 5 Select the printer from the list. 6 Click Add. e Click Continue after viewing the Readme file. h Type the user password, and then click OK. All necessary software is complete. 2 Add the printer: a For IP printing: In Mac OS X version 10.5 or later 1... From the Apple menu, choose System Preferences. 2 Click Print & Fax. 3 Click +. 4 Select the printer from the list. 5 Click Add. In Mac OS ...
... Click Print & Fax. 3 Click +. 4 Click AppleTalk. 5 Select the printer from the list. 6 Click Add. e Click Continue after viewing the Readme file. h Type the user password, and then click OK. All necessary software is complete. 2 Add the printer: a For IP printing: In Mac OS X version 10.5 or later 1... From the Apple menu, choose System Preferences. 2 Click Print & Fax. 3 Click +. 4 Select the printer from the list. 5 Click Add. In Mac OS ...

User Guide
Page 36
.... 4 Select Suggested, and then click Next. Note: If your CD or DVD drive. 2 Click Install Printer and Software. 3 Click Agree to agree to appear. For Windows users 1 Insert the Software and Documentation CD. Additional printer setup 36 9 Select the printer from the list. 10 Click Add. Before you are configuring access for computers on the...
.... 4 Select Suggested, and then click Next. Note: If your CD or DVD drive. 2 Click Install Printer and Software. 3 Click Agree to agree to appear. For Windows users 1 Insert the Software and Documentation CD. Additional printer setup 36 9 Select the printer from the list. 10 Click Add. Before you are configuring access for computers on the...

User Guide
Page 37
... Mac OS X version 10.5 or later 1 From the Apple menu, choose System Preferences. 2 Click Print & Fax. 3 Click +. 4 Click IP. 5 Type the IP address of your printer in the Address field. 7 Click Add. • For AppleTalk printing: In Mac OS X version 10.5 1 From the Apple menu, choose System Preferences. 2 Click Print & Fax... agreement. 6 Select a Destination, and then click Continue. 7 From the Easy Install screen, click Install. 8 Type the user password, and then click OK. All the necessary software is installed on the computer. 9 Click Restart when installation is complete.
... Mac OS X version 10.5 or later 1 From the Apple menu, choose System Preferences. 2 Click Print & Fax. 3 Click +. 4 Click IP. 5 Type the IP address of your printer in the Address field. 7 Click Add. • For AppleTalk printing: In Mac OS X version 10.5 1 From the Apple menu, choose System Preferences. 2 Click Print & Fax... agreement. 6 Select a Destination, and then click Continue. 7 From the Easy Install screen, click Install. 8 Type the user password, and then click OK. All the necessary software is installed on the computer. 9 Click Restart when installation is complete.

User Guide
Page 58
... Recycled papers that may also require a longer conditioning period. This content provides the paper with a software application to the alignment of paper. Thick paper may contaminate the printer • Preprinted papers that can negatively affect paper handling. Grain is either grain long, running the...paper fibers in the same source; Grain direction Grain refers to successfully print on the package. • Do not use with the printer: • Chemically treated papers used to make copies without carbon paper, also known as carbonless papers, carbonless copy paper (CCP), ...
... Recycled papers that may also require a longer conditioning period. This content provides the paper with a software application to the alignment of paper. Thick paper may contaminate the printer • Preprinted papers that can negatively affect paper handling. Grain is either grain long, running the...paper fibers in the same source; Grain direction Grain refers to successfully print on the package. • Do not use with the printer: • Chemically treated papers used to make copies without carbon paper, also known as carbonless papers, carbonless copy paper (CCP), ...

User Guide
Page 61
... that lie flat when individually placed on page 44. Vinyl, pharmacy, and dual‑sided labels are supported for occasional use is specified by the printer Note: Optional trays are not available for 216 x 356 mm (8.5 x 14 in.) unless the size is not listed, configure a Universal paper size. Paper sizes supported...
... that lie flat when individually placed on page 44. Vinyl, pharmacy, and dual‑sided labels are supported for occasional use is specified by the printer Note: Optional trays are not available for 216 x 356 mm (8.5 x 14 in.) unless the size is not listed, configure a Universal paper size. Paper sizes supported...

User Guide
Page 62
... supported only for grain long papers. 2 This size setting formats the page for 216 x 356 mm (8.5 x 14 in.) unless the size is specified by the software application. 3 If a paper size you want to use is not listed, configure a Universal paper size. Paper tray capacities The capacities of the trays and the...
... supported only for grain long papers. 2 This size setting formats the page for 216 x 356 mm (8.5 x 14 in.) unless the size is specified by the software application. 3 If a paper size you want to use is not listed, configure a Universal paper size. Paper tray capacities The capacities of the trays and the...

User Guide
Page 100
... or customized message to the factory default settings Notes: • Do Not Restore is the factory default printer language. • Setting a printer language as the default does not prevent a software program from sending print jobs that can be customized by a system support person. All downloads stored in... flash memory are deleted. Do Not Restore keeps the user‑defined settings. • Restore Now returns all printer settings to the factory ...
... or customized message to the factory default settings Notes: • Do Not Restore is the factory default printer language. • Setting a printer language as the default does not prevent a software program from sending print jobs that can be customized by a system support person. All downloads stored in... flash memory are deleted. Do Not Restore keeps the user‑defined settings. • Restore Now returns all printer settings to the factory ...

User Guide
Page 102
... binding be collated. • The On setting stacks the print job sequentially. • Both settings print the entire job the number of landscape pages. Understanding printer menus 102 Finishing menu Menu item Sides (Duplex) 2 sided 1 sided Duplex Binding Long Edge Short Edge Copies 1-999 Blank Pages Do Not Print Print Collate... is the factory default setting. Stacks the pages of the print job. for Macintosh users, choose File > Print, and then adjust the settings from the software program: for notes.
... binding be collated. • The On setting stacks the print job sequentially. • Both settings print the entire job the number of landscape pages. Understanding printer menus 102 Finishing menu Menu item Sides (Duplex) 2 sided 1 sided Duplex Binding Long Edge Short Edge Copies 1-999 Blank Pages Do Not Print Print Collate... is the factory default setting. Stacks the pages of the print job. for Macintosh users, choose File > Print, and then adjust the settings from the software program: for notes.

User Guide
Page 104
... > Print, and then adjust the settings from the Print dialog and pop‑up menus. • To set Enhance Fine Lines from the software program: for files such as architectural drawings, maps, electrical circuit diagrams, and flow charts Notes: • Off is the factory default setting. ... the output. Note: 0 is the factory default setting. • To set Enhance Fine Lines using the Embedded Web Server, type the network printer IP address in order to enhance pictures horizontally or vertically, or to images Note: Auto is the factory default setting. • Selecting a smaller...
... > Print, and then adjust the settings from the Print dialog and pop‑up menus. • To set Enhance Fine Lines from the software program: for files such as architectural drawings, maps, electrical circuit diagrams, and flow charts Notes: • Off is the factory default setting. ... the output. Note: 0 is the factory default setting. • To set Enhance Fine Lines using the Embedded Web Server, type the network printer IP address in order to enhance pictures horizontally or vertically, or to images Note: Auto is the factory default setting. • Selecting a smaller...


