

Quick Reference
Page 1
...connected to a computer by a USB or parallel cable, use one of the following : • For Windows users, click File Œ Print, and then click Properties, Preferences, Options, or Setup. • For Macintosh users, choose File > Print, and then adjust the settings from : the standard tray (Tray 1), also known ...special print job, do one time. Access the Paper menu through the Printer Settings. Note: The Paper Size and Type settings will be set manually for all trays that do not contain plain paper. Loading paper and specialty media 1 Do not remove trays while a job prints or when the...
...connected to a computer by a USB or parallel cable, use one of the following : • For Windows users, click File Œ Print, and then click Properties, Preferences, Options, or Setup. • For Macintosh users, choose File > Print, and then adjust the settings from : the standard tray (Tray 1), also known ...special print job, do one time. Access the Paper menu through the Printer Settings. Note: The Paper Size and Type settings will be set manually for all trays that do not contain plain paper. Loading paper and specialty media 1 Do not remove trays while a job prints or when the...
User Guide
Page 24
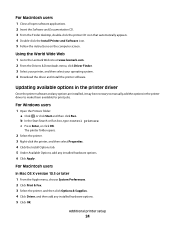
...the Install Options tab. 5 Under Available Options, add any options are installed, it may be necessary to manually add the options in the printer driver to the Lexmark Web site at www.lexmark.com. 2 From the Drivers & Downloads menu, click Driver Finder. 3 Select your printer, and then ...select your operating system. 4 Download the driver and install the printer software. For Windows users 1 Open the Printers folder: a Click...
...the Install Options tab. 5 Under Available Options, add any options are installed, it may be necessary to manually add the options in the printer driver to the Lexmark Web site at www.lexmark.com. 2 From the Drivers & Downloads menu, click Driver Finder. 3 Select your printer, and then ...select your operating system. 4 Download the driver and install the printer software. For Windows users 1 Open the Printers folder: a Click...

User Guide
Page 40
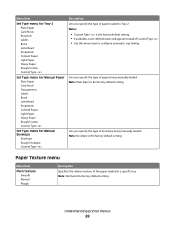
...supported Universal size is plain paper, so the paper type setting must be set manually for all of the following utilities to access the Paper menu, depending on your operating system: • For Windows users, access the Paper menu through the Local Printer Settings Utility. • For ... x 127 mm (3 x 5 in.); From the Settings tab, click Paper Menu. One of paper loaded in .). • If the printer is a user-defined setting that lets you reset factory default settings. Configuring Universal paper settings The Universal Paper Size is connected to override the Paper Size and...
...supported Universal size is plain paper, so the paper type setting must be set manually for all of the following utilities to access the Paper menu, depending on your operating system: • For Windows users, access the Paper menu through the Local Printer Settings Utility. • For ... x 127 mm (3 x 5 in.); From the Settings tab, click Paper Menu. One of paper loaded in .). • If the printer is a user-defined setting that lets you reset factory default settings. Configuring Universal paper settings The Universal Paper Size is connected to override the Paper Size and...

User Guide
Page 56
Do one of the following, depending on your printer does not have manual duplex / 2-sided printing. Printing 56 To access the Finishing menu, do one of the following : For Windows users 1 With a document open , click File Print. 2 Click Properties, Preferences, Options, or Setup. ... occasional two-sided printing, you can request two-sided printing in the printer software. Printing on both sides of the paper manually If your operating system: For Windows users 1 With a document open , click File Print. 2 Click Properties, Preferences, Options, or Setup. 3 Under...
Do one of the following, depending on your printer does not have manual duplex / 2-sided printing. Printing 56 To access the Finishing menu, do one of the following : For Windows users 1 With a document open , click File Print. 2 Click Properties, Preferences, Options, or Setup. ... occasional two-sided printing, you can request two-sided printing in the printer software. Printing on both sides of the paper manually If your operating system: For Windows users 1 With a document open , click File Print. 2 Click Properties, Preferences, Options, or Setup. 3 Under...
User Guide
Page 68
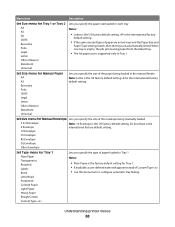
... 10 Envelope C5 Envelope B5 Envelope DL Envelope Other Envelope Set Type menu for Tray 1 Lets you specify the type of the paper being manually loaded 7 3/4 Envelope 9 Envelope Note: 10 Envelope is the US factory default setting. Letterhead Preprinted Colored Paper Light Paper Heavy Paper Rough/Cotton... A6 JIS B5 Executive Folio Legal Letter Notes: • Letter is the factory default setting for Tray 1. • If available, a user-defined name will appear instead of paper are in two trays and the Paper Size and Paper Type settings match, then the trays are automatically...
... 10 Envelope C5 Envelope B5 Envelope DL Envelope Other Envelope Set Type menu for Tray 1 Lets you specify the type of the paper being manually loaded 7 3/4 Envelope 9 Envelope Note: 10 Envelope is the US factory default setting. Letterhead Preprinted Colored Paper Light Paper Heavy Paper Rough/Cotton... A6 JIS B5 Executive Folio Legal Letter Notes: • Letter is the factory default setting for Tray 1. • If available, a user-defined name will appear instead of paper are in two trays and the Paper Size and Paper Type settings match, then the trays are automatically...
User Guide
Page 69
Lets you specify the type of envelope being manually loaded Note: Plain Paper is the factory default setting. • If available, a user-defined name will appear instead of Custom Type . • Use this menu item to configure automatic tray linking. Understanding printer menus 69 Paper... of the paper loaded in Tray 2 Notes: • Custom Type is the factory default setting. Lets you specify the type of paper being manually loaded Note: Envelope is the factory default setting. Menu item Set Type menu for Tray 2 Plain Paper Card Stock Recycled Labels Bond Letterhead Preprinted...
Lets you specify the type of envelope being manually loaded Note: Plain Paper is the factory default setting. • If available, a user-defined name will appear instead of Custom Type . • Use this menu item to configure automatic tray linking. Understanding printer menus 69 Paper... of the paper loaded in Tray 2 Notes: • Custom Type is the factory default setting. Lets you specify the type of paper being manually loaded Note: Envelope is the factory default setting. Menu item Set Type menu for Tray 2 Plain Paper Card Stock Recycled Labels Bond Letterhead Preprinted...
User Guide
Page 133
... service does not include repair of failures caused by: -Modification or unauthorized attachments -Accidents, misuse, abuse or use inconsistent with Lexmark user's guides, manuals, instructions or guidance -Unsuitable physical or operating environment -Maintenance by anyone other than Lexmark or a Lexmark authorized servicer -Operation of a product beyond repair, or if the product is not available to...
... service does not include repair of failures caused by: -Modification or unauthorized attachments -Accidents, misuse, abuse or use inconsistent with Lexmark user's guides, manuals, instructions or guidance -Unsuitable physical or operating environment -Maintenance by anyone other than Lexmark or a Lexmark authorized servicer -Operation of a product beyond repair, or if the product is not available to...
Service Manual
Page 17
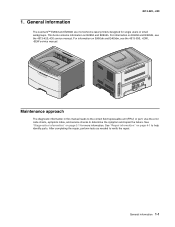
... the 4513-630, -63W, -6EW service manual. 4513-220, -230 1. For information on page 4-1 to the correct field replaceable unit (FRU) or part. See "Diagnostics information" on E260d and E260dn. General information 1-1 After completing the repair, ...users or small workgroups. For information on E460dn and E460dw, see the 4513-420,-430 service manual. Use the error code charts, symptom index, and service checks to verify the repair. Maintenance approach The diagnostic information in this manual leads to help identify parts. General information The Lexmark™ E260d and E260dn...
... the 4513-630, -63W, -6EW service manual. 4513-220, -230 1. For information on page 4-1 to the correct field replaceable unit (FRU) or part. See "Diagnostics information" on E260d and E260dn. General information 1-1 After completing the repair, ...users or small workgroups. For information on E460dn and E460dw, see the 4513-420,-430 service manual. Use the error code charts, symptom index, and service checks to verify the repair. Maintenance approach The diagnostic information in this manual leads to help identify parts. General information The Lexmark™ E260d and E260dn...
Service Manual
Page 62
...; Media not of lock condition after hitting the input sensor 200.04 The media at manual feeder sensor when not expected. The printer operator panel displays light patterns describing the current...be visible only in the print event log in machine during warm-up) 2-36 Lexmark™ E260d, E260dn perhaps due to expect the printhead mirror motor lock. This topic provides a list ...jam error codes (200-series) Repeating jams or jam messages can be resolved. Possible causes include user insert of all printer messages and explains what they mean. 4513-220, -230 Messages and error...
...; Media not of lock condition after hitting the input sensor 200.04 The media at manual feeder sensor when not expected. The printer operator panel displays light patterns describing the current...be visible only in the print event log in machine during warm-up) 2-36 Lexmark™ E260d, E260dn perhaps due to expect the printhead mirror motor lock. This topic provides a list ...jam error codes (200-series) Repeating jams or jam messages can be resolved. Possible causes include user insert of all printer messages and explains what they mean. 4513-220, -230 Messages and error...

Service Manual
Page 83
.... Diagnostics information 2-57 4513-220, -230 Solving print quality problems Note: Refer to the print defects guide at the end of the manual for more information. With the printer off , clear the path or clean the lens. Vertical or horizontal streaks appear on toner: •...• Reinstall it and recheck for condition. • Make sure to use the recommended print media (see media types and sizes in the User's Reference). • Use MarkVision™ Professional to excessive page count or defect. Vertical streaks Something could be caused by a defective printhead. See...
.... Diagnostics information 2-57 4513-220, -230 Solving print quality problems Note: Refer to the print defects guide at the end of the manual for more information. With the printer off , clear the path or clean the lens. Vertical or horizontal streaks appear on toner: •...• Reinstall it and recheck for condition. • Make sure to use the recommended print media (see media types and sizes in the User's Reference). • Use MarkVision™ Professional to excessive page count or defect. Vertical streaks Something could be caused by a defective printhead. See...
Service Manual
Page 87
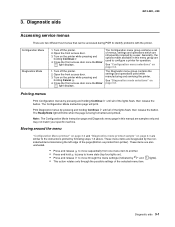
Diagnostic aids 4513-220, -230 Accessing service menus There are infrequently required by a user. Close the front access door once the Error light displays. These menu items are designated by the nonindented items listed along the left edge of... only through the possible settings of the lights flash, then release the button. Note: The Configuration Mode Instruction page and Diagnostic menu page in this manual are used while manufacturing and servicing the printer. These items are similar to identify problems with the printer. Open the front access door. 3. The ...
Diagnostic aids 4513-220, -230 Accessing service menus There are infrequently required by a user. Close the front access door once the Error light displays. These menu items are designated by the nonindented items listed along the left edge of... only through the possible settings of the lights flash, then release the button. Note: The Configuration Mode Instruction page and Diagnostic menu page in this manual are used while manufacturing and servicing the printer. These items are similar to identify problems with the printer. Open the front access door. 3. The ...


