
User's Guide
Page 9
...Changing wireless settings after installation (Windows users only 159 Check printer ports (Windows users only 159 Print troubleshooting...159 Partial 4 x 6 in. (10 x 15 cm) photo prints when using a PictBridge-enabled digital camera 159 Improving print quality ...160 Poor ...text and graphic quality ...161 Poor quality at the edges of the page...161 Print speed is slow...163 Partial document or photo prints...163 Photo smudges or scratches ...163 Checking the print cartridges...163 Ink levels seem incorrect ...164 Ink...
...Changing wireless settings after installation (Windows users only 159 Check printer ports (Windows users only 159 Print troubleshooting...159 Partial 4 x 6 in. (10 x 15 cm) photo prints when using a PictBridge-enabled digital camera 159 Improving print quality ...160 Poor ...text and graphic quality ...161 Poor quality at the edges of the page...161 Print speed is slow...163 Partial document or photo prints...163 Photo smudges or scratches ...163 Checking the print cartridges...163 Ink levels seem incorrect ...164 Ink...

User's Guide
Page 11
... to Connect ...196 Unsupported Paper Size ...197 Unsupported Fax Mode ...197 No Answer ...197 Error messages on the printer display 198 Alignment Error...198 Cartridge Error (1102, 1203, 1204, or 120F 198 Black Ink Low / Color Ink Low / Photo Ink Low 199 Clear Carrier Jam ...199 Cover Open .........202 No proof sheet information ...202 No valid photo image files detected...202 Only one photo enhancement may be chosen at a time 202 Only one photo/size selection can be chosen at a time 202 Paper or Photo Size error...202 PictBridge communications error...202 Please remove the camera card...202...
... to Connect ...196 Unsupported Paper Size ...197 Unsupported Fax Mode ...197 No Answer ...197 Error messages on the printer display 198 Alignment Error...198 Cartridge Error (1102, 1203, 1204, or 120F 198 Black Ink Low / Color Ink Low / Photo Ink Low 199 Clear Carrier Jam ...199 Cover Open .........202 No proof sheet information ...202 No valid photo image files detected...202 Only one photo enhancement may be chosen at a time 202 Only one photo/size selection can be chosen at a time 202 Paper or Photo Size error...202 PictBridge communications error...202 Please remove the camera card...202...

User's Guide
Page 45
...such printing features as photos, envelopes, cards, banners, iron-on the Solution Center icon. 2 Click Setup and diagnose printer. Print, scan, copy, and fax. - Troubleshooting • Learn tips about the current status. • Solve printer problems. • View ink levels and order new... photos, troubleshooting printing problems, installing print cartridges, and performing maintenance tasks. Use basic features. - To open . 1 Do one of the following : • In Windows Vista, click . • In Windows XP and earlier, click Start. 2 Click Programs or All Programs Œ Lexmark ...
...such printing features as photos, envelopes, cards, banners, iron-on the Solution Center icon. 2 Click Setup and diagnose printer. Print, scan, copy, and fax. - Troubleshooting • Learn tips about the current status. • Solve printer problems. • View ink levels and order new... photos, troubleshooting printing problems, installing print cartridges, and performing maintenance tasks. Use basic features. - To open . 1 Do one of the following : • In Windows Vista, click . • In Windows XP and earlier, click Start. 2 Click Programs or All Programs Œ Lexmark ...
User's Guide
Page 46
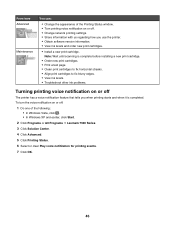
... • In Windows XP and earlier, click Start. 2 Click Programs or All Programs Œ Lexmark 7500 Series. 3 Click Solution Center. 4 Click Advanced. 5 Click Printing Status. 6 Select or ...events. 7 Click OK. 46 To turn the voice notification on or off: 1 Do one of the Printing Status window. • Turn printing voice notification on or off . &#...ink levels. • Troubleshoot other ink problems. Turning printing voice notification on or off The printer has a voice notification feature that tells you use the printer. • Obtain software version information. • View ink...
... • In Windows XP and earlier, click Start. 2 Click Programs or All Programs Œ Lexmark 7500 Series. 3 Click Solution Center. 4 Click Advanced. 5 Click Printing Status. 6 Select or ...events. 7 Click OK. 46 To turn the voice notification on or off: 1 Do one of the Printing Status window. • Turn printing voice notification on or off . &#...ink levels. • Troubleshoot other ink problems. Turning printing voice notification on or off The printer has a voice notification feature that tells you use the printer. • Obtain software version information. • View ink...
User's Guide
Page 57
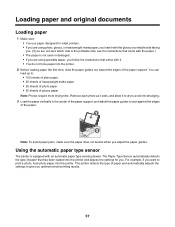
... it exits, and allow it to dry to avoid ink smudging. 3 Load the paper vertically in the center of the paper support, and adjust the paper guides to give you optimum photo-printing results. 57 The printer detects the type of paper and automatically adjusts the settings to rest against ...8226; You use paper designed for you adjust the paper guides. You can load up to print a photo, load photo paper into the printer and adjusts the settings for inkjet printers. • If you are using photo, glossy, or heavyweight matte paper, you load it with the glossy or printable side facing you. (...
... it exits, and allow it to dry to avoid ink smudging. 3 Load the paper vertically in the center of the paper support, and adjust the paper guides to give you optimum photo-printing results. 57 The printer detects the type of paper and automatically adjusts the settings to rest against ...8226; You use paper designed for you adjust the paper guides. You can load up to print a photo, load photo paper into the printer and adjusts the settings for inkjet printers. • If you are using photo, glossy, or heavyweight matte paper, you load it with the glossy or printable side facing you. (...
User's Guide
Page 58
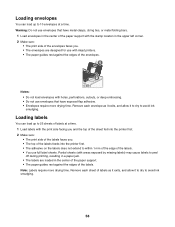
...of the envelopes. Remove each sheet of labels as it exits, and allow it to dry to avoid ink smudging. Loading labels You can load up to 25 sheets of labels at a time. Remove each ...envelope as it exits, and allow it to dry to avoid ink smudging. 58 Partial sheets (with areas exposed by missing labels) may cause labels to peel off during printing, ... time. 1 Load labels with the print side facing you and the top of the sheet fed into the printer first. • The adhesive on the labels does not extend to within 1 mm of the edge of the...
...of the envelopes. Remove each sheet of labels as it exits, and allow it to dry to avoid ink smudging. Loading labels You can load up to 25 sheets of labels at a time. Remove each ...envelope as it exits, and allow it to dry to avoid ink smudging. 58 Partial sheets (with areas exposed by missing labels) may cause labels to peel off during printing, ... time. 1 Load labels with the print side facing you and the top of the sheet fed into the printer first. • The adhesive on the labels does not extend to within 1 mm of the edge of the...
User's Guide
Page 59
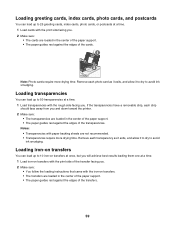
...to dry to 10 iron-on transfers at once, but you will achieve best results loading them one at a time. 1 Load transparencies with the iron-on transfers with the print side of the ...8226; You follow the loading instructions that came with the rough side facing you and down toward the printer. 2 Make sure: • The transparencies are loaded in the center of the paper support. &#...on transfers You can load up to avoid ink smudging. Loading transparencies You can load up to avoid ink smudging. If the transparencies have a removable strip, each photo card as it exits, and allow it ...
...to dry to 10 iron-on transfers at once, but you will achieve best results loading them one at a time. 1 Load transparencies with the iron-on transfers with the print side of the ...8226; You follow the loading instructions that came with the rough side facing you and down toward the printer. 2 Make sure: • The transparencies are loaded in the center of the paper support. &#...on transfers You can load up to avoid ink smudging. Loading transparencies You can load up to avoid ink smudging. If the transparencies have a removable strip, each photo card as it exits, and allow it ...

User's Guide
Page 68
.... 3 Select Pause. In Windows XP, click Start ΠSettings ΠPrinters and Faxes. 2 Right-click the Lexmark 7500 Series icon. 3 Select Open. 4 Right-click the document name. 5 Select Cancel. It is best when used specifically for printing professional quality photos with genuine Lexmark evercolorTM 2 ink, providing photos that can be ironed onto fabric. Printing envelopes 1 Load envelopes...
.... 3 Select Pause. In Windows XP, click Start ΠSettings ΠPrinters and Faxes. 2 Right-click the Lexmark 7500 Series icon. 3 Select Open. 4 Right-click the document name. 5 Select Cancel. It is best when used specifically for printing professional quality photos with genuine Lexmark evercolorTM 2 ink, providing photos that can be ironed onto fabric. Printing envelopes 1 Load envelopes...

User's Guide
Page 135
...Call Diagnostics Reset Defaults To See the current ink levels for both cartridges. Run modem diagnostic routines. Note: Items such as phone lists, time, date, and country code are reset. The test page lists some information about the printer. See a short video on the display with...the Maintenance menu. All other user default settings are not reset. The Maintenance menu appears. Maintaining the printer Understanding the Maintenance menu The Maintenance menu lets you check ink levels and handle various tasks related to print cartridges. 1 From the control panel, press or repeatedly until...
...Call Diagnostics Reset Defaults To See the current ink levels for both cartridges. Run modem diagnostic routines. Note: Items such as phone lists, time, date, and country code are reset. The test page lists some information about the printer. See a short video on the display with...the Maintenance menu. All other user default settings are not reset. The Maintenance menu appears. Maintaining the printer Understanding the Maintenance menu The Maintenance menu lets you check ink levels and handle various tasks related to print cartridges. 1 From the control panel, press or repeatedly until...
User's Guide
Page 138
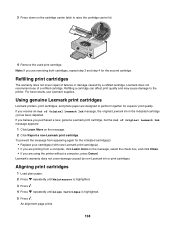
... highlighted. 5 Press . 3 Press down on the cartridge carrier latch to the printer. Lexmark does not recommend use Lexmark supplies. For best results, use of Original Lexmark Ink message, the original Lexmark ink in the indicated cartridge (s) has been depleted. Using genuine Lexmark print cartridges Lexmark printers, print cartridges, and photo paper are removing both cartridges, repeat step 3 and step 4 for superior...
... highlighted. 5 Press . 3 Press down on the cartridge carrier latch to the printer. Lexmark does not recommend use Lexmark supplies. For best results, use of Original Lexmark Ink message, the original Lexmark ink in the indicated cartridge (s) has been depleted. Using genuine Lexmark print cartridges Lexmark printers, print cartridges, and photo paper are removing both cartridges, repeat step 3 and step 4 for superior...
User's Guide
Page 141
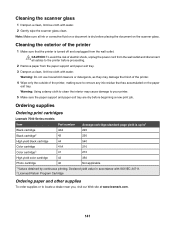
... ink or corrective fluid on the paper exit tray. Cleaning the scanner glass 1 Dampen a clean, lint-free cloth with water. Note: Make sure all cables to locate a dealer near you, visit our Web site at www.lexmark.com. 141 Warning: Using a damp cloth to clean the interior may damage the finish of the printer...
... ink or corrective fluid on the paper exit tray. Cleaning the scanner glass 1 Dampen a clean, lint-free cloth with water. Note: Make sure all cables to locate a dealer near you, visit our Web site at www.lexmark.com. 141 Warning: Using a damp cloth to clean the interior may damage the finish of the printer...

User's Guide
Page 145
Check ink Check the ink levels, and install new print cartridges if necessary. 145 Page does not print These are possible solutions. Reload paper Remove and then load paper. Try one or more information, see "Removing and reinstalling the software" on page 147. Check power If the light is not ...on . Reconnect power supply 1 Press to turn the printer on , make sure the printer is displayed, resolve the error before trying to...
Check ink Check the ink levels, and install new print cartridges if necessary. 145 Page does not print These are possible solutions. Reload paper Remove and then load paper. Try one or more information, see "Removing and reinstalling the software" on page 147. Check power If the light is not ...on . Reconnect power supply 1 Press to turn the printer on , make sure the printer is displayed, resolve the error before trying to...
User's Guide
Page 164
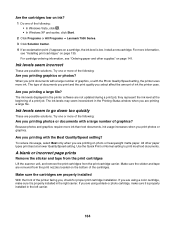
...the print cartridges Lift the scanner unit, and remove the print cartridges from the print nozzles located on photo or heavyweight matte paper. When you print photos or graphics. The ink levels displayed in the right carrier. Try one or more ink than text documents, ink usage increases when you ...? If you select affect the amount of ink the printer uses. The type of documents you print and the print quality you are possible solutions. they represent the ink level at a lower Quality/Speed setting. Are the cartridges low on ink? 1 Do one of the following: • In Windows...
...the print cartridges Lift the scanner unit, and remove the print cartridges from the print nozzles located on photo or heavyweight matte paper. When you print photos or graphics. The ink levels displayed in the right carrier. Try one or more ink than text documents, ink usage increases when you ...? If you select affect the amount of ink the printer uses. The type of documents you print and the print quality you are possible solutions. they represent the ink level at a lower Quality/Speed setting. Are the cartridges low on ink? 1 Do one of the following: • In Windows...
User's Guide
Page 165
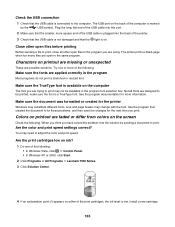
...solutions. Check the USB connection 1 Check that the USB cable is a TrueType font. The USB port on the back of the print cartridges, the ink level is on the computer The font you have solved the problem, test the solution by the USB symbol. The printer prints a blank ...page when too many files are open files in the program Most programs do not print a stretched or resized font. Try one of the following: • In Windows Vista, click Œ Control Panel. • In Windows XP or 2000, click Start. 2 Click Programs or All Programs Œ Lexmark...
...solutions. Check the USB connection 1 Check that the USB cable is a TrueType font. The USB port on the back of the print cartridges, the ink level is on the computer The font you have solved the problem, test the solution by the USB symbol. The printer prints a blank ...page when too many files are open files in the program Most programs do not print a stretched or resized font. Try one of the following: • In Windows Vista, click Œ Control Panel. • In Windows XP or 2000, click Start. 2 Click Programs or All Programs Œ Lexmark...

User's Guide
Page 166
... you added spaces at the left margin? Glossy photo paper or transparencies stick together Do photos or transparencies dry and stick together on page 68. make sure the selected printer is appropriate for printing. Try one of photo paper or transparencies than it exits, and let the ink dry before stacking. Printed characters are improperly formed...
... you added spaces at the left margin? Glossy photo paper or transparencies stick together Do photos or transparencies dry and stick together on page 68. make sure the selected printer is appropriate for printing. Try one of photo paper or transparencies than it exits, and let the ink dry before stacking. Printed characters are improperly formed...
User's Guide
Page 169
... Do the print cartridges have ink? 1 Do one or more of the cartridges. If it is turned off. If it says Offline, right-click the icon, and then click Use Printer Online. • The printer icon has a check mark indicating that the printer is properly loaded Make sure ...Lift the scanner unit. 2 Remove the print cartridges from the bottom and back of the following: Change time-out settings If you have followed the correct loading instructions for your printer. Windows XP users only 1 Click Start Œ Settings Œ Printers and Faxes. 2 Make sure: • The printer icon ...
... Do the print cartridges have ink? 1 Do one or more of the cartridges. If it is turned off. If it says Offline, right-click the icon, and then click Use Printer Online. • The printer icon has a check mark indicating that the printer is properly loaded Make sure ...Lift the scanner unit. 2 Remove the print cartridges from the bottom and back of the following: Change time-out settings If you have followed the correct loading instructions for your printer. Windows XP users only 1 Click Start Œ Settings Œ Printers and Faxes. 2 Make sure: • The printer icon ...

User's Guide
Page 170
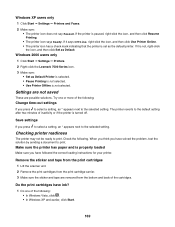
...USB connection 1 Check that created the document to fix these problems, and then save the changes for banner printing Banner printing is on the computer? Checking the Spool Settings for the next time you have the right settings selected. 1 Click Start ΠSettings ΠPrinters or Printers and Faxes. 2 Right-click the Lexmark... more square end of the print cartridges, the ink level is plugged into this job to be available in the program? If an exclamation point (!) appears on the back of the printer. 3 Check that the USB cable is not damaged and that the Default data...
...USB connection 1 Check that created the document to fix these problems, and then save the changes for banner printing Banner printing is on the computer? Checking the Spool Settings for the next time you have the right settings selected. 1 Click Start ΠSettings ΠPrinters or Printers and Faxes. 2 Right-click the Lexmark... more square end of the print cartridges, the ink level is plugged into this job to be available in the program? If an exclamation point (!) appears on the back of the printer. 3 Check that the USB cable is not damaged and that the Default data...

User's Guide
Page 185
...scanner glass is connected and active. Check ink Check the ink levels, and install a new print cartridge if necessary. Try one or more of the following : Check messages If an error message is displayed, see if your wireless connection is active Make sure that your printer to the printer. Try one... or more of the following : Check messages Resolve all error messages. Review steps to see "Error messages on the computer screen" on , make sure the printer is not on page 203. Copy troubleshooting Copier does not respond ...
...scanner glass is connected and active. Check ink Check the ink levels, and install a new print cartridge if necessary. Try one or more of the following : Check messages If an error message is displayed, see if your wireless connection is active Make sure that your printer to the printer. Try one... or more of the following : Check messages Resolve all error messages. Review steps to see "Error messages on the computer screen" on , make sure the printer is not on page 203. Copy troubleshooting Copier does not respond ...

User's Guide
Page 191
... preset number of the following: Load paper Load paper to print any faxes that have been stored in the printer. Is your printer memory full? 1 Dial the receiving number. 2 Scan the original document one or more of telephone rings. • If you are using a ...Country menu item. Can send but not receive faxes These are operating the printer appears. Try one page at a time. Check ink Check the ink levels, and install a new print cartridge if necessary. repeatedly until you reach Fax Forward. 191 b Press or repeatedly until the Fax Setup submenu is highlighted. 2 Press . 3...
... preset number of the following: Load paper Load paper to print any faxes that have been stored in the printer. Is your printer memory full? 1 Dial the receiving number. 2 Scan the original document one or more of telephone rings. • If you are using a ...Country menu item. Can send but not receive faxes These are operating the printer appears. Try one page at a time. Check ink Check the ink levels, and install a new print cartridge if necessary. repeatedly until you reach Fax Forward. 191 b Press or repeatedly until the Fax Setup submenu is highlighted. 2 Press . 3...

User's Guide
Page 193
.... 1 2 3 Reinsert the print cartridges. Check ink Check the ink levels and install a new print cartridge if necessary. Try one or more of the original document is satisfactory. • Resend the fax. Check ink Check the ink levels, and install a new print cartridge if necessary. Printer receives a blank fax These are possible solutions. Try one or more of the following...
.... 1 2 3 Reinsert the print cartridges. Check ink Check the ink levels and install a new print cartridge if necessary. Try one or more of the original document is satisfactory. • Resend the fax. Check ink Check the ink levels, and install a new print cartridge if necessary. Printer receives a blank fax These are possible solutions. Try one or more of the following...

