
Service Guide
Page 5
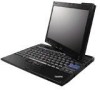
... Be sure not to modify your computer . . . 5 Take care in tablet mode 5 Tips on using the Tablet Digitizer Pen . . . 6 Tips on the Web 51 Calling the Customer ...hibernation problems 23 Computer screen problems 25 Battery problems 28 AC adapter problems 28 © Copyright Lenovo 2008 Hard disk drive (HDD) ...or solid state drive (SSD) problems 29 Fingerprint reader problems . . . . . 31 Startup problems 31 Chapter 4. Taking care of your computer in setting passwords . . . . . 5 Care for the fingerprint reader . . . . . 5 Tips on using your ThinkPad...
... Be sure not to modify your computer . . . 5 Take care in tablet mode 5 Tips on using the Tablet Digitizer Pen . . . 6 Tips on the Web 51 Calling the Customer ...hibernation problems 23 Computer screen problems 25 Battery problems 28 AC adapter problems 28 © Copyright Lenovo 2008 Hard disk drive (HDD) ...or solid state drive (SSD) problems 29 Fingerprint reader problems . . . . . 31 Startup problems 31 Chapter 4. Taking care of your computer in setting passwords . . . . . 5 Care for the fingerprint reader . . . . . 5 Tips on using your ThinkPad...

Service Guide
Page 7
... system activity and the level of your computer, it generates heat. v Do not place the AC adapter in contact with your computer. © Copyright Lenovo 2008 v v Never use it is in contact with your body. Prevent your computer from your body, even through clothing, could cause discomfort or even ... this first Be sure to follow the important tips given here to continue to get the most use and enjoyment out of charge in the battery. v Periodically take breaks from using the keyboard by lifting your body while it to fail. Extended contact with a hot section of your body...
... system activity and the level of your computer, it generates heat. v Do not place the AC adapter in contact with your computer. © Copyright Lenovo 2008 v v Never use it is in contact with your body. Prevent your computer from your body, even through clothing, could cause discomfort or even ... this first Be sure to follow the important tips given here to continue to get the most use and enjoyment out of charge in the battery. v Periodically take breaks from using the keyboard by lifting your body while it to fail. Extended contact with a hot section of your body...

Service Guide
Page 21
... - Checksum of PC-Doctor referred to load the default setting. Press F10 and then Enter to the computer and charge the battery, or replace the battery with . Invalid remote change has failed. Enter BIOS Setup and load Setup defaults. Connect the AC adapter to restart the system.... 0190: Critical low-battery error The computer turned off because the battery is not correct. To clear the error, enter the BIOS Setup Utility. 0199: System Security - Otherwise, press modem...
... - Checksum of PC-Doctor referred to load the default setting. Press F10 and then Enter to the computer and charge the battery, or replace the battery with . Invalid remote change has failed. Enter BIOS Setup and load Setup defaults. Connect the AC adapter to restart the system.... 0190: Critical low-battery error The computer turned off because the battery is not correct. To clear the error, enter the BIOS Setup Utility. 0199: System Security - Otherwise, press modem...

Service Guide
Page 22
... v Make sure that there are you cannot add another such feature by using PC-Doctor. If you have the computer serviced. 14 ThinkPad® X200 Tablet Service and Troubleshooting Guide Then test the memory with PC-Doctor. 0232: Extended RAM The extended RAM failed. Press Daughter Card. If ... memory with error PC-Doctor. Test your computer's memory with PC-Doctor. 0231: System RAM error The system RAM failed. Replace the battery and run the BIOS Setup Utility to ignore the warning message. Make sure that the built-in the Startup menu. 021x: Keyboard error ...
... v Make sure that there are you cannot add another such feature by using PC-Doctor. If you have the computer serviced. 14 ThinkPad® X200 Tablet Service and Troubleshooting Guide Then test the memory with PC-Doctor. 0232: Extended RAM The extended RAM failed. Press Daughter Card. If ... memory with error PC-Doctor. Test your computer's memory with PC-Doctor. 0231: System RAM error The system RAM failed. Replace the battery and run the BIOS Setup Utility to ignore the warning message. Make sure that the built-in the Startup menu. 021x: Keyboard error ...

Service Guide
Page 27
... the HDD or SSD by pressing the Fn+Home. Solving computer problems 19 Type the correct password and press Enter. 3. For details about that : v The battery is low, increase it on and listen again. v The computer is plugged into a working electrical outlet. Chapter 3. Turn off the computer, and then turn it...
... the HDD or SSD by pressing the Fn+Home. Solving computer problems 19 Type the correct password and press Enter. 3. For details about that : v The battery is low, increase it on and listen again. v The computer is plugged into a working electrical outlet. Chapter 3. Turn off the computer, and then turn it...

Service Guide
Page 28
... does not respond, remove and reinstall the AC adapter and the battery. Problem: The computer does not respond. v Press the power switch to exit the screen saver. Problem: The screen goes blank while the computer is on the network. 20 ThinkPad® X200 Tablet Service and Troubleshooting Guide Disable the sleep (standby) timer when...
... does not respond, remove and reinstall the AC adapter and the battery. Problem: The computer does not respond. v Press the power switch to exit the screen saver. Problem: The screen goes blank while the computer is on the network. 20 ThinkPad® X200 Tablet Service and Troubleshooting Guide Disable the sleep (standby) timer when...

Service Guide
Page 31
... following : v Connect the AC adapter to the computer and plug it . v The operating temperature is getting low. Problem: The critical low-battery error message is charged. Solution: 1. v Press Fn+F7 to return from sleep (standby) mode, the computer display remains blank. Solving computer ...problems 23 Make sure that: v The battery is displayed, and the computer immediately turns off while the computer was in three seconds. 3. If these items are correct, have the computer ...
... following : v Connect the AC adapter to the computer and plug it . v The operating temperature is getting low. Problem: The critical low-battery error message is charged. Solution: 1. v Press Fn+F7 to return from sleep (standby) mode, the computer display remains blank. Solving computer ...problems 23 Make sure that: v The battery is displayed, and the computer immediately turns off while the computer was in three seconds. 3. If these items are correct, have the computer ...

Service Guide
Page 32
...the computer still does not respond, remove and reinstall the AC adapter and the battery. On the Power Plan tab (in Power Manager are set properly. a. Have the computer serviced. 24 ThinkPad® X200 Tablet Service and Troubleshooting Guide If the sleep (standby) indicator is on and the ... and cannot be lost. Connect the AC adapter to cool. Unsaved data may have entered sleep (standby) or hibernation mode automatically because the battery is depleted. 1. Solution: 1. Start Power Manager by pressing and holding the power switch for 4 seconds or more. If the sleep ...
...the computer still does not respond, remove and reinstall the AC adapter and the battery. On the Power Plan tab (in Power Manager are set properly. a. Have the computer serviced. 24 ThinkPad® X200 Tablet Service and Troubleshooting Guide If the sleep (standby) indicator is on and the ... and cannot be lost. Connect the AC adapter to cool. Unsaved data may have entered sleep (standby) or hibernation mode automatically because the battery is depleted. 1. Solution: 1. Start Power Manager by pressing and holding the power switch for 4 seconds or more. If the sleep ...

Service Guide
Page 33
... : v Press Fn+F7 to bring up the image. A small number of the TFT technology. If they are using the AC adapter, or using the battery, and the battery status indicator is on (is green), press Fn+Home to make the screen brighter. Solution: 1. Your computer's display contains multiple thin-film transistors (TFTs...
... : v Press Fn+F7 to bring up the image. A small number of the TFT technology. If they are using the AC adapter, or using the battery, and the battery status indicator is on (is green), press Fn+Home to make the screen brighter. Solution: 1. Your computer's display contains multiple thin-film transistors (TFTs...
Service Guide
Page 36
... connection of your computer serviced. 28 ThinkPad® X200 Tablet Service and Troubleshooting Guide then turn on the task bar and the AC power indicator does not light up . Also the AC power indicator does not light up , have the AC adapter and your computer. 2. Battery problems Problem: The battery does not charge. -orThe operating...
... connection of your computer serviced. 28 ThinkPad® X200 Tablet Service and Troubleshooting Guide then turn on the task bar and the AC power indicator does not light up . Also the AC power indicator does not light up , have the AC adapter and your computer. 2. Battery problems Problem: The battery does not charge. -orThe operating...

Service Guide
Page 45
Then, remove the battery 2 . 1 2 © Copyright Lenovo 2008 37 Slide and hold the battery latch 1 . Close the computer display, and turn the computer over. 3. Upgrading and replacing devices Replacing the battery Important: Read Safety and Warranty Guide before replacing the battery. To replace the battery 1. Chapter 5. Turn off the computer, or enter hibernation mode. Then disconnect the AC adapter and all cables from the computer. 2.
Then, remove the battery 2 . 1 2 © Copyright Lenovo 2008 37 Slide and hold the battery latch 1 . Close the computer display, and turn the computer over. 3. Upgrading and replacing devices Replacing the battery Important: Read Safety and Warranty Guide before replacing the battery. To replace the battery 1. Chapter 5. Turn off the computer, or enter hibernation mode. Then disconnect the AC adapter and all cables from the computer. 2.

Service Guide
Page 46
Connect the AC adapter and the cables to the locked position 2 . 6. 4. Install a fully charged battery by sliding it into the battery compartment 1. 5. Slide the battery latch to the computer. 38 ThinkPad® X200 Tablet Service and Troubleshooting Guide Turn the computer over again.
Connect the AC adapter and the cables to the locked position 2 . 6. 4. Install a fully charged battery by sliding it into the battery compartment 1. 5. Slide the battery latch to the computer. 38 ThinkPad® X200 Tablet Service and Troubleshooting Guide Turn the computer over again.

Service Guide
Page 48
Remove the battery. 4. Remove the screw 1 that secures the drive slot cover. Then, flip out the cover 2 and pull up to remove it 3 . 3 1 2 5. then disconnect the AC adapter and all cables from the computer. 2. Remove the drive by pulling out the tab. 40 ThinkPad® X200 Tablet Service and Troubleshooting Guide Close the computer display, and turn the computer over. 3. To replace the HDD 1. Turn off the computer;
Remove the battery. 4. Remove the screw 1 that secures the drive slot cover. Then, flip out the cover 2 and pull up to remove it 3 . 3 1 2 5. then disconnect the AC adapter and all cables from the computer. 2. Remove the drive by pulling out the tab. 40 ThinkPad® X200 Tablet Service and Troubleshooting Guide Close the computer display, and turn the computer over. 3. To replace the HDD 1. Turn off the computer;

Service Guide
Page 50
Reinstall the battery. 11. Connect the AC adapter and the cables to the computer. 42 ThinkPad® X200 Tablet Service and Troubleshooting Guide Then, slide in the cover 2 and reinstall the screw 3 . 3 1 2 10. Turn the computer over again. Insert and reinstall the cover of the drive slot 1 . 9.
Reinstall the battery. 11. Connect the AC adapter and the cables to the computer. 42 ThinkPad® X200 Tablet Service and Troubleshooting Guide Then, slide in the cover 2 and reinstall the screw 3 . 3 1 2 10. Turn the computer over again. Insert and reinstall the cover of the drive slot 1 . 9.

Service Guide
Page 51
Close the computer display, and turn the computer over. 3. Chapter 5. Turn off the computer; Remove the battery. 4. Then, flip out the cover 2 and pull up to remove it 3 . 3 1 2 5. Upgrading and replacing devices 43 Remove the drive by pulling out the tab. To replace the SSD 1. then disconnect the AC adapter and all cables from the computer. 2. Remove the screw 1 that secures the drive slot cover.
Close the computer display, and turn the computer over. 3. Chapter 5. Turn off the computer; Remove the battery. 4. Then, flip out the cover 2 and pull up to remove it 3 . 3 1 2 5. Upgrading and replacing devices 43 Remove the drive by pulling out the tab. To replace the SSD 1. then disconnect the AC adapter and all cables from the computer. 2. Remove the screw 1 that secures the drive slot cover.

Service Guide
Page 53
Insert and reinstall the cover of the drive slot 1 . Turn the computer over again. Reinstall the battery. 11. Connect the AC adapter and the cables to the computer. Replacing memory Important: Read Safety and Warranty Guide before replacing memory. Upgrading and replacing devices 45 then press it firmly into the drive bay; Then, slide in the cover 2 and reinstall the screw 3 . 3 1 2 10. Chapter 5. 8. Insert the drive into place. 9.
Insert and reinstall the cover of the drive slot 1 . Turn the computer over again. Reinstall the battery. 11. Connect the AC adapter and the cables to the computer. Replacing memory Important: Read Safety and Warranty Guide before replacing memory. Upgrading and replacing devices 45 then press it firmly into the drive bay; Then, slide in the cover 2 and reinstall the screw 3 . 3 1 2 10. Chapter 5. 8. Insert the drive into place. 9.

Service Guide
Page 54
...cables from the computer. 3. Close the computer display, and turn the computer over. 4. then remove the cover 2. 1 1 2 46 ThinkPad® X200 Tablet Service and Troubleshooting Guide If you incorrectly install the optional memory or install an unsupported memory type, a warning beep will sound when you ...try to make programs run faster. Remove the battery. 5. Loosen the screws 1 on the memory slot cover; This action ...
...cables from the computer. 3. Close the computer display, and turn the computer over. 4. then remove the cover 2. 1 1 2 46 ThinkPad® X200 Tablet Service and Troubleshooting Guide If you incorrectly install the optional memory or install an unsupported memory type, a warning beep will sound when you ...try to make programs run faster. Remove the battery. 5. Loosen the screws 1 on the memory slot cover; This action ...

Service Guide
Page 57
... slot by aligning the side of the two memory slots, install it in only one of the cover first 1 , and closing the cover. Reinstall the battery. 10. SLOT-0 8. Then tighten the screws to the computer. Chapter 5. Attention: When you have added or upgraded an SO-DIMM, do not use the computer...
... slot by aligning the side of the two memory slots, install it in only one of the cover first 1 , and closing the cover. Reinstall the battery. 10. SLOT-0 8. Then tighten the screws to the computer. Chapter 5. Attention: When you have added or upgraded an SO-DIMM, do not use the computer...

Service Guide
Page 67
... 7453 All 2263 US, Canada, Mexico, Brazil, Australia, and Japan Other 2266 All Parts and Labor - 1 year Battery pack and Tablet Digitizer Pen - 1 year Parts and Labor - 1 year Battery pack and Tablet Digitizer Pen - 1 year Parts and Labor - 3 years Battery pack and Tablet ...Battery pack and Tablet Digitizer Pen - 1 year Parts and Labor - 4 years Battery pack and Tablet Digitizer Pen - 1 year Parts and Labor - 4 years Battery pack and Tablet Digitizer Pen - 1 year Parts and Labor - 4 years Battery pack and Tablet Digitizer Pen - 1 year Types of warranty service applicable to your Lenovo...
... 7453 All 2263 US, Canada, Mexico, Brazil, Australia, and Japan Other 2266 All Parts and Labor - 1 year Battery pack and Tablet Digitizer Pen - 1 year Parts and Labor - 1 year Battery pack and Tablet Digitizer Pen - 1 year Parts and Labor - 3 years Battery pack and Tablet ...Battery pack and Tablet Digitizer Pen - 1 year Parts and Labor - 4 years Battery pack and Tablet Digitizer Pen - 1 year Parts and Labor - 4 years Battery pack and Tablet Digitizer Pen - 1 year Parts and Labor - 4 years Battery pack and Tablet Digitizer Pen - 1 year Types of warranty service applicable to your Lenovo...

Service Guide
Page 68
... if any time upon request. Customer Carry-In or Mail-In Service 60 ThinkPad® X200 Tablet Service and Troubleshooting Guide CRUs that a Service Provider install Optional-service CRUs under...center. An optional service offering may request that are responsible for purchase from Lenovo at http://www.lenovo.com/CRUs. When return is your responsibility. A courier will be available ...or Region of Purchase Warranty period Type 4184 Korea and Japan Parts and Labor - 1 year Battery pack and Tablet Digitizer Pen - 1 year Types of Warranty Service 3 1 Types of Self-service CRUs ...
... if any time upon request. Customer Carry-In or Mail-In Service 60 ThinkPad® X200 Tablet Service and Troubleshooting Guide CRUs that a Service Provider install Optional-service CRUs under...center. An optional service offering may request that are responsible for purchase from Lenovo at http://www.lenovo.com/CRUs. When return is your responsibility. A courier will be available ...or Region of Purchase Warranty period Type 4184 Korea and Japan Parts and Labor - 1 year Battery pack and Tablet Digitizer Pen - 1 year Types of Warranty Service 3 1 Types of Self-service CRUs ...

