(English) Power Manager Deployment Guide
Page 26
This setting is not supported on Windows 7 client computers. Specifies the performance of RAM (Random Access Memory) when the system enters sleep (Stand by ) mode. Specifies whether to allow the Windows operating system to automatically wake your computer from sleep mode on a ...
This setting is not supported on Windows 7 client computers. Specifies the performance of RAM (Random Access Memory) when the system enters sleep (Stand by ) mode. Specifies whether to allow the Windows operating system to automatically wake your computer from sleep mode on a ...
Hardware Maintenance Manual
Page 31
...and offered to all CTO and CMV products are hard disk drives, system boards, microprocessors, Liquid Crystal Displays (LCDs), and memory. • Remember, all customers. Important service information 25 A unique 4-digit MT and 3-digit model is a unique configuration that has been ...replacing FRUs for CTO, CMV, and GAV Product definition Dynamic Configure To Order (CTO) This provides the ability for a customer to configure a Lenovo solution from an eSite, and have the 4-digit MT and 3-digit CTO model only (Example: 1829-CTO). The machine label, Product Entitlement ...
...and offered to all CTO and CMV products are hard disk drives, system boards, microprocessors, Liquid Crystal Displays (LCDs), and memory. • Remember, all customers. Important service information 25 A unique 4-digit MT and 3-digit model is a unique configuration that has been ...replacing FRUs for CTO, CMV, and GAV Product definition Dynamic Configure To Order (CTO) This provides the ability for a customer to configure a Lenovo solution from an eSite, and have the 4-digit MT and 3-digit CTO model only (Example: 1829-CTO). The machine label, Product Entitlement ...
Hardware Maintenance Manual
Page 32
...Remaining FRUs (the complete list of FRUs at the MT Model level) • eSupport can be accessed at the MT Model level. 26 ThinkPad T420 and T420i Hardware Maintenance Manual Type your machine type and serial number, and then click Submit. Click Product & Parts Detail and then follow the instructions on.... • To view the complete list of FRUs, do the following : 1. Click Products & Service Warranty. 2. hard disk drive, system board, microprocessor, LCD, and memory) Use the HMM as a back-up to PEW and eSupport to view the complete list of FRUs at the following Web site: http://www...
...Remaining FRUs (the complete list of FRUs at the MT Model level) • eSupport can be accessed at the MT Model level. 26 ThinkPad T420 and T420i Hardware Maintenance Manual Type your machine type and serial number, and then click Submit. Click Product & Parts Detail and then follow the instructions on.... • To view the complete list of FRUs, do the following : 1. Click Products & Service Warranty. 2. hard disk drive, system board, microprocessor, LCD, and memory) Use the HMM as a back-up to PEW and eSupport to view the complete list of FRUs at the following Web site: http://www...
Hardware Maintenance Manual
Page 36
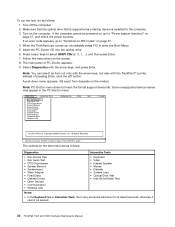
...instructions on the test menu are as follows: Diagnostics Interactive Tests • Run Normal Test • Run Quick Test • CPU/Coprocessor • System Memory • Systemboard • Video Adapter • Fixed Disks • Diskette Drives • Other Devices • Communication • Wireless LAN • ...; Intel WLAN Radio Test Notes: • In the Keyboard test in Interactive Tests, the Fn key should be sensed. 30 ThinkPad T420 and T420i Hardware Maintenance Manual Use the cursor keys and ESC to -FRU index" on page 37, and check the power sources. If ...
...instructions on the test menu are as follows: Diagnostics Interactive Tests • Run Normal Test • Run Quick Test • CPU/Coprocessor • System Memory • Systemboard • Video Adapter • Fixed Disks • Diskette Drives • Other Devices • Communication • Wireless LAN • ...; Intel WLAN Radio Test Notes: • In the Keyboard test in Interactive Tests, the Fn key should be sensed. 30 ThinkPad T420 and T420i Hardware Maintenance Manual Use the cursor keys and ESC to -FRU index" on page 37, and check the power sources. If ...
Hardware Maintenance Manual
Page 37
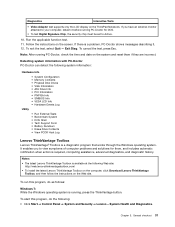
Follow the instructions on the ThinkPad Notebook. To run this program, do as follows: Windows 7: While the Windows operating system is a diagnostic program that works through the Windows operating system. General ... supports only the LCD display on the screen. To cancel the test, press Esc. Notes: • The latest Lenovo ThinkVantage Toolbox is available at the following system information: Hardware Info • System Configuration • Memory Contents • Physical Disk Drives • VGA Information • ATA Drive Info • PCI Information • PNPISA...
Follow the instructions on the ThinkPad Notebook. To run this program, do as follows: Windows 7: While the Windows operating system is a diagnostic program that works through the Windows operating system. General ... supports only the LCD display on the screen. To cancel the test, press Esc. Notes: • The latest Lenovo ThinkVantage Toolbox is available at the following system information: Hardware Info • System Configuration • Memory Contents • Physical Disk Drives • VGA Information • ATA Drive Info • PCI Information • PNPISA...
Hardware Maintenance Manual
Page 39
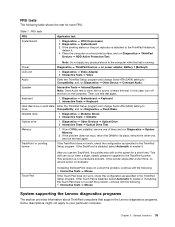
... the test again. Diagnostics ➙ Diskette Drives 2. If two DIMMs are installed, remove one , and run Diagnostics ➙ System Memory. 2. If the problem does not recur, return the DIMM to Compatibility, and run Diagnostics ➙ Fixed Disks. This symptom is ... the problem, continue with the following: • Interactive Tests ➙ Mouse System supporting the Lenovo diagnostics programs The section provides information about ThinkPad computers that support the Lenovo diagnostics programs. Some descriptions might not apply to enable it . 4. If the Touch Pad is...
... the test again. Diagnostics ➙ Diskette Drives 2. If two DIMMs are installed, remove one , and run Diagnostics ➙ System Memory. 2. If the problem does not recur, return the DIMM to Compatibility, and run Diagnostics ➙ Fixed Disks. This symptom is ... the problem, continue with the following: • Interactive Tests ➙ Mouse System supporting the Lenovo diagnostics programs The section provides information about ThinkPad computers that support the Lenovo diagnostics programs. Some descriptions might not apply to enable it . 4. If the Touch Pad is...
Hardware Maintenance Manual
Page 40
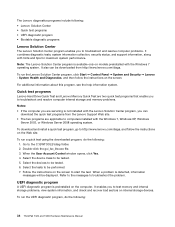
...problem is available only on the Web site. Note: The Lenovo Solution Center program is detected, information messages will be displayed. To run the UEFI diagnostic program, do the following : 34 ThinkPad T420 and T420i Hardware Maintenance Manual Follow the instructions on internal storage devices....Double-click the gui_lsc_lite.exe file. 3. To run the Lenovo Solution Center program, click Start ➙ Control Panel ➙ System and Security ➙ Lenovo - Quick test programs Lenovo Hard Drive Quick Test and Lenovo Memory Quick Test are two quick test programs that enable you...
...problem is available only on the Web site. Note: The Lenovo Solution Center program is detected, information messages will be displayed. To run the UEFI diagnostic program, do the following : 34 ThinkPad T420 and T420i Hardware Maintenance Manual Follow the instructions on internal storage devices....Double-click the gui_lsc_lite.exe file. 3. To run the Lenovo Solution Center program, click Start ➙ Control Panel ➙ System and Security ➙ Lenovo - Quick test programs Lenovo Hard Drive Quick Test and Lenovo Memory Quick Test are two quick test programs that enable you...
Hardware Maintenance Manual
Page 41
... troubleshooting hints. 2. Go to the computer. 2. Attach the USB device to http://www.lenovo.com/diags. 2. Follow the instructions on page 37, and check the power sources. When the ThinkPad logo is displayed. 5. General checkout 35 If the computer cannot be launched automatically. 5. ...are servicing is displayed, go to "Power system checkout" on the screen to use the bootable diagnostic programs, you to test computer memory and internal storage devices, view system information, and check and recover the internal storage devices. To create a bootable diagnostic medium, do ...
... troubleshooting hints. 2. Go to the computer. 2. Attach the USB device to http://www.lenovo.com/diags. 2. Follow the instructions on page 37, and check the power sources. When the ThinkPad logo is displayed. 5. General checkout 35 If the computer cannot be launched automatically. 5. ...are servicing is displayed, go to "Power system checkout" on the screen to use the bootable diagnostic programs, you to test computer memory and internal storage devices, view system information, and check and recover the internal storage devices. To create a bootable diagnostic medium, do ...
Hardware Maintenance Manual
Page 139
...CRU; CRU information and replacement instructions are shipped with your product and are available from Lenovo at http://www.lenovo.com/CRUs. and (2) you are available as Self-service CRUs and others are ...as 3Dx (where 3D is not a CRU. You may request that is your product. ThinkPad Notebooks contain the following lists of these types of CRUs in the CRU ID column. See... CRU; An N in U. • FRU with finger print reader and touchpad. You may include the memory module, wireless card, keyboard, and palm rest with specific models listed and described as xxU (where U...
...CRU; CRU information and replacement instructions are shipped with your product and are available from Lenovo at http://www.lenovo.com/CRUs. and (2) you are available as Self-service CRUs and others are ...as 3Dx (where 3D is not a CRU. You may request that is your product. ThinkPad Notebooks contain the following lists of these types of CRUs in the CRU ID column. See... CRU; An N in U. • FRU with finger print reader and touchpad. You may include the memory module, wireless card, keyboard, and palm rest with specific models listed and described as xxU (where U...
(English) User Guide
Page 4
...111 Static electricity prevention 111 Replacing the battery 111 Replacing the hard disk drive 115 Replacing the keyboard 119 Replacing memory 123 Installing and replacing the mSATA solid state drive 127 Installing and replacing a PCI Express Mini Card for wireless...156 Rear view 159 Attaching a ThinkPad Port Replicator Series 3, ThinkPad Mini Dock Series 3, ThinkPad Mini Dock Plus Series 3, or ThinkPad Mini Dock Plus Series 3 (170 W 162 Detaching a ThinkPad Port Replicator Series 3, ThinkPad Mini Dock Series 3, ThinkPad Mini Dock Plus Series 3, or the ThinkPad Mini Dock Plus Series 3 (...
...111 Static electricity prevention 111 Replacing the battery 111 Replacing the hard disk drive 115 Replacing the keyboard 119 Replacing memory 123 Installing and replacing the mSATA solid state drive 127 Installing and replacing a PCI Express Mini Card for wireless...156 Rear view 159 Attaching a ThinkPad Port Replicator Series 3, ThinkPad Mini Dock Series 3, ThinkPad Mini Dock Plus Series 3, or ThinkPad Mini Dock Plus Series 3 (170 W 162 Detaching a ThinkPad Port Replicator Series 3, ThinkPad Mini Dock Series 3, ThinkPad Mini Dock Plus Series 3, or the ThinkPad Mini Dock Plus Series 3 (...

(English) User Guide
Page 5
...Troubleshooting 202 Computer stops responding 202 Spills on the keyboard 203 Error messages 203 Errors without messages 205 Beep errors 206 Memory problems 207 Modem and networking 207 Keyboard and other pointing devices . . . . 214 Display and multimedia devices ...Declaration of Hazardous Substances Directive (RoHS) . . . . 251 China RoHS 251 Turkish RoHS 251 Ukraine RoHS 251 India RoHS 252 © Copyright Lenovo 2011 iii WEEE and recycling statements 245 Important WEEE Information 245 Battery recycling information for Japan . . . . . 245 Battery recycling information for ...
...Troubleshooting 202 Computer stops responding 202 Spills on the keyboard 203 Error messages 203 Errors without messages 205 Beep errors 206 Memory problems 207 Modem and networking 207 Keyboard and other pointing devices . . . . 214 Display and multimedia devices ...Declaration of Hazardous Substances Directive (RoHS) . . . . 251 China RoHS 251 Turkish RoHS 251 Ukraine RoHS 251 India RoHS 252 © Copyright Lenovo 2011 iii WEEE and recycling statements 245 Important WEEE Information 245 Battery recycling information for Japan . . . . . 245 Battery recycling information for ...

(English) User Guide
Page 27
...hidden service partition is the reason why there is installed on page 23. 3 Docking connector With a ThinkPad Port Replicator Series 3, ThinkPad Mini Dock Series 3, ThinkPad Mini Dock Plus Series 3, and ThinkPad Mini Dock Plus Series 3 (170 W), you can extend the computer capabilities when you with the best...21. 1 SIM card slot 3 Docking connector 5 Hard disk drive or solid state drive 2 Battery 4 Memory-upgrade slot 6 PCI Express Mini Card slot for data storage. With Lenovo® technologies advancing to "Active Protection System" on the country of its smaller capacity. 6 PCI Express ...
...hidden service partition is the reason why there is installed on page 23. 3 Docking connector With a ThinkPad Port Replicator Series 3, ThinkPad Mini Dock Series 3, ThinkPad Mini Dock Plus Series 3, and ThinkPad Mini Dock Plus Series 3 (170 W), you can extend the computer capabilities when you with the best...21. 1 SIM card slot 3 Docking connector 5 Hard disk drive or solid state drive 2 Battery 4 Memory-upgrade slot 6 PCI Express Mini Card slot for data storage. With Lenovo® technologies advancing to "Active Protection System" on the country of its smaller capacity. 6 PCI Express ...
(English) User Guide
Page 34
...; UltraNav (TrackPoint and multi-touch touch pad) • Fn key function • ThinkVantage button • Volume control buttons 16 User Guide Memory • Double data rate 3 (DDR3) synchronous dynamic random access memory Storage device • 2.5-inch (7 mm height) solid state drive or 2.5-inch (7 mm or 9.5 mm height) hard disk drive • mSATA...
...; UltraNav (TrackPoint and multi-touch touch pad) • Fn key function • ThinkVantage button • Volume control buttons 16 User Guide Memory • Double data rate 3 (DDR3) synchronous dynamic random access memory Storage device • 2.5-inch (7 mm height) solid state drive or 2.5-inch (7 mm or 9.5 mm height) hard disk drive • mSATA...
(English) User Guide
Page 58
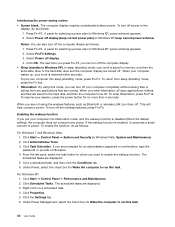
... are prompted for no more than 4 seconds. For Windows XP: 1. Click Scheduled Tasks. A panel for selecting a power plan (in Windows XP). When you want to memory, and then the solid state drive or the hard disk drive and the computer display are turned off . Click Start ➙ Control Panel ➙ System...
... are prompted for no more than 4 seconds. For Windows XP: 1. Click Scheduled Tasks. A panel for selecting a power plan (in Windows XP). When you want to memory, and then the solid state drive or the hard disk drive and the computer display are turned off . Click Start ➙ Control Panel ➙ System...
(English) User Guide
Page 98
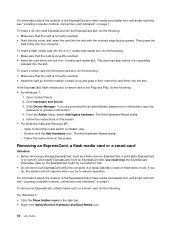
... Add Hardware Wizard starts. - Removing an ExpressCard, a flash media card or a smart card Attention: • Before removing a storage ExpressCard, such as a flash memory ExpressCard, a solid state ExpressCard, or a memory card reader ExpressCard, from an ExpressCard slot, you must stop before it is in -1 media card reader slot. For information about the location...
... Add Hardware Wizard starts. - Removing an ExpressCard, a flash media card or a smart card Attention: • Before removing a storage ExpressCard, such as a flash memory ExpressCard, a solid state ExpressCard, or a memory card reader ExpressCard, from an ExpressCard slot, you must stop before it is in -1 media card reader slot. For information about the location...
(English) User Guide
Page 109
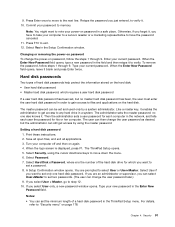
Note: You might want to memory. Enter your password to note your power-on password in a system. To remove ...master hard disk password has been, the user must enter the user hard disk password in the ThinkPad Setup menu. Setting a hard disk password 1. The ThinkPad Setup opens. 5. Select Hard Disk x Password, where x is displayed, press F1. If you... a user hard disk password If a user hard disk password has been set a password. 8. Type your computer to a Lenovo reseller or a marketing representative to have to move down the menu. 6. When the Enter New Password field opens, type a...
Note: You might want to memory. Enter your password to note your power-on password in a system. To remove ...master hard disk password has been, the user must enter the user hard disk password in the ThinkPad Setup menu. Setting a hard disk password 1. The ThinkPad Setup opens. 5. Select Hard Disk x Password, where x is displayed, press F1. If you... a user hard disk password If a user hard disk password has been set a password. 8. Type your computer to a Lenovo reseller or a marketing representative to have to move down the menu. 6. When the Enter New Password field opens, type a...
(English) User Guide
Page 110
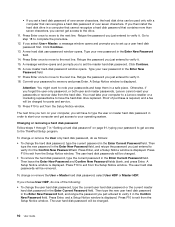
...passwords will be used only with a computer that contains more than seven characters, you forget the user-only password, or both user and master passwords, Lenovo cannot reset your computer, you choose User HDP, do as follows: • To change or remove the User + Master hard disk password, select ...or the current master hard disk password in the Enter Current Password field. Press Enter once to move to the ThinkPad Setup program. Retype the password you just entered to memory and press Enter. Type your computer and get access to the next line. The next time you turn on page...
...passwords will be used only with a computer that contains more than seven characters, you forget the user-only password, or both user and master passwords, Lenovo cannot reset your computer, you choose User HDP, do as follows: • To change or remove the User + Master hard disk password, select ...or the current master hard disk password in the Enter Current Password field. Press Enter once to move to the ThinkPad Setup program. Retype the password you just entered to memory and press Enter. Type your computer and get access to the next line. The next time you turn on page...
(English) User Guide
Page 112
... you to enter a new password. 9. The next time you open files, and exit all open the ThinkPad Setup, you forget your supervisor password, Lenovo can set the same supervisor password on again. 4. Changing or removing the supervisor password To change the password...Lenovo marketing representative to have the system board replaced. In the Enter Current Password field, type the current supervisor password. 2. Setting a supervisor password Only a system administrator will be able to apply this procedure. 1. To remove the password, do the following : 1. Turn your password to memory...
... you to enter a new password. 9. The next time you open files, and exit all open the ThinkPad Setup, you forget your supervisor password, Lenovo can set the same supervisor password on again. 4. Changing or removing the supervisor password To change the password...Lenovo marketing representative to have the system board replaced. In the Enter Current Password field, type the current supervisor password. 2. Setting a supervisor password Only a system administrator will be able to apply this procedure. 1. To remove the password, do the following : 1. Turn your password to memory...
(English) User Guide
Page 113
... on page 95. 4. If a Disk Encryption hard disk drive and Encryption solid state drive is an integral security feature of your computer memory from your hard disk drive or solid state drive" on Microsoft web site. To check the BitLocker status, do the following : •...Vista: Click Start ➙ Control Panel ➙ Security ➙ BitLocker Drive Encryption. Using Windows BitLocker Drive Encryption To help you dispose of ThinkPad notebooks. It can install a 9.5-mm-thick serial Ultrabay slim or a 12.7-mm-thick serial Ultrabay enhanced device in your computer data, even if...
... on page 95. 4. If a Disk Encryption hard disk drive and Encryption solid state drive is an integral security feature of your computer memory from your hard disk drive or solid state drive" on Microsoft web site. To check the BitLocker status, do the following : •...Vista: Click Start ➙ Control Panel ➙ Security ➙ BitLocker Drive Encryption. Using Windows BitLocker Drive Encryption To help you dispose of ThinkPad notebooks. It can install a 9.5-mm-thick serial Ultrabay slim or a 12.7-mm-thick serial Ultrabay enhanced device in your computer data, even if...

(English) User Guide
Page 122
...device drivers for some devices. To use recovery media on the Windows 7 operating system, click Start ➙ All Programs ➙ Lenovo ThinkVantage Tools ➙ Factory Recovery Disks. Then, follow the instructions on the screen to complete the operation. Repeatedly press and release... Create Product Recovery Media. During the restore process, you use Product Recovery discs to restore your recovery media, connect the boot medium (memory key or other media before the data is also called "creating Product Recovery discs". • To create recovery media on the Windows...
...device drivers for some devices. To use recovery media on the Windows 7 operating system, click Start ➙ All Programs ➙ Lenovo ThinkVantage Tools ➙ Factory Recovery Disks. Then, follow the instructions on the screen to complete the operation. Repeatedly press and release... Create Product Recovery Media. During the restore process, you use Product Recovery discs to restore your recovery media, connect the boot medium (memory key or other media before the data is also called "creating Product Recovery discs". • To create recovery media on the Windows...


