ThinkPad T42 Display - Lenovo
ThinkPad T42 Display
View Results Below
Free Lenovo ThinkPad T42 manuals!
Problems with Lenovo ThinkPad T42?
Ask a Question
Free Lenovo ThinkPad T42 manuals!
Problems with Lenovo ThinkPad T42?
Ask a Question
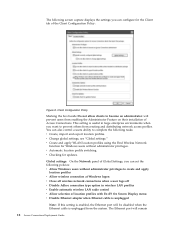
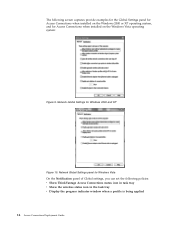
Related Manual Pages


Similar Questions

No Display
My lenovo e49 laptop is on with fast spinning motherboard fan but no display?
My lenovo e49 laptop is on with fast spinning motherboard fan but no display?
(Posted by raib40 1 year ago)

Extended Display
Hi i would like to know does the Lenovo G570 not have an extended display option as i am struggling ...
Hi i would like to know does the Lenovo G570 not have an extended display option as i am struggling ...
(Posted by godlouw 11 years ago)
