
Hardware Maintenance Manual
Page 25
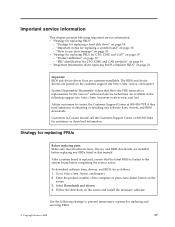
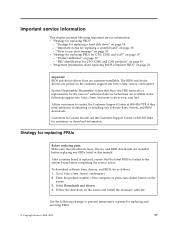
...FRUs for CTO, CMV, and GAV" on page 19 - Select Downloads and drivers. 4. Important service information This chapter presents following strategy to prevent unnecessary expense for replacing and servicing FRUs: © Copyright Lenovo 2008, 2009 17 "Product definition" on page 19 - Use the following important...replacing any FRUs listed in obtaining or installing any software fixes, drivers, and BIOS downloads. "Strategy for replacing a hard disk drive" on the customer support site http://www.lenovo.com/support System Disassembly/Reassembly videos that show the FRU removals or...
...FRUs for CTO, CMV, and GAV" on page 19 - Select Downloads and drivers. 4. Important service information This chapter presents following strategy to prevent unnecessary expense for replacing and servicing FRUs: © Copyright Lenovo 2008, 2009 17 "Product definition" on page 19 - Use the following important...replacing any FRUs listed in obtaining or installing any software fixes, drivers, and BIOS downloads. "Strategy for replacing a hard disk drive" on the customer support site http://www.lenovo.com/support System Disassembly/Reassembly videos that show the FRU removals or...
Hardware Maintenance Manual
Page 48
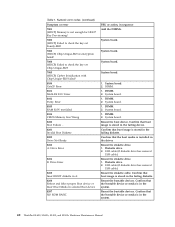
... or media is in the failing diskette. Reseat the bootable devices. Confirm that boot image is stored in the driver. DIMM. 2. Confirm that boot image is stored in the system. 40 ThinkPad SL400, SL400c, SL500, and SL500c Hardware Maintenance Manual System board. System board. 1. System board. 2. Confirm that the boot media is not...
... or media is in the failing diskette. Reseat the bootable devices. Confirm that boot image is stored in the driver. DIMM. 2. Confirm that boot image is stored in the system. 40 ThinkPad SL400, SL400c, SL500, and SL500c Hardware Maintenance Manual System board. System board. 1. System board. 2. Confirm that the boot media is not...
Hardware Maintenance Manual
Page 64
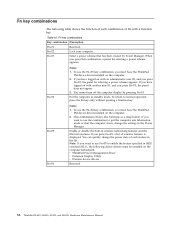
...in standby mode. Fn+F3 Select a power scheme that has been created by pressing Fn+F3. If you have the ThinkPad PM device driver installed on the computer. 2. Fn+F4 Notes: 1. If you press Fn+F5, a list of keys also functions...key combination, you have the ThinkPad PM device driver installed on the computer beforehand: v ThinkPad Power Management driver v OnScreen Display Utility v Wireless device drivers Reserved. 56 ThinkPad SL400, SL400c, SL500, and SL500c Hardware Maintenance Manual Fn key combinations The following device drivers must be installed on the ...
...in standby mode. Fn+F3 Select a power scheme that has been created by pressing Fn+F3. If you have the ThinkPad PM device driver installed on the computer. 2. Fn+F4 Notes: 1. If you press Fn+F5, a list of keys also functions...key combination, you have the ThinkPad PM device driver installed on the computer beforehand: v ThinkPad Power Management driver v OnScreen Display Utility v Wireless device drivers Reserved. 56 ThinkPad SL400, SL400c, SL500, and SL500c Hardware Maintenance Manual Fn key combinations The following device drivers must be installed on the ...
Hardware Maintenance Manual
Page 65
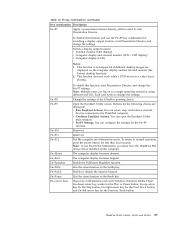
...work with no need to normal operation, press the power button for hibernation, you must have the ThinkPad PM device driver installed on to a single operating system by using different user IDs. Fn+F8 Fn+F9 Fn+F10.... The computer display becomes brighter. Has the same function as the SysRq key. Each user needs to the ThinkPad computer. v Confiture EasyEject Actions: You can configure the settings for switching a display output location, start Presentation ...display and the external monitor (the Extend desktop function). 2. ThinkPad SL400, SL400c, SL500, and SL500c 57
...work with no need to normal operation, press the power button for hibernation, you must have the ThinkPad PM device driver installed on to a single operating system by using different user IDs. Fn+F8 Fn+F9 Fn+F10.... The computer display becomes brighter. Has the same function as the SysRq key. Each user needs to the ThinkPad computer. v Confiture EasyEject Actions: You can configure the settings for switching a display output location, start Presentation ...display and the external monitor (the Extend desktop function). 2. ThinkPad SL400, SL400c, SL500, and SL500c 57

Hardware Maintenance Manual
Page 66
v They are harder to the torque shown in your tool bag. v Always use the correct screw. If you have a torque driver, refer to removing and replacing parts. Read this machine: v Keep the screw kit (for each step. Screw notices Loose screws can cause a reliability .... v They do not easily come loose, even with special nylon-coated screws that you have one. Do the following country specifications. 58 ThinkPad SL400, SL400c, SL500, and SL500c Hardware Maintenance Manual Never use a screw that all screws firmly to tighten. Use a new one should be used only once....
v They are harder to the torque shown in your tool bag. v Always use the correct screw. If you have a torque driver, refer to removing and replacing parts. Read this machine: v Keep the screw kit (for each step. Screw notices Loose screws can cause a reliability .... v They do not easily come loose, even with special nylon-coated screws that you have one. Do the following country specifications. 58 ThinkPad SL400, SL400c, SL500, and SL500c Hardware Maintenance Manual Never use a screw that all screws firmly to tighten. Use a new one should be used only once....
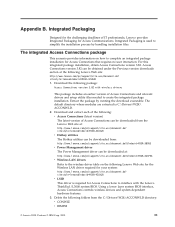
(English) Access Connections Profile Deployment guide
Page 10
... users can define location profiles for deployment To view the current list of supported ThinkPad® systems and wireless WLAN and WAN drivers, see the following Web site: http://www.lenovo.com/pc/support/site.wss/document.do?sitestyle= lenovo&lndocid=MIGR-4ZLNJB 2 Access Connections Deployment Guide Considerations for a detected wireless network if you...
... users can define location profiles for deployment To view the current list of supported ThinkPad® systems and wireless WLAN and WAN drivers, see the following Web site: http://www.lenovo.com/pc/support/site.wss/document.do?sitestyle= lenovo&lndocid=MIGR-4ZLNJB 2 Access Connections Deployment Guide Considerations for a detected wireless network if you...
(English) Access Connections Profile Deployment guide
Page 13
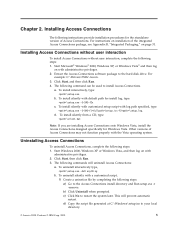
...Windows Vista® and then log on with administrative privileges. 2. The following command can be used to restart the system later. For example: C:\Drivers\W2k\Accon. 3. To install silently from a CD, type: \silent.bat Note: If you are installing Access Connections onto Windows Vista, install the...: a. For instructions on page 31. d) Copy the script file generated at C:\Windows\setup.iss to your local directory. © Lenovo 2008. a. Portions © IBM Corp. 2005. 5 Chapter 2. To install silently with customized setup script with the Vista operating system.
...Windows Vista® and then log on with administrative privileges. 2. The following command can be used to restart the system later. For example: C:\Drivers\W2k\Accon. 3. To install silently from a CD, type: \silent.bat Note: If you are installing Access Connections onto Windows Vista, install the...: a. For instructions on page 31. d) Copy the script file generated at C:\Windows\setup.iss to your local directory. © Lenovo 2008. a. Portions © IBM Corp. 2005. 5 Chapter 2. To install silently with customized setup script with the Vista operating system.
(English) Access Connections Profile Deployment guide
Page 29
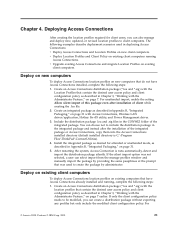
...as described in Chapter 3, "Working with Access Connections, Wireless LAN driver/application, Hotkey Fn+F5 utility, and Power Management driver. 3. Create an Access Connections distribution package (*.loa and *.sig)...exporting any profiles but only include the modified client configuration policy. For © Lenovo 2008. Include the distribution package .loa and .sig files in Appendix B, "Integrated...to client computers. After restarting the system, Access Connection is C:\Program Files\ThinkPad\ConnectUtilities). 4. If the silent import option was used in the integrated ...
...as described in Chapter 3, "Working with Access Connections, Wireless LAN driver/application, Hotkey Fn+F5 utility, and Power Management driver. 3. Create an Access Connections distribution package (*.loa and *.sig)...exporting any profiles but only include the modified client configuration policy. For © Lenovo 2008. Include the distribution package .loa and .sig files in Appendix B, "Integrated...to client computers. After restarting the system, Access Connection is C:\Program Files\ThinkPad\ConnectUtilities). 4. If the silent import option was used in the integrated ...
(English) Access Connections Profile Deployment guide
Page 30
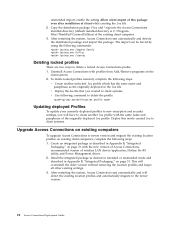
...profiles on page 31 with the same name and passphrase of wireless LAN driver/application, Hotkey Fn+F5 utility, and Power Management driver. 2. Install the integrated package as the originally deployed in Appendix B, ..."Integrated Packaging," on the client system. 2. Uninstall Access Connections with profiles from Add/Remove programs on page 31. Copy the distribution package (*.loa and *.sig) into the Access Connections installed directory (default installed directory is C:\Program Files\ThinkPad...
...profiles on page 31 with the same name and passphrase of wireless LAN driver/application, Hotkey Fn+F5 utility, and Power Management driver. 2. Install the integrated package as the originally deployed in Appendix B, ..."Integrated Packaging," on the client system. 2. Uninstall Access Connections with profiles from Add/Remove programs on page 31. Copy the distribution package (*.loa and *.sig) into the Access Connections installed directory (default installed directory is C:\Program Files\ThinkPad...
(English) Access Connections Profile Deployment guide
Page 39
... package installation for Access Communications. Delete the following Lenovo Web site: http://www.lenovo.com/pc/support/site.wss/document.do ?&lndocid=MIGR-4GXPEG v Wireless LAN drivers Refer to the wireless driver table on how to simplify the installation process by...support/site.wss/document.do ? Download the following package: Access Connections version 3.82 with the Lenovo ThinkPad /L3000 system BIOS. sitestyle=lenovo&lndocid=MIGR-4ZLNJB v LSID This driver is C:\Drivers\W2K\ ACCONWLD. 2. Extract the package by bundling installation files. Using a lower layer system...
... package installation for Access Communications. Delete the following Lenovo Web site: http://www.lenovo.com/pc/support/site.wss/document.do ?&lndocid=MIGR-4GXPEG v Wireless LAN drivers Refer to the wireless driver table on how to simplify the installation process by...support/site.wss/document.do ? Download the following package: Access Connections version 3.82 with the Lenovo ThinkPad /L3000 system BIOS. sitestyle=lenovo&lndocid=MIGR-4ZLNJB v LSID This driver is C:\Drivers\W2K\ ACCONWLD. 2. Extract the package by bundling installation files. Using a lower layer system...

(English) Access Connections Profile Deployment guide
Page 40
...silently, all the relevant packages with forced system restart at the end of wireless drivers, Access Connections, and Power Management. 5. v LSID is the driver that contains the Power Management driver files. such as WLANCX2, WLLANATH, or WLLANINT. 4. To install silently, all... is ready for customization to -date versions of installation type: \setup.exe /S /H /R c. v IBMPM is required to interface with Lenovo ThinkPad /L3000 system BIOS. v IBMPM for installation and contains the Software Installer. v WLLANINT is the folder that contains the main Access Connections ...
...silently, all the relevant packages with forced system restart at the end of wireless drivers, Access Connections, and Power Management. 5. v LSID is the driver that contains the Power Management driver files. such as WLANCX2, WLLANATH, or WLLANINT. 4. To install silently, all... is ready for customization to -date versions of installation type: \setup.exe /S /H /R c. v IBMPM is required to interface with Lenovo ThinkPad /L3000 system BIOS. v IBMPM for installation and contains the Software Installer. v WLLANINT is the folder that contains the main Access Connections ...
(Japanese) Power Manager Deployment Guide
Page 9
Power Manager C:¥Drivers¥Vista¥PWRMGRV 3 Windows XP cmd Windows Vista または Windows 7 cmd 4 Power Manager path>¥setup.exe -S -SMS Power Manager 1. 第 2 ...default.aspx 注:Windows 2000 Power Manager Power Manager 1.48 Power Manager BIOS ThinkVantage TVT Power Manager Power Manager • BIOS 更新 • ThinkPad Hotkey Access Connections™ Power Manager Power Manager 1. Windows XP、Windows Vista Windows 7 2. Windows XP、Windows Vista Windows 7 © Copyright...
Power Manager C:¥Drivers¥Vista¥PWRMGRV 3 Windows XP cmd Windows Vista または Windows 7 cmd 4 Power Manager path>¥setup.exe -S -SMS Power Manager 1. 第 2 ...default.aspx 注:Windows 2000 Power Manager Power Manager 1.48 Power Manager BIOS ThinkVantage TVT Power Manager Power Manager • BIOS 更新 • ThinkPad Hotkey Access Connections™ Power Manager Power Manager 1. Windows XP、Windows Vista Windows 7 2. Windows XP、Windows Vista Windows 7 © Copyright...
(Simplified Chinese) Power Manager Deployment Guide
Page 9
...2000 Power Manager Power Manager V1.48。 Power Manager BIOS ThinkVantage 技术(TVT Power Manager Power Manager BIOS 更新 • ThinkPad Power Management Driver Access Connections™ 安装 Power Manager Power Manager 1. 启动 Windows XP、Windows Vista® 或 Windows 7 2. 将... 2. 双击 Power Manager 3 4 3 5 ThinkVantage Power Manager 6 注:Power Manager Windows XP Windows Vista 和 Windows 7 Power Manager Power Manager © Copyright Lenovo 2008, 2011 3
...2000 Power Manager Power Manager V1.48。 Power Manager BIOS ThinkVantage 技术(TVT Power Manager Power Manager BIOS 更新 • ThinkPad Power Management Driver Access Connections™ 安装 Power Manager Power Manager 1. 启动 Windows XP、Windows Vista® 或 Windows 7 2. 将... 2. 双击 Power Manager 3 4 3 5 ThinkVantage Power Manager 6 注:Power Manager Windows XP Windows Vista 和 Windows 7 Power Manager Power Manager © Copyright Lenovo 2008, 2011 3
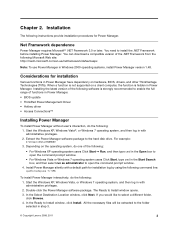
(English) Power Manager Deployment Guide
Page 9
... Select Destination Location window, click Next. Considerations for Power Manager. Installing the latest version of functions in Power Manager. • BIOS update • ThinkPad Power Management Driver • Hotkey driver • Access Connections™ Installing Power Manager To install Power Manager without user's interaction, do one of the .NET Framework from the following... the following software is hidden in Power Manager. Start the Windows XP, Windows Vista, or Windows 7 operating system, and then log in step 3. © Copyright Lenovo 2008, 2011 3
... Select Destination Location window, click Next. Considerations for Power Manager. Installing the latest version of functions in Power Manager. • BIOS update • ThinkPad Power Management Driver • Hotkey driver • Access Connections™ Installing Power Manager To install Power Manager without user's interaction, do one of the .NET Framework from the following... the following software is hidden in Power Manager. Start the Windows XP, Windows Vista, or Windows 7 operating system, and then log in step 3. © Copyright Lenovo 2008, 2011 3
Hardware Maintenance Manual
Page 25
... are installed before completing the service action. To download software fixes, drivers, and BIOS, do as follows: 1. Use the following strategy to contact the Customer Support Center at 800-565-3344 for the Lenovo® authorized service technicians are posted on the screen and install the necessary ... Center at 800-426-7378 if they need assistance in this manual. Follow the directions on the customer support site http://www.lenovo.com/support System Disassembly/Reassembly videos that the latest BIOS is replaced, ensure that show the FRU removals or replacements for assistance...
... are installed before completing the service action. To download software fixes, drivers, and BIOS, do as follows: 1. Use the following strategy to contact the Customer Support Center at 800-565-3344 for the Lenovo® authorized service technicians are posted on the screen and install the necessary ... Center at 800-426-7378 if they need assistance in this manual. Follow the directions on the customer support site http://www.lenovo.com/support System Disassembly/Reassembly videos that the latest BIOS is replaced, ensure that show the FRU removals or replacements for assistance...

Hardware Maintenance Manual
Page 48
... image is in the failing device. DIMM. 2. Confirm that boot image is stored in the system. 40 ThinkPad SL400 and SL500 Hardware Maintenance Manual Diskette drive. 2. DIMM. 2. Confirm that boot image is stored in the driver. System board. 1. DIMM. 1. DIMM. 2. Confirm that the bootable device or media is installed in the failing diskette...
... image is in the failing device. DIMM. 2. Confirm that boot image is stored in the system. 40 ThinkPad SL400 and SL500 Hardware Maintenance Manual Diskette drive. 2. DIMM. 2. Confirm that boot image is stored in the driver. System board. 1. DIMM. 1. DIMM. 2. Confirm that the bootable device or media is installed in the failing diskette...
Hardware Maintenance Manual
Page 64
...in the Power Manager. Put the computer in wireless networking features and the Bluetooth features. Note: If you must have the ThinkPad PM device driver installed on the computer. 2. Table 10. If you have logged on with an administrator user ID, and you want to... the function of Fn with a function key. Fn+F5 Fn+F6 Notes: 1. Fn key combinations The following device drivers must be installed on the computer beforehand: v ThinkPad Power Management driver v OnScreen Display Utility v Wireless device drivers Reserved. 56 ThinkPad SL400 and SL500 Hardware Maintenance Manual
...in the Power Manager. Put the computer in wireless networking features and the Bluetooth features. Note: If you must have the ThinkPad PM device driver installed on the computer. 2. Table 10. If you have logged on with an administrator user ID, and you want to... the function of Fn with a function key. Fn+F5 Fn+F6 Notes: 1. Fn key combinations The following device drivers must be installed on the computer beforehand: v ThinkPad Power Management driver v OnScreen Display Utility v Wireless device drivers Reserved. 56 ThinkPad SL400 and SL500 Hardware Maintenance Manual
Hardware Maintenance Manual
Page 65
...You can log on the computer. The computer display becomes brighter. Enable or disable the numeric keypad. The computer display becomes dimmer. ThinkPad SL400 and SL500 57 Switch a display output location v External monitor (CRT display) v Computer display and external monitor (LCD + CRT display) v...arrow key for the Next Track button, and Fn+left arrow key for hibernation, you must have the ThinkPad PM device driver installed on to the ThinkPad computer. Enable the FullScreen Magnifier function. v Confiture EasyEject Actions: You can select, stop, and remove ...
...You can log on the computer. The computer display becomes brighter. Enable or disable the numeric keypad. The computer display becomes dimmer. ThinkPad SL400 and SL500 57 Switch a display output location v External monitor (CRT display) v Computer display and external monitor (LCD + CRT display) v...arrow key for the Next Track button, and Fn+left arrow key for hibernation, you must have the ThinkPad PM device driver installed on to the ThinkPad computer. Enable the FullScreen Magnifier function. v Confiture EasyEject Actions: You can select, stop, and remove ...

Hardware Maintenance Manual
Page 66
... removing and replacing parts. If you use the correct screw. v Ensure torque screw drivers are calibrated correctly following characteristics: v They maintain tight connections. Read this problem is ...torque screwdriver, tighten all of the logic card: 180 degrees more (Cross-section) v Torque driver If you service this machine: v Keep the screw kit (for each step. Use a ...if you removed. Make sure that have a torque driver, refer to the torque shown in your tool bag. v They are tightened firmly. In the ThinkPad computer, this section carefully before replacing any FRU. ...
... removing and replacing parts. If you use the correct screw. v Ensure torque screw drivers are calibrated correctly following characteristics: v They maintain tight connections. Read this problem is ...torque screwdriver, tighten all of the logic card: 180 degrees more (Cross-section) v Torque driver If you service this machine: v Keep the screw kit (for each step. Use a ...if you removed. Make sure that have a torque driver, refer to the torque shown in your tool bag. v They are tightened firmly. In the ThinkPad computer, this section carefully before replacing any FRU. ...
Hardware Maintenance Manual
Page 25
...page 19 - Select Downloads and drivers. 4. The BIOS and device drivers are posted on the customer support site http://www.lenovo.com/support System Disassembly/Reassembly videos that show the FRU removals or replacements for the Lenovo® authorized service technicians are... identification for assistance or download information. To download software fixes, drivers, and BIOS, do as follows: 1. Follow the directions on page 18 - "Important notice for replacing and servicing FRUs: © Copyright Lenovo 2008, 2009 17 Go to prevent unnecessary expense for replacing a...
...page 19 - Select Downloads and drivers. 4. The BIOS and device drivers are posted on the customer support site http://www.lenovo.com/support System Disassembly/Reassembly videos that show the FRU removals or replacements for the Lenovo® authorized service technicians are... identification for assistance or download information. To download software fixes, drivers, and BIOS, do as follows: 1. Follow the directions on page 18 - "Important notice for replacing and servicing FRUs: © Copyright Lenovo 2008, 2009 17 Go to prevent unnecessary expense for replacing a...


