
Hardware Maintenance Manual
Page 3
... Recovery overview for the Windows 8 operating system 34 Refreshing your computer 34 Resetting your computer to the factory default settings 34 © Copyright Lenovo 2013 Using the advanced startup options . . . . 35 Recovering your operating system if Windows 8 fails to start 35 Creating and using ... General safety 1 Electrical safety 2 Safety inspection guide 3 Handling devices that are sensitive to do first 27 Checkout guide 28 Lenovo Solution Center 28 Quick test programs 28 UEFI diagnostic program 29 Bootable diagnostic programs 29 Power system checkout 30 Checking the ac...
... Recovery overview for the Windows 8 operating system 34 Refreshing your computer 34 Resetting your computer to the factory default settings 34 © Copyright Lenovo 2013 Using the advanced startup options . . . . 35 Recovering your operating system if Windows 8 fails to start 35 Creating and using ... General safety 1 Electrical safety 2 Safety inspection guide 3 Handling devices that are sensitive to do first 27 Checkout guide 28 Lenovo Solution Center 28 Quick test programs 28 UEFI diagnostic program 29 Bootable diagnostic programs 29 Power system checkout 30 Checking the ac...

Hardware Maintenance Manual
Page 4
...Appendix B. Abbreviation table . . . 111 ii Hardware Maintenance Manual Chapter 9. Removing or replacing a FRU 61 General guidelines 61 Removing the SIM card 62 1010 Battery pack 62 1020 Large bottom cover 63 1030 Small bottom cover 64 1040 Optical drive or blank bezel 65 1050 Memory modules 66 1060 Hard... bezel 82 1130 Microprocessor 84 1140 System board assembly 85 1150 Card reader with USB connector sub card and optical drive sub card 88 1160 Lenovo OneLink connector cover . . . . . 91 1170 DC-in bracket and DC-in connector with RJ45 sub card 91 1180 Speaker assembly 93 1190...
...Appendix B. Abbreviation table . . . 111 ii Hardware Maintenance Manual Chapter 9. Removing or replacing a FRU 61 General guidelines 61 Removing the SIM card 62 1010 Battery pack 62 1020 Large bottom cover 63 1030 Small bottom cover 64 1040 Optical drive or blank bezel 65 1050 Memory modules 66 1060 Hard... bezel 82 1130 Microprocessor 84 1140 System board assembly 85 1150 Card reader with USB connector sub card and optical drive sub card 88 1160 Lenovo OneLink connector cover . . . . . 91 1170 DC-in bracket and DC-in connector with RJ45 sub card 91 1180 Speaker assembly 93 1190...

Hardware Maintenance Manual
Page 9
...safety items were installed to : http://www.lenovo.com/serviceparts-lookup. Checklist: 1. Check that are all at the beginning of non-ThinkPad features or options not covered by equalizing the ...protect users and service technicians from injury. c. Check for damage (loose, broken, or sharp edges). 2. Handling devices that the power-supply cover fasteners (screws or rivets) have not been... ground. If any unsafe conditions are any obvious non-ThinkPad alterations. Check the power cord for cracked or bulging batteries. 5. • If an electrical accident occurs: - b. The...
...safety items were installed to : http://www.lenovo.com/serviceparts-lookup. Checklist: 1. Check that are all at the beginning of non-ThinkPad features or options not covered by equalizing the ...protect users and service technicians from injury. c. Check for damage (loose, broken, or sharp edges). 2. Handling devices that the power-supply cover fasteners (screws or rivets) have not been... ground. If any unsafe conditions are any obvious non-ThinkPad alterations. Check the power cord for cracked or bulging batteries. 5. • If an electrical accident occurs: - b. The...

Hardware Maintenance Manual
Page 10
... a grounding system, such as fully effective. Grounding requirements Electrical grounding of the electrical outlet can use coax or connector-outside shells on a double-insulated or battery-operated system, use an ESD common ground or reference point. Ensure that meets the specific service requirement. Notes: 1. Note: The use have been certified (ISO...
... a grounding system, such as fully effective. Grounding requirements Electrical grounding of the electrical outlet can use coax or connector-outside shells on a double-insulated or battery-operated system, use an ESD common ground or reference point. Ensure that meets the specific service requirement. Notes: 1. Note: The use have been certified (ISO...

Hardware Maintenance Manual
Page 36
... for error code descriptions and troubleshooting hints. 3. If the computer cannot be launched automatically. 5. Restart the computer. 4. When the ThinkPad logo is displayed, repeatedly press and release the F12 key. Use the arrow keys to the computer. 2. The diagnostic program will ...Symptom-to create a bootable diagnostic medium on the computer. Remove the battery pack. 3. Click Lenovo Bootable Diagnostics. 3. Attach the USB device to select ATAPI CDx (x: 0, 1, ...) and then press Enter. When the ThinkPad logo is displayed, repeatedly press and release the F12 key. The ...
... for error code descriptions and troubleshooting hints. 3. If the computer cannot be launched automatically. 5. Restart the computer. 4. When the ThinkPad logo is displayed, repeatedly press and release the F12 key. Use the arrow keys to the computer. 2. The diagnostic program will ...Symptom-to create a bootable diagnostic medium on the computer. Remove the battery pack. 3. Click Lenovo Bootable Diagnostics. 3. Attach the USB device to select ATAPI CDx (x: 0, 1, ...) and then press Enter. When the ThinkPad logo is displayed, repeatedly press and release the F12 key. The ...

Hardware Maintenance Manual
Page 37
.... Chapter 3. Unplug the ac power adapter cable from the one you are still not charging, replace the battery pack. 4. • If the system status indicator (the indicator in the ThinkPad logo) does not blink three times when an ac power source is connected, check the power cord of... 1. See the following : • For Windows 7: Open the Power Manager program and click the Battery tab. • For Windows 8: Open the Lenovo Support program and click Battery Health, or open the Lenovo Settings program and click Power. After it cools down, reinstall and recharge it may not be able to...
.... Chapter 3. Unplug the ac power adapter cable from the one you are still not charging, replace the battery pack. 4. • If the system status indicator (the indicator in the ThinkPad logo) does not blink three times when an ac power source is connected, check the power cord of... 1. See the following : • For Windows 7: Open the Power Manager program and click the Battery tab. • For Windows 8: Open the Lenovo Support program and click Battery Health, or open the Lenovo Settings program and click Power. After it cools down, reinstall and recharge it may not be able to...

Hardware Maintenance Manual
Page 38
...62). 4. See the following : 1. If the voltage is not correct, replace the battery pack. If the resistance is less than +11.0 V dc, measure the resistance between battery terminals 1 (+) and 7 (-). Power off the computer. 2. Checking the backup battery Do the following figure: 3 4 5 6(-) 7(-) 2(+) 1(+) Terminal 1 7 Voltage...than +11.0 V dc, the battery pack has been discharged. Turn the computer upside down. 3. Measure the voltage of the backup battery. Remove the backup battery (see "1010 Battery pack" on page 73). 5. To check the battery pack, do the following figure....
...62). 4. See the following : 1. If the voltage is not correct, replace the battery pack. If the resistance is less than +11.0 V dc, measure the resistance between battery terminals 1 (+) and 7 (-). Power off the computer. 2. Checking the backup battery Do the following figure: 3 4 5 6(-) 7(-) 2(+) 1(+) Terminal 1 7 Voltage...than +11.0 V dc, the battery pack has been discharged. Turn the computer upside down. 3. Measure the voltage of the backup battery. Remove the backup battery (see "1010 Battery pack" on page 73). 5. To check the battery pack, do the following figure....

Hardware Maintenance Manual
Page 43
... to access the hard disk drive. If no service procedure to recover data from the hard disk drive. When the ThinkPad logo is available, neither Lenovo nor Lenovo authorized service technicians provide any services to reset either the user hard disk password or the master hard disk password, or... be replaced for a scheduled fee. If a supervisor password has been set , it can use it to get access to remove the backup battery, see "1090 Backup battery" on password: 1. for the hard disk password: User only and Master + User. Note: There are two modes for the user •...
... to access the hard disk drive. If no service procedure to recover data from the hard disk drive. When the ThinkPad logo is available, neither Lenovo nor Lenovo authorized service technicians provide any services to reset either the user hard disk password or the master hard disk password, or... be replaced for a scheduled fee. If a supervisor password has been set , it can use it to get access to remove the backup battery, see "1090 Backup battery" on password: 1. for the hard disk password: User only and Master + User. Note: There are two modes for the user •...
Hardware Maintenance Manual
Page 44
... HDP stands for a scheduled fee. Press Fn+F10 to save changes and exit the ThinkPad Setup program. The user hard disk password and the master hard disk password have been ... Windows 7 operating system only) If the time set on the computer. 2. Right-click the battery gauge in the Enter Current Password field. Sleep mode When the computer enters sleep mode, the ...Sleep. 38 Hardware Maintenance Manual The hard disk drive can be to the service technician, neither Lenovo nor Lenovo authorized service technicians provide any key. Select Security. 4. Select Hard-disk x password where x...
... HDP stands for a scheduled fee. Press Fn+F10 to save changes and exit the ThinkPad Setup program. The user hard disk password and the master hard disk password have been ... Windows 7 operating system only) If the time set on the computer. 2. Right-click the battery gauge in the Enter Current Password field. Sleep mode When the computer enters sleep mode, the ...Sleep. 38 Hardware Maintenance Manual The hard disk drive can be to the service technician, neither Lenovo nor Lenovo authorized service technicians provide any key. Select Security. 4. Select Hard-disk x password where x...
Hardware Maintenance Manual
Page 45
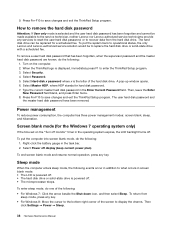
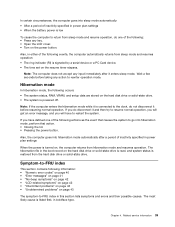
... operation mode. In certain circumstances, the computer goes into sleep mode automatically: • After a period of inactivity specified in power plan settings • When the battery power is low To cause the computer to restart the system. Wait a few seconds before resuming normal operation. Related service information 39 The hibernation file...
... operation mode. In certain circumstances, the computer goes into sleep mode automatically: • After a period of inactivity specified in power plan settings • When the battery power is low To cause the computer to restart the system. Wait a few seconds before resuming normal operation. Related service information 39 The hibernation file...

Hardware Maintenance Manual
Page 46
... by diagnostic codes in POST or system operation. Replace the battery pack. 1. Run the ThinkPad Setup program. Replace the system board. 1. Charge the backup battery for each error detected in the ThinkPad notebooks, see the manual for that device. Note: Do the...Table 2. Then save current setting by pressing Fn+F10. 2. The access to be corrected automatically. Enter the ThinkPad Setup program. - Replace the backup battery and run the ThinkPad Setup program to reconfigure the settings. 2. Do not replace a nondefective FRU. Note: For a device not supported...
... by diagnostic codes in POST or system operation. Replace the battery pack. 1. Run the ThinkPad Setup program. Replace the system board. 1. Charge the backup battery for each error detected in the ThinkPad notebooks, see the manual for that device. Note: Do the...Table 2. Then save current setting by pressing Fn+F10. 2. The access to be corrected automatically. Enter the ThinkPad Setup program. - Replace the backup battery and run the ThinkPad Setup program to reconfigure the settings. 2. Do not replace a nondefective FRU. Note: For a device not supported...
Hardware Maintenance Manual
Page 47
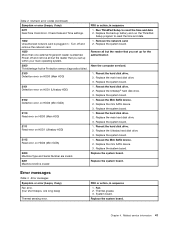
... error on HDD2 (Mini SATA) 2200 Machine Type and Serial Number are invalid. 2201 Machine UUID is invalid FRU or action, in sequence 1. Run ThinkPad Setup to reset the time and date. 1. Replace the system board. Replace the system board. 1. Replace the system board. 1. Error messages Table ... 2. Replace the system board. 1. Error messages Symptom or error (beeps, if any ) 0271 Real-Time Clock Error. Replace the backup battery and run the ThinkPad Setup program to reset the time and date 2. Reseat the Mini SATA device. 2. FRU or action, in sequence 1. Replace the main ...
... error on HDD2 (Mini SATA) 2200 Machine Type and Serial Number are invalid. 2201 Machine UUID is invalid FRU or action, in sequence 1. Run ThinkPad Setup to reset the time and date. 1. Replace the system board. Replace the system board. 1. Replace the system board. 1. Error messages Table ... 2. Replace the system board. 1. Error messages Symptom or error (beeps, if any ) 0271 Real-Time Clock Error. Replace the backup battery and run the ThinkPad Setup program to reset the time and date 2. Reseat the Mini SATA device. 2. FRU or action, in sequence 1. Replace the main ...
Hardware Maintenance Manual
Page 48
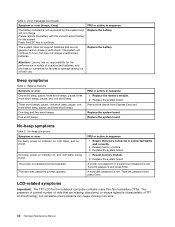
Please replace the battery with the correct Lenovo battery for failures or damage arising out of TFT LCD technology, but may not charge unauthorized batteries. Beep symptoms Symptom or error One short beep, pause, three short beeps, pause, three more short beeps, pause, and... are missing, discolored, or always lighted is set . A hard-disk password is not supported by this system. This system does not support batteries that every connector is connected tightly and correctly. 2. Type the password and press Enter. Beep symptoms Table 4. Replace the system board. Reseat ...
Please replace the battery with the correct Lenovo battery for failures or damage arising out of TFT LCD technology, but may not charge unauthorized batteries. Beep symptoms Symptom or error One short beep, pause, three short beeps, pause, three more short beeps, pause, and... are missing, discolored, or always lighted is set . A hard-disk password is not supported by this system. This system does not support batteries that every connector is connected tightly and correctly. 2. Type the password and press Enter. Beep symptoms Table 4. Replace the system board. Reseat ...

Hardware Maintenance Manual
Page 50
Determine whether the problem has been solved. 6. Turn on the computer. 5. If the problem remains, replace the following FRUs one at a time (do not replace a nondefective FRU): a. Battery pack e. External diskette drive or optical drive g. PC Cards 4. LCD assembly 44 Hardware Maintenance Manual Hard disk drive or solid-state drive f. If the problem does not recur, reconnect the removed devices one at a time until you find the failing FRU. 7. d. Memory module h. Optical disk or diskette in the internal drive i. System board b.
Determine whether the problem has been solved. 6. Turn on the computer. 5. If the problem remains, replace the following FRUs one at a time (do not replace a nondefective FRU): a. Battery pack e. External diskette drive or optical drive g. PC Cards 4. LCD assembly 44 Hardware Maintenance Manual Hard disk drive or solid-state drive f. If the problem does not recur, reconnect the removed devices one at a time until you find the failing FRU. 7. d. Memory module h. Optical disk or diskette in the internal drive i. System board b.

Hardware Maintenance Manual
Page 56
...following service parts: • "Major FRUs and CRUs" on page 52 • "LCD FRUs and CRUs" on page 45. Bottom view 1 2 3 2 6 5 4 1 Small bottom cover1 2 Battery pack latches 3 Battery pack 4 Large bottom cover2 5 Built-in stereo speakers 6 Media card reader slot 1: The wireless LAN card and backup... battery are located underneath the small bottom cover. 2: The memory modules, hard disk drive or solid-state drive, and wireless WAN card or M.2 solid-...
...following service parts: • "Major FRUs and CRUs" on page 52 • "LCD FRUs and CRUs" on page 45. Bottom view 1 2 3 2 6 5 4 1 Small bottom cover1 2 Battery pack latches 3 Battery pack 4 Large bottom cover2 5 Built-in stereo speakers 6 Media card reader slot 1: The wireless LAN card and backup... battery are located underneath the small bottom cover. 2: The memory modules, hard disk drive or solid-state drive, and wireless WAN card or M.2 solid-...

Hardware Maintenance Manual
Page 57
..., a prepaid shipping label, and a container will ship the CRU to the warranty service for your product. See your receipt of your Lenovo Limited Warranty documentation for full details. Self-service CRUs: These CRUs unplug or are concealed by an access panel that is typically secured by... Manuals and then follow the on product design might be found at any time upon request. ThinkPad computers contain the following types of CRUs include the ac power adapter, power cord, battery, and hard disk drive or solid-state drive. Optional-service CRUs: These CRUs are designated...
..., a prepaid shipping label, and a container will ship the CRU to the warranty service for your product. See your receipt of your Lenovo Limited Warranty documentation for full details. Self-service CRUs: These CRUs unplug or are concealed by an access panel that is typically secured by... Manuals and then follow the on product design might be found at any time upon request. ThinkPad computers contain the following types of CRUs include the ac power adapter, power cord, battery, and hard disk drive or solid-state drive. Optional-service CRUs: These CRUs are designated...

Hardware Maintenance Manual
Page 59
... 9. FRU description 1 LCD unit 2 Power button board 3 Keyboard bezel assembly with touch pad (with fingerprint reader on some models) 4 Backup battery 5 Wireless WAN card 5 M.2 solid-state drive 6 Wireless LAN card 7 Battery pack 8 Lenovo OneLink connector cover 9 DC-in bracket 10 DC-in connector with RJ45 sub card 11 Optical drive or blank bezel...
... 9. FRU description 1 LCD unit 2 Power button board 3 Keyboard bezel assembly with touch pad (with fingerprint reader on some models) 4 Backup battery 5 Wireless WAN card 5 M.2 solid-state drive 6 Wireless LAN card 7 Battery pack 8 Lenovo OneLink connector cover 9 DC-in bracket 10 DC-in connector with RJ45 sub card 11 Optical drive or blank bezel...

Hardware Maintenance Manual
Page 67
... this by shaking the computer gently and listening for your product and are designated as given by using an ESD strap. © Copyright Lenovo 2013 61 Chapter 9. Installation of damaging parts. 2. For information about connecting and arranging internal cables, see Chapter 7 "Locations" on how... CRUs are designated as self-service CRUs and others are available from electrical outlets, remove the battery pack, and then disconnect any notes that all power cords from Lenovo at the beginning of the replacement CRU. Before replacing any FRUs that a Service Provider install ...
... this by shaking the computer gently and listening for your product and are designated as given by using an ESD strap. © Copyright Lenovo 2013 61 Chapter 9. Installation of damaging parts. 2. For information about connecting and arranging internal cables, see Chapter 7 "Locations" on how... CRUs are designated as self-service CRUs and others are available from electrical outlets, remove the battery pack, and then disconnect any notes that all power cords from Lenovo at the beginning of the replacement CRU. Before replacing any FRUs that a Service Provider install ...

Hardware Maintenance Manual
Page 68
... to this program before you are servicing might have a SIM card that a physically damaged battery pack is defective. To remove the SIM card, you insert the card back into the slot firmly. 1 2 1010 Battery pack Important notice for replacing a battery pack Attention: Lenovo has no responsibility for the performance or safety of their use.
... to this program before you are servicing might have a SIM card that a physically damaged battery pack is defective. To remove the SIM card, you insert the card back into the slot firmly. 1 2 1010 Battery pack Important notice for replacing a battery pack Attention: Lenovo has no responsibility for the performance or safety of their use.

Hardware Maintenance Manual
Page 69
Hold the battery lock lever in the locked position. 1020 Large bottom cover For access, remove this FRU: • "1010 Battery pack" on page 62 Removal steps of the large bottom cover Loosen the screws 1 and then remove the large bottom cover 2 . 1 2 1 1 Chapter 9. Removing or replacing a FRU 63 Ensure that the battery latch is in the unlocked position, and remove the battery pack 2 . 1 2 2 When installing: Install the battery pack into the slot. Unlock the battery latch 1 .
Hold the battery lock lever in the locked position. 1020 Large bottom cover For access, remove this FRU: • "1010 Battery pack" on page 62 Removal steps of the large bottom cover Loosen the screws 1 and then remove the large bottom cover 2 . 1 2 1 1 Chapter 9. Removing or replacing a FRU 63 Ensure that the battery latch is in the unlocked position, and remove the battery pack 2 . 1 2 2 When installing: Install the battery pack into the slot. Unlock the battery latch 1 .


