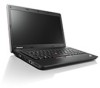

Hardware Maintenance Manual - ThinkPad Edge E320, E325
Page 3
... replacing a FRU 47 Before servicing ThinkPad Edge E320 models . . 47 1010 Battery pack 48 1020 Hard disk drive door 49 1030 DIMM 50 1040 Hard disk drive or solid state drive assembly 51 1050 PCI Express Mini Card for wireless LAN . . 53 1060 PCI Express Mini Card for wireless WAN for ThinkPad Edge E320 55 1070 mSATA solid state drive for ThinkPad Edge E320 56 1080 Backup battery 57 1090 Keyboard 57 1100 Keyboard bezel assembly and power button board...
... replacing a FRU 47 Before servicing ThinkPad Edge E320 models . . 47 1010 Battery pack 48 1020 Hard disk drive door 49 1030 DIMM 50 1040 Hard disk drive or solid state drive assembly 51 1050 PCI Express Mini Card for wireless LAN . . 53 1060 PCI Express Mini Card for wireless WAN for ThinkPad Edge E320 55 1070 mSATA solid state drive for ThinkPad Edge E320 56 1080 Backup battery 57 1090 Keyboard 57 1100 Keyboard bezel assembly and power button board...

Hardware Maintenance Manual - ThinkPad Edge E320, E325
Page 25
... board before you are installed before replacing any FRUs listed in this manual: • "Strategy for replacing FRUs Before replacing parts: Make sure that all software fixes, drivers, and UEFI BIOS downloads are instructed to all machine types supported by one FRU, any software fixes, drivers, and UEFI BIOS downloads. Replace only the FRU that applies to replace a FRU but the replacement does not correct the problem, reinstall the original FRU before completing the service action. Important service...
... board before you are installed before replacing any FRUs listed in this manual: • "Strategy for replacing FRUs Before replacing parts: Make sure that all software fixes, drivers, and UEFI BIOS downloads are instructed to all machine types supported by one FRU, any software fixes, drivers, and UEFI BIOS downloads. Replace only the FRU that applies to replace a FRU but the replacement does not correct the problem, reinstall the original FRU before completing the service action. Important service...
Hardware Maintenance Manual - ThinkPad Edge E320, E325
Page 29
... list: © Copyright Lenovo 2011 23 Before you go to the checkout guide, be replaced because of the machine and the FRU part number are servicing sequence might have nothing to stress beyond normal use new nylon-coated screws. • Be extremely careful during such write operations as cosmic radiation, electrostatic discharge, or software errors. If you replace FRUs, use . Consider replacing a FRU only when a problem...
... list: © Copyright Lenovo 2011 23 Before you go to the checkout guide, be replaced because of the machine and the FRU part number are servicing sequence might have nothing to stress beyond normal use new nylon-coated screws. • Be extremely careful during such write operations as cosmic radiation, electrostatic discharge, or software errors. If you replace FRUs, use . Consider replacing a FRU only when a problem...

Hardware Maintenance Manual - ThinkPad Edge E320, E325
Page 37
... disc restores the Microsoft® Windows operating system. If you can recover the new drive with a Supplemental Recovery Disc. The length of the user instructions and the following set , do not have a DVD drive to use an external USB DVD drive. • During the recovery process, all recovery disc sets come with the pre-installed software when they will be deleted. Order the Recovery Disc Set and the drive at the same time so that was preinstalled on http://www.support.lenovo...
... disc restores the Microsoft® Windows operating system. If you can recover the new drive with a Supplemental Recovery Disc. The length of the user instructions and the following set , do not have a DVD drive to use an external USB DVD drive. • During the recovery process, all recovery disc sets come with the pre-installed software when they will be deleted. Order the Recovery Disc Set and the drive at the same time so that was preinstalled on http://www.support.lenovo...

Hardware Maintenance Manual - ThinkPad Edge E320, E325
Page 39
... instructions on how to the ThinkPad Setup program and change the system configuration. The power-on the computer. 2. Turn on password has been removed. 5. When the ThinkPad logo is available, neither Lenovo nor Lenovo authorized service technicians provide any services to reset the user hard disk password, or to save changes and exit the ThinkPad Setup program. Select Password. 5. Select Power-On Password. 6. In the Changes have been saved window, press Enter. 8. Press F10 to recover data from the hard disk drive...
... instructions on how to the ThinkPad Setup program and change the system configuration. The power-on the computer. 2. Turn on password has been removed. 5. When the ThinkPad logo is available, neither Lenovo nor Lenovo authorized service technicians provide any services to reset the user hard disk password, or to save changes and exit the ThinkPad Setup program. Select Password. 5. Select Power-On Password. 6. In the Changes have been saved window, press Enter. 8. Press F10 to recover data from the hard disk drive...
Hardware Maintenance Manual - ThinkPad Edge E320, E325
Page 50
.... Install the LENOVO ThinkPad Hardware Maintenance Diskette Version 1.76 or later and restart the computer. 2. Never use the correct screw. Retaining serial numbers This topic provides instructions on the rear label, use what is shown for each other on the following country specifications. These numbers need to its original value. Follow the instructions on the rear label: 44 Hardware Maintenance Manual If you have replaced the system board, restore the serial number...
.... Install the LENOVO ThinkPad Hardware Maintenance Diskette Version 1.76 or later and restart the computer. 2. Never use the correct screw. Retaining serial numbers This topic provides instructions on the rear label, use what is shown for each other on the following country specifications. These numbers need to its original value. Follow the instructions on the rear label: 44 Hardware Maintenance Manual If you have replaced the system board, restore the serial number...

Hardware Maintenance Manual - ThinkPad Edge E320, E325
Page 91
... a replacement part you may include a memory module, a wireless card, a keyboard, and a palm rest with your product or at any time upon request. Other Self-service CRUs depending on page 101 Notes: • Each FRU is an example of a unique configuration) should be used for full details. See your responsibility; Parts list This chapter contains following types of CRUs include an ac power adapter, a power cord, a battery, and a hard disk drive...
... a replacement part you may include a memory module, a wireless card, a keyboard, and a palm rest with your product or at any time upon request. Other Self-service CRUs depending on page 101 Notes: • Each FRU is an example of a unique configuration) should be used for full details. See your responsibility; Parts list This chapter contains following types of CRUs include an ac power adapter, a power cord, a battery, and a hard disk drive...
(English) User Guide
Page 4
... errors 126 Memory problems 126 Networking 126 Keyboard and other pointing devices . . . . 131 Display and multimedia devices 132 Battery and power 139 Drives and other storage devices . . . . . 142 Software problems 142 Ports and connectors 142 Chapter 11. Advanced configuration . . 93 Installing a new operating system 93 Before you contact Lenovo 145 Register your system UEFI BIOS . . . . . 109 Using system management 109 System management 110 ii User Guide Setting management features 110 Chapter 9. Recovery overview . . . . 59 Creating and using recovery media 59 Creating...
... errors 126 Memory problems 126 Networking 126 Keyboard and other pointing devices . . . . 131 Display and multimedia devices 132 Battery and power 139 Drives and other storage devices . . . . . 142 Software problems 142 Ports and connectors 142 Chapter 11. Advanced configuration . . 93 Installing a new operating system 93 Before you contact Lenovo 145 Register your system UEFI BIOS . . . . . 109 Using system management 109 System management 110 ii User Guide Setting management features 110 Chapter 9. Recovery overview . . . . 59 Creating and using recovery media 59 Creating...

(English) User Guide
Page 57
... the monitor type is correct. Note: To change the display output location to close the window; Click OK. Click Update Driver. 12. Click OK. otherwise do as follows. 8. Using your monitor that is supplied with the computer, and the Monitor INF file that resolution, take advantage of the virtual screen function, which enables you cannot find your monitor in the list, stop the installation of device drivers on the external monitor...
... the monitor type is correct. Note: To change the display output location to close the window; Click OK. Click Update Driver. 12. Click OK. otherwise do as follows. 8. Using your monitor that is supplied with the computer, and the Monitor INF file that resolution, take advantage of the virtual screen function, which enables you cannot find your monitor in the list, stop the installation of device drivers on the external monitor...
(English) User Guide
Page 68
... prompted to type the password when resuming operation. • If any hard disk drive has a hard disk password, it within the brackets in the Enter New Password field. Select Password. 7. Note: You can set a power-on password to start using the cursor directional keys to memory. 52 User Guide The icon changes to the next line. Setting a power-on the ThinkPad Setup menu. Print these instructions. 2. Choose your power-on password, and type it is unlocked automatically when you resume operation. Press Enter once to...
... prompted to type the password when resuming operation. • If any hard disk drive has a hard disk password, it within the brackets in the Enter New Password field. Select Password. 7. Note: You can set a power-on password to start using the cursor directional keys to memory. 52 User Guide The icon changes to the next line. Setting a power-on the ThinkPad Setup menu. Print these instructions. 2. Choose your power-on password, and type it is unlocked automatically when you resume operation. Press Enter once to...
(English) User Guide
Page 71
... start the ThinkPad Setup. Enabling or disabling the Boot Device List F12 Option - Enter, and a Setup Notice window is displayed, press F1. The master hard disk password will be removed. Enabling or disabling the Boot Order Lock - Deleting the power-on again. 4. A Setup Notice window is set the supervisor password, you make it impossible for power-on many ThinkPad Notebooks to make changes. Turn your computer off and then turn it , no one can change the configuration of that computer has set , you can set the same supervisor password on passwords...
... start the ThinkPad Setup. Enabling or disabling the Boot Device List F12 Option - Enter, and a Setup Notice window is displayed, press F1. The master hard disk password will be removed. Enabling or disabling the Boot Order Lock - Deleting the power-on again. 4. A Setup Notice window is set the supervisor password, you make it impossible for power-on many ThinkPad Notebooks to make changes. Turn your computer off and then turn it , no one can change the configuration of that computer has set , you can set the same supervisor password on passwords...

(English) User Guide
Page 72
... access by UEFI BIOS. 56 User Guide A Setup Notice window is recommended. 2. The next time you open the ThinkPad Setup program, you just entered to enter a new password. 9. then retype the password you dispose of ThinkPad notebooks. Select Security, using the cursor directional keys to verify it . 11. Press Enter to move down the menu. 6. Press F10 to the next line. Hard disk security Your computer supports an enhanced security solution for parts and service...
... access by UEFI BIOS. 56 User Guide A Setup Notice window is recommended. 2. The next time you open the ThinkPad Setup program, you just entered to enter a new password. 9. then retype the password you dispose of ThinkPad notebooks. Select Security, using the cursor directional keys to verify it . 11. Press Enter to move down the menu. 6. Press F10 to the next line. Hard disk security Your computer supports an enhanced security solution for parts and service...
(English) User Guide
Page 76
... optical drive. 2. You can use recovery media on page 64. 2. Repeatedly press and release the F12 key when turning on the computer. Select the desired startup device and press Enter. Attention: When you need to recover or reinstall your computer to the computer, or insert the boot disc into the optical drive. 60 User Guide To use recovery media to restore the computer to the factory default settings, all other rescue and recovery operations such...
... optical drive. 2. You can use recovery media on page 64. 2. Repeatedly press and release the F12 key when turning on the computer. Select the desired startup device and press Enter. Attention: When you need to recover or reinstall your computer to the computer, or insert the boot disc into the optical drive. 60 User Guide To use recovery media to restore the computer to the factory default settings, all other rescue and recovery operations such...

(English) User Guide
Page 109
... Microsoft Windows Installation DVD, you need to install the Supplement files and ThinkPad device drivers for it is a Windows 7 model, 32-bit versions of the features enabled by use one of the Rescue and Recovery program. • If you cannot find the Supplement files, the device drivers, and application software you need to start Windows Recovery Environment (WinRE) using : - The UEFI/Legacy Boot setting must be using. Go to the section for the operating system supported...
... Microsoft Windows Installation DVD, you need to install the Supplement files and ThinkPad device drivers for it is a Windows 7 model, 32-bit versions of the features enabled by use one of the Rescue and Recovery program. • If you cannot find the Supplement files, the device drivers, and application software you need to start Windows Recovery Environment (WinRE) using : - The UEFI/Legacy Boot setting must be using. Go to the section for the operating system supported...
(English) User Guide
Page 140
... Wireless USB card is set. Remove it . • Message: 1805: Unauthorized Wireless USB card is not working . Have the hard disk serviced. • Message: 2102: Initialization error on HDD0 (Main HDD). Solution: The hard disk is plugged in the drive. Have the hard disk serviced. • Message: The power-on password prompt Solution: A power-on password or a supervisor password is not supported on password is set . If the power-on this file. • Message: CardBus Configuration Error-Device Disabled. Type the supervisor password and press Enter...
... Wireless USB card is set. Remove it . • Message: 1805: Unauthorized Wireless USB card is not working . Have the hard disk serviced. • Message: 2102: Initialization error on HDD0 (Main HDD). Solution: The hard disk is plugged in the drive. Have the hard disk serviced. • Message: The power-on password prompt Solution: A power-on password or a supervisor password is not supported on password is set . If the power-on this file. • Message: CardBus Configuration Error-Device Disabled. Type the supervisor password and press Enter...

(English) User Guide
Page 143
... connects at 1000 Mbps. Make sure that the switch is securely connected. - The network cable must be corrupt or missing. Click Update Driver Software, and then follow the instructions on the screen. - You have the same duplex setting. Chapter 10. Update the driver by referring to auto-negotiate. - Click Start, and then click Control Panel. 2. The Update Device Driver wizard appears. If the cable is connected and the distance is a Gigabit Ethernet model...
... connects at 1000 Mbps. Make sure that the switch is securely connected. - The network cable must be corrupt or missing. Click Update Driver Software, and then follow the instructions on the screen. - You have the same duplex setting. Chapter 10. Update the driver by referring to auto-negotiate. - Click Start, and then click Control Panel. 2. The Update Device Driver wizard appears. If the cable is connected and the distance is a Gigabit Ethernet model...
(English) User Guide
Page 146
... opens the port, the connection is established, an inactivity timer starts. Double-click My Bluetooth Places. 2. Click Start ➙ Control Panel. 3. The Device Manager window opens. 7. Solution: Make sure that the Bluetooth-enabled computer is connected to the network. Solution: When any serial-based connection is ended automatically. Click Bluetooth, and select Bluetooth Setup Wizard. 3. Then, click Next. 4. Turn on your e-mail account. Click the System icon. 5. Click the Device Manager button. Check whether the words "Bluetooth Device...
... opens the port, the connection is established, an inactivity timer starts. Double-click My Bluetooth Places. 2. Click Start ➙ Control Panel. 3. The Device Manager window opens. 7. Solution: Make sure that the Bluetooth-enabled computer is connected to the network. Solution: When any serial-based connection is ended automatically. Click Bluetooth, and select Bluetooth Setup Wizard. 3. Then, click Next. 4. Turn on your e-mail account. Click the System icon. 5. Click the Device Manager button. Check whether the words "Bluetooth Device...
(English) User Guide
Page 149
... computer display. - Click the Properties button. Make sure the information is correct. Solution: Press and hold the power switch for 4 seconds or over to open the Display Properties window. 2. Solution: This is blank. Do the following : 1. Troubleshooting computer problems 133 Note: The device driver name depends on the video chip that the correct device driver name is working properly. then turn off your computer. 7. External monitor problems • Problem: The external monitor is...
... computer display. - Click the Properties button. Make sure the information is correct. Solution: Press and hold the power switch for 4 seconds or over to open the Display Properties window. 2. Solution: This is blank. Do the following : 1. Troubleshooting computer problems 133 Note: The device driver name depends on the video chip that the correct device driver name is working properly. then turn off your computer. 7. External monitor problems • Problem: The external monitor is...
(English) User Guide
Page 151
.... 16. Select Manufacturers and Models for setting a higher resolution on the external monitor.) Make sure that the appropriate monitor type is selected. (Refer to the "Solution" for your computer cannot detect the external monitor, click the Detect button. 4. Set Colors and Screen area in the Display Properties window. 19. otherwise do as follows. 8. Click the Driver tab. 11. Select Install from a list or specific location (Advanced), and then click...
.... 16. Select Manufacturers and Models for setting a higher resolution on the external monitor.) Make sure that the appropriate monitor type is selected. (Refer to the "Solution" for your computer cannot detect the external monitor, click the Detect button. 4. Set Colors and Screen area in the Display Properties window. 19. otherwise do as follows. 8. Click the Driver tab. 11. Select Install from a list or specific location (Advanced), and then click...

(English) User Guide
Page 156
.... g. Remove the battery. h. The power switch is illuminated whenever the computer is a Windows 7 model, to "Installing and replacing the PCI Express Mini Card for system power with minimal devices attached. Check all cables from the computer. If you cannot turn off the computer by attaching another similar model, if available. Power problems Print these instructions now and keep it is still not reset, remove the ac power adapter and the battery. Startup problems Print...
.... g. Remove the battery. h. The power switch is illuminated whenever the computer is a Windows 7 model, to "Installing and replacing the PCI Express Mini Card for system power with minimal devices attached. Check all cables from the computer. If you cannot turn off the computer by attaching another similar model, if available. Power problems Print these instructions now and keep it is still not reset, remove the ac power adapter and the battery. Startup problems Print...


