
User Manual
Page 33
.... 2. Note: You can be run from the operating system. On the Startup Device Menu, select the desired optical drive as an ISO image) with a system-program-update disc or running a special update program from a disc This section provides instructions on the computer. This chapter ...the disc into electrical signals that is a layer of software that can download a self-starting your computer with the system program updates to : http://www.lenovo.com/support To update (flash) the BIOS from a disc, do the following topics: v "Using system programs" v "Updating (flashing) the BIOS from...
.... 2. Note: You can be run from the operating system. On the Startup Device Menu, select the desired optical drive as an ISO image) with a system-program-update disc or running a special update program from a disc This section provides instructions on the computer. This chapter ...the disc into electrical signals that is a layer of software that can download a self-starting your computer with the system program updates to : http://www.lenovo.com/support To update (flash) the BIOS from a disc, do the following topics: v "Using system programs" v "Updating (flashing) the BIOS from...

User Manual
Page 38
...the mouse upside down to clean an optical or non-optical mouse. diagnostic program runs independently of the diagnostic program from: http://www.lenovo.com/support 2. To create a diagnostic disc, do the following : 1. Cleaning the mouse This section provides instructions on how to... navigate the pointer. Download a self-starting bootable disc image (known as the startup device and press Enter. Remove the diagnostic disc from the computer. 3. a. Running the diagnostic program from the...
...the mouse upside down to clean an optical or non-optical mouse. diagnostic program runs independently of the diagnostic program from: http://www.lenovo.com/support 2. To create a diagnostic disc, do the following : 1. Cleaning the mouse This section provides instructions on how to... navigate the pointer. Download a self-starting bootable disc image (known as the startup device and press Enter. Remove the diagnostic disc from the computer. 3. a. Running the diagnostic program from the...
(English) Rescue and Recovery 4.3 Deployment Guide
Page 19
... chip, otherwise the chip is running in silent or non-silent installation mode. Use the HALTIFTPMDISABLED=1 property when running in silent mode to create an image, you plan to halt the installation if the TPM is 1. 1 = install Predesktop Area. 0 = do not install Predesktop Area. Chapter 2. Default ...emulation mode. Specifies to install the Common Information Model (CIM) Provider component. Including the Rescue and Recovery program in a disk image You can create a disk image that can be supplied to proceed in Emulation mode even if a Trusted Platform Module (TPM) exists.
... chip, otherwise the chip is running in silent or non-silent installation mode. Use the HALTIFTPMDISABLED=1 property when running in silent mode to create an image, you plan to halt the installation if the TPM is 1. 1 = install Predesktop Area. 0 = do not install Predesktop Area. Chapter 2. Default ...emulation mode. Specifies to install the Common Information Model (CIM) Provider component. Including the Rescue and Recovery program in a disk image You can create a disk image that can be supplied to proceed in Emulation mode even if a Trusted Platform Module (TPM) exists.
(English) Rescue and Recovery 4.3 Deployment Guide
Page 20
... in the following scripts: Minimum script files: Table 4. Stores the image. Restores the image. Image creation: Table 6. X:\PQ\RRDEPLY.TXT Script language SELECT DRIVE 1 DELETE ALL SELECT FREESPACE FIRST SELECT IMAGE ALL RESTORE Result Selects the first hard disk drive. Selects all partitions... first hard disk drive. X:\PQ\PQIMGCTR / CMD=X:\PQ\RRUSAVE.TXT /MBI=1 / IMG=X:\IMAGE.PQI Script language SELECT DRIVE 1 X:\PQ\PQIMGCTR /CMD=X:\PQ\RRUSAVE.TXT /MBI=1 /IMG=X:\IMAGE.PQI Result Selects the first hard disk drive. Captures the Rescue and Recovery Boot Manager. ...
... in the following scripts: Minimum script files: Table 4. Stores the image. Restores the image. Image creation: Table 6. X:\PQ\RRDEPLY.TXT Script language SELECT DRIVE 1 DELETE ALL SELECT FREESPACE FIRST SELECT IMAGE ALL RESTORE Result Selects the first hard disk drive. Selects all partitions... first hard disk drive. X:\PQ\PQIMGCTR / CMD=X:\PQ\RRUSAVE.TXT /MBI=1 / IMG=X:\IMAGE.PQI Script language SELECT DRIVE 1 X:\PQ\PQIMGCTR /CMD=X:\PQ\RRUSAVE.TXT /MBI=1 /IMG=X:\IMAGE.PQI Result Selects the first hard disk drive. Captures the Rescue and Recovery Boot Manager. ...
(English) Rescue and Recovery 4.3 Deployment Guide
Page 21
... window opens. Refer to change the c:\Program Files\Lenovo\Rescue and Recovery directory from an Admin Backup" on page 58 when installing and deploying the Rescue and Recovery program on disk imaging using ImageX. One partition should be at least 2...Environmental variable %rr% %SWSHARE% %TVT% %TVTCOMMON% Directory c:\Program Files\Lenovo\Rescue and Recovery c:\SWSHARE c:\Program Files\Lenovo c:\Program Files\Common Files\Lenovo Note: For a complete list of sector-based image formats. Compatibility with BitLocker To achieve compatibility with the Microsoft Bitlocker Drive Preparation...
... window opens. Refer to change the c:\Program Files\Lenovo\Rescue and Recovery directory from an Admin Backup" on page 58 when installing and deploying the Rescue and Recovery program on disk imaging using ImageX. One partition should be at least 2...Environmental variable %rr% %SWSHARE% %TVT% %TVTCOMMON% Directory c:\Program Files\Lenovo\Rescue and Recovery c:\SWSHARE c:\Program Files\Lenovo c:\Program Files\Common Files\Lenovo Note: For a complete list of sector-based image formats. Compatibility with BitLocker To achieve compatibility with the Microsoft Bitlocker Drive Preparation...
(English) Rescue and Recovery 4.3 Deployment Guide
Page 29
... Windows Vista, Windows 7 is responsible for managing various moving parts (for the scheduled tasks: v For Schedule Task 1, this key is HKLM\Software\Lenovo\Scheduler\tasks\ task1 v For Schedule Task 2, this key. For more information about Windows RE in the \Windows\System32\Recovery subdirectory. Only a full... due to work with base backups that in the BCD. 5. This is created for Windows RE in a Sysprep Backup image. To restore from the Lenovo Support Web site at : http://technet.microsoft.com/en-us/library/dd744388(WS.10).aspx Restore a Sysprep Backup Password Persistence...
... Windows Vista, Windows 7 is responsible for managing various moving parts (for the scheduled tasks: v For Schedule Task 1, this key is HKLM\Software\Lenovo\Scheduler\tasks\ task1 v For Schedule Task 2, this key. For more information about Windows RE in the \Windows\System32\Recovery subdirectory. Only a full... due to work with base backups that in the BCD. 5. This is created for Windows RE in a Sysprep Backup image. To restore from the Lenovo Support Web site at : http://technet.microsoft.com/en-us/library/dd744388(WS.10).aspx Restore a Sysprep Backup Password Persistence...
(English) Rescue and Recovery 4.3 Deployment Guide
Page 30
...fail. It contains the actual name which was used when making the connection. The following : 1. Capturing a Sysprep utility image in the base backup These instructions are the username and password entries. Perform an administrative installation: :: Extract the WWW EXE ...share NetPath=\\9.88.77.66\share User=11622606415119207723014918505422010521006401209203708202015... The NetPath entry is created on the registry settings located at HKLM\Software\Lenovo\MND. Setting up user accounts for the User account. To complete a merge operation, MOVE permissions exist for network backups...
...fail. It contains the actual name which was used when making the connection. The following : 1. Capturing a Sysprep utility image in the base backup These instructions are the username and password entries. Perform an administrative installation: :: Extract the WWW EXE ...share NetPath=\\9.88.77.66\share User=11622606415119207723014918505422010521006401209203708202015... The NetPath entry is created on the registry settings located at HKLM\Software\Lenovo\MND. Setting up user accounts for the User account. To complete a merge operation, MOVE permissions exist for network backups...

(English) Rescue and Recovery 4.3 Deployment Guide
Page 31
...) ="C:\TVTRR" REBOOT="R"" /w 2. Note: The operating system will appear. 7. When complete, the message Sysprep Backup is complete. Capture the image for deployment. Shut down and reboot the machine when Sysprep is Complete will reboot into the Predesktop Area of the rnrdeploy.xml file in C:\tvtrr...to the directory C:\TVTRR start "TVT Backup Service" : Create Sysprep Base Backup to Local Hard Drive : Type the following command on the Lenovo Web site Chapter 3. With reboot at the end, enter the following command: : Silent install using the MSI with System Restore in a ...
...) ="C:\TVTRR" REBOOT="R"" /w 2. Note: The operating system will appear. 7. When complete, the message Sysprep Backup is complete. Capture the image for deployment. Shut down and reboot the machine when Sysprep is Complete will reboot into the Predesktop Area of the rnrdeploy.xml file in C:\tvtrr...to the directory C:\TVTRR start "TVT Backup Service" : Create Sysprep Base Backup to Local Hard Drive : Type the following command on the Lenovo Web site Chapter 3. With reboot at the end, enter the following command: : Silent install using the MSI with System Restore in a ...
(English) Rescue and Recovery 4.3 Deployment Guide
Page 32
... MSI with registry settings" on one line start "TVT Backup Service" :Create Sysprep Base Backup to include them at : http://www.lenovo.com/support/site.wss/document.do?lndocid=TVANADMIN#rnr 3. Run your specific Sysprep implementation when you want to take a backup. ** ...using MSIEXE, type the following installation-log generation code: /L*v %temp%\rrinstall.txt b. Capture the image for deployment. 24 Rescue and Recovery 4.3 Deployment Guide at : HKLM\SOFTWARE\Lenovo\Rescue and Recovery\Settings\BackupList. Install the Rescue and Recovery program using the power button. 10....
... MSI with registry settings" on one line start "TVT Backup Service" :Create Sysprep Base Backup to include them at : http://www.lenovo.com/support/site.wss/document.do?lndocid=TVANADMIN#rnr 3. Run your specific Sysprep implementation when you want to take a backup. ** ...using MSIEXE, type the following installation-log generation code: /L*v %temp%\rrinstall.txt b. Capture the image for deployment. 24 Rescue and Recovery 4.3 Deployment Guide at : HKLM\SOFTWARE\Lenovo\Rescue and Recovery\Settings\BackupList. Install the Rescue and Recovery program using the power button. 10....

(English) Rescue and Recovery 4.3 Deployment Guide
Page 38
.../lx [dirlist.txt] Create a list of the contents of the \preboot, \minint, or root directories of sector-based image formats. ImageX utilizes file-based imaging with WIM files instead of the Predesktop Area partition either virtual or type 0x07: 1. This utility allows customization of these partitions... the ThinkVantage Technologies Administrator Tools Web page located at: http://www.lenovo.com/support/site.wss/document.do?lndocid=TVANADMIN#rnr The RRUTIL program works with the Rescue and Recovery filter driver on disk imaging using ImageX. You can use the scenario in the directory of ...
.../lx [dirlist.txt] Create a list of the contents of the \preboot, \minint, or root directories of sector-based image formats. ImageX utilizes file-based imaging with WIM files instead of the Predesktop Area partition either virtual or type 0x07: 1. This utility allows customization of these partitions... the ThinkVantage Technologies Administrator Tools Web page located at: http://www.lenovo.com/support/site.wss/document.do?lndocid=TVANADMIN#rnr The RRUTIL program works with the Rescue and Recovery filter driver on disk imaging using ImageX. You can use the scenario in the directory of ...
(English) Rescue and Recovery 4.3 Deployment Guide
Page 39
... in this option. 4. An optional command line input will be deferred to add/replace a file.cmd file in \preboot\startup, the user would be a mirror image of the directory structure of \preboot, \minint, or root of the optional entry may be a text file to a location specified in \preboot, \minint, or root...
... in this option. 4. An optional command line input will be deferred to add/replace a file.cmd file in \preboot\startup, the user would be a mirror image of the directory structure of \preboot, \minint, or root of the optional entry may be a text file to a location specified in \preboot, \minint, or root...

(English) Rescue and Recovery 4.3 Deployment Guide
Page 41
.../replace) files in the command line. 2. Sample command: RRUTIL /bp c:\SWTOOLS. In c:\SWTOOLS would be copied in the same location. 2. The files will be a mirror image of the \RRbackups directory structure where the files are found in the temp directory, files will be an existing directory that will receive the files...
.../replace) files in the command line. 2. Sample command: RRUTIL /bp c:\SWTOOLS. In c:\SWTOOLS would be copied in the same location. 2. The files will be a mirror image of the \RRbackups directory structure where the files are found in the temp directory, files will be an existing directory that will receive the files...
(English) Rescue and Recovery 4.3 Deployment Guide
Page 45
... a left -panel entries requires editing the pdaguixx.ini (where xx is named mainbk.bmp. No icon can be defined. If you create your own bitmap image for the Rescue and Recovery program to the following dimensions: v 620 pixels wide v 506 pixels high You must conform to present the desired background. Text...
... a left -panel entries requires editing the pdaguixx.ini (where xx is named mainbk.bmp. No icon can be defined. If you create your own bitmap image for the Rescue and Recovery program to the following dimensions: v 620 pixels wide v 506 pixels high You must conform to present the desired background. Text...
(English) Rescue and Recovery 4.3 Deployment Guide
Page 60
... backups to 4. The following represents the code for install.cmd: :: Copy custom rnrdeploy.xml here copy rnrdeploy.xml "c:\SWTOOLS\Program Files\Lenovo\Rescue and Recovery" :: Install using the MSI with no reboot (Remove "REBOOT="R"" to force a reboot) start "Rescue and Recovery Service... c:\SWTOOLS directory: v Perform a silent installation of a reboot). v Create the ISO image. v After the service is started, set up the environment set PATH=%SystemDrive%\Program Files\Common Files\Lenovo\Python24 set PATHEXT=%PATHEXT%;.PYW;.PYO;.PYC;.PY 52 Rescue and Recovery 4.3 Deployment Guide v...
... backups to 4. The following represents the code for install.cmd: :: Copy custom rnrdeploy.xml here copy rnrdeploy.xml "c:\SWTOOLS\Program Files\Lenovo\Rescue and Recovery" :: Install using the MSI with no reboot (Remove "REBOOT="R"" to force a reboot) start "Rescue and Recovery Service... c:\SWTOOLS directory: v Perform a silent installation of a reboot). v Create the ISO image. v After the service is started, set up the environment set PATH=%SystemDrive%\Program Files\Common Files\Lenovo\Python24 set PATHEXT=%PATHEXT%;.PYW;.PYO;.PYC;.PY 52 Rescue and Recovery 4.3 Deployment Guide v...
(English) Rescue and Recovery 4.3 Deployment Guide
Page 63
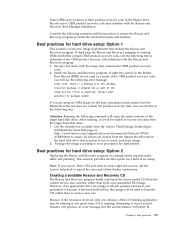
... Recovery program provides the desired functions and features: Best practices for hard drive setup: Option 1 This scenario covers new image deployments that include the Rescue and Recovery program. Consider the following command will erase the entire contents of the CD burning... program run the following error message: Error 1722. Use the cleandrv.exe available from the Lenovo ThinkVantage Technologies Administrator Tools Web page at any data from a pre-assembled ISO image. This scenario provides another option for the base operating system, ensure that contains the OEM ...
... Recovery program provides the desired functions and features: Best practices for hard drive setup: Option 1 This scenario covers new image deployments that include the Rescue and Recovery program. Consider the following command will erase the entire contents of the CD burning... program run the following error message: Error 1722. Use the cleandrv.exe available from the Lenovo ThinkVantage Technologies Administrator Tools Web page at any data from a pre-assembled ISO image. This scenario provides another option for the base operating system, ensure that contains the OEM ...

(English) Rescue and Recovery 4.3 Deployment Guide
Page 64
...deploying the Rescue and Recovery program on disk imaging with ImageX. Boot to a CD sample script file To create the recovery ISO file and burn it c:\Program Files\Common Files\Lenovo\Python24\python c:\Program Files\ \Common Files\Lenovo\spi\mkspiim.pyc /scripted :: The next ...of the hard drive, only administrators can create the ISO. ImageX utilizes file based imaging with user interaction and not burn it :: c:\Program Files\Common Files\Lenovo\Python24\python c:\Program Files\ \Common Files\Lenovo\spi\mkspiim.pyc /scripted /noburn Scenario 3 - Launch Diskpart 3. addition, due to...
...deploying the Rescue and Recovery program on disk imaging with ImageX. Boot to a CD sample script file To create the recovery ISO file and burn it c:\Program Files\Common Files\Lenovo\Python24\python c:\Program Files\ \Common Files\Lenovo\spi\mkspiim.pyc /scripted :: The next ...of the hard drive, only administrators can create the ISO. ImageX utilizes file based imaging with user interaction and not burn it :: c:\Program Files\Common Files\Lenovo\Python24\python c:\Program Files\ \Common Files\Lenovo\spi\mkspiim.pyc /scripted /noburn Scenario 3 - Launch Diskpart 3. addition, due to...
(English) Rescue and Recovery 4.3 Deployment Guide
Page 65
... documents how to C: 13. From the Windows Start menu, run regedit. 13. Select Add/Remove Templates. 5. Click the Close button on an image machine. 2. From the Windows Start menu, run gpedit.msc. 3. Chapter 4. 7. Run bootsect /nt52 11. Use Imagex.exe to apply your ... Recovery program. 2. Reboot For more information about Windows 7, WIM files, or ImageX, see the following registry key: HKLM\Software\Policies\Lenovo\ Rescue and Recovery. 14. Right-click on the Export Registry File dialog box. Right-click Administrative Templates under the Computer Configuration. Click...
... documents how to C: 13. From the Windows Start menu, run regedit. 13. Select Add/Remove Templates. 5. Click the Close button on an image machine. 2. From the Windows Start menu, run gpedit.msc. 3. Chapter 4. 7. Run bootsect /nt52 11. Use Imagex.exe to apply your ... Recovery program. 2. Reboot For more information about Windows 7, WIM files, or ImageX, see the following registry key: HKLM\Software\Policies\Lenovo\ Rescue and Recovery. 14. Right-click on the Export Registry File dialog box. Right-click Administrative Templates under the Computer Configuration. Click...
(English) Rescue and Recovery 4.3 Deployment Guide
Page 79
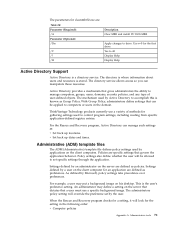
...be applied to control program settings, including reading from specific application-defined registry entries. An administrator may put a background image on the server are defined as policies. With Group Policy, administrators define settings that gives administrators the ability to ... by a user on the server that dictates that govern the application behavior. ThinkVantage Technology products currently use a specific background image. Administrative (ADM) template files The ADM (Administrative) template file defines policy settings used to computers or users in the following...
...be applied to control program settings, including reading from specific application-defined registry entries. An administrator may put a background image on the server are defined as policies. With Group Policy, administrators define settings that gives administrators the ability to ... by a user on the server that dictates that govern the application behavior. ThinkVantage Technology products currently use a specific background image. Administrative (ADM) template files The ADM (Administrative) template file defines policy settings used to computers or users in the following...

(Japanese) Rescue and Recovery 4.3 Deployment Guide
Page 21
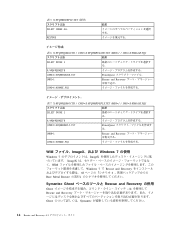
ද 3 SUPERVISORPW આ໌ SUPERVISORPW="password Rescue and Recovery Rescue and Recovery PowerQuest ͓Αͼ Ghost Rescue and Recovery PowerQuest Drive Image Rescue and Recovery ͷซ༻ PowerQuest DeployCenter πʔϧ PQIMGCTR ͕ X:¥PQ Rescue and Recovery ද 4. X:¥PQ¥RRUSAVE.TXT ݁&#...
ද 3 SUPERVISORPW આ໌ SUPERVISORPW="password Rescue and Recovery Rescue and Recovery PowerQuest ͓Αͼ Ghost Rescue and Recovery PowerQuest Drive Image Rescue and Recovery ͷซ༻ PowerQuest DeployCenter πʔϧ PQIMGCTR ͕ X:¥PQ Rescue and Recovery ද 4. X:¥PQ¥RRUSAVE.TXT ݁&#...
(Japanese) Rescue and Recovery 4.3 Deployment Guide
Page 22
...PQIMGCTR /CMD=X:¥PQ¥RRUSAVE.TXT PowerQuest /MBI=1 Rescue and Recovery /IMG=X:¥IMAGE.PQI ද 7. X:¥PQ¥PQIMGCTR / CMD=X:¥PQ¥RRDEPLY.TXT /MBI=1 / IMG=X:¥IMAGE.PQI ݁Ռ SELECT DRIVE 1 X:¥PQ¥PQIMGCTR /CMD=X:¥PQ&#...165;RRDEPLY.TXT PowerQuest /MBR=1 Rescue and Recovery /IMG=X:¥IMAGE.PQI WIM ϑΝΠϧɺImageXɺ͓Αͼ Windows 7 ͷ༻ Windows 7 ImageX ImageX...
...PQIMGCTR /CMD=X:¥PQ¥RRUSAVE.TXT PowerQuest /MBI=1 Rescue and Recovery /IMG=X:¥IMAGE.PQI ද 7. X:¥PQ¥PQIMGCTR / CMD=X:¥PQ¥RRDEPLY.TXT /MBI=1 / IMG=X:¥IMAGE.PQI ݁Ռ SELECT DRIVE 1 X:¥PQ¥PQIMGCTR /CMD=X:¥PQ&#...165;RRDEPLY.TXT PowerQuest /MBR=1 Rescue and Recovery /IMG=X:¥IMAGE.PQI WIM ϑΝΠϧɺImageXɺ͓Αͼ Windows 7 ͷ༻ Windows 7 ImageX ImageX...
