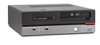
Hardware Maintenance Manual
Page 129
... 2, "Safety information," on page 3 and "Handling electrostatic discharge-sensitive devices" on the left-side cover and slide the cover to the rear to the computer. 4. Tower Computers 123 Chapter 9. Unplug all power cords from the drives, and turn off all cables attached to remove the cover. 1. This procedure describes how to...
Hardware Maintenance Manual
Page 131
Tower Computers 125 Machine types 7816, 7817, 9686 and 9687 1 Microprocessor fan connector 14 Front USB connectors (2) 2 Microprocessor and heat sink 15 Battery 3 Memory connector 1 16 ...
Hardware Maintenance Manual
Page 133
... connector 20 PCI Express x16 graphics adapter connector 10 SATA IDE connectors (4) 21 System fan connector 11 Front panel connector 22 12 V power connector Chapter 9. Tower Computers 127
Hardware Maintenance Manual
Page 135
... the switch to 230 V. 6. Install the four screws to the system board. Note: Use only the screws provided by Lenovo. 8. Reconnect a power supply connector to "Completing the FRU replacement" on page 125. 9. Tower Computers 129 Disconnect the power supply cables from the system board and from all drives. 3. See "Locating parts on...
Hardware Maintenance Manual
Page 137
Lift the heat sink and fan assembly off the failing system board. Rotate handle 1 to release the heat sink clamp and then disengage the clamp from the system board socket, lift the small handle 1 . Remove the retention module from the rear of the failing system board and install it in the same position on its side so that the thermal grease does not come in contact with anything. 13. Tower Computers 131 Place the heat sink on the new system board. 14. To release the microprocessor 2 from the plastic retention bracket. 12. Replacing FRUs - 11. Chapter 9.
Hardware Maintenance Manual
Page 139
Insert and tighten the screws that secure the system board. 22. Tower Computers 133 Lower the microprocessor straight down into position. 23. Connect all cables to the hard disk drive. 24. Lower the small handle to secure ...
Hardware Maintenance Manual
Page 141
12. Lift the heat sink and fan assembly off the failing system board. Tower Computers 135 Place the heat sink on its side so that the thermal grease does not come in contact with anything. Replacing FRUs - Chapter 9.
Hardware Maintenance Manual
Page 143
... the microprocessor socket while it on the microprocessor socket of the failing system board. 16. Remove the black plastic cover and place it is exposed. Tower Computers 137 Chapter 9. b. On the new system board, release the lever securing the microprocessor retainer and then pivot the retainer until it into position with...
Hardware Maintenance Manual
Page 145
... microprocessor more accessible. 3. Replacing FRUs - Disconnect the heat sink and fan assembly cable from the plastic retention bracket. 5. Place the heat sink on page 123. 2. Tower Computers 139 See "Removing the cover" on its right side to release the heat sink clamp and then disengage the clamp from the system board...
Hardware Maintenance Manual
Page 147
... sure that the small triangle on one corner is in the socket. 12. Install the heat sink and fan assembly on page 125. 14. Chapter 9. Tower Computers 141 Connect the heat sink and fan assembly cable to "Completing the FRU replacement" on the microprocessor socket. 10. Lower the small handle to...
Hardware Maintenance Manual
Page 149
Do not touch the gold contacts on the bottom. 7. Tower Computers 143 6. Important Touch only the sides of the socket. Lift the microprocessor straight up and out of the microprocessor. To remove the microprocessor 2 from the system board, lift the small handle 3 and open the retainer 1 . Chapter 9. Replacing FRUs -
Hardware Maintenance Manual
Page 151
Connect the heat sink and fan assembly cable to "Completing the FRU replacement" on the system board. 14. To secure the microprocessor in the socket, close the microprocessor retainer and lock it into the system board socket of the system board. 12. Install the heat sink and fan assembly on page 161. Chapter 9. Replacing FRUs - Go to the system board. 11. Tower Computers 145 Lower the microprocessor straight down into position with the small handle. 13. See the system board illustration for your machine type at "Locating parts on the system board" on page 125. 15.
Hardware Maintenance Manual
Page 153
Chapter 9. Replacing FRUs - Go to "Completing the FRU replacement" on page 161. the retaining clips close. 5. Tower Computers 147
Hardware Maintenance Manual
Page 155
Install the new adapter into the adapter connector. 5. Ensure the adapter is fully seated into the same adapter connector. 4. Chapter 9. At the rear of the computer, pivot the adapter latch to the closed position to "Completing the FRU replacement" on page 161. Replacing FRUs - Go to secure the adapter. 6. 3. Tower Computers 149
Hardware Maintenance Manual
Page 157
Do not touch the circuit board 5 on the bracket with the holes in the hard disk drive. Slide the new hard disk drive into the drive cage until it snaps into the blue bracket, flex the bracket, and align the pins 1 through 4 on the bottom of the hard disk drive. 8. Chapter 9. Tower Computers 151 Replacing FRUs - To install the new drive into position. 7.
Hardware Maintenance Manual
Page 159
... signal and power cables to "Completing the FRU replacement" on page 161. Replacing FRUs - See "Removing the cover" on page 128. 3. Replace the front bezel. Tower Computers 153 Remove the front bezel. Go to the drive. 8. Note: Notice that there is a spare retainer bracket 1 attached to remove and replace an optical...
Hardware Maintenance Manual
Page 161
.... Remove the fan assembly by pulling the rubber mounts back through the rear of the rear fan cable to remove and replace the system fan. 1. Tower Computers 155 Remove the computer cover. The fan assembly is mounted with four rubber mounts that protrude through the chassis. Replacing the rear fan assembly...
Hardware Maintenance Manual
Page 163
... assembly with four rubber mounts that protrude through the front of the front fan cable to remove and replace the front fan assembly. 1. Replacing FRUs - Tower Computers 157 Remove the computer cover. See "Removing and replacing the front bezel" on page 123. 2. Note the routing of the chassis. The fan assembly...
Hardware Maintenance Manual
Page 165
... FRUs - Note the front audio/USB assembly cable routing and remove the screw that secures the assembly to "Completing the FRU replacement" on page 125. 4. Tower Computers 159 Route the cable for your machine type at "Locating parts on the system board" on page 161. Reinstall the front bezel. 10. Install...
Hardware Maintenance Manual
Page 167
... cables, including telephone lines and power cords. Note: When the computer is turned on page 51. Ensure that were removed. Chapter 9. Install the new battery. 6. 5. Tower Computers 161