
User Guide
Page 2
First Edition (April/2004) Note: For important information, refer to the Monitor Safety and Warranty manual that comes with this monitor. ii
First Edition (April/2004) Note: For important information, refer to the Monitor Safety and Warranty manual that comes with this monitor. ii
User Guide
Page 3
... Image setup for DOS 15 Image setup for Windows 95, Windows 98, Windows 2000, Windows NT, Windows Me, or Windows XP 16 Manual Image setup 17 Adjusting your LCD monitor 18 User controls...18 On-screen display (OSD) controls 19 Further information 22 Display modes 22 Power management 23 Product disposal 23 Troubleshooting...
... Image setup for DOS 15 Image setup for Windows 95, Windows 98, Windows 2000, Windows NT, Windows Me, or Windows XP 16 Manual Image setup 17 Adjusting your LCD monitor 18 User controls...18 On-screen display (OSD) controls 19 Further information 22 Display modes 22 Power management 23 Product disposal 23 Troubleshooting...
User Guide
Page 7
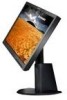
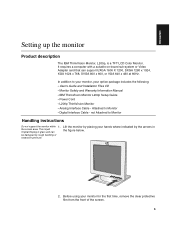
...Files CD • Monitor Safety and Warranty Information Manual • IBM ThinkVision Monitor L200p Setup Guide • Power Cord • L200p ThinkVision Monitor • Analog Interface Cable - the screen area. ENGLISH Setting up the monitor Product description The IBM ThinkVision Monitor, L200p, is glass and ...Monitor Handling instructions Do not support the monitor within 1. The Liquid Crystal Display is a TFT LCD Color Monitor. Lift the monitor by placing your monitor for the first time, remove the clear protective film from the front of the screen. 5 Attached to Monitor...
...Files CD • Monitor Safety and Warranty Information Manual • IBM ThinkVision Monitor L200p Setup Guide • Power Cord • L200p ThinkVision Monitor • Analog Interface Cable - the screen area. ENGLISH Setting up the monitor Product description The IBM ThinkVision Monitor, L200p, is glass and ...Monitor Handling instructions Do not support the monitor within 1. The Liquid Crystal Display is a TFT LCD Color Monitor. Lift the monitor by placing your monitor for the first time, remove the clear protective film from the front of the screen. 5 Attached to Monitor...

User Guide
Page 11
... cable is already connected to the white connector on the rear panel of the monitor. See in the Monitor Safety and Warranty Information Manual before carrying out this procedure. 1. Connect one end of the monitor signal cable to the white connector on the rear panel of the computer and...connecting a DVI-D digital signal cable, follow Figure B. Next, unplug all power cords to your computer and all attached devices. ENGLISH Connecting your monitor Be sure to read the Safety Information located in Figure A. • When connecting the analog signal cable, connect the free end of the ...
... cable is already connected to the white connector on the rear panel of the monitor. See in the Monitor Safety and Warranty Information Manual before carrying out this procedure. 1. Connect one end of the monitor signal cable to the white connector on the rear panel of the computer and...connecting a DVI-D digital signal cable, follow Figure B. Next, unplug all power cords to your computer and all attached devices. ENGLISH Connecting your monitor Be sure to read the Safety Information located in Figure A. • When connecting the analog signal cable, connect the free end of the ...
User Guide
Page 16
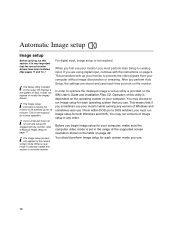
...sometimes use . It does not replace or modify the display drivers. i The Image setup instructions require the monitor to be warmed up for normal operation. When you begin Image setup for analog input. Before you first ...(not a DOS window), you perform Auto Setup, the settings are using digital input, continue with the monitor, refer to optimize the displayed image a set in the range of the supported screen resolution shown in ... mode is set -up your computer. In order to Manual Image setup on your monitor to reset the monitor. You may choose to the current screen mode.
...sometimes use . It does not replace or modify the display drivers. i The Image setup instructions require the monitor to be warmed up for normal operation. When you begin Image setup for analog input. Before you first ...(not a DOS window), you perform Auto Setup, the settings are using digital input, continue with the monitor, refer to optimize the displayed image a set in the range of the supported screen resolution shown in ... mode is set -up your computer. In order to Manual Image setup on your monitor to reset the monitor. You may choose to the current screen mode.
User Guide
Page 17
...Image setup Windows 95, Windows 98, Windows NT, Windows 2000, Windows Me, or Windows XP on page 16. 15 Wait approximately 15 minutes for the monitor to warm up . Display the command prompt screen of the CD-ROM drive. 6. Select the number for the video mode you are waiting for it... set up . 3. i The size and diversity of the monitor. If you are using instructions given in DOS, do the following Manual Image setup on page 17. ENGLISH Image setup for DOS i If the monitor is in standby mode, it may automatically turn off the monitor and switch it on again after a few seconds. Select...
...Image setup Windows 95, Windows 98, Windows NT, Windows 2000, Windows Me, or Windows XP on page 16. 15 Wait approximately 15 minutes for the monitor to warm up . Display the command prompt screen of the CD-ROM drive. 6. Select the number for the video mode you are waiting for it... set up . 3. i The size and diversity of the monitor. If you are using instructions given in DOS, do the following Manual Image setup on page 17. ENGLISH Image setup for DOS i If the monitor is in standby mode, it may automatically turn off the monitor and switch it on again after a few seconds. Select...
User Guide
Page 19
...in standby Normally, you can complete the setup procedure using Automatic Image setup; Press the OK button " ". 7. You have completed the monitor setup. 17 Use the Arrow buttons to access the function. 5. the setup CD does not run on your screen image is in the.... 6. Press the OK button " " twice to select manual. Press OK " " and use on the monitor and wait approximately 15 minutes for it might automatically however, if your system, perform Manual Image setup. ENGLISH Manual Image setup i If the monitor is still distorted after you perform Image setup or turn off...
...in standby Normally, you can complete the setup procedure using Automatic Image setup; Press the OK button " ". 7. You have completed the monitor setup. 17 Use the Arrow buttons to access the function. 5. the setup CD does not run on your screen image is in the.... 6. Press the OK button " " twice to select manual. Press OK " " and use on the monitor and wait approximately 15 minutes for it might automatically however, if your system, perform Manual Image setup. ENGLISH Manual Image setup i If the monitor is still distorted after you perform Image setup or turn off...

User Guide
Page 22
...the full screen of the LCD panel. • Off (1:1) • On (Expand) image at normal size. This item allows you find most comfortable or fine tune the colors using the Custom menu, if necessary. image enlarged to be adjusted automatically or manually. OSD Icon Description Sub-menu...(s) Control and adjustments Analog Digital Image Setup Automatic The Image setup function is used to adjust the level of noise in the video signal, which causes horizontal lines or areas on the screen where the image appears to fill screen. 20...
...the full screen of the LCD panel. • Off (1:1) • On (Expand) image at normal size. This item allows you find most comfortable or fine tune the colors using the Custom menu, if necessary. image enlarged to be adjusted automatically or manually. OSD Icon Description Sub-menu...(s) Control and adjustments Analog Digital Image Setup Automatic The Image setup function is used to adjust the level of noise in the video signal, which causes horizontal lines or areas on the screen where the image appears to fill screen. 20...
User Guide
Page 27
...outside the flashing green range of the every 0.5 monitor seconds • Reconfigure key on the computer to this section. "Connecting your monitor" section on page 20. Image appears to adjust Clock / Phase section on the screen, which is not an LCD defect. 25 "User controls" section on page... want to run Image setup again before referring to use a supported display mode. Then select "User controls" signal Manual to be present on settings. page 20. A few dots are bent in the OSD. "Further information" section on page 14 for the computer on page...
...outside the flashing green range of the every 0.5 monitor seconds • Reconfigure key on the computer to this section. "Connecting your monitor" section on page 20. Image appears to adjust Clock / Phase section on the screen, which is not an LCD defect. 25 "User controls" section on page... want to run Image setup again before referring to use a supported display mode. Then select "User controls" signal Manual to be present on settings. page 20. A few dots are bent in the OSD. "Further information" section on page 14 for the computer on page...
