(English) User Guide
Page 5
... Rescue System 25 OneKey Recovery 26 Driver and Application Installation 27 Using the Software 29 Lenovo Support 30 Troubleshooting and Confirming Setup 31 Troubleshooting Display Problems 32 Troubleshooting Touch screen 33 Troubleshooting Audio Problems 33 Troubleshooting Software Problems 34 Troubleshooting Problems with Optical Drives and Hard Disks 35 Special considerations for troubleshooting Windows...
... Rescue System 25 OneKey Recovery 26 Driver and Application Installation 27 Using the Software 29 Lenovo Support 30 Troubleshooting and Confirming Setup 31 Troubleshooting Display Problems 32 Troubleshooting Touch screen 33 Troubleshooting Audio Problems 33 Troubleshooting Software Problems 34 Troubleshooting Problems with Optical Drives and Hard Disks 35 Special considerations for troubleshooting Windows...
(English) User Guide
Page 30
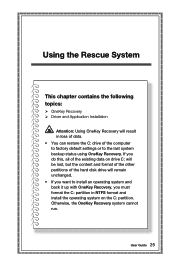
... in NTFS format and install the operating system on the C: partition. Using the Rescue System This chapter contains the following topics: OneKey Recovery Driver and Application Installation Attention: Using OneKey Recovery will remain unchanged. • If you want to the last system backup status using OneKey Recovery.
... in NTFS format and install the operating system on the C: partition. Using the Rescue System This chapter contains the following topics: OneKey Recovery Driver and Application Installation Attention: Using OneKey Recovery will remain unchanged. • If you want to the last system backup status using OneKey Recovery.
(English) User Guide
Page 32
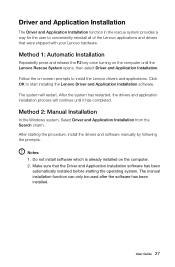
... Application Installation software. Method 1: Automatic Installation Repeatedly press and release the F2 key once turning on -screen prompts to install the Lenovo drivers and applications. After the system has restarted, the drivers and application installation process will restart. After starting the operating system. Notes: 1. User Guide 27 Do not install software which is...
... Application Installation software. Method 1: Automatic Installation Repeatedly press and release the F2 key once turning on -screen prompts to install the Lenovo drivers and applications. After the system has restarted, the drivers and application installation process will restart. After starting the operating system. Notes: 1. User Guide 27 Do not install software which is...
(English) User Guide
Page 38
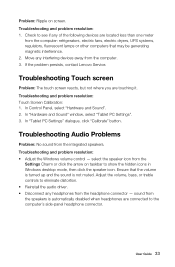
In "Hardware and Sound" window, select "Tablet PC Settings". 3. Check to the computer's side-panel headphone connector. If the problem persists, contact Lenovo Service. Troubleshooting Touch screen Problem: The touch screen reacts, but not where you are located less than one meter from the computer: refrigerators, electric fans, ... 1. select the speaker icon from the Settings Charm or click the arrow on screen. Problem: Ripple on taskbar to eliminate distortion. • Reinstall the audio driver. • Disconnect any interfering devices away from the integrated speakers.
In "Hardware and Sound" window, select "Tablet PC Settings". 3. Check to the computer's side-panel headphone connector. If the problem persists, contact Lenovo Service. Troubleshooting Touch screen Problem: The touch screen reacts, but not where you are located less than one meter from the computer: refrigerators, electric fans, ... 1. select the speaker icon from the Settings Charm or click the arrow on screen. Problem: Ripple on taskbar to eliminate distortion. • Reinstall the audio driver. • Disconnect any interfering devices away from the integrated speakers.
(English) User Guide
Page 41
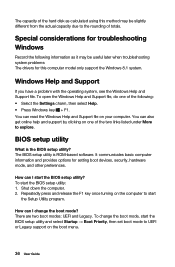
.... BIOS setup utility What is ROM-based software. The capacity of the hard disk as it may be useful later when troubleshooting system problems: The drivers for setting boot devices, security, hardware mode, and other preferences. How can read the Windows Help and Support file on one of the two links...
.... BIOS setup utility What is ROM-based software. The capacity of the hard disk as it may be useful later when troubleshooting system problems: The drivers for setting boot devices, security, hardware mode, and other preferences. How can read the Windows Help and Support file on one of the two links...
Lenovo B50-35 All-In-One Computer Hardware Maintenance Manual
Page 22
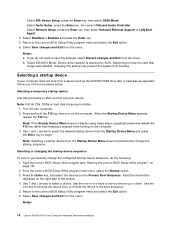
...when turning on page 13). 2. Depending on how the hard disk image was installed, changing this procedure to start up or down. Notes: 16 Lenovo B50-35 All-In-One Computer Hardware Maintenance Manual Select ATA Device Setup, press the Enter key, then select SATA Mode. Select Network Setup, press the ...sequence, do not want to exclude the device from the menu. Read the information displayed on the computer. Select IDE/AHCI Mode: Device driver support is required for the Primary Boot Sequence. Use the key to save the settings, select Discard changes and Exit from booting.
...when turning on page 13). 2. Depending on how the hard disk image was installed, changing this procedure to start up or down. Notes: 16 Lenovo B50-35 All-In-One Computer Hardware Maintenance Manual Select ATA Device Setup, press the Enter key, then select SATA Mode. Select Network Setup, press the ...sequence, do not want to exclude the device from the menu. Read the information displayed on the computer. Select IDE/AHCI Mode: Device driver support is required for the Primary Boot Sequence. Use the key to save the settings, select Discard changes and Exit from booting.

Lenovo B50-35 All-In-One Computer Hardware Maintenance Manual
Page 34
Step 6. Step 8. Use a small flat head screwdriver to press and push out the pins that secure the optical drive to the disk. 2 3 28 Lenovo B50-35 All-In-One Computer Hardware Maintenance Manual Locate the optical removal notch, and then use a screw driver push the optical drive out. Remove the 2 screws that secure the cover to the metal bracket. 1 Step 9. Step 7. Push a small iron stick (paper clip) into the small hole on the optical drive cover so that the disk springs out as shown.
Step 6. Step 8. Use a small flat head screwdriver to press and push out the pins that secure the optical drive to the disk. 2 3 28 Lenovo B50-35 All-In-One Computer Hardware Maintenance Manual Locate the optical removal notch, and then use a screw driver push the optical drive out. Remove the 2 screws that secure the cover to the metal bracket. 1 Step 9. Step 7. Push a small iron stick (paper clip) into the small hole on the optical drive cover so that the disk springs out as shown.

