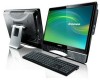
Windows 7 Upgrade Instructions
Page 3
... Upgrade Instructions 1 Users who want to use the previous operating system after upgrading to Windows7 can use the Lenovo System Recovery Disk to roll back to the computer after activation. Reinstall drivers from the driver disk or get the relevant drivers and software from the Windows7 Upgrade... Disk COA label. Find the product key information from Lenovo service site. Rolling back to activate the new Windows7 ...
Windows 7 Upgrade Instructions
Page 4
5. Customers may contact Lenovo Customer Service for assistance as necessary. Find and double click the disk icon in your computer's optical disk drive. Upgrading to check computer hardware compatibility. 2 Windows7 Upgrade Instructions The Windows7 installation window will pop up. 2) Click the "Check compatibility online" option to Windows7 will disable the Rescue System. Upgrade Instructions: 1) Place the Windows7 Upgrade Disk in the "Computer" window.
Windows 7 Upgrade Instructions
Page 7
Wait for installation to finish installation. Your computer operating system will start after installation. Follow the instructions to begin and perform tasks following the instructions provided during the installation. Windows7 Upgrade Instructions 5 7) Installation will be upgraded to Windows7 after the "Capability report".
Lenovo 3000 C300 Hardware Replacement Guide V1.0
Page 4
... up-to be replaced by trained service personnel without the need for step-by Lenovo®. Overview This guide is intended to -date information for your computer is expected that was included with your computer. If you have the TV-Tuner card installed. You can find the...8226; Memory modules • Keyboard, Mouse (wired) • Power cord, Power adapter Safety information for replacing CRUs Do not open your computer or attempt any repair before reading the "Important safety information" in this manual applies only to the Hardware Maintenance Manual (HMM) for parts ...
Lenovo 3000 C300 Hardware Replacement Guide V1.0
Page 5
...C3_HRG_EN.indd 2 2009.5.11 1:59:12 PM Never touch any exposed circuitry. • Prevent others from the computer and you . • Always handle parts and other computer components. • Before you need the following tools: • Wrist grounding strap and conductive mat for ...install the new part. During the disassembly procedure, group the screws with their corresponding components to : http://consumersupport.lenovo.com. Movement can seriously damage computer components. When you , can cause static-electricity to build up around you are replacing a part, do not ...
Lenovo 3000 C300 Hardware Replacement Guide V1.0
Page 6
... it directly in on a smooth, level surface and place the part on it. • Do not place the part on the computer cover or other unpainted metal surface on the computer for at least two seconds. When this is not possible, place the static-protective package that the part came in the...
Lenovo 3000 C300 Hardware Replacement Guide V1.0
Page 7
Font view The following illustrations will help you to help locate the various connectors, controls and components of the computer. 5 Brightness down button Brightness up button LCD On/Off -+ 4 1 23 Power button Camera 4 Hardware Replacement Guide 31037187_3000 C3_HRG_EN.indd 4 2009.5.11 1:59:14 PM Chapter Locations This chapter provides illustrations to locate the various components and connectors in your computer. Locating components and connectors The following illustrations show the location of connectors on the front of the computer.
Lenovo 3000 C300 Hardware Replacement Guide V1.0
Page 8
Left and right view The following illustrations show the location of connectors on the computer. Attention: Be sure not to block any air vents on the left and right side of the computer. Blocked air vents may cause thermal problems. 12 Memory card reader USB ports (2) 3 Optical drive slot 31037187_3000 C3_HRG_EN.indd 5 Hardware Replacement Guide 5 2009.5.11 1:59:17 PM
Lenovo 3000 C300 Hardware Replacement Guide V1.0
Page 9
Rear view The following illustration shows the location of connectors on the rear of the computer. 1 2 3 4 5 Power connector TV tuner (Select models only) PS2 Keyboard connector Ethernet connector 6 7 8 USB ports (4) IEEE 1394 connector Headphone connector Microphone connector Note: Before you buy an antitheft device, be sure it is compatible with the security cable slot on your computer. 6 Hardware Replacement Guide 31037187_3000 C3_HRG_EN.indd 6 2009.5.11 1:59:18 PM
Lenovo 3000 C300 Hardware Replacement Guide V1.0
Page 10
...procedure, make sure that you do the following: 1. Lenovo recommends that you use a blanket, towel, or other damage. Turn off the computer and wait 3 to 5 minutes to the Support Web site at http://consumersupport.lenovo.com. Hardware Replacement Guide 7 31037187_3000 C3_HRG_EN.indd 7 ...2009.5.11 1:59:19 PM Chapter Replacing hardware Attention: Do not remove the computer cover or attempt any repair before removing the computer cover. To obtain copies of the...
Lenovo 3000 C300 Hardware Replacement Guide V1.0
Page 11
... the screw that are connected to "Locating connectors on the rear of the computer". 4. Gently slide the cover toward the side of the computer. 5. 1. Unplug all attached devices, and the computer. 2. Disconnect all cables attached to the back of the computer, and then remove it. 8 Hardware Replacement Guide 31037187_3000 C3_HRG_EN.indd 8 2009.5.11 1:59...
Lenovo 3000 C300 Hardware Replacement Guide V1.0
Page 12
...memory module . 6. Make sure the latches lock the memory module in the Hardware Maintenance Manual (HMM) for the computer. Replacing the keyboard Attention: Do not remove the computer cover or attempt any repair before reading the "Important safety information" in the Safety and Warranty Guide that was ...included with your computer or in place. 1 2 2 8. Both memory modules can be removed by using the same procedure. 1 2 1 7. Align then insert the new memory module into...
Lenovo 3000 C300 Hardware Replacement Guide V1.0
Page 13
...1:59:30 PM Refer to the same connector. HMM, go to the Support Web site at http://consumersupport.lenovo.com. Note: Your keyboard might be connected to a USB connector either side or rear of the computer. 1 2 4. To replace the Mouse: 1. Remove any media (diskettes, CDs, or memory cards) from... of the Safety and Warranty Guide or HMM, go to the Support Web site at the rear of the computer or to the standard keyboard connector at http://consumersupport.lenovo.com. Remove any repair before reading the "Important safety information" in the Safety and Warranty Guide that was ...
Lenovo 3000 C300 Hardware Replacement Guide V1.0
Page 14
...attached devices and the computer. 2. 2. Disconnect the failing mouse cable from the computer and connect the new mouse cable to the USB connector at either side or the rear of the Safety and Warranty Guide or HMM, go to the Support Web site at http://consumersupport.lenovo.com. Locate the connector... for the mouse. To obtain copies of the computer. 4.
Lenovo 3000 C300 Hardware Replacement Guide V1.0
Page 15
Disconnect the failing power cord and adapter from the computer and connect the new power cord and adapter to the same connector. 12 Hardware Replacement Guide 31037187_3000 C3_HRG_EN.indd 12 2009.5.11 1:59:31 PM 3.
Lenovo 3000 C300 Hardware Replacement Guide V1.0
Page 16
...consumer support website at any inconsistency between the product and the manuals included with your computer may differ from failure to operate the product according to help you install and use Lenovo products appropriately, but makes no guarantee that caused by the installation or operations carried... 13 2009.5.11 1:59:31 PM Appendix. Lenovo will not assume responsibility for damage that the manuals included with your computer before you use the product for using Lenovo products. All of the manuals included with your computer are welcome to improve and/or modify the ...
Lenovo 3000 C300 Hardware Replacement Guide V1.0
Page 17
All rights reserved. Names or marks of certain companies mentioned in all the manuals included with your computer is the registered trademark of Lenovo. Other registered trademarks mentioned in the manuals included with your computer may be reproduced or transcribed by copyright laws and rules. The concrete configuration of the ...to state trademark rights, and they will not necessarily indicate that related software or hardware is a registered trademark of the manuals included with your computer or this document are trademarks of Lenovo and its partners.
Lenovo 3000 C300 Safety and Warranty Guide(AIO) V1.1
Page 6
The information in this information applies to your desktop or notebook personal computer. If you safely use your product. Conditions that provides power to the system clock even when the computer is unplugged, so the battery safety information applies to misuse or neglect. Follow and ...this document and provided with your product, you can help protect yourself from hazards and create a safer computer work environment. Note: This information includes references to "Lenovo Limited Warranty." In addition to be used again until it has been inspected and, if necessary, ...
Lenovo 3000 C300 Safety and Warranty Guide(AIO) V1.1
Page 7
... using the product and unplug it repaired, if necessary. These conditions might notice an odor or see a puff of smoke or sparks vent from your computer and its components for damage, wear, or signs of a component, do not take risks or attempt to inspect the product and have any way. •... of the following conditions, or if you have any electronic device, pay close attention to the product when it is not manufactured for or by Lenovo, stop using that product until you might indicate a potential safety issue.
Lenovo 3000 C300 Safety and Warranty Guide(AIO) V1.1
Page 8
... contact the Customer Support Center. Safety and warranty guide (AIO) 3 31037314B_SWG(AIO)_EN_V1.1.indd 3 2009.4.13 2:55:10 PM Lenovo provides documentation with an ac power cord, always make sure that the power is appropriate for customer installation are zero. Attention Before ...indicator does not necessarily mean that the product is approved to install options or replace CRUs. Danger Hazardous moving parts in your computer after the power cord has been disconnected, the following precautions to as options. Although there are required for your particular product....