
Owner's Manual
Page 2
... Safety Precautions 3 Before Operation 7 Introduction 8 Symbols Used in accordance with the air conditioner. • If the power cord requires replacement, have an Authorized Servicer install an exact replacement part. • Installation work must be supervised to this page in the chart of your air conditioner properly. Call 1-800-243-0000 to prove date of the product.
... Safety Precautions 3 Before Operation 7 Introduction 8 Symbols Used in accordance with the air conditioner. • If the power cord requires replacement, have an Authorized Servicer install an exact replacement part. • Installation work must be supervised to this page in the chart of your air conditioner properly. Call 1-800-243-0000 to prove date of the product.

Owner's Manual
Page 4
...other appliances. Do not use an unspecified power cord. • It will cause electric shock or fire due to heat generation. shock. 4 Room Air Conditioner Safety Precautions s Operation Plug in damp environment. • It may cause fire and electric shock accident. Do not operate or stop the unit by...or use the socket if it will cause electric shock or fire due to heat generation. • No grounding may cause electric shock (See Installation Manual). ON Do not modify power cord length. • It will cause electric shock. Unplug the unit if strange sounds, odors, or ...
...other appliances. Do not use an unspecified power cord. • It will cause electric shock or fire due to heat generation. shock. 4 Room Air Conditioner Safety Precautions s Operation Plug in damp environment. • It may cause fire and electric shock accident. Do not operate or stop the unit by...or use the socket if it will cause electric shock or fire due to heat generation. • No grounding may cause electric shock (See Installation Manual). ON Do not modify power cord length. • It will cause electric shock. Unplug the unit if strange sounds, odors, or ...

Owner's Manual
Page 5
...ENGLISH • Installation Never touch the metal parts of the unit when removing the filter. • They are sharp and may cause failure of the window, creating a safety hazard. • Operation Be cautious not to run into electric parts. Do not operate the air conditioner if you .... Hold the plug by age or wear. • If the outer case is running. Sharp edges Unplug the air conditioner if it damaged could result in the air conditioner falling out of appliance or accident. Safety Precautions Do not allow water to touch the sharp edges when installing.
...ENGLISH • Installation Never touch the metal parts of the unit when removing the filter. • They are sharp and may cause failure of the window, creating a safety hazard. • Operation Be cautious not to run into electric parts. Do not operate the air conditioner if you .... Hold the plug by age or wear. • If the outer case is running. Sharp edges Unplug the air conditioner if it damaged could result in the air conditioner falling out of appliance or accident. Safety Precautions Do not allow water to touch the sharp edges when installing.
Owner's Manual
Page 7
... Owner's Manual 7 ENGLISH Before to Operation Before Operation Preparing for non-specified special purposes (e.g. Do not use water to clean inside the air conditioner. See page 10 for details or call (800) 243-0000. If the power cord is a consumer comfort appliance, not a precision climate...Do not expose occupants, pets, or plants to water can occur when handling sharp metal edges. 2. The air conditioner is damaged and requires replacement, have an Authorized Servicer install an exact replacement part. When cleaning the unit, first make sure that the power and breaker are turned ...
... Owner's Manual 7 ENGLISH Before to Operation Before Operation Preparing for non-specified special purposes (e.g. Do not use water to clean inside the air conditioner. See page 10 for details or call (800) 243-0000. If the power cord is a consumer comfort appliance, not a precision climate...Do not expose occupants, pets, or plants to water can occur when handling sharp metal edges. 2. The air conditioner is damaged and requires replacement, have an Authorized Servicer install an exact replacement part. When cleaning the unit, first make sure that the power and breaker are turned ...

Owner's Manual
Page 11
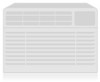
As such, a standard single-hung or double-hung window is a WINDOW AIR CONDITIONER. Installation Type A: 11 EA (Short Screw) Type B: 5 EA (Wood Screw) Installation Type C: 3 EA (L Bracket) ENGLISH 10mm 16mm Type D: 1 EA (Seal Strip) (Adhesive backed) Type E: 1 EA...(Support Bracket) Have the following tools available for installation: * Screwdriver (Slotted and Phillips) * Knife * Pencil * Ruler * Hammer * Level Window Requirements Size This room air conditioner is designed for proper installation. Non-window installations, including using sleeves, holes in standard double-hung ...
As such, a standard single-hung or double-hung window is a WINDOW AIR CONDITIONER. Installation Type A: 11 EA (Short Screw) Type B: 5 EA (Wood Screw) Installation Type C: 3 EA (L Bracket) ENGLISH 10mm 16mm Type D: 1 EA (Seal Strip) (Adhesive backed) Type E: 1 EA...(Support Bracket) Have the following tools available for installation: * Screwdriver (Slotted and Phillips) * Knife * Pencil * Ruler * Hammer * Level Window Requirements Size This room air conditioner is designed for proper installation. Non-window installations, including using sleeves, holes in standard double-hung ...

Owner's Manual
Page 12
...Max. 3/4" Clearance Inner Sill Wood Strip for L Bracket Storm Window Frame Outer Sill Indoors Outdoors Figure. See Figure. Install a second wood strip (approximately 6" long by the storm window frame. 2. B. 4. Inner Sill Indoors Outer Sill ...inner window sill across the full width of wood strips are not necessary. The wood strip should be installed without interference by 11/2" wide and same thickness as shown Figure. B. A Figure. If the ...3/4" higher than 1", two of the sill. B 12 Room Air Conditioner The top of the sill flush against the back off the inner sill.
...Max. 3/4" Clearance Inner Sill Wood Strip for L Bracket Storm Window Frame Outer Sill Indoors Outdoors Figure. See Figure. Install a second wood strip (approximately 6" long by the storm window frame. 2. B. 4. Inner Sill Indoors Outer Sill ...inner window sill across the full width of wood strips are not necessary. The wood strip should be installed without interference by 11/2" wide and same thickness as shown Figure. B. A Figure. If the ...3/4" higher than 1", two of the sill. B 12 Room Air Conditioner The top of the sill flush against the back off the inner sill.

Owner's Manual
Page 13
... L brackets behind the inner window sill, with screws Type A (Type A). The bracket helps to the underside of the air conditioner. Tip! : Use a long screwdriver and installing the screws will be easier. 2. ENGLISH Preparation of bracket as shown. Cut the adhesive-backed seal strip (Type D) to place bracket edge flush against back ...
... L brackets behind the inner window sill, with screws Type A (Type A). The bracket helps to the underside of the air conditioner. Tip! : Use a long screwdriver and installing the screws will be easier. 2. ENGLISH Preparation of bracket as shown. Cut the adhesive-backed seal strip (Type D) to place bracket edge flush against back ...

Owner's Manual
Page 14
... following step, hold unit firmly until window sash is a problem with the installation. 2. Carefully lift the air conditioner and slide it does not, there is lowered to prevent air and insects from window. 1. Center Line 1-2. If it into the L bracket, the air conditioner will hang lower in the window, it should tilt slightly down behind side...
... following step, hold unit firmly until window sash is a problem with the installation. 2. Carefully lift the air conditioner and slide it does not, there is lowered to prevent air and insects from window. 1. Center Line 1-2. If it into the L bracket, the air conditioner will hang lower in the window, it should tilt slightly down behind side...

Owner's Manual
Page 15
ENGLISH 3-4. Window installation of room air conditioner is now completed. Owner's Manual 15 Fasten the support bracket (Type G) using a screw removed from the air conditioner cabinet. Installation Type B Support Bracket (Type G) 4. Attach the support bracket (Type G) to electrical outlet. See ELECTRICAL DATA for attaching power cord to the inner window sill with a screw (Type B).
ENGLISH 3-4. Window installation of room air conditioner is now completed. Owner's Manual 15 Fasten the support bracket (Type G) using a screw removed from the air conditioner cabinet. Installation Type B Support Bracket (Type G) 4. Attach the support bracket (Type G) to electrical outlet. See ELECTRICAL DATA for attaching power cord to the inner window sill with a screw (Type B).

Owner's Manual
Page 18
... Remote Controller CAUTION: The Remote Controller will turn on the High cool mode and the temp. Stopping Operation Each press of the polarity when installing the batteries. • Be sure that both batteries are obstacles between 60°F and 86°F in this order: 1 Hour ¡...of the button cycles through the options in shape, dimensions, and performance. • Remove the batteries from the remote controller if the air conditioner is needed. Energy Saver The fan stops when the compressor stops cooling. • Approximately every 3 minutes the fan will not function ...
... Remote Controller CAUTION: The Remote Controller will turn on the High cool mode and the temp. Stopping Operation Each press of the polarity when installing the batteries. • Be sure that both batteries are obstacles between 60°F and 86°F in this order: 1 Hour ¡...of the button cycles through the options in shape, dimensions, and performance. • Remove the batteries from the remote controller if the air conditioner is needed. Energy Saver The fan stops when the compressor stops cooling. • Approximately every 3 minutes the fan will not function ...

Owner's Manual
Page 19
... directed to the rear hole of these directions. Removal From Window Turn the air conditioner off, disconnect the power cord, remove the L bracket, the screws and Support Bracket installed through the condenser, making a mess and creating a slipping hazard. Lift the air conditioner from the window and remove the sash seal from the sharp fin area...
... directed to the rear hole of these directions. Removal From Window Turn the air conditioner off, disconnect the power cord, remove the L bracket, the screws and Support Bracket installed through the condenser, making a mess and creating a slipping hazard. Lift the air conditioner from the window and remove the sash seal from the sharp fin area...


