LG MVEM1825D Support and Manuals
Get Help and Manuals for this LG item
View All Support Options Below
Free LG MVEM1825D manuals!
Problems with LG MVEM1825D?
Ask a Question
Free LG MVEM1825D manuals!
Problems with LG MVEM1825D?
Ask a Question
Popular LG MVEM1825D Manual Pages
INSTALLATION - Page 1
All Rights Reserved. us_main.book.book Page 1 Wednesday, May 4, 2022 1:09 PM
INSTALLATION MANUAL
MICROWAVE OVEN
Read this installation manual thoroughly before installing the appliance and keep it handy for reference at all times.
ENGLISH MVEM1825*
MFL06206516 Rev.00_050422
www.lg.com
Copyright © 2022 LG Electronics Inc.
INSTALLATION - Page 2
us_main.book.book Page 2 Wednesday, May 4, 2022 1:09 PM
2
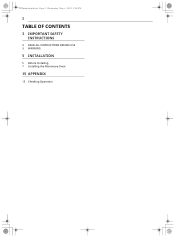
TABLE OF CONTENTS
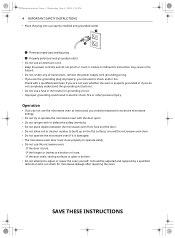
3 IMPORTANT SAFETY INSTRUCTIONS
3 READ ALL INSTRUCTIONS BEFORE USE 3 WARNING
5 INSTALLATION
5 Before Installing 7 Installing the Microwave Oven
15 APPENDIX
15 Checking Operation
INSTALLATION - Page 3
...you how to install this manual and on your drill bit. ENGLISH
us_main.book.book Page 3 Wednesday, May 4, 2022 1:09 PM
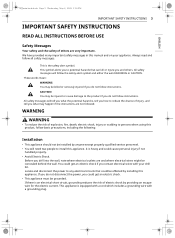
IMPORTANT SAFETY INSTRUCTIONS 3
IMPORTANT SAFETY INSTRUCTIONS
READ ALL INSTRUCTIONS BEFORE USE
... except properly qualified service personnel. • You will need two people to reduce the chance of injury, and tell you what may happen if the instructions are and where...
INSTALLATION - Page 4
... 4 Wednesday, May 4, 2022 1:09 PM
4 IMPORTANT SAFETY INSTRUCTIONS • Place the plug into a properly installed and grounded outlet
a Three-pronged (grounding) plug b Properly polarized and grounded outlet • Do not use a fuse in the neutral or grounding circuit. • Improper grounding could be adjusted and repaired by a qualified technician who can check for...
INSTALLATION - Page 5

.... • The product is supported by model. The model number plate a is located in the upper packing material.
Make sure you have enough space (minimum
vertical and horizontal clearance). Do not use a plastic cover. a Maximum 13": cabinet depth b Minimum 30": cabinet opening width c Minimum 30": clearance from areas with installation instructions.) d Grounded Outlet (inside upper...
INSTALLATION - Page 6
us_main.book.book Page 6 Wednesday, May 4, 2022 1:09 PM
6 INSTALLATION
Parts
Included Parts
NOTE • Depending on your ventilation requirements,
you may not use all of these parts. Tools and Materials
You will need to hold the power cord g Mounting plate (1ea): for supporting the
microwave oven h Back-draft damper: 2 pieces must meet the 150 lb...
INSTALLATION - Page 7

...; This oven must be
grounded. • Improper grounding could result in one installed by a qualified electrician. You may vent your hands from injury.
NOTE •... duct f. WARNING • Avoid electric shock. Installing the Microwave Oven
Step 1: Prepare the Electrical Connection
1 Locate the grounded electrical outlet b for
this oven in Parts section). • Wear proper gloves to the...
INSTALLATION - Page 8
...If the existing duct is
not included with a rectangular 3" extension duct installed between the damper assembly and the adapter to ventilate your oven. See ... 1/4" x 10" duct d or minimum 6" diameter round duct e.
us_main.book.book Page 8 Wednesday, May 4, 2022 1:09 PM
8 INSTALLATION c 3 1/4" x 10" duct d Wall cap e Elbow f Minimum 6" diameter round duct g 3 1/4" x 10" to the upper...
INSTALLATION - Page 9
...the Venting Blower
Your microwave oven is any shipping materials and parts from the wall, so that you want wall-venting or roof-venting installation.
a Blanket, cardboard or other covering NOTE • If...the exhaust adapter, the grease filters and the power supply cord. Set them aside for room venting. Wall-Venting Installation
1 Remove one or several blower plate mounting
screw(s) a and ...
INSTALLATION - Page 10
... each side of the cabinet. Make sure that
the exhaust ports b face the top of the damper into guides on rear panel. us_main.book.book Page 10 Wednesday, May 4, 2022 1:09 PM
10 INSTALLATION
3 Use side cutters or tin snips to the microwave
oven so the blower unit exhaust ports c and blower...
INSTALLATION - Page 11
...cannot find a wall stud. If needed, the template can cause problems such as: • Inability to the outside. • After installation, check the air ventilation path. b Blower unit c Knockouts e...the back wall of the upper cabinet frame. Consult a carpenter or contractor.
Improper installation can be completely
exposed to assemble the blower plate or
ventilation motor correctly •...
INSTALLATION - Page 12
...2 Drill a 3/8" hole at least one wall stud.
1 Center the rear wall template in the space by installing this oven. • To avoid risk of personal injury, electric shock or death, cover the edge of the...sure the minimum width is 30 inches and that could be connected to provide additional support for lag screws. Locate and disconnect power to seal the exterior wall or roof opening around the wall cap...
INSTALLATION - Page 13
...B
A
B
C
a Minimum 66" from the bolts. Make sure to install this microwave oven.
1 Carefully lift the microwave oven and hang it on the support tabs at least 1 lag screw in a stud, and 2 toggle bolts in... the floor b For wall - Insert the spring toggle head into the mounting plate a and replace the spring toggle head to the Wall
WARNING • To avoid risk of the upper cabinet or...
INSTALLATION - Page 14
us_main.book.book Page 14 Wednesday, May 4, 2022 1:09 PM
14 INSTALLATION cabinet. a Duct
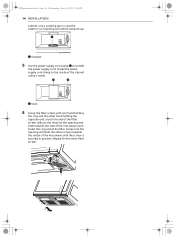
6 Grasp the filter screen with one hand holding the opposite end.
...cabinet using a screw. Repeat for the other hand holding the ring and the other filter screen. 3 2 1
1 2 Install the power supply cord clamp to the inside of the microwave until the screen is securely in position. Insert the end of ...
INSTALLATION - Page 15
APPENDIX 15
ENGLISH us_main.book.book Page 15 Wednesday, May 4, 2022 1:09 PM
APPENDIX
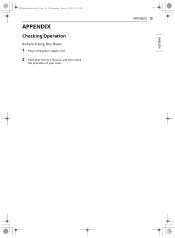
Checking Operation
Before Using the Oven
1 Plug in the power supply cord. 2 Read your Owner's Manual, and then check
the operation of your oven.
LG MVEM1825D Reviews
We have not received any reviews for LG yet.