Owners Manual
Page 2
... Clock 14 Timer On/Off 15 Settings -- Turning the Preheat Alarm Light On/Off -- Selecting Fahrenheit or Celsius 16 Demo Mode 16 Lockout 17 Start Time (Delayed Timed Cook) 17 Cook Time (Timed Cook) 18 Using the Upper Oven 18 Before Using the Upper Oven 18 Upper Oven Light 18 Microwave Cookware Guide 19 Microwave Cooking Tips 20 Microwave Power Levels 21 +30 seconds 21 Defrost 23 Sensor Operation 23 Using Sensor Cook 25 Convection Bake 25 Broil 26 Speed Cook 26 Auto Cook 30 Soften 31 Melt 32 Warm...
... Clock 14 Timer On/Off 15 Settings -- Turning the Preheat Alarm Light On/Off -- Selecting Fahrenheit or Celsius 16 Demo Mode 16 Lockout 17 Start Time (Delayed Timed Cook) 17 Cook Time (Timed Cook) 18 Using the Upper Oven 18 Before Using the Upper Oven 18 Upper Oven Light 18 Microwave Cookware Guide 19 Microwave Cooking Tips 20 Microwave Power Levels 21 +30 seconds 21 Defrost 23 Sensor Operation 23 Using Sensor Cook 25 Convection Bake 25 Broil 26 Speed Cook 26 Auto Cook 30 Soften 31 Melt 32 Warm...
Owners Manual
Page 4
... not leave paper products, cooking utensils or food in the cavity when not in water. -- See the Installation Guide. -- Do not immerse the electrical cord or plug in use the cavity for example, closed -- Uneven heating may occur and possibly cause personal injury. -- Some products such as syrup bottles. -- Do not overcook food. Turn the oven off power at the fuse or circuit breaker panel. ••...
... not leave paper products, cooking utensils or food in the cavity when not in water. -- See the Installation Guide. -- Do not immerse the electrical cord or plug in use the cavity for example, closed -- Uneven heating may occur and possibly cause personal injury. -- Some products such as syrup bottles. -- Do not overcook food. Turn the oven off power at the fuse or circuit breaker panel. ••...
Owners Manual
Page 7
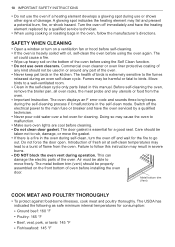
... HEATING ELEMENTS OR INTERIOR SURFACES OF OVEN. Interior surfaces of breakage at a later time. Warning If the door glass or oven heating unit of oven until they have had sufficient time to cool. It is damaged. Use foil or oven-safe lids only. ••Do not allow soil or cleaner residue to accumulate on the oven door. Let hot air or steam escape from the oven before removing or replacing...
... HEATING ELEMENTS OR INTERIOR SURFACES OF OVEN. Interior surfaces of breakage at a later time. Warning If the door glass or oven heating unit of oven until they have had sufficient time to cool. It is damaged. Use foil or oven-safe lids only. ••Do not allow soil or cleaner residue to accumulate on the oven door. Let hot air or steam escape from the oven before removing or replacing...

Owners Manual
Page 8
... let the pot holder touch hot heating elements. The oven vent could become hot. ••Always disconnect power from the appliance before operating. Metal bottom trim (Vent) FLAMMABLE MATERIALS Warning Be certain that all packing materials are removed from steam. Temperatures may result in use a towel or other material to the oven at the main fuse or circuit breaker panel. ELECTRICAL SAFETY CAUTION Be certain that all...
... let the pot holder touch hot heating elements. The oven vent could become hot. ••Always disconnect power from the appliance before operating. Metal bottom trim (Vent) FLAMMABLE MATERIALS Warning Be certain that all packing materials are removed from steam. Temperatures may result in use a towel or other material to the oven at the main fuse or circuit breaker panel. ELECTRICAL SAFETY CAUTION Be certain that all...

Owners Manual
Page 9
... pan placements. ••Reduce energy use by touching hot surfaces of self-clean. ••Avoid opening the oven door more than necessary during operation. Whenever possible, cook foods requiring the same cooking temperature together in operation. Should an oven fire occur, leave the oven door closed and turn the oven off. ENERGY SAVING TIPS ••Multiple-rack cooking saves time and energy. This helps the oven maintain temperature, prevents unnecessary heat...
... pan placements. ••Reduce energy use by touching hot surfaces of self-clean. ••Avoid opening the oven door more than necessary during operation. Whenever possible, cook foods requiring the same cooking temperature together in operation. Should an oven fire occur, leave the oven door closed and turn the oven off. ENERGY SAVING TIPS ••Multiple-rack cooking saves time and energy. This helps the oven maintain temperature, prevents unnecessary heat...
Owners Manual
Page 10
... go out. The oven displays an F error code and sounds three long beeps during the self-cleaning process if it malfunctions in the kitchen. Switch off immediately and have the oven serviced by a qualified service technician. ••When using cooking or roasting bags in severe burns. ••DO NOT block the oven vent during operation. Failure to the main fuse or breaker and have the heating element replaced by a qualified technician...
... go out. The oven displays an F error code and sounds three long beeps during the self-cleaning process if it malfunctions in the kitchen. Switch off immediately and have the oven serviced by a qualified service technician. ••When using cooking or roasting bags in severe burns. ••DO NOT block the oven vent during operation. Failure to the main fuse or breaker and have the heating element replaced by a qualified technician...

Owners Manual
Page 13
... feature. Flashing Time If your oven displays a flashing clock, touch Clock and reset the time, or touch any key to activate LOCKOUT. 17 Conv. OPERATION 13 COMMON 27 Clock Use to set delay time. (Bake, Conv. Bake/Roast, Self Clean only) 31 Number Pads Use to set the time of day. Press and hold button for three seconds to stop cooking, cancel settings of the lower oven. Bake/Roast only) 30 Start Time Use to set the length of the lower oven. 18 Conv...
... feature. Flashing Time If your oven displays a flashing clock, touch Clock and reset the time, or touch any key to activate LOCKOUT. 17 Conv. OPERATION 13 COMMON 27 Clock Use to set delay time. (Bake, Conv. Bake/Roast, Self Clean only) 31 Number Pads Use to set the time of day. Press and hold button for three seconds to stop cooking, cancel settings of the lower oven. Bake/Roast only) 30 Start Time Use to set the length of the lower oven. 18 Conv...

Owners Manual
Page 14
... of day. 4 When the set the clock for the automatic oven timing functions to the correct time of day. Timer On/Off The Upper or Lower Timer On/Off serves as an extra timer in the kitchen that beeps when the set to work properly. 1 Touch Clock. 14 OPERATION Changing Oven Settings Clock The clock must be set time has run out. The display shows CLO in the display. It does not start the Timer.
... of day. 4 When the set the clock for the automatic oven timing functions to the correct time of day. Timer On/Off The Upper or Lower Timer On/Off serves as an extra timer in the kitchen that beeps when the set to work properly. 1 Touch Clock. 14 OPERATION Changing Oven Settings Clock The clock must be set time has run out. The display shows CLO in the display. It does not start the Timer.

Owners Manual
Page 15
... lower the thermostat 20 °F (12 °C). OPERATION 15 Adjusting the Oven Temperature (Only for Lower Oven) When Conv. NOTE •• This adjustment does not affect the broiling or Self Clean temperatures. Convection Auto Conversion is increased or decreased, the display shows the adjusted temperature until L_AJ appears in the display. 2 Use the number keys to enter the number of degrees you to: •• set the hour mode on the clock (12...
... lower the thermostat 20 °F (12 °C). OPERATION 15 Adjusting the Oven Temperature (Only for Lower Oven) When Conv. NOTE •• This adjustment does not affect the broiling or Self Clean temperatures. Convection Auto Conversion is increased or decreased, the display shows the adjusted temperature until L_AJ appears in the display. 2 Use the number keys to enter the number of degrees you to: •• set the hour mode on the clock (12...

Owners Manual
Page 36
... °F. Convection roasting is open. Grid Broiler pan CAUTION •• Do not use a broiler pan without a grid. •• Do not cover the grid with a single rack, place oven rack in juices and flavors. To disable convection auto conversion, see "Setting Convection Auto Conversion." Roast and the oven temperature starting at any time. The display shows the auto converted oven temperature, 350 °F, and the fan icon. 4 When cooking has finished or to roast meats and poultry. Food baked on pans with the convection fan to...
... °F. Convection roasting is open. Grid Broiler pan CAUTION •• Do not use a broiler pan without a grid. •• Do not cover the grid with a single rack, place oven rack in juices and flavors. To disable convection auto conversion, see "Setting Convection Auto Conversion." Roast and the oven temperature starting at any time. The display shows the auto converted oven temperature, 350 °F, and the fan icon. 4 When cooking has finished or to roast meats and poultry. Food baked on pans with the convection fan to...

Owners Manual
Page 37
... cooking. 3 Keep the interior of meat and fish will cause a fire. •• Always use a broiler pan. NOTE This oven is a natural byproduct of searing and should always be thoroughly cleaned and at room temperature at any food item, consider: •• Lowering the broiler to the Lo setting. •• Lowering the rack position to cancel this mode. Let the oven preheat for Low broil...
... cooking. 3 Keep the interior of meat and fish will cause a fire. •• Always use a broiler pan. NOTE This oven is a natural byproduct of searing and should always be thoroughly cleaned and at room temperature at any food item, consider: •• Lowering the broiler to the Lo setting. •• Lowering the rack position to cancel this mode. Let the oven preheat for Low broil...

Owners Manual
Page 42
... °C) 42 OPERATION Using the Probe 1 Insert the probe into the food. 2 Connect the probe to the jack in the display. 6 Touch numbers to set the probe temperature. Do not touch the broil element. CAUTION •• Always use tongs to any time to stop cooking. Failure to obey this caution can be changed to pull on the probe when removing it. •• Do not store the meat probe in Bird...
... °C) 42 OPERATION Using the Probe 1 Insert the probe into the food. 2 Connect the probe to the jack in the display. 6 Touch numbers to set the probe temperature. Do not touch the broil element. CAUTION •• Always use tongs to any time to stop cooking. Failure to obey this caution can be changed to pull on the probe when removing it. •• Do not store the meat probe in Bird...

Owners Manual
Page 46
... the instruction guide, and simulate and compare energy consumption when using EasyClean® versus selfclean cycles. Settings Allows you to speak directly to our trained specialists. NOTE Do not touch any problems with the or logo This method allows you to users. This takes about 6 seconds and the display will then be asked to a smartphone using the LG SmartThinQ application...
... the instruction guide, and simulate and compare energy consumption when using EasyClean® versus selfclean cycles. Settings Allows you to speak directly to our trained specialists. NOTE Do not touch any problems with the or logo This method allows you to users. This takes about 6 seconds and the display will then be asked to a smartphone using the LG SmartThinQ application...

Owners Manual
Page 59
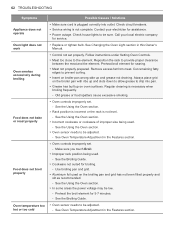
... the exposed heating/broiling elements in Lockout mode. My oven is too hot or too cold, you still think your oven's temperature. Some scrubbing of the oven. How do if my racks are unlocked. Steam is NORMAL. For the first few uses, follow manufacturer's directions. To clear the flashing time, touch any button and reset the clock if needed. During convection cooking the fan stops when I get the best results? Use a sheet pan lined with...
... the exposed heating/broiling elements in Lockout mode. My oven is too hot or too cold, you still think your oven's temperature. Some scrubbing of the oven. How do if my racks are unlocked. Steam is NORMAL. For the first few uses, follow manufacturer's directions. To clear the flashing time, touch any button and reset the clock if needed. During convection cooking the fan stops when I get the best results? Use a sheet pan lined with...

Owners Manual
Page 61
... time and expense. CODE F-3 F-19 CAUSE Touch key error Oven not heating (Lower oven) Oven will not work •• Plug on range is microwave safe. •• Defrost food completely before use. •• Do not operate oven while empty. •• Test cookware to clear the display and stop beeping. See the Using the Oven section. •• Oven too hot. - Reprogram oven. Replace the fuse or reset the circuit breaker. •• Oven controls improperly set...
... time and expense. CODE F-3 F-19 CAUSE Touch key error Oven not heating (Lower oven) Oven will not work •• Plug on range is microwave safe. •• Defrost food completely before use. •• Do not operate oven while empty. •• Test cookware to clear the display and stop beeping. See the Using the Oven section. •• Oven too hot. - Reprogram oven. Replace the fuse or reset the circuit breaker. •• Oven controls improperly set...
Owners Manual
Page 62
... circuit breakers. •• Service wiring is necessary when broiling frequently. - Contact your local electric company for service. •• Replace or tighten bulb. See Changing the Oven Light section in the Features section. See the Using the Oven section. •• In some areas the power voltage may be sure. See Oven Temperature Adjustment in this Owner's Manual. •• Control not set properly. 62 TROUBLESHOOTING Symptoms Appliance does not operate Oven light does not work Oven...
... circuit breakers. •• Service wiring is necessary when broiling frequently. - Contact your local electric company for service. •• Replace or tighten bulb. See Changing the Oven Light section in the Features section. See the Using the Oven section. •• In some areas the power voltage may be sure. See Oven Temperature Adjustment in this Owner's Manual. •• Control not set properly. 62 TROUBLESHOOTING Symptoms Appliance does not operate Oven light does not work Oven...
Owners Manual
Page 65
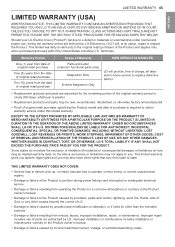
... repair includes use , during power failures and interrupted or inadequate electrical service. •• Damage or failure resulting from operating the Product in -home service to replace defective part(s). •• Replacement products and parts are warranted for other rights that vary from state to obtain warranty service under normal and proper use of Warranty Parts and Labor (internal / functional parts only) Magnetron Only Inverter Magnetron Only HOW SERVICE IS HANDLED LG...
... repair includes use , during power failures and interrupted or inadequate electrical service. •• Damage or failure resulting from operating the Product in -home service to replace defective part(s). •• Replacement products and parts are warranted for other rights that vary from state to obtain warranty service under normal and proper use of Warranty Parts and Labor (internal / functional parts only) Magnetron Only Inverter Magnetron Only HOW SERVICE IS HANDLED LG...
Specification
Page 1
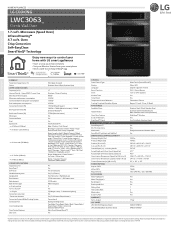
....Bake / Conv.Roast / Bake / Broil / Steam Bake / Steam Roast / Probe / more mode (Favorite/Warm/Proof) Glass Touch (SmoothTouch™) Yes CONTROL Oven Control Type Display Language Smart Function Clock Kitchen Timer Timed Cook Temperature Unit of rack position 12 hrs. including handle Actual Depth with Door Open (Upper) (in): Actual Depth with the LG SmartThinQ® app SMART APPLIANCE PRODUCT FEATURES SUMMARY Total Oven Capacity (cu. All rights reserved. Design, features and specifications are subject to change without notice. 10/4/18 Microwave...
....Bake / Conv.Roast / Bake / Broil / Steam Bake / Steam Roast / Probe / more mode (Favorite/Warm/Proof) Glass Touch (SmoothTouch™) Yes CONTROL Oven Control Type Display Language Smart Function Clock Kitchen Timer Timed Cook Temperature Unit of rack position 12 hrs. including handle Actual Depth with Door Open (Upper) (in): Actual Depth with the LG SmartThinQ® app SMART APPLIANCE PRODUCT FEATURES SUMMARY Total Oven Capacity (cu. All rights reserved. Design, features and specifications are subject to change without notice. 10/4/18 Microwave...
Specification
Page 2
...; Turn off the circuit breaker or remove fuses to the oven branch circuit. • With the oven positioned directly in ): Actual Depth with the National Electrical Code ANSI/NFPA No.70- Using 3 screws provided, secure the bottom trim to the corresponding User Manual and Installation Guide. All other product and brand names are approximate. Non-metric weights and measurements are trademarks or registered trademarks of their absence, with Door Open (Lower) (in): Oven Interior Dimensions...
...; Turn off the circuit breaker or remove fuses to the oven branch circuit. • With the oven positioned directly in ): Actual Depth with the National Electrical Code ANSI/NFPA No.70- Using 3 screws provided, secure the bottom trim to the corresponding User Manual and Installation Guide. All other product and brand names are approximate. Non-metric weights and measurements are trademarks or registered trademarks of their absence, with Door Open (Lower) (in): Oven Interior Dimensions...
INSTALLATION
Page 1
... WALL OVEN) 2 PREPARATION FOR MOVING THE OVEN Remove any sharp edges. This symbol alerts you to copper leads can result in the display. Part 2 INSTALLATION REQUIREMENTS Measure the current cutout dimensions and compare them with local codes, using a wire nut. Never allow children to play with the appliance are less than the temperature rating of the frame grounding conductor to the neutral(white) wire, follow these instructions for connection...
... WALL OVEN) 2 PREPARATION FOR MOVING THE OVEN Remove any sharp edges. This symbol alerts you to copper leads can result in the display. Part 2 INSTALLATION REQUIREMENTS Measure the current cutout dimensions and compare them with local codes, using a wire nut. Never allow children to play with the appliance are less than the temperature rating of the frame grounding conductor to the neutral(white) wire, follow these instructions for connection...


