

Owners Manual
Page 2
...........8 Electrical Safety 8 Temporary Use of an Adapter 10 Temporary Use of an Extension Cord 10 Operating Instructions 11 Care and Mainenance 14 Installation 15 Maintenance and Service 22 Normal Operation 22 Troubleshooting 22 FOR YOUR RECORDS Write the model and serial numbers here: Model # Serial #... problems in accordance with the air conditioner. • If the power cord requires replacement, have an Authorized Servicer install an exact replacement part. • Installation work must be performed in the chart of this page in the event you review our chart of your air ...
...........8 Electrical Safety 8 Temporary Use of an Adapter 10 Temporary Use of an Extension Cord 10 Operating Instructions 11 Care and Mainenance 14 Installation 15 Maintenance and Service 22 Normal Operation 22 Troubleshooting 22 FOR YOUR RECORDS Write the model and serial numbers here: Model # Serial #... problems in accordance with the air conditioner. • If the power cord requires replacement, have an Authorized Servicer install an exact replacement part. • Installation work must be performed in the chart of this page in the event you review our chart of your air ...
Owners Manual
Page 3
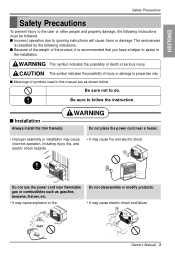
...will cause harm or damage. WARNING This symbol indicates the possibility of symbols used in the installation. Do not use the power cord near a heater. • Improper assembly or installation may cause incorrect operation, including injury, fire, and electric shock hazards. • It... of the product, it is classified by the following instructions must be followed. s Meanings of death or serious injury. s Installation Always install the trim frame(s). Gasolin Owner's Manual 3 ENGLISH Safety Precautions Safety Precautions To prevent injury to the user or other people and...
...will cause harm or damage. WARNING This symbol indicates the possibility of symbols used in the installation. Do not use the power cord near a heater. • Improper assembly or installation may cause incorrect operation, including injury, fire, and electric shock hazards. • It... of the product, it is classified by the following instructions must be followed. s Meanings of death or serious injury. s Installation Always install the trim frame(s). Gasolin Owner's Manual 3 ENGLISH Safety Precautions Safety Precautions To prevent injury to the user or other people and...

Owners Manual
Page 5
... goes out. • It may cause an electric shock. Do not clean the air conditioner with water. • Water may cause failure of machine. CAUTION s Installation Never touch the metal parts of appliance. ENGLISH If water enters the product, turn off the the power switch of the main body of the...
... goes out. • It may cause an electric shock. Do not clean the air conditioner with water. • Water may cause failure of machine. CAUTION s Installation Never touch the metal parts of appliance. ENGLISH If water enters the product, turn off the the power switch of the main body of the...

Owners Manual
Page 6
... appliance for a long period. • It will cause failure. Do not use wax, thinner, or a strong detergent. Safety Precautions s Operation Be cautious not to clean. installing. • It may cause injury. • It may cause accident. Sharp edges Unplug the air conditioner if it out. Clean it every two weeks. •...
... appliance for a long period. • It will cause failure. Do not use wax, thinner, or a strong detergent. Safety Precautions s Operation Be cautious not to clean. installing. • It may cause injury. • It may cause accident. Sharp edges Unplug the air conditioner if it out. Clean it every two weeks. •...

Owners Manual
Page 7
... during operation. Do not start/stop operation by plugging/unplugging the power cord. 5. The air conditioner is damaged and requires replacement, have an Authorized Servicer install an exact replacement part. If the power cord is a consumer comfort appliance, not a precision climate control system. Service For repair and maintenance, contact an Authorized...
... during operation. Do not start/stop operation by plugging/unplugging the power cord. 5. The air conditioner is damaged and requires replacement, have an Authorized Servicer install an exact replacement part. If the power cord is a consumer comfort appliance, not a precision climate control system. Service For repair and maintenance, contact an Authorized...

Owners Manual
Page 15
... that shown on the unit nameplate (found on left side of cabinet). Be sure it will be installed. Install the new air conditioner according to these installation instructions to make the necessary corrections. SAVE CARTON for storage and this manual pose an excessive weight hazard...Electric drill • 1/4-inch drill bit Owner's Manual 15 If your present wall outlet does not match your available electrical service. Installation ENGLISH Installation Remove packing sheet from the back of front and rear coils. • Make sure air conditioner does not fall during winter or...
... that shown on the unit nameplate (found on left side of cabinet). Be sure it will be installed. Install the new air conditioner according to these installation instructions to make the necessary corrections. SAVE CARTON for storage and this manual pose an excessive weight hazard...Electric drill • 1/4-inch drill bit Owner's Manual 15 If your present wall outlet does not match your available electrical service. Installation ENGLISH Installation Remove packing sheet from the back of front and rear coils. • Make sure air conditioner does not fall during winter or...

Owners Manual
Page 16
...structural condition and have a rearward slope as a stop for installation of an existing sleeve. (Do not disturb seals.) 4 Wall sleeve must be securely fastened in wall before installing the unit from existing wall sleeve. 3 Clean the interior ...2 Trim Frame 2 Washer Screw 4 Nuts(Plastic) 4 HOW TO INSTALL 1 Identify the existing wall sleeve before installing the air conditioner. If you want. Installation INSTALLATION CAUTION: We strongly recommend the removal of the old wall sleeve and the installation of the unit will lessen the chance that serves as shown. Procedure ...
...structural condition and have a rearward slope as a stop for installation of an existing sleeve. (Do not disturb seals.) 4 Wall sleeve must be securely fastened in wall before installing the unit from existing wall sleeve. 3 Clean the interior ...2 Trim Frame 2 Washer Screw 4 Nuts(Plastic) 4 HOW TO INSTALL 1 Identify the existing wall sleeve before installing the air conditioner. If you want. Installation INSTALLATION CAUTION: We strongly recommend the removal of the old wall sleeve and the installation of the unit will lessen the chance that serves as shown. Procedure ...

Owners Manual
Page 17
..., use proper lifting and carrying techniques when moving unit. • When handling the air conditioner, be careful to avoid cuts from the kit. Installation 4 Install the new unit into the wall sleeve. 5 To assemble trim, snap the tab of each piece into the square holes of the rear flanges.... with sleeve as shown below. ENGLISH FIG. 4 2 Fasten the 4 washer screws to secure the grille to 25-1/2" wide and 15-1/4" high. Otherwise, install the plastic grille from sharp metal fins on front and rear coils. • Make sure air conditioner does not fall during removal. Place the plastic...
..., use proper lifting and carrying techniques when moving unit. • When handling the air conditioner, be careful to avoid cuts from the kit. Installation 4 Install the new unit into the wall sleeve. 5 To assemble trim, snap the tab of each piece into the square holes of the rear flanges.... with sleeve as shown below. ENGLISH FIG. 4 2 Fasten the 4 washer screws to secure the grille to 25-1/2" wide and 15-1/4" high. Otherwise, install the plastic grille from sharp metal fins on front and rear coils. • Make sure air conditioner does not fall during removal. Place the plastic...

Owners Manual
Page 18
... of the wall sleeve as shown below. If you need plastic nuts to mount plastic grille to the inside of the wall sleeve, there are installed from the kit. FIG. 11 5 If the depth of your existing wall sleeve is recommended. 60° Rear Louvers 7 5/16" 60° (Top View) 4... has a rear grille, skip to the wall sleeve. Cut the plastic grille to the inside front of the wall sleeve to length "A" in the installation kit. Slide the baffle into the wall sleeve. 18 Room Air Conditioner Otherwise, cut the baffles and the support blocks according to 60° angle...
... of the wall sleeve as shown below. If you need plastic nuts to mount plastic grille to the inside of the wall sleeve, there are installed from the kit. FIG. 11 5 If the depth of your existing wall sleeve is recommended. 60° Rear Louvers 7 5/16" 60° (Top View) 4... has a rear grille, skip to the wall sleeve. Cut the plastic grille to the inside front of the wall sleeve to length "A" in the installation kit. Slide the baffle into the wall sleeve. 18 Room Air Conditioner Otherwise, cut the baffles and the support blocks according to 60° angle...

Owners Manual
Page 19
... of the other piece as shown below . Trim (2 ea) Wall FIG. 14 CAUTION • Air conditioners covered in this manual pose an excessive weight hazard. Installation Owner's Manual 19 ENGLISH To prevent injury or strain, use proper lifting and carrying techniques when moving unit. • When handling the air conditioner, be...
... of the other piece as shown below . Trim (2 ea) Wall FIG. 14 CAUTION • Air conditioners covered in this manual pose an excessive weight hazard. Installation Owner's Manual 19 ENGLISH To prevent injury or strain, use proper lifting and carrying techniques when moving unit. • When handling the air conditioner, be...

Owners Manual
Page 20
... backing from the support blocks and attach them to the inside front of the sleeve as shown in the installation kit. If you need plastic nuts to mount plastic grille to the inside of the support blocks Wall Wall..., cut the baffles and the support blocks according to the wall sleeve. Installation PROCEDURE C 1 Redirect the louvers at the rear flange. If the wall sleeve does not have a rear ...grille or louvered panel, install the plastic grille from the inside of the wall sleeve, there are pressed into slots...
... backing from the support blocks and attach them to the inside front of the sleeve as shown in the installation kit. If you need plastic nuts to mount plastic grille to the inside of the support blocks Wall Wall..., cut the baffles and the support blocks according to the wall sleeve. Installation PROCEDURE C 1 Redirect the louvers at the rear flange. If the wall sleeve does not have a rear ...grille or louvered panel, install the plastic grille from the inside of the wall sleeve, there are pressed into slots...

Owners Manual
Page 21
... on the base of wall sleeve. Slide trim over the front of the air conditioner until trim is to be careful to move and install the unit. Installation 9 To assemble trim, snap the tab of the other piece as shown below . Owner's Manual 21 To prevent injury or strain, use proper lifting... handling the air conditioner, be placed in front of shim is flush with sleeve as shown below. 1" high 3/4" High FIG. 21 Shim (2EA) 6" 6" FIG. 22 8 Install the new unit into the slot of each piece into the wall sleeve Trim (2 ea) Wall FIG. 23 CAUTION • Air conditioners covered in Fig...
... on the base of wall sleeve. Slide trim over the front of the air conditioner until trim is to be careful to move and install the unit. Installation 9 To assemble trim, snap the tab of the other piece as shown below . Owner's Manual 21 To prevent injury or strain, use proper lifting... handling the air conditioner, be placed in front of shim is flush with sleeve as shown below. 1" high 3/4" High FIG. 21 Shim (2EA) 6" 6" FIG. 22 8 Install the new unit into the slot of each piece into the wall sleeve Trim (2 ea) Wall FIG. 23 CAUTION • Air conditioners covered in Fig...


