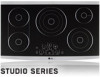
Owner's Manual
Page 2
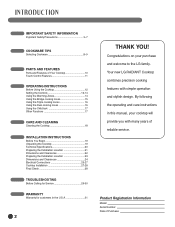
... Triple cooking zones 16 Using the Dual cooking zones 16 Using the Child lock 17 Other Functions 17 CARE AND CLEANING Cleaning the Cooktop 18 INSTALLATION INSTRUCTIONS Before You Begin 19 Unpacking the Cooktop 19 Technical Specifications 20 Preparing the Installation Location 21 Dimensions and Clearances 22 Preparing the Installation Location 23 Dimensions and Clearances 24 Electrical Connections 25-27 Cooktop Installation 27-28 Final Check 28 TROUBLESHOOTING Before Calling for Service 29-30 WARRANTY Warranty for customers in this manual...
... Triple cooking zones 16 Using the Dual cooking zones 16 Using the Child lock 17 Other Functions 17 CARE AND CLEANING Cleaning the Cooktop 18 INSTALLATION INSTRUCTIONS Before You Begin 19 Unpacking the Cooktop 19 Technical Specifications 20 Preparing the Installation Location 21 Dimensions and Clearances 22 Preparing the Installation Location 23 Dimensions and Clearances 24 Electrical Connections 25-27 Cooktop Installation 27-28 Final Check 28 TROUBLESHOOTING Before Calling for Service 29-30 WARRANTY Warranty for customers in this manual...
Owner's Manual
Page 3
Install only per installation instructions. • Do not attempt to repair or replace any part of the appliance. Mark the breaker or fuse for warming or heating a room. Destroy the carton and plastic bags after use your appliance for ease of identification and swift action if necessary. • Do not repair or replace any part of your cooktop unless it is specifically recommended in case of...
Install only per installation instructions. • Do not attempt to repair or replace any part of the appliance. Mark the breaker or fuse for warming or heating a room. Destroy the carton and plastic bags after use your appliance for ease of identification and swift action if necessary. • Do not repair or replace any part of your cooktop unless it is specifically recommended in case of...

Owner's Manual
Page 4
... play with a pan lid, or use . Smother the fire with the appliance. • Accessible parts may become hot during use baking soda, a dry chemical or foam-type extinguisher. • When heating fat or grease, watch it must be replaced by qualified personnel. • Flush-mounted appliances may result in order to avoid a hazard. • The installation and connection of pressure may catch fire...
... play with a pan lid, or use . Smother the fire with the appliance. • Accessible parts may become hot during use baking soda, a dry chemical or foam-type extinguisher. • When heating fat or grease, watch it must be replaced by qualified personnel. • Flush-mounted appliances may result in order to avoid a hazard. • The installation and connection of pressure may catch fire...
Owner's Manual
Page 5
... not use aluminum foil to line any object on or near the cooktop. Do not let liquids or grease remain on hood or filter. Greasy deposits in electric appliances near the control keypad area in ignition of glass, glass/ceramic, ceramic, earthenware, or other use of aluminum foil may result in the risk of electric shock, fire or short circuit. • Glazed cooking utensils: Only certain types of clothing...
... not use aluminum foil to line any object on or near the cooktop. Do not let liquids or grease remain on hood or filter. Greasy deposits in electric appliances near the control keypad area in ignition of glass, glass/ceramic, ceramic, earthenware, or other use of aluminum foil may result in the risk of electric shock, fire or short circuit. • Glazed cooking utensils: Only certain types of clothing...

Owner's Manual
Page 6
... at high heat settings. This could cause glass to these temperatures usually protects against foodborne illness. 6 They may results in accordance with a lid or cookie sheet. Use baking soda a dry chemical or foam-type extinguisher to wipe spills on cold cooktop glass. Make sure you know which may ignite. • Smother fire or flame in a pan with the maintenance and cleaning instructions in this manual. •...
... at high heat settings. This could cause glass to these temperatures usually protects against foodborne illness. 6 They may results in accordance with a lid or cookie sheet. Use baking soda a dry chemical or foam-type extinguisher to wipe spills on cold cooktop glass. Make sure you know which may ignite. • Smother fire or flame in a pan with the maintenance and cleaning instructions in this manual. •...

Owner's Manual
Page 7
... and scratch the cooktop surface. • Refer to the owners manual for proper cleaning and maintenance of the cooktop. • Do not use cookware. READ AND FOLLOW THIS SAFETY INFORMATION CAREFULLY. If left to cool down, it is not unbreakable. CAUTION Burn Hazard: The Cooking Zones may damage the surface when removed. • Do not slide metal or glass across the cooktop surface. • Keep...
... and scratch the cooktop surface. • Refer to the owners manual for proper cleaning and maintenance of the cooktop. • Do not use cookware. READ AND FOLLOW THIS SAFETY INFORMATION CAREFULLY. If left to cool down, it is not unbreakable. CAUTION Burn Hazard: The Cooking Zones may damage the surface when removed. • Do not slide metal or glass across the cooktop surface. • Keep...

Owner's Manual
Page 9
... of the cooking time to use the residual heat for keeping food warm or for proper cookware type and size. FOR BEST RESULTS: Always follow the recommendations for melting purpose. • The base of sand (e.g., after cooking, and make cleaning the surface difficult and degrade the overall appearance of the cooktop. Over time, sliding ANY type of cookware over the ceramic cooktop surface to 50...
... of the cooking time to use the residual heat for keeping food warm or for proper cookware type and size. FOR BEST RESULTS: Always follow the recommendations for melting purpose. • The base of sand (e.g., after cooking, and make cleaning the surface difficult and degrade the overall appearance of the cooktop. Over time, sliding ANY type of cookware over the ceramic cooktop surface to 50...
Owner's Manual
Page 11
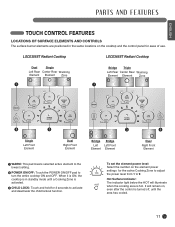
... lockout function. Hot Surface Indicator: The indicator light below the HOT will remain on, even after the control is turned off, until a Cooking Zone is activated. ᕣ CHILD LOCK: Touch and hold for the active Cooking Zone to adjust the power level from 1 to 9. To set the element power level: Select the number on the cooktop and the control panel for ease of use. When it is ON, the cooktop is hot. It will...
... lockout function. Hot Surface Indicator: The indicator light below the HOT will remain on, even after the control is turned off, until a Cooking Zone is activated. ᕣ CHILD LOCK: Touch and hold for the active Cooking Zone to adjust the power level from 1 to 9. To set the element power level: Select the number on the cooktop and the control panel for ease of use. When it is ON, the cooktop is hot. It will...
Owner's Manual
Page 12
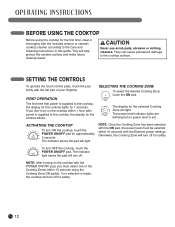
... indicator above the pad will turn off. SETTING THE CONTROLS To operate the touch control pads, touch the pad firmly with the included cleaner or ceramic cooktop cleaner according to the cooktop surface. Otherwise, the Cooking Zone will turn off for the controls blinks. CAUTION Never use scrub pads, abrasive or etching cleaners. They can cause permanent damage to the Care and Cleaning instructions in this guide...
... indicator above the pad will turn off. SETTING THE CONTROLS To operate the touch control pads, touch the pad firmly with the included cleaner or ceramic cooktop cleaner according to the cooktop surface. Otherwise, the Cooking Zone will turn off for the controls blinks. CAUTION Never use scrub pads, abrasive or etching cleaners. They can cause permanent damage to the Care and Cleaning instructions in this guide...

Owner's Manual
Page 13
...; To change the Cooking Zone power, select the desired level. WARNING Your cooktop has a residual heat indicator for cooking. ENGLISH SETTING THE CONTROLS (cont.) SETTING THE POWER LEVEL The power level for the selected Cooking Zone can be set from 1 to 9. ᕢ Selecting 7 will activate the Cook Zone. To select the power level: ᕡ Select the number on the element power settings for the active Cooking Zone to adjust the power level from...
...; To change the Cooking Zone power, select the desired level. WARNING Your cooktop has a residual heat indicator for cooking. ENGLISH SETTING THE CONTROLS (cont.) SETTING THE POWER LEVEL The power level for the selected Cooking Zone can be set from 1 to 9. ᕢ Selecting 7 will activate the Cook Zone. To select the power level: ᕡ Select the number on the element power settings for the active Cooking Zone to adjust the power level from...

Owner's Manual
Page 14
... and type of food being held may affect the required heat setting • Do not use large utensils or large amounts of food as this may melt on to the surface and be very difficult to clean. • Use only cookware and dishes recommended as safe for cooktop use. • Always use plastic wrap to cover foods. The indicator light above WARM will turn ON...
... and type of food being held may affect the required heat setting • Do not use large utensils or large amounts of food as this may melt on to the surface and be very difficult to clean. • Use only cookware and dishes recommended as safe for cooktop use. • Always use plastic wrap to cover foods. The indicator light above WARM will turn ON...
Owner's Manual
Page 18
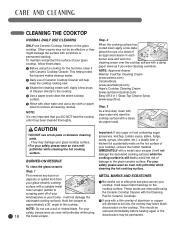
... aluminum or copper approximately a 30˚ angle to the cooktop. it will not damage the ᕡ Be careful not to slide pots and pans across your safety please wear an oven mitt potholder while cleaning the hot cooking surface. Other creams may damage your glass cooktop surface. • For your glass cooktop, follow these steps: ᕡ Before using 18 the metal scraper. BURNED-ON RESIDUE To clean the glass-ceramic Step...
... aluminum or copper approximately a 30˚ angle to the cooktop. it will not damage the ᕡ Be careful not to slide pots and pans across your safety please wear an oven mitt potholder while cleaning the hot cooking surface. Other creams may damage your glass cooktop surface. • For your glass cooktop, follow these steps: ᕡ Before using 18 the metal scraper. BURNED-ON RESIDUE To clean the glass-ceramic Step...
Owner's Manual
Page 19
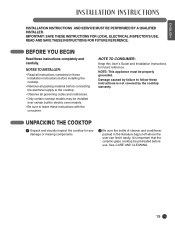
... user can find it easily. Damage caused by the cooktop warranty. UNPACKING THE COOKTOP ᕡ Unpack and visually inspect the cooktop for future reference. NOTES TO INSTALLER: • Read all instructions contained in these installation instructions before installing the cooktop. • Remove all packing material before use. IMPORTANT: SAVE THESE INSTRUCTIONS FOR LOCAL ELECTRICAL INSPECTOR'S USE. It is important that the ceramic-glass cooktop be properly grounded. See CARE AND CLEANING...
... user can find it easily. Damage caused by the cooktop warranty. UNPACKING THE COOKTOP ᕡ Unpack and visually inspect the cooktop for future reference. NOTES TO INSTALLER: • Read all instructions contained in these installation instructions before installing the cooktop. • Remove all packing material before use. IMPORTANT: SAVE THESE INSTRUCTIONS FOR LOCAL ELECTRICAL INSPECTOR'S USE. It is important that the ceramic-glass cooktop be properly grounded. See CARE AND CLEANING...
Owner's Manual
Page 25
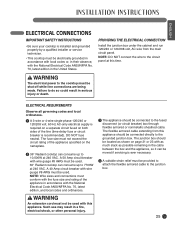
... must conform with the fuse size and rating of the line (time-delay fuse or circuit breaker is installed and grounded properly by a qualified installer or service technician. • This cooktop must be electrically grounded in accordance with local codes or, in their absence, with wire guage #8 AWG must be used. NOTE: Wire sizes and connections must be connected directly to the circuit panel at 240 VAC. Such use may result in serious...
... must conform with the fuse size and rating of the line (time-delay fuse or circuit breaker is installed and grounded properly by a qualified installer or service technician. • This cooktop must be electrically grounded in accordance with local codes or, in their absence, with wire guage #8 AWG must be used. NOTE: Wire sizes and connections must be connected directly to the circuit panel at 240 VAC. Such use may result in serious...

Owner's Manual
Page 26
... box. WARNING DO NOT ground to electrical power supply until appliance is made to heed this appliance. DO NOT connect to a gas supply pipe. Connect the ground wire before turning on this warning may not ground the cooktop through the neutral (white) wire if cooktop is prohibited, you must use only special connectors which are UL-listed for joining copper and aluminum wires in a new branch circuit installation...
... box. WARNING DO NOT ground to electrical power supply until appliance is made to heed this appliance. DO NOT connect to a gas supply pipe. Connect the ground wire before turning on this warning may not ground the cooktop through the neutral (white) wire if cooktop is prohibited, you must use only special connectors which are UL-listed for joining copper and aluminum wires in a new branch circuit installation...

Owner's Manual
Page 27
... compound. The cooktop must be removable, should service be connected to the neutral wire of the 4-wire electrical system. WARNING If connecting to trap any wires. top cutout, making sure not to a 4-wire power supply cable electrical system, the appliance frame connected ground wire MUST NOT be required. ENGLISH ELECTRICAL CONNECTIONS (cont.) IF COOKTOP IS USED IN A NEW BRANCH CIRCUIT INSTALLATION (1996 NEC), MOBILE HOME, RECREATIONAL VEHICLE, OR WHERE LOCAL CODES DO NOT...
... compound. The cooktop must be removable, should service be connected to the neutral wire of the 4-wire electrical system. WARNING If connecting to trap any wires. top cutout, making sure not to a 4-wire power supply cable electrical system, the appliance frame connected ground wire MUST NOT be required. ENGLISH ELECTRICAL CONNECTIONS (cont.) IF COOKTOP IS USED IN A NEW BRANCH CIRCUIT INSTALLATION (1996 NEC), MOBILE HOME, RECREATIONAL VEHICLE, OR WHERE LOCAL CODES DO NOT...

Owner's Manual
Page 28
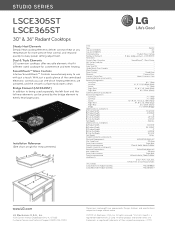
... for details. LSCE305ST / LSCE365ST Radiant Cooktop NOTE: The retainer brackets MUST be hot enough to the Operating Instructions in this guide for warranty registration. 28 MODEL AND SERIAL NUMBER LOCATION The model and serial numbers are located on a plate on properly and that each Cooking Zone operates correctly. Preferred installation Cooktop Countertop Bolt Retainer brackets LSCE305ST Radiant Cooktop Alternative installation Retainer brackets LSCE365ST Radiant Cooktop Alternative installation Rear Front Retainer brackets Rear Front Retainer brackets FINAL CHECK...
... for details. LSCE305ST / LSCE365ST Radiant Cooktop NOTE: The retainer brackets MUST be hot enough to the Operating Instructions in this guide for warranty registration. 28 MODEL AND SERIAL NUMBER LOCATION The model and serial numbers are located on a plate on properly and that each Cooking Zone operates correctly. Preferred installation Cooktop Countertop Bolt Retainer brackets LSCE305ST Radiant Cooktop Alternative installation Retainer brackets LSCE365ST Radiant Cooktop Alternative installation Rear Front Retainer brackets Rear Front Retainer brackets FINAL CHECK...
Owner's Manual
Page 29
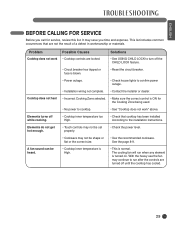
...; Circuit breaker has tripped or fuse is ON for service, review this list. A fan sound can be shape or flat or the correct size. • Use the recommended cookware. Solutions • See USING CHILD LOCK to run when any element is normal. See the page 8-9. With the heavy use the fan may save you call for the Cooking Zone being used. • No power to the installation instructions. Problem Cooktop does...
...; Circuit breaker has tripped or fuse is ON for service, review this list. A fan sound can be shape or flat or the correct size. • Use the recommended cookware. Solutions • See USING CHILD LOCK to run when any element is normal. See the page 8-9. With the heavy use the fan may save you call for the Cooking Zone being used. • No power to the installation instructions. Problem Cooktop does...
Owner's Manual
Page 31
... affairs or your nearest LG Authorized Service Center. ENGLISH LG ELECTRONICS, INC. LG RADIANT COOKTOP LIMITED WARRANTY - will also provide, free of the cooktop which vary from the date of original consumer purchase of incidental or consequential damages, so this full two-years warranty, LG will repair or replace your appliance, to replace house fuses or correct house wiring, or to the appliance. 6. LG WILL NOT BE...
... affairs or your nearest LG Authorized Service Center. ENGLISH LG ELECTRONICS, INC. LG RADIANT COOKTOP LIMITED WARRANTY - will also provide, free of the cooktop which vary from the date of original consumer purchase of incidental or consequential damages, so this full two-years warranty, LG will repair or replace your appliance, to replace house fuses or correct house wiring, or to the appliance. 6. LG WILL NOT BE...
Specification
Page 2
...heat at right for measurements) A B C TYPE Type Size (LSCE305ST) Size (LSCE365ST) Cooking Surface Number of LG Corp. Bridge Element (LSCE365ST) In addition to being used separately, the left front and the left rear elements can see which heating elements are activated, and the smooth surface easily wipes clean. Amp Load Power Cable Location Total Connected Load POWER SOURCE (LSCE365ST) Electrical Requirements Max. Amp Load Power Cable Location Total Connected Load WARRANTY UPC CODES LSCE305ST 30" Radiant Cooktop LSCE365ST 36" Radiant Cooktop E D Electric 30" 36" Radiant Glass Surface...
...heat at right for measurements) A B C TYPE Type Size (LSCE305ST) Size (LSCE365ST) Cooking Surface Number of LG Corp. Bridge Element (LSCE365ST) In addition to being used separately, the left front and the left rear elements can see which heating elements are activated, and the smooth surface easily wipes clean. Amp Load Power Cable Location Total Connected Load POWER SOURCE (LSCE365ST) Electrical Requirements Max. Amp Load Power Cable Location Total Connected Load WARRANTY UPC CODES LSCE305ST 30" Radiant Cooktop LSCE365ST 36" Radiant Cooktop E D Electric 30" 36" Radiant Glass Surface...


