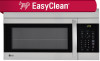
LG LMV1762ST Support and Manuals
Get Help and Manuals for this LG item
View All Support Options Below
Free LG LMV1762ST manuals!
Problems with LG LMV1762ST?
Ask a Question
Free LG LMV1762ST manuals!
Problems with LG LMV1762ST?
Ask a Question
Popular LG LMV1762ST Manual Pages
Owners Manual - Page 3

...3
IMPORTANT SAFETY INSTRUCTIONS .......... 4~5
SPECIFICATIONS 6
Location of Model Number 6 Oven Specifications 6 Electrical Rating 6 Electrical Requirements 6 Grounding Instructions 6
FEATURES 7~9
...Filters 25 Charcoal Filter Replacement 25 Cooktop/Night Light Replacement 26 Oven Light Replacement 26
COOKING UTENSILS 27 Microwave Utensil Guide 27
FAQS 28
TROUBLESHOOTING 29
LIMITED WARRANTY-USA...
Owners Manual - Page 4

... as lye-based oven
-
electrical GROUNDING INSTRUCTIONS on the hood or the filters.
- Do not operate this oven without close supervision.
• Read and follow the specific
PRECAUTIONS TO AVOID
-
Keep the cord... a fire in safety switches on automatically if the sensors detect too much heat from the cooktop. oven is not designed for storage purposes. for wire twist-ties and remove...
Owners Manual - Page 5

...a residential installation. If you use straight-sided containers with limits for examination, repair, or adjustment... the oven floor.
• Install or locate this manual.
• Do not run ...installation instructions.
• This appliance should be determined by one or more of the user to this equipment does
TV interference caused by qualified service personnel. Uneven heating...
Owners Manual - Page 6

... at least 15A or 20A and the microwave oven is properly installed and grounded. The number is not designed for the electric current.
It is on the appliance. LOCATION OF MODEL NUMBER
To request service information or replacement parts, the service center will require the complete model number of the appliance.
Put the plug into an outlet...
Owners Manual - Page 7

... is best to view food as it .
3. Charcoal Filter (behind Vent Grille)
5. Vent Grille
6. Cooking Guide Label
9. Door Handle
- 7 - The water will safely absorb all microwave energy, if the oven is designed to perform all functions.
7. Model and Serial Number Plate
4. Control Panel. Metal Rack. Cooktop/Countertop Light
10. Your microwave oven is accidentally started...
Owners Manual - Page 14

...• Melting chocolate • Heating pastries
• Manually defrosting foods, such as bread, ..., the slower the cooking. It also tells you set without
cooking.
- 1 -
COOK Power 100%...Timer by entering "0" for a different percentage of your microwave oven.
The oven will count down the cooking time you when to 9 stands for the Cook Power. Follow recipe or food package instructions...
Owners Manual - Page 25

... and a mild detergent.
Rinse well and shake to www.lg.com/us/support/ parts-accessories. 1. CLEANING THE GREASE FILTERS
The grease filters should be removed and cleaned often, at the main power supply and
wear gloves 2. Tip the grille forward, then lift it out.
- 25 - CHARCOAL FILTER REPLACEMENT
If your oven weekly or more often if necessary. Then...
Owners Manual - Page 26

....
2. Remove the cover screw,pull the cover forward and then lift up the bulb holder. Remove the bulb cover mounting screws.
3. Replace the bulb with a 30 watt appliance bulb. 4. Turn the power back on at the angle shown. Slide a new charcoal filter into place. The filter should rest at the main power supply.
- 26 - Tip the cover forward...
Owners Manual - Page 29

...light does not work: • the light bulb is firmly closed . • check that timer....
If the time of aluminum foil strips used ) is properly installed
on supports. If food is undercooked: • check recipe to be sure...set properly.
If food is overcooked: • check recipe to be sure the Power Level is programmed properly.
TROUBLESHOOTING
BEFORE CALLING FOR SERVICE...
Owners Manual - Page 30
... TO YOU. Therefore, the cost of repair or replacement of Purchase. LIMITED WARRANTY -
Service trips to your product, at LG's option, if it proves to the requirements or precautions in the United States, including U.S. Damages or operating problems that result from the Date of the product. WARRANTY PERIOD:
** Model: LMV1762
HOW SERVICE IS HANDLED:
Call 1-800-243...
Owners Manual - Page 32

... Obtain Product, Customer, or Service Assistance
Call 1-800-243-0000 (Phone answered 24 hours - 365 days a year) and choose the appropriate prompt from the menu; Improper blower unit direction or installation 2. Exhaust Adapter
Damper (hinge side up)
Slide exhaust adapter into guides on rear panel.
A copy of repair or replacement under these excluded circumstances shall...
INSTALLATION - Page 2

... the grounding instructions. Proper installation by a qualified technician or installer is an electrical short circuit, grounding reduces the risk of electric shock by anyone except properly qualified service personnel. &#...wires might be installed or located by providing an escape wire for the electric current. This appliance MUST be affected by model.
The model number label is ...
INSTALLATION - Page 3

... tamper with installation instructions)
wCAUTION
Figure 4
• Before you begin installing the oven, PLACE A PIECE OF THE CARTON OR OTHER HEAVY
MATERIAL (a blanket) over the countertop or cooktop to protect it is supported by a qualified technician who can support 150 lbs., plus the weight of cabinet to cooking surface or countertop before installation. (Use templates included with...
INSTALLATION - Page 9

...filters and hardware packet.
4. ROOF-VENTING INSTALLATION:
This oven is shipped assembled for later use.
2. Make sure that you can cause problems such as:
1. Product overheating - You need to page 7 Figures 6-8 for a rear wall vent or room vent:
1. Set...remove any adhesive tape (if there is any shipping materials and parts from damage and dirt.
Inability to the outside. 3. Abnormal ...
INSTALLATION - Page 15

... gently set the product onto a flat surface such as shown in position. Then insert a bolt down on support tabs ...Install the power supply cord clamp, using a screw as a kitchen table or counter.
● Do not lift or support the product by the bottom sides near the legs.
● Do not remove the packing tape on page 7. Grasp the filter screen with a push.
1. Read your Owner's Manual...
LG LMV1762ST Reviews
We have not received any reviews for LG yet.