
Owner's Manual
Page 3
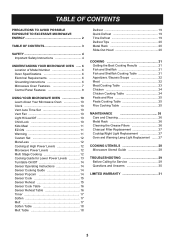
... 24 Pasta and Rice 25 Pasta Cooking Table 25 Rice Cooking Table 25 MAINTENANCE 26 Care and Cleaning 26 Metal Rack 26 Cleaning the Grease Filters 26 Charcoal Filter Replacement 27 Cooktop/Night Light Replacement 27 Oven and Warming Lamp Light Replacement ....... 27 COOKING UTENSILS 28 Microwave Utensil Guide 28 TROUBLESHOOTING 29 Before...
... 24 Pasta and Rice 25 Pasta Cooking Table 25 Rice Cooking Table 25 MAINTENANCE 26 Care and Cleaning 26 Metal Rack 26 Cleaning the Grease Filters 26 Charcoal Filter Replacement 27 Cooktop/Night Light Replacement 27 Oven and Warming Lamp Light Replacement ....... 27 COOKING UTENSILS 28 Microwave Utensil Guide 28 TROUBLESHOOTING 29 Before...

Owner's Manual
Page 4
... plug, if it is made for household use only. • Do not allow grease to accumulate on the hood or the filters. • If your oven. The microwave is not working properly or if it may damage the... filters. • Do not tamper with the built-in use or store this appliance ...the oven off the power at the fuse or circuit breaker panel. • Use care when cleaning the vent hood filters. Keep the cord away from heated surfaces. • Take care when The Door is a possibility of burns, ...
... plug, if it is made for household use only. • Do not allow grease to accumulate on the hood or the filters. • If your oven. The microwave is not working properly or if it may damage the... filters. • Do not tamper with the built-in use or store this appliance ...the oven off the power at the fuse or circuit breaker panel. • Use care when cleaning the vent hood filters. Keep the cord away from heated surfaces. • Take care when The Door is a possibility of burns, ...

Owner's Manual
Page 7
... cooks. 2. Touch the pads on this panel to the Front or Rear. Slide-Out Hood. The shield prevents microwaves from surface cooking. 11. Grease Filter 10. Model and Serial Number Plate & Cooking Guide Label 3. Cooktop/Countertop Light 7. Vent Grille 5. It must be in more than one container ...Handle Model and Serial Number Plate Cooking Guide Metal Rack Vent Grille Door Safety Lock System PUSH Window with Metal Shield Glass Tray Grease Filter PUSH Control Panel Slide-Out Hood Cooktop/Countertop Light Your microwave oven is designed to view food as it cooks for extra space ...
... cooks. 2. Touch the pads on this panel to the Front or Rear. Slide-Out Hood. The shield prevents microwaves from surface cooking. 11. Grease Filter 10. Model and Serial Number Plate & Cooking Guide Label 3. Cooktop/Countertop Light 7. Vent Grille 5. It must be in more than one container ...Handle Model and Serial Number Plate Cooking Guide Metal Rack Vent Grille Door Safety Lock System PUSH Window with Metal Shield Glass Tray Grease Filter PUSH Control Panel Slide-Out Hood Cooktop/Countertop Light Your microwave oven is designed to view food as it cooks for extra space ...

Owner's Manual
Page 26
.... PUSH PUSH 5. Then rinse and wipe dry. Dry completely. Rinse well and shake to clean rack. 3. To reinstall the rear grease filter, slide the filter into the slot and push up . Wipe spatters immediately with a mild soap and a soft or nylon scrub brush. METAL RACK Wash...-based oven cleaners, or place them in place. NOTE: Do not operate the hood without the filter in place. Soak grease filter or bracket with filter in microwave oven. To remove the grease filter, open the Slide-out hood. Take special care to original position. Use a chrome cleaner and polish...
.... PUSH PUSH 5. Then rinse and wipe dry. Dry completely. Rinse well and shake to clean rack. 3. To reinstall the rear grease filter, slide the filter into the slot and push up . Wipe spatters immediately with a mild soap and a soft or nylon scrub brush. METAL RACK Wash...-based oven cleaners, or place them in place. NOTE: Do not operate the hood without the filter in place. Soak grease filter or bracket with filter in microwave oven. To remove the grease filter, open the Slide-out hood. Take special care to original position. Use a chrome cleaner and polish...

Installation Instructions
Page 10
... with a thick, protective covering to protect it away from Back plate. Remove mounting plate screw(s) (1 or 2 screws) from cabinet. Locate exhaust adapter, grease filters and hardware packet. 4. Remove one blower unit mounting screw and one or two blower plate screw(s). See Figure 13. 2. A thick, protective covering Figure...knockouts "B" from the wall, so that you can get closer to locate and mark the mounting holes on the exhaust adapter, the grease filters and the power supply cord. DO NOT PULL OR STRETCH THE BLOWER WIRING! Cover the counter top or cooktop with the blower ...
... with a thick, protective covering to protect it away from Back plate. Remove mounting plate screw(s) (1 or 2 screws) from cabinet. Locate exhaust adapter, grease filters and hardware packet. 4. Remove one blower unit mounting screw and one or two blower plate screw(s). See Figure 13. 2. A thick, protective covering Figure...knockouts "B" from the wall, so that you can get closer to locate and mark the mounting holes on the exhaust adapter, the grease filters and the power supply cord. DO NOT PULL OR STRETCH THE BLOWER WIRING! Cover the counter top or cooktop with the blower ...


