
Owners Manual
Page 1
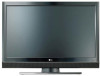
... of the set of power-saving guidelines issued by the U.S. ENERGY STAR is a set . eooa LCD TV I PLASMA TV OWNER'S MANUAL LCD TV MODELS 32LB9D 47LC7DF PLASMA TV MODELS 60PY3D Please read this information to your set. Environmental Protection Agency(EPA). Retain [t for energy ...efficiency. See the [abe[ attached on the back cover and quote this manual carefully before operating your dealer when you require service. has determined that this product meets the ENERGY STAR guidelines for future reference. As...
... of the set of power-saving guidelines issued by the U.S. ENERGY STAR is a set . eooa LCD TV I PLASMA TV OWNER'S MANUAL LCD TV MODELS 32LB9D 47LC7DF PLASMA TV MODELS 60PY3D Please read this information to your set. Environmental Protection Agency(EPA). Retain [t for energy ...efficiency. See the [abe[ attached on the back cover and quote this manual carefully before operating your dealer when you require service. has determined that this product meets the ENERGY STAR guidelines for future reference. As...

Owners Manual
Page 4
Pay particular attention to qualified service personnel. O Unplug this apparatus during lightning storms or when unused for long periods of this owner's manual to be exposed to rain or moisture, does not operate normally, or has been dropped. that is damaged, liquid has been spilled or objects have ...
Pay particular attention to qualified service personnel. O Unplug this apparatus during lightning storms or when unused for long periods of this owner's manual to be exposed to rain or moisture, does not operate normally, or has been dropped. that is damaged, liquid has been spilled or objects have ...
Owners Manual
Page 5
Preset 59 ManualPictureAdjustment - Color Tone - Analog BroadcastingSystem Captions .... 77 - Add / Delete Channel ( Manual Tuning) .. 43 - Color Tone - User Mode 61 XD - Digital Broadcasting System Captions ...79 - CONTENTS WARNING / CAUTION 1 SAFETY INSTRUCTIONS 2 FEATURES OF THIS TV 6 PREPARATION Accessories 7 Front ...
Preset 59 ManualPictureAdjustment - Color Tone - Analog BroadcastingSystem Captions .... 77 - Add / Delete Channel ( Manual Tuning) .. 43 - Color Tone - User Mode 61 XD - Digital Broadcasting System Captions ...79 - CONTENTS WARNING / CAUTION 1 SAFETY INSTRUCTIONS 2 FEATURES OF THIS TV 6 PREPARATION Accessories 7 Front ...

Owners Manual
Page 6
Auto Clock Setup 81 - Manual Clock Setup 82 Auto On/OffTime Setting 83 Sleep Time Setting 84 Auto Shut-off Setting 85 Z_ ¸ _ 7 =7_Z _ 7_ =_ PARENTAL CONTROL/RATINGS _ _ Set Password & Lock System 86 Channel Blocking 88 Movie & TV Rating 89 External Input Blocking 92 Key Lock 92 APPEND IX Troubleshooting 93 Maintenance 95 Product Specifications 96 Programming the Remote Control .......... 97 IR Codes 101 External Control through RS-232C ......... 103 5 TIME SETTING Clock Setting -
Auto Clock Setup 81 - Manual Clock Setup 82 Auto On/OffTime Setting 83 Sleep Time Setting 84 Auto Shut-off Setting 85 Z_ ¸ _ 7 =7_Z _ 7_ =_ PARENTAL CONTROL/RATINGS _ _ Set Password & Lock System 86 Channel Blocking 88 Movie & TV Rating 89 External Input Blocking 92 Key Lock 92 APPEND IX Troubleshooting 93 Maintenance 95 Product Specifications 96 Programming the Remote Control .......... 97 IR Codes 101 External Control through RS-232C ......... 103 5 TIME SETTING Clock Setting -

Owners Manual
Page 8
... accessory is stain or fingerprint on surface of that the following accessories are included with the polishing cloth for the product. _o z Owner's Manual Power Cord Batteries CD Manual Remote Control Polishing Cloth _ Slightly wipe stained spot on the exterior only with your plasma display. PREPARATION ACCESSORIES Ensure that excessive power may...
... accessory is stain or fingerprint on surface of that the following accessories are included with the polishing cloth for the product. _o z Owner's Manual Power Cord Batteries CD Manual Remote Control Polishing Cloth _ Slightly wipe stained spot on the exterior only with your plasma display. PREPARATION ACCESSORIES Ensure that excessive power may...

Owners Manual
Page 19
... the left ) the shaft bolt on the middle of stand's back. And when stand be level with TV. you can adjust the the TV set manually to set the hole. 18 ADDITIONAL COVER SWIVEL STAND (o.ly60PY3D model) After installing the TV, you must remove the cable management and loosen (to when...
... the left ) the shaft bolt on the middle of stand's back. And when stand be level with TV. you can adjust the the TV set manually to set the hole. 18 ADDITIONAL COVER SWIVEL STAND (o.ly60PY3D model) After installing the TV, you must remove the cable management and loosen (to when...

Owners Manual
Page 21
... to use _ Turn on the digital set-top box. (Refer to the COMPONENT IN AUDIO 1 lacks on _4 the set -top box to the owner's manual for Digital Contents, x _4 When connecting Component cable z 1.
... to use _ Turn on the digital set-top box. (Refer to the COMPONENT IN AUDIO 1 lacks on _4 the set -top box to the owner's manual for Digital Contents, x _4 When connecting Component cable z 1.

Owners Manual
Page 24
... DVD to the COMPONENT [N AUDIO1 iacks on the remote control _ If connected to COMPONENT IN 2 input, select COMPONENT 2 input source. _ Refer to the DVD player's manual for operating instructions, Component Input ports To get better picture quality, connect a DVD player to use _ Turn on the DVD player, insert a DVD, _ Select COMPONENT...
... DVD to the COMPONENT [N AUDIO1 iacks on the remote control _ If connected to COMPONENT IN 2 input, select COMPONENT 2 input source. _ Refer to the DVD player's manual for operating instructions, Component Input ports To get better picture quality, connect a DVD player to use _ Turn on the DVD player, insert a DVD, _ Select COMPONENT...

Owners Manual
Page 25
m c _ Refer to the DVD player's manual for operating instructions, If the DVD does not support Auto HDM[, you need to the AUDIO x input jacks on the set . When connecting HDMI cable 1. ...
m c _ Refer to the DVD player's manual for operating instructions, If the DVD does not support Auto HDM[, you need to the AUDIO x input jacks on the set . When connecting HDMI cable 1. ...

Owners Manual
Page 26
... number. Now to connect O onnect the RF antenna out socket of the VCR to the Antenna socket on the VCR. (Refer to the VCR owner's manuaL) 25 Insert a video tape into the VCR and press PLAY on the set, Connect the antenna cable to the RF antenna in the Option menu...
... number. Now to connect O onnect the RF antenna out socket of the VCR to the Antenna socket on the VCR. (Refer to the VCR owner's manuaL) 25 Insert a video tape into the VCR and press PLAY on the set, Connect the antenna cable to the RF antenna in the Option menu...

Owners Manual
Page 27
... you have a mono VCR. How to use m Insert a video tape into the VCR and press PLAY on the _O VCR. (Refer to the VCR owner's manuaL) c m Select AV1 input source wffh usMg the INPUT button on rT1 the remote control. How to the VCR owner...'s manuaL) m Select AVl input source with a RCA cable 1. How to connect O Connect the S-VIDEO output of the VCR to the AUDIO Mput iacks on the VCR. (...
... you have a mono VCR. How to use m Insert a video tape into the VCR and press PLAY on the _O VCR. (Refer to the VCR owner's manuaL) c m Select AV1 input source wffh usMg the INPUT button on rT1 the remote control. How to the VCR owner...'s manuaL) m Select AVl input source with a RCA cable 1. How to connect O Connect the S-VIDEO output of the VCR to the AUDIO Mput iacks on the VCR. (...

Owners Manual
Page 36
... TV speakers off. CAUTION Do not look into the optical output port. See the external audio equipment instruction manual for operation. Off" in the AUDIO menu. (_, p.74). See the external audio equipment instruction manual for operation. Block the SPD[F out(optical/coaxial) about the contents _vith ACP(Audio Copy Protection) function. 35...
... TV speakers off. CAUTION Do not look into the optical output port. See the external audio equipment instruction manual for operation. Off" in the AUDIO menu. (_, p.74). See the external audio equipment instruction manual for operation. Block the SPD[F out(optical/coaxial) about the contents _vith ACP(Audio Copy Protection) function. 35...

Owners Manual
Page 42
ON-SCREEN MENUS SELECTION Your TV's OSD (On Screen Display) may differ slightly from what is shown in this manual O Press the MENU button and then use • or • button to select each menu, O Press the I_ button and then use • • _11I_ button to display the available menus, SETUP I Z PICTURE c_ --4 i z z rrl rm 0 z It It 0 rm LOCK For USA For Canada AUDIO OPTION OnFyPlasmaTV modeF 41
ON-SCREEN MENUS SELECTION Your TV's OSD (On Screen Display) may differ slightly from what is shown in this manual O Press the MENU button and then use • or • button to select each menu, O Press the I_ button and then use • • _11I_ button to display the available menus, SETUP I Z PICTURE c_ --4 i z z rrl rm 0 z It It 0 rm LOCK For USA For Canada AUDIO OPTION OnFyPlasmaTV modeF 41

Owners Manual
Page 44
...; or • button O Press the I_ button and then use • or • button to select Manual Tunin& O Psdreescst thDeTVI_, TbVu,tCtoAnDaTnVd, athnednCuAsTeV•. Add/Delete Channel(Manual Tuning) A password is required to gain access to Manual Tuning menu if the Lock System is turned on, If selecting DTV or CADTV input signal...
...; or • button O Press the I_ button and then use • or • button to select Manual Tunin& O Psdreescst thDeTVI_, TbVu,tCtoAnDaTnVd, athnednCuAsTeV•. Add/Delete Channel(Manual Tuning) A password is required to gain access to Manual Tuning menu if the Lock System is turned on, If selecting DTV or CADTV input signal...

Owners Manual
Page 61
... return to select the PICTURE menu. Press the MENU button and then use • or • button to the previous menu. 6O @@ P CTUR£ CONTROL MANUAL PICTURE ADJUSTMENT Picture Mode -User Mode Adjust the picture appearance to make appropriate adjustments.
... return to select the PICTURE menu. Press the MENU button and then use • or • button to the previous menu. 6O @@ P CTUR£ CONTROL MANUAL PICTURE ADJUSTMENT Picture Mode -User Mode Adjust the picture appearance to make appropriate adjustments.

Owners Manual
Page 63
...8226; or • button to z _D © O Press the I_ button and then use • or • button to select Auto or Manual. Selecting the Manual 1. Use the _1 or I_ button to the previous menu. 62 @@@ Press the V button and then use _11or I_ button to select XD Contrast...TV viewing or press MENU button to return to select On or Off. When selecting Picture Mode options (Dynamic, Standard and Mild), XD is LG Electronics unique picture improving technology to the point where it does not damage the originalpicture. 2. XD Color : Adjusting the colors of the reflection....
...8226; or • button to z _D © O Press the I_ button and then use • or • button to select Auto or Manual. Selecting the Manual 1. Use the _1 or I_ button to the previous menu. 62 @@@ Press the V button and then use _11or I_ button to select XD Contrast...TV viewing or press MENU button to return to select On or Off. When selecting Picture Mode options (Dynamic, Standard and Mild), XD is LG Electronics unique picture improving technology to the point where it does not damage the originalpicture. 2. XD Color : Adjusting the colors of the reflection....

Owners Manual
Page 82
... the I_ button and then use • or • button to select your viewing area observes Daylight Saving time. for the current Set the clock manually if the current time is set incorrectly by the broadcasting station. Canada : Eastern, Central, Mountain, Pacific New F.land or Atlantic O Press the I_ button and...
... the I_ button and then use • or • button to select your viewing area observes Daylight Saving time. for the current Set the clock manually if the current time is set incorrectly by the broadcasting station. Canada : Eastern, Central, Mountain, Pacific New F.land or Atlantic O Press the I_ button and...

Owners Manual
Page 83
... to set the year, date, and time options. O ress EXIT button to return to TV viewing or press 0O MENU button to return to select Manual. Press the I_ button and then use • or • button to l-m select Clock z Press the I_ button and then use • or • ...button to select the TIME menu. TIME SETTING Manual Clock Setup If the current time setting is wrong, reset the clock manually. O ress the MENU button and then use • or • button to the previous menu. 82
... to set the year, date, and time options. O ress EXIT button to return to TV viewing or press 0O MENU button to return to select Manual. Press the I_ button and then use • or • button to l-m select Clock z Press the I_ button and then use • or • ...button to select the TIME menu. TIME SETTING Manual Clock Setup If the current time setting is wrong, reset the clock manually. O ress the MENU button and then use • or • button to the previous menu. 82


