Owners Manual
Page 2
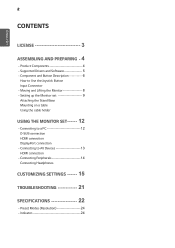
... and Button Description----------- 6 How to Use the Joystick Button Input Connector --Moving and Lifting the Monitor 8 --Setting up the Monitor set 9 Attaching the Stand Base Mounting on a table Using the cable holder USING THE MONITOR SET------- 12 --Connecting to a PC 12 D-SUB connection HDMI connection DisplayPort connection --Connecting to AV Devices...
... and Button Description----------- 6 How to Use the Joystick Button Input Connector --Moving and Lifting the Monitor 8 --Setting up the Monitor set 9 Attaching the Stand Base Mounting on a table Using the cable holder USING THE MONITOR SET------- 12 --Connecting to a PC 12 D-SUB connection HDMI connection DisplayPort connection --Connecting to AV Devices...
Owners Manual
Page 10
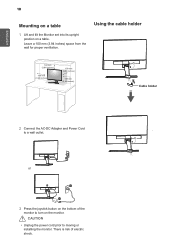
CAUTION yyUnplug the power cord prior to turn on the monitor. Leave a 100 mm (3.94 inches) space from the wall for proper ventilation. or 3 Press the joystick button on a table. Using the cable holder 100 mm (3.94 inches) 100 mm (3.94 inches) 100 mm (3.94 inches) 100 mm (3.94 inches) Cable holder 2 Connect the AC-DC Adapter and Power Cord to a wall outlet. There is risk of the monitor to moving or installing the monitor. ENEGNLGISH 10 Mounting on a table 1 Lift and tilt the Monitor set into its upright position on the bottom of electric shock.
CAUTION yyUnplug the power cord prior to turn on the monitor. Leave a 100 mm (3.94 inches) space from the wall for proper ventilation. or 3 Press the joystick button on a table. Using the cable holder 100 mm (3.94 inches) 100 mm (3.94 inches) 100 mm (3.94 inches) 100 mm (3.94 inches) Cable holder 2 Connect the AC-DC Adapter and Power Cord to a wall outlet. There is risk of the monitor to moving or installing the monitor. ENEGNLGISH 10 Mounting on a table 1 Lift and tilt the Monitor set into its upright position on the bottom of electric shock.


