
IC-206 User Manual
Page 74
IC-206 3-9 Network printing 3 3.3 Specifying an IP address The following procedure describes how to assign the IP address to the machine from the control panel. 2 Note The IP address setting should be specified according to instructions from the network administrator. The IP address setting is selected, and then press the [OK] key. MANAGEMENT" is specified in Utility mode by the administrator. 1 Press the [Utility] key in the control panel. 2 Press the [,] or [+] key until "ADMIN.
IC-206 3-9 Network printing 3 3.3 Specifying an IP address The following procedure describes how to assign the IP address to the machine from the control panel. 2 Note The IP address setting should be specified according to instructions from the network administrator. The IP address setting is selected, and then press the [OK] key. MANAGEMENT" is specified in Utility mode by the administrator. 1 Press the [Utility] key in the control panel. 2 Press the [,] or [+] key until "ADMIN.

IC-206 User Manual
Page 76
...then type it in correctly. 8 Use the keypad to type in the IP address, and then press the [OK] key. - Continue with the network administrator. - "AUTO" is available only if a DHCP server is selected, a screen appears, allowing you to specify the IP address. For the subnet ...mask, consult with step 7. - If "SPECIFY" is on the network. Network printing 3 6 Press the [,] or [+] key until "AUTO" or "SPECIFY" is selected, it will automatically be necessary to specify the subnet mask or ...
...then type it in correctly. 8 Use the keypad to type in the IP address, and then press the [OK] key. - Continue with the network administrator. - "AUTO" is available only if a DHCP server is selected, a screen appears, allowing you to specify the IP address. For the subnet ...mask, consult with step 7. - If "SPECIFY" is on the network. Network printing 3 6 Press the [,] or [+] key until "AUTO" or "SPECIFY" is selected, it will automatically be necessary to specify the subnet mask or ...

IC-206 User Manual
Page 77
..." menu appears again. 11 Press the [Reset] key in the gateway. 3 9 Using the keypad, type in the control panel. - Network printing - If the number was incorrectly entered, press the [Clear/Stop] key to erase it, and then type it . - In order to apply the new ..., the machine must be turned off , then on again to restart it in correctly. 10 Press the [OK] key. For the gateway, consult with the network administrator. - After the screen shown below appears, turn the machine off , then on again to be restarted. 3-12 IC-206
..." menu appears again. 11 Press the [Reset] key in the gateway. 3 9 Using the keypad, type in the control panel. - Network printing - If the number was incorrectly entered, press the [Clear/Stop] key to erase it, and then type it . - In order to apply the new ..., the machine must be turned off , then on again to restart it in correctly. 10 Press the [OK] key. For the gateway, consult with the network administrator. - After the screen shown below appears, turn the machine off , then on again to be restarted. 3-12 IC-206

IC-206 User Manual
Page 84
... driver is not selected, IPP printing cannot be installed, refer to the User's Guide for the GDI printer controller, included with the network administrator. 3 Click the Network tab, and then click "IPP Configuration" in the password to log on page 2-15. If the check box is installed on the.... (For details on installing the PCL driver, refer to "Installing the printer driver by using the Add Printer Wizard" on to the Administrator mode. - Network printing 3 2 Reminder Before specifying settings, check that the "Enable IPP" check box is to be performed. If the GDI driver is...
... driver is not selected, IPP printing cannot be installed, refer to the User's Guide for the GDI printer controller, included with the network administrator. 3 Click the Network tab, and then click "IPP Configuration" in the password to log on page 2-15. If the check box is installed on the.... (For details on installing the PCL driver, refer to "Installing the printer driver by using the Add Printer Wizard" on to the Administrator mode. - Network printing 3 2 Reminder Before specifying settings, check that the "Enable IPP" check box is to be performed. If the GDI driver is...

IC-206 User Manual
Page 141
... to E-mail DNS SET- If a DNS server is used. Consult with the network administrator. Specify settings for printing using TCP/IP. work administrator. Consult with the network ad- o - o o ● o o ● o o ●*1 o o ●*1 o o ●*1*3 o o 7-2 IC-206 If a DNS server is on the network, specify the IP address of the send- WEB SET- TING for o TING accessing...
... to E-mail DNS SET- If a DNS server is used. Consult with the network administrator. Specify settings for printing using TCP/IP. work administrator. Consult with the network ad- o - o o ● o o ● o o ●*1 o o ●*1 o o ●*1*3 o o 7-2 IC-206 If a DNS server is on the network, specify the IP address of the send- WEB SET- TING for o TING accessing...

IC-206 User Manual
Page 144
...for destinations on Internet faxing, refer to the User's Guide for communicating with the network administrator. Network settings 7 *1: Necessary if notification of the URL is no usable SMTP server on the network. *4: The setting must be specified in order to use direct faxing. For details... on the LDAP server. Specify the search attributes when us - ministrator. Consult with the network administrator. For details on the LDAP server. Specify the port number (between 1 o o and 65535) used to use Internet faxing. tinations ...
...for destinations on Internet faxing, refer to the User's Guide for communicating with the network administrator. Network settings 7 *1: Necessary if notification of the URL is no usable SMTP server on the network. *4: The setting must be specified in order to use direct faxing. For details... on the LDAP server. Specify the search attributes when us - ministrator. Consult with the network administrator. For details on the LDAP server. Specify the port number (between 1 o o and 65535) used to use Internet faxing. tinations ...

IC-206 User Manual
Page 145
... setting other than "ANONYMOUS" was selected as LDAP search results. Select the LDAP authentication meth- Consult with the network administrator. Consult with the network administrator. Type in an account name if any setting other than "ANONYMOUS" was selected as the authentication method. Specify...the LDAP server. o od. Specify the account name used to the LDAP server. Consult with the network administrator. 7 Network settings Parameter SEARCH METHOD LDAP TIMEOUT MAX. SEARCH RESULTS AUTHENTICATION LDAP ACCOUNT LDAP PASSWORD DOMAIN NAME Description Settings ...
... setting other than "ANONYMOUS" was selected as LDAP search results. Select the LDAP authentication meth- Consult with the network administrator. Consult with the network administrator. Type in an account name if any setting other than "ANONYMOUS" was selected as the authentication method. Specify...the LDAP server. o od. Specify the account name used to the LDAP server. Consult with the network administrator. 7 Network settings Parameter SEARCH METHOD LDAP TIMEOUT MAX. SEARCH RESULTS AUTHENTICATION LDAP ACCOUNT LDAP PASSWORD DOMAIN NAME Description Settings ...

IC-206 User Manual
Page 148
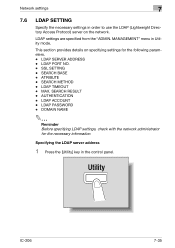
... a continuous operation. 1 Press the [Utility] key in Utility mode. GATEWAY - DNS CONFIG - LPD SETTING - SLP SETTING - SUBNET MASK - SNMP SETTING 2 Reminder Before specifying network settings, check with the network administrator for the following parameters. - IP ADDRESS SETTING - WEB SETTING - This section provides details on specifying settings for the necessary information. MANAGEMENT" menu in...
... a continuous operation. 1 Press the [Utility] key in Utility mode. GATEWAY - DNS CONFIG - LPD SETTING - SLP SETTING - SUBNET MASK - SNMP SETTING 2 Reminder Before specifying network settings, check with the network administrator for the following parameters. - IP ADDRESS SETTING - WEB SETTING - This section provides details on specifying settings for the necessary information. MANAGEMENT" menu in...

IC-206 User Manual
Page 151
After the message "ACCEPTED" appears, the "NETWORK SETTING" menu appears again. 11 Press the [Reset] key in correctly. 7-12 IC-206 After the screen shown below appears, turn the machine off, then on again to restart it. 2 Note If a number was incorrectly entered, press the [Clear/Stop] key to erase the number, and then type it in the control panel. - For the subnet mask, consult with the network administrator. 9 Use the keypad to type in the subnet mask, and then press the [OK] key. - 7 Network settings 8 Use the keypad to type in the gateway. 10 Press the [OK] key.
After the message "ACCEPTED" appears, the "NETWORK SETTING" menu appears again. 11 Press the [Reset] key in correctly. 7-12 IC-206 After the screen shown below appears, turn the machine off, then on again to restart it. 2 Note If a number was incorrectly entered, press the [Clear/Stop] key to erase the number, and then type it in the control panel. - For the subnet mask, consult with the network administrator. 9 Use the keypad to type in the subnet mask, and then press the [OK] key. - 7 Network settings 8 Use the keypad to type in the gateway. 10 Press the [OK] key.

IC-206 User Manual
Page 152
... the new settings, the machine must be turned off, then on again to type in the IP address of the DNS server. Continue with the network administrator. 7-13 For the IP address of the DNS server, consult with step 3. 3 Use the keypad to be restarted. Specifying the DNS settings 1 In the...
... the new settings, the machine must be turned off, then on again to type in the IP address of the DNS server. Continue with the network administrator. 7-13 For the IP address of the DNS server, consult with step 3. 3 Use the keypad to be restarted. Specifying the DNS settings 1 In the...

IC-206 User Manual
Page 158
Network settings 7 7.4 E-MAIL SETTING 1 E-mail transmission settings are specified from the "ADMIN. E-MAIL ADDRESS - SMTP SERVER ADDRESS - TEXT INSERT - This section provides details on specifying settings ... panel. POP BEFORE SMTP - E-MAIL MODE (available only when optional fax kit FK-506 is installed) 2 Reminder Before specifying e-mail transmission settings, check with the network administrator for the following parameters. -
Network settings 7 7.4 E-MAIL SETTING 1 E-mail transmission settings are specified from the "ADMIN. E-MAIL ADDRESS - SMTP SERVER ADDRESS - TEXT INSERT - This section provides details on specifying settings ... panel. POP BEFORE SMTP - E-MAIL MODE (available only when optional fax kit FK-506 is installed) 2 Reminder Before specifying e-mail transmission settings, check with the network administrator for the following parameters. -

IC-206 User Manual
Page 161
... message "ACCEPTED" appears, the "E-MAIL SETTING 1" menu appears again. 2 Note If a number was incorrectly entered, press the [Clear/Stop] key to first obtain from the network administrator the e-mail ad- Be sure to erase the number, and then type it in the e-mail address of the sender.... - 7 Network settings Specifying the e-mail address of the sender 1 In the "E-MAIL SETTING 1" menu, press the [,] or [+] key until "E-MAIL ADDRESS" is selected, and then press ...
... message "ACCEPTED" appears, the "E-MAIL SETTING 1" menu appears again. 2 Note If a number was incorrectly entered, press the [Clear/Stop] key to first obtain from the network administrator the e-mail ad- Be sure to erase the number, and then type it in the e-mail address of the sender.... - 7 Network settings Specifying the e-mail address of the sender 1 In the "E-MAIL SETTING 1" menu, press the [,] or [+] key until "E-MAIL ADDRESS" is selected, and then press ...

IC-206 User Manual
Page 162
... ADDR." is selected, and then press the [OK] key. 2 Type in correctly. The host name can contain a maximum of the SMTP server, consult with the network administrator. 3 Press the [OK] key. For the IP address or host name of 64 characters. - IC-206 7-23 Press the [OK] key. - After the message "ACCEPTED...
... ADDR." is selected, and then press the [OK] key. 2 Type in correctly. The host name can contain a maximum of the SMTP server, consult with the network administrator. 3 Press the [OK] key. For the IP address or host name of 64 characters. - IC-206 7-23 Press the [OK] key. - After the message "ACCEPTED...

IC-206 User Manual
Page 170
... until "POP3 PORT NO." is selected, and then press the [OK] key. The host name can contain a maximum of the POP3 server, consult with the network administrator. 7 Press the [OK] key. IC-206 7-31 To specify a host name for the POP3 server...
... until "POP3 PORT NO." is selected, and then press the [OK] key. The host name can contain a maximum of the POP3 server, consult with the network administrator. 7 Press the [OK] key. IC-206 7-31 To specify a host name for the POP3 server...

IC-206 User Manual
Page 172
For the account name, consult with the network administrator. 3 Press the [OK] key. After the message "ACCEPTED" appears, the "E-MAIL SETTING 2" menu appears again. 2 Note If a number was incorrectly entered, press the [Clear/Stop] key to erase the number, and then type it in the account name. - Network settings 7 Specifying the POP3 account 1 In the "E-MAIL SETTING 2" menu, press the [,] or [+] key until "POP3 ACCOUNT" is selected, and then press the [OK] key. 2 Type in correctly. The account name can contain a maximum of 64 characters. - IC-206 7-33
For the account name, consult with the network administrator. 3 Press the [OK] key. After the message "ACCEPTED" appears, the "E-MAIL SETTING 2" menu appears again. 2 Note If a number was incorrectly entered, press the [Clear/Stop] key to erase the number, and then type it in the account name. - Network settings 7 Specifying the POP3 account 1 In the "E-MAIL SETTING 2" menu, press the [,] or [+] key until "POP3 ACCOUNT" is selected, and then press the [OK] key. 2 Type in correctly. The account name can contain a maximum of 64 characters. - IC-206 7-33

IC-206 User Manual
Page 173
For the password, consult with the network administrator. 3 Press the [OK] key. After the message "ACCEPTED" appears, the "E-MAIL SETTING 2" menu appears again. 2 Note If a number was incorrectly entered, press the [Clear/Stop] key to erase the number, and then type it in the password. - 7 Network settings Specifying the POP3 password 1 In the "E-MAIL SETTING 2" menu, press the [,] or [+] key until "POP3 PASSWORD" is selected, and then press the [OK] key. 2 Type in correctly. 7-34 IC-206 The password can contain a maximum of 32 characters. -
For the password, consult with the network administrator. 3 Press the [OK] key. After the message "ACCEPTED" appears, the "E-MAIL SETTING 2" menu appears again. 2 Note If a number was incorrectly entered, press the [Clear/Stop] key to erase the number, and then type it in the password. - 7 Network settings Specifying the POP3 password 1 In the "E-MAIL SETTING 2" menu, press the [,] or [+] key until "POP3 PASSWORD" is selected, and then press the [OK] key. 2 Type in correctly. 7-34 IC-206 The password can contain a maximum of 32 characters. -
IC-206 User Manual
Page 174
...menu in the control panel. SEARCH BASE - ATRIBUTE - LDAP PASSWORD - IC-206 7-35 This section provides details on the network. LDAP TIMEOUT - SEARCH RESULT - LDAP SERVER ADDRESS - SEARCH METHOD - MAX. Network settings 7 7.6 LDAP SETTING Specify the necessary settings in order to use the LDAP (Lightweight Directory Access Protocol) server on ... LDAP settings are specified from the "ADMIN. AUTHENTICATION - LDAP PORT NO. - LDAP ACCOUNT - DOMAIN NAME 2 Reminder Before specifying LDAP settings, check with the network administrator for the following parameters. -
...menu in the control panel. SEARCH BASE - ATRIBUTE - LDAP PASSWORD - IC-206 7-35 This section provides details on the network. LDAP TIMEOUT - SEARCH RESULT - LDAP SERVER ADDRESS - SEARCH METHOD - MAX. Network settings 7 7.6 LDAP SETTING Specify the necessary settings in order to use the LDAP (Lightweight Directory Access Protocol) server on ... LDAP settings are specified from the "ADMIN. AUTHENTICATION - LDAP PORT NO. - LDAP ACCOUNT - DOMAIN NAME 2 Reminder Before specifying LDAP settings, check with the network administrator for the following parameters. -

IC-206 User Manual
Page 176
... host name for the LDAP server, the DNS setting must be specified. - The host name can contain a maximum of the LDAP server, consult with the network administrator. - To specify a host name for the LDAP server. - After the message "ACCEPTED" appears, the "LDAP SETTING" menu appears again. Specifying the LDAP port number 1 In... the "LDAP SETTING" menu, press the [+] or [,] key until "LDAP SERVER ADDR." is selected, and then press the [OK] key. Network settings 7 5 In the "LDAP SETTING" menu, press the [+] or [,] key until "LDAP PORT NO."
... host name for the LDAP server, the DNS setting must be specified. - The host name can contain a maximum of the LDAP server, consult with the network administrator. - To specify a host name for the LDAP server. - After the message "ACCEPTED" appears, the "LDAP SETTING" menu appears again. Specifying the LDAP port number 1 In... the "LDAP SETTING" menu, press the [+] or [,] key until "LDAP SERVER ADDR." is selected, and then press the [OK] key. Network settings 7 5 In the "LDAP SETTING" menu, press the [+] or [,] key until "LDAP PORT NO."

IC-206 User Manual
Page 178
... where the LDAP server is selected, and then press the [OK] key. IC-206 7-39 For the search base, consult with the network administrator. - The search base can contain a maximum of 64 characters. - Network settings 7 Specifying the search base 1 In the "LDAP SETTING" menu, press the [+] or [,] key until "AT- TRIBUTE" is searched...
... where the LDAP server is selected, and then press the [OK] key. IC-206 7-39 For the search base, consult with the network administrator. - The search base can contain a maximum of 64 characters. - Network settings 7 Specifying the search base 1 In the "LDAP SETTING" menu, press the [+] or [,] key until "AT- TRIBUTE" is searched...

IC-206 User Manual
Page 179
... - After the message "ACCEPTED" appears, the "LDAP SETTING" menu appears again. For the attribute, consult with the network administrator. - ed, and then press the [OK] key. 7-40 - Whether "BEGIN", "CONTAIN" or "END" is select- IC-206 Selecting the search method 1 In the "LDAP SETTING" ...
... - After the message "ACCEPTED" appears, the "LDAP SETTING" menu appears again. For the attribute, consult with the network administrator. - ed, and then press the [OK] key. 7-40 - Whether "BEGIN", "CONTAIN" or "END" is select- IC-206 Selecting the search method 1 In the "LDAP SETTING" ...


