
User Manual
Page 7
... custody 1. 6. 3 Treatment against environmental condition Chapter 2 Basic Operations 2. 1 Turning on the KIP C7800 2. 2 Turning off the KIP C7800 2. 3 Replacing the Roll Media 2. 4 Setting Cut Sheet Media to Bypass Feeder 2. 4. 1 Loading Small Size Sheet 2. 4. 2 Loading Large Size Sheet 2. 5 Replacing the Toner Cartridge 2. 6 Replacing the Waste Toner Box 2. 7 Initial Cut (Straighten the leading edge of roll media) 2. 8 Sleep Mode Chapter...
... custody 1. 6. 3 Treatment against environmental condition Chapter 2 Basic Operations 2. 1 Turning on the KIP C7800 2. 2 Turning off the KIP C7800 2. 3 Replacing the Roll Media 2. 4 Setting Cut Sheet Media to Bypass Feeder 2. 4. 1 Loading Small Size Sheet 2. 4. 2 Loading Large Size Sheet 2. 5 Replacing the Toner Cartridge 2. 6 Replacing the Waste Toner Box 2. 7 Initial Cut (Straighten the leading edge of roll media) 2. 8 Sleep Mode Chapter...

User Manual
Page 17
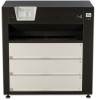
...the AC power. Open here to clear a print jam in North America Use the following type of part Stacker Port Fuser Exit Door Waste Toner Box Breaker Power Cord Breaker Power Cord Function For a dedicated Auto Stacker for the power cord used in Fuser Unit. 1. 5. 3 ... view Fuser Exit Door Stacker Port Waste Toner Box Name of power cord (UL-Listed). (1) Rating 250VAC, 20A (2) Plug type NEMA6-20 (3) Socket type IEC60320 : C19 (4) Cord SJT 3xAWG12 L Collects the wasted toner. It is possible to the wall outlet alone. NOTE : Specification for the KIP C7800 (DC24V 2A) Prints come from ...
...the AC power. Open here to clear a print jam in North America Use the following type of part Stacker Port Fuser Exit Door Waste Toner Box Breaker Power Cord Breaker Power Cord Function For a dedicated Auto Stacker for the power cord used in Fuser Unit. 1. 5. 3 ... view Fuser Exit Door Stacker Port Waste Toner Box Name of power cord (UL-Listed). (1) Rating 250VAC, 20A (2) Plug type NEMA6-20 (3) Socket type IEC60320 : C19 (4) Cord SJT 3xAWG12 L Collects the wasted toner. It is possible to the wall outlet alone. NOTE : Specification for the KIP C7800 (DC24V 2A) Prints come from ...

User Manual
Page 18
Collects the wasted toner. 1-10 Chapter 1 Before Use Rear Door Waste Toner Box (for Belt Unit) Name of part Rear Door Waste Toner Box (for Belt Unit) Function Can access the mis-fed media and the Waste Toner Box for Belt Unit by opening Rear Door.
Collects the wasted toner. 1-10 Chapter 1 Before Use Rear Door Waste Toner Box (for Belt Unit) Name of part Rear Door Waste Toner Box (for Belt Unit) Function Can access the mis-fed media and the Waste Toner Box for Belt Unit by opening Rear Door.

User Manual
Page 22
Chapter 2 Basic Operations 2. 1 Turning on the KIP C7800 2. 2 Turning off the KIP C7800 2. 3 Replacing the Roll Media 2. 4 Setting Cut Sheet Media to Bypass Feeder 2. 4. 1 Loading Small Size Sheet 2. 4. 2 Loading Large Size Sheet 2. 5 Replacing the Toner Cartridge 2. 6 Replacing the Waste Toner Box 2. 7 Initial Cut (Straighten the leading edge of roll media) 2. 8 Sleep Mode page 2- 2 2- 4 2- 6 2-11 2-12 2-14 2-16 2-20 2-24 2-26 2-1 Chapter 2 Basic Operations
Chapter 2 Basic Operations 2. 1 Turning on the KIP C7800 2. 2 Turning off the KIP C7800 2. 3 Replacing the Roll Media 2. 4 Setting Cut Sheet Media to Bypass Feeder 2. 4. 1 Loading Small Size Sheet 2. 4. 2 Loading Large Size Sheet 2. 5 Replacing the Toner Cartridge 2. 6 Replacing the Waste Toner Box 2. 7 Initial Cut (Straighten the leading edge of roll media) 2. 8 Sleep Mode page 2- 2 2- 4 2- 6 2-11 2-12 2-14 2-16 2-20 2-24 2-26 2-1 Chapter 2 Basic Operations

User Manual
Page 41
... machine frame" and "on the corner near the window. Apply the Sticker on the mentioned corner in L shape to seal the box in the future replacement. 2. 6 Replacing the Waste Toner Box NOTE Replace the 2 Waste Toner Boxes "on the rear corner of the Stickers. Stickers (1) Stickers Stickers Stickers Mylar NOTE (1) Never overlap the "Mylar" on the sensor...
... machine frame" and "on the corner near the window. Apply the Sticker on the mentioned corner in L shape to seal the box in the future replacement. 2. 6 Replacing the Waste Toner Box NOTE Replace the 2 Waste Toner Boxes "on the rear corner of the Stickers. Stickers (1) Stickers Stickers Stickers Mylar NOTE (1) Never overlap the "Mylar" on the sensor...

User Manual
Page 42
... using Waste Toner Box with the stored "Sticker". Otherwise the toner will explode if thrown into the fire. Discard the Waste Toner Box according to your local regulations. Please ask the seller for the way of the using Waste Toner Box stored Sticker NOTE (1) Do not handle the Waste Toner Box roughly. New Waste Toner Box 2-21 Sensor window Chapter 2 Basic Operations Install the new Waste Toner Box so...
... using Waste Toner Box with the stored "Sticker". Otherwise the toner will explode if thrown into the fire. Discard the Waste Toner Box according to your local regulations. Please ask the seller for the way of the using Waste Toner Box stored Sticker NOTE (1) Do not handle the Waste Toner Box roughly. New Waste Toner Box 2-21 Sensor window Chapter 2 Basic Operations Install the new Waste Toner Box so...

User Manual
Page 43
Firmly push and close the Waste Toner Case. 6. Keep it pressing even after releasing. 2-22 Stopper Chapter 2 Basic Operations Open the Rear Door (Belt Unit). Sticker Rear Door 7. With pressing, turn the stopper to the arrow direction to release the Waste Toner Box. Insert the last one sticker in the kit (for future sealing) beside the new Waste Toner Box. Waste Toner Box 8. 5. Slightly press the Waste Toner Box at the bottom of the Rear Door (Belt Unit).
Firmly push and close the Waste Toner Case. 6. Keep it pressing even after releasing. 2-22 Stopper Chapter 2 Basic Operations Open the Rear Door (Belt Unit). Sticker Rear Door 7. With pressing, turn the stopper to the arrow direction to release the Waste Toner Box. Insert the last one sticker in the kit (for future sealing) beside the new Waste Toner Box. Waste Toner Box 8. 5. Slightly press the Waste Toner Box at the bottom of the Rear Door (Belt Unit).

User Manual
Page 44
.... NOTE (1) Do not handle the Waste Toner Box roughly. The Waste Toner Box will explode if thrown into the fire. Slowly release the pressure. Firmly push and install the new Waste Toner Box (for the way of dispose. 10. 9. WARNING Do not discard it . Slowly and gently remove the Waste Toner Box from its open hole. (2) The Waste Toner Box should be returned to lock...
.... NOTE (1) Do not handle the Waste Toner Box roughly. The Waste Toner Box will explode if thrown into the fire. Slowly release the pressure. Firmly push and install the new Waste Toner Box (for the way of dispose. 10. 9. WARNING Do not discard it . Slowly and gently remove the Waste Toner Box from its open hole. (2) The Waste Toner Box should be returned to lock...

User Manual
Page 64
NOTE (1) "Printer waste toner bottle full" also appears if the Waste Toner Box is incorrectly set. (2) The printer has 2 Waste Toner Boxes, one is for the Drum (on the Rear Door). The printer does not restart operation until the Waste Toner Box is for Belt Unit (on the rear corner) and the other is properly replaced. For replacement procedure, see [2.6 Replacing the Waste Toner Box]. For Drum For Belt Unit 3-17 Chapter 3 Troubleshooting 3. 3. 3 Printer waste toner bottle full When the Waste Toner Box is full, the UI screen shows "Printer waste toner bottle full."
NOTE (1) "Printer waste toner bottle full" also appears if the Waste Toner Box is incorrectly set. (2) The printer has 2 Waste Toner Boxes, one is for the Drum (on the Rear Door). The printer does not restart operation until the Waste Toner Box is for Belt Unit (on the rear corner) and the other is properly replaced. For replacement procedure, see [2.6 Replacing the Waste Toner Box]. For Drum For Belt Unit 3-17 Chapter 3 Troubleshooting 3. 3. 3 Printer waste toner bottle full When the Waste Toner Box is full, the UI screen shows "Printer waste toner bottle full."


