
User Guide
Page 4
Table of Contents Changing the quantity of test prints...4-3 5 Using the Diagnostic Tool Adjusting Print Head and Paper Cutter Registration 5-1 Updating Firmware...5-4 6 Troubleshooting the Printer Appendix A: Important Printer Information Printer Specifications ...A-1 ENERGY STAR Partner...A-1 Appendix B: Safety and Regulatory Information Important Safety Information ...B-1 Safety Labels...B-2 Regulatory and Safety Compliance...B-2 Safety ...B-2 Radio frequency interference ...B-2 Noise emission...B-3 Disposal ...B-3 iv
Table of Contents Changing the quantity of test prints...4-3 5 Using the Diagnostic Tool Adjusting Print Head and Paper Cutter Registration 5-1 Updating Firmware...5-4 6 Troubleshooting the Printer Appendix A: Important Printer Information Printer Specifications ...A-1 ENERGY STAR Partner...A-1 Appendix B: Safety and Regulatory Information Important Safety Information ...B-1 Safety Labels...B-2 Regulatory and Safety Compliance...B-2 Safety ...B-2 Radio frequency interference ...B-2 Noise emission...B-3 Disposal ...B-3 iv
User Guide
Page 36
... 2, 3, 4) 4-2 The printer DSP firmware version is displayed. Press Enter. 2. Press Enter. 2. Select the level of prints made since the printer was manufactured. The printer FEE firmware version is displayed. The engine firmware version is on and ready to scroll through the printer settings in the Settings following ...total possible (YYY) for the media currently installed. Operating the Printer Accessing the Printer Press Menu Scroll repeatedly to make prints. This counter cannot be reset. Checking the DSP firmware version DSP Firm X.XX None. Select the language. 1. ...
... 2, 3, 4) 4-2 The printer DSP firmware version is displayed. Press Enter. 2. Press Enter. 2. Select the level of prints made since the printer was manufactured. The printer FEE firmware version is displayed. The engine firmware version is on and ready to scroll through the printer settings in the Settings following ...total possible (YYY) for the media currently installed. Operating the Printer Accessing the Printer Press Menu Scroll repeatedly to make prints. This counter cannot be reset. Checking the DSP firmware version DSP Firm X.XX None. Select the language. 1. ...
User Guide
Page 42
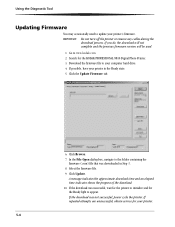
... the firmware (.rom) file that was successful, wait for the printer to initialize and for the Ready light to appear. Using the Diagnostic Tool Updating Firmware You may occasionally need to update your printer. 5-4 Click Browse. 7. If the download was not successful, power cycle the printer. If repeated attempts are unsuccessful, obtain service for the KODAK PROFESSIONAL 9810 Digital Photo Printer. 3.
... the firmware (.rom) file that was successful, wait for the printer to initialize and for the Ready light to appear. Using the Diagnostic Tool Updating Firmware You may occasionally need to update your printer. 5-4 Click Browse. 7. If the download was not successful, power cycle the printer. If repeated attempts are unsuccessful, obtain service for the KODAK PROFESSIONAL 9810 Digital Photo Printer. 3.
User Guide
Page 51
Index A air flow clearances, 1-1 C cables, connecting, 1-8 calibrating the printer, 3-1 calibration errors, 3-9 calibration software installing, 3-1 uninstalling, 3-8 calibration utility, using, 3-2 connecting cables, 1-8 customizing printer properties, 2-3 D diagnostic tool, 5-1 disposal, B-3 E error messages, calibration, 3-9 F firmware, updating, 5-4 H humidity, printer specifications, A-1 I installing calibration software, 3-1 paper, 1-2 printer driver, 2-2 ribbon, 1-6 L labels, safety, B-2 loading paper, 1-2 ribbon, 1-6 N noise emission spec, B-3 O operator panel error/red light, 4-1 ...
Index A air flow clearances, 1-1 C cables, connecting, 1-8 calibrating the printer, 3-1 calibration errors, 3-9 calibration software installing, 3-1 uninstalling, 3-8 calibration utility, using, 3-2 connecting cables, 1-8 customizing printer properties, 2-3 D diagnostic tool, 5-1 disposal, B-3 E error messages, calibration, 3-9 F firmware, updating, 5-4 H humidity, printer specifications, A-1 I installing calibration software, 3-1 paper, 1-2 printer driver, 2-2 ribbon, 1-6 L labels, safety, B-2 loading paper, 1-2 ribbon, 1-6 N noise emission spec, B-3 O operator panel error/red light, 4-1 ...
User Guide
Page 52
Index R radio frequency compliance, B-2 Ready message, operator panel, 4-2 recycling, B-3 ribbon, loading, 1-6 S safety compliance, B-2 tips, B-1 warning labels, B-2 setting up the printer, 1-1 setup mode, 4-1 software installing calibration software, 3-1 printer driver, 2-2 USB cable, connecting, 1-8 uninstalling, 2-9, 3-8 specifications printer, A-1 switch, power, 1-9 T temperature printer specifications, A-1 test print, making, 4-3 troubleshooting the printer, 6-1 U uninstalling calibration software, 3-8 printer driver, 2-9 updating firmware, 5-4 USB cable, connecting, 1-8 I-2
Index R radio frequency compliance, B-2 Ready message, operator panel, 4-2 recycling, B-3 ribbon, loading, 1-6 S safety compliance, B-2 tips, B-1 warning labels, B-2 setting up the printer, 1-1 setup mode, 4-1 software installing calibration software, 3-1 printer driver, 2-2 USB cable, connecting, 1-8 uninstalling, 2-9, 3-8 specifications printer, A-1 switch, power, 1-9 T temperature printer specifications, A-1 test print, making, 4-3 troubleshooting the printer, 6-1 U uninstalling calibration software, 3-8 printer driver, 2-9 updating firmware, 5-4 USB cable, connecting, 1-8 I-2