
User Guide
Page 1
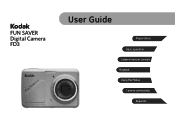
FUN SAVER Digital Camera FD3 User Guide Preparations Basic operation Camera function controls Playback Using the Menus Camera connectivity Appendix
FUN SAVER Digital Camera FD3 User Guide Preparations Basic operation Camera function controls Playback Using the Menus Camera connectivity Appendix
User Guide
Page 3
... product. Operation is subject to the following the provision of Conformity Model Name: KODAK FUN SAVER Digital Camera/FD3 Eastman Kodak Company Rochester, New York 14650 © Eastman Kodak Company, 2011. Tested To Comply With FCC Standards FOR HOME OR OFFICE USE FCC Statement This device complies with the European requirements for sales in Europe...
... product. Operation is subject to the following the provision of Conformity Model Name: KODAK FUN SAVER Digital Camera/FD3 Eastman Kodak Company Rochester, New York 14650 © Eastman Kodak Company, 2011. Tested To Comply With FCC Standards FOR HOME OR OFFICE USE FCC Statement This device complies with the European requirements for sales in Europe...

User Guide
Page 4
... of locations: • In the rain, very humid and dusty places. • In a place where the camera can be used shortens markedly. Battery notes: Incorrect use the camera in dry environment. ii • Do not expose the batteries to water, and take particular care to keep them... not store photos that are stored in the autogenerated folder in contact with your camera. If the camera will not be used for a while before using it impossible to recognize the picture when the camera is subject to high temperature, e.g. In cold locations, battery performance deteriorates and...
... of locations: • In the rain, very humid and dusty places. • In a place where the camera can be used shortens markedly. Battery notes: Incorrect use the camera in dry environment. ii • Do not expose the batteries to water, and take particular care to keep them... not store photos that are stored in the autogenerated folder in contact with your camera. If the camera will not be used for a while before using it impossible to recognize the picture when the camera is subject to high temperature, e.g. In cold locations, battery performance deteriorates and...

User Guide
Page 5
Copyright © Copyright 2011 Eastman Kodak Company. No part of this digital camera. Safety information Please read this manual carefully and keep it in this manual are used for purchasing this publication may be damaged. 1 Improper handling may be reproduced, transmitted, transcribed, stored...permission of Eastman Kodak Company. Using other types of batteries may damage the camera and invalidate the warranty. • Do not touch the camera lens. • Please not expose the camera to service the camera yourself. • Do not drop or knock the camera. All rights ...
Copyright © Copyright 2011 Eastman Kodak Company. No part of this digital camera. Safety information Please read this manual carefully and keep it in this manual are used for purchasing this publication may be damaged. 1 Improper handling may be reproduced, transmitted, transcribed, stored...permission of Eastman Kodak Company. Using other types of batteries may damage the camera and invalidate the warranty. • Do not touch the camera lens. • Please not expose the camera to service the camera yourself. • Do not drop or knock the camera. All rights ...
User Guide
Page 6
...useful information to be taken while operating the camera. 2 To clean, wipe the camera with instructions on how to use abrasive cleansers, alcohol-based, or solventbased cleaners to clean the camera.... Every effort has been made to ensure that the contents of time. • Do not use your digital camera...and remove the batteries from the camera if you are going to store the camera for long periods of this manual are used to help you with a ...
...useful information to be taken while operating the camera. 2 To clean, wipe the camera with instructions on how to use abrasive cleansers, alcohol-based, or solventbased cleaners to clean the camera.... Every effort has been made to ensure that the contents of time. • Do not use your digital camera...and remove the batteries from the camera if you are going to store the camera for long periods of this manual are used to help you with a ...

User Guide
Page 7
... ii BEFORE YOU START 1 Preface 1 Copyright 1 Trademarks 1 Safety information 1 About this manual 2 Symbols used in this manual 2 CONTENTS 3 GETTING READY 7 Unpacking 7 Camera Views 8 Inserting the Battery and SD/SDHC Card (Not included) .10 Turning On and Off 12 Using the Mode Button 13 Setting Date/Time and Language 14 Setting the Date and...
... ii BEFORE YOU START 1 Preface 1 Copyright 1 Trademarks 1 Safety information 1 About this manual 2 Symbols used in this manual 2 CONTENTS 3 GETTING READY 7 Unpacking 7 Camera Views 8 Inserting the Battery and SD/SDHC Card (Not included) .10 Turning On and Off 12 Using the Mode Button 13 Setting Date/Time and Language 14 Setting the Date and...

User Guide
Page 10
Transferring Files to your PC 59 Connecting to a PictBridge Compatible Printer 61 Setting the USB Mode 61 Connecting the Camera and Printer 62 Using the PictBridge Menu 63 Print with Date 63 Print without Date 64 Print Index 65 Print DPOF 66 Exit 66 APPENDICES 67 Specifications 67 Error Messages 71 Troubleshooting 73 6
Transferring Files to your PC 59 Connecting to a PictBridge Compatible Printer 61 Setting the USB Mode 61 Connecting the Camera and Printer 62 Using the PictBridge Menu 63 Print with Date 63 Print without Date 64 Print Index 65 Print DPOF 66 Exit 66 APPENDICES 67 Specifications 67 Error Messages 71 Troubleshooting 73 6

User Guide
Page 11
GETTING READY Unpacking Your package should contain the camera model you purchased along with the following items. If anything is missing or appears to be damaged, please contact your vendor. AA-size Alkaline Batteries USB Cable Wrist Strap 7
GETTING READY Unpacking Your package should contain the camera model you purchased along with the following items. If anything is missing or appears to be damaged, please contact your vendor. AA-size Alkaline Batteries USB Cable Wrist Strap 7

User Guide
Page 16
... . To remove the SD/SDHC card, open the battery compartment and gently push the card to 16 GB memory cards from recognized manufacturers such as Kodak are not included. Turning On and Off Press the Power button to select a different one after it is turned on . You can press the Mode... button to turn off the camera, press the Power button again. To turn the camera on the last use of 64 MB to release it will appear. Pull the card out carefully. Optional SD/SDHC cards are recommended for...
... . To remove the SD/SDHC card, open the battery compartment and gently push the card to 16 GB memory cards from recognized manufacturers such as Kodak are not included. Turning On and Off Press the Power button to select a different one after it is turned on . You can press the Mode... button to turn off the camera, press the Power button again. To turn the camera on the last use of 64 MB to release it will appear. Pull the card out carefully. Optional SD/SDHC cards are recommended for...

User Guide
Page 17
Using the Mode Button This camera provides a convenient Mode Button that allows you to capture a sequence of shots and stitch them together into a panoramic photo. All the available modes are listed ...
Using the Mode Button This camera provides a convenient Mode Button that allows you to capture a sequence of shots and stitch them together into a panoramic photo. All the available modes are listed ...

User Guide
Page 18
Press Power to select Date/Time. Use the Up/Down button to turn the camera on. 2. Press the Left/Right to highlight each field and use the Up/Down to enter the setting. 2. Then press the Right button to adjust the value. 3. Setting the Date and Time 1. Press the button to ...confirm the setting. 14 Press the button to confirm the setting. Press the button, switch among the setting menus by using the Left/Right button to the following setup options in the Setup menu. • Date / Time • Language To access the Setup menu, do the...
Press Power to select Date/Time. Use the Up/Down button to turn the camera on. 2. Press the Left/Right to highlight each field and use the Up/Down to enter the setting. 2. Then press the Right button to adjust the value. 3. Setting the Date and Time 1. Press the button to ...confirm the setting. 14 Press the button to confirm the setting. Press the button, switch among the setting menus by using the Left/Right button to the following setup options in the Setup menu. • Date / Time • Language To access the Setup menu, do the...

User Guide
Page 19
Use the Up/Down button to go to select the desired language. 3. Use the Left/Right buttons to the Language. Press the button to enter the setting. 2. Setting the Language 1. Then press the Right button to confirm the setting. The Date/Time and Language setup will automatically appear when the camera is turned on the first time. 15
Use the Up/Down button to go to select the desired language. 3. Use the Left/Right buttons to the Language. Press the button to enter the setting. 2. Setting the Language 1. Then press the Right button to confirm the setting. The Date/Time and Language setup will automatically appear when the camera is turned on the first time. 15

User Guide
Page 20
...running water. • If liquid crystal gets into your eye, flush the affected eye with clean water for use. please remove any moisture on the LCD screen. Drink large quantities of the pixels are operational for at ... flush your mouth thoroughly with water. If any way. LCD Screen notes: Extremely high-precision technology had been used to water; Avoid exposing the LCD screen to manufacture the LCD screen so that constantly appear on the LCD ...icons, see "LCD Screen display" on the LCD screen to indicate the current camera settings and status. About the LCD Screen When you turn the...
...running water. • If liquid crystal gets into your eye, flush the affected eye with clean water for use. please remove any moisture on the LCD screen. Drink large quantities of the pixels are operational for at ... flush your mouth thoroughly with water. If any way. LCD Screen notes: Extremely high-precision technology had been used to water; Avoid exposing the LCD screen to manufacture the LCD screen so that constantly appear on the LCD ...icons, see "LCD Screen display" on the LCD screen to indicate the current camera settings and status. About the LCD Screen When you turn the...

User Guide
Page 21
...(See "Digital Zoom" on . 2. The LCD screen will show green focus frame after the Zoom button is in focus. 5. Using the Zoom Function Your camera is the easiest mode to turn the camera on page 41) When the optical zoom reaches its maximum value, release the Zoom button then press it again for... the current zoom status. 17 Zoom indicator is hidden after the subject is released. While operating in this mode, the camera automatically optimizes your picture on the LCD screen and press the Shutter button halfway to zoom in or out on the subject. 4. Press Shutter ...
...(See "Digital Zoom" on . 2. The LCD screen will show green focus frame after the Zoom button is in focus. 5. Using the Zoom Function Your camera is the easiest mode to turn the camera on page 41) When the optical zoom reaches its maximum value, release the Zoom button then press it again for... the current zoom status. 17 Zoom indicator is hidden after the subject is released. While operating in this mode, the camera automatically optimizes your picture on the LCD screen and press the Shutter button halfway to zoom in or out on the subject. 4. Press Shutter ...

User Guide
Page 22
... goes off automatically based on existing light conditions. • Flash : Red-eye reduction The camera exposes a brief flash before the picture is taken to confirm the settings and exit the screen. Press Left/Right button to select the basic functions ... screen of Basic Function. 18 4. Press button to confirm the settings and exit the menu, or press Down button to select the settings of the camera include Flash, Selftimer, Macro Capture, and Exposure Compensation. Basic Functions Menu The Basic Function Menus of the required function. 3. The suitable function setting can let...
... goes off automatically based on existing light conditions. • Flash : Red-eye reduction The camera exposes a brief flash before the picture is taken to confirm the settings and exit the screen. Press Left/Right button to select the basic functions ... screen of Basic Function. 18 4. Press button to confirm the settings and exit the menu, or press Down button to select the settings of the camera include Flash, Selftimer, Macro Capture, and Exposure Compensation. Basic Functions Menu The Basic Function Menus of the required function. 3. The suitable function setting can let...

User Guide
Page 24
... of the required function. 3. Press button to confirm the settings and exit the menu, or press Down button to enter the selection screen of the camera include Image Size, Image Quality, White Balance, Image Color and ISO etc. Press Left/Right button to confirm the settings and exit the screen. 2. The...
... of the required function. 3. Press button to confirm the settings and exit the menu, or press Down button to enter the selection screen of the camera include Image Size, Image Quality, White Balance, Image Color and ISO etc. Press Left/Right button to confirm the settings and exit the screen. 2. The...
User Guide
Page 25
... • WB : Fluorescent • WB : Fluorescent CWF • WB : Incandescent • WB : Manual (Press the shutter button to set the sensitivity of the camera sensor based on different camera models. 21 ISO The ISO function allows you to adjust the color temperature under different light source to ensure faithful color reproduction. WB...
... • WB : Fluorescent • WB : Fluorescent CWF • WB : Incandescent • WB : Manual (Press the shutter button to set the sensitivity of the camera sensor based on different camera models. 21 ISO The ISO function allows you to adjust the color temperature under different light source to ensure faithful color reproduction. WB...

User Guide
Page 32
...maximum pictures. The camera will automatically compose a panoramic picture using the individual shots that you take. Pictures cannot be deleted, nor the zoom adjusted until the series is taken, the semi-transparent image of the first shot will commence automatically. 3. Panorama Mode can use this image to...you to create a panoramic picture: 1. Follow these steps to create a panoramic picture. Press the button to the Panorama Mode. The camera will then stitch the pictures into a panorama automatically. 6. Turn the mode dial to enter Playback mode and review the panorama result. ...
...maximum pictures. The camera will automatically compose a panoramic picture using the individual shots that you take. Pictures cannot be deleted, nor the zoom adjusted until the series is taken, the semi-transparent image of the first shot will commence automatically. 3. Panorama Mode can use this image to...you to create a panoramic picture: 1. Follow these steps to create a panoramic picture. Press the button to the Panorama Mode. The camera will then stitch the pictures into a panorama automatically. 6. Turn the mode dial to enter Playback mode and review the panorama result. ...

User Guide
Page 33
... right scene for you can select from a total of 12 scene types to the optimal settings for the occasion and the camera will show background and atmosphere. 29 Select a scene using the Left/Right button and press the button. Bring lively pictures to life. Indoor For shooting people indoors. Press the button...
... right scene for you can select from a total of 12 scene types to the optimal settings for the occasion and the camera will show background and atmosphere. 29 Select a scene using the Left/Right button and press the button. Bring lively pictures to life. Indoor For shooting people indoors. Press the button...

User Guide
Page 34
... behind glass or window. Leaf For shooting plants. Vivid reproduction of green and blue. Glass Suitable for photographing children and pets. Camera automatically adjusts and corrects exposure value (EV). Sunset For shooting sunsets. Night portrait For shooting portraits with night scenes as background. ...30 Night landscape For shooting night scenes. Shutterspeed is slower than normal. (Use of tripod is recommended) Museum For shooting in order not to disturb the subject being photographed. Vivid reproduction of tripod is not ...
... behind glass or window. Leaf For shooting plants. Vivid reproduction of green and blue. Glass Suitable for photographing children and pets. Camera automatically adjusts and corrects exposure value (EV). Sunset For shooting sunsets. Night portrait For shooting portraits with night scenes as background. ...30 Night landscape For shooting night scenes. Shutterspeed is slower than normal. (Use of tripod is recommended) Museum For shooting in order not to disturb the subject being photographed. Vivid reproduction of tripod is not ...

