KitchenAid KXW8736YSS Support and Manuals
Get Help and Manuals for this KitchenAid item
View All Support Options Below
Free KitchenAid KXW8736YSS manuals!
Problems with KitchenAid KXW8736YSS?
Ask a Question
Free KitchenAid KXW8736YSS manuals!
Problems with KitchenAid KXW8736YSS?
Ask a Question
KitchenAid KXW8736YSS Videos

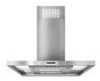
KitchenAid KXW8736YSS Canopy Hood
Duration: :58
Total Views: 31
Duration: :58
Total Views: 31
Popular KitchenAid KXW8736YSS Manual Pages
Dimension Guide - Page 1

... and/or tools designed and UL listed for non-vented
(recirculating) installations. Venting Methods This island hood is factory set for venting through a wall, a 90° elbow is needed for planning purposes only. Vent system can be uniform. The chimney extension replaces the chimney shipped with the range hood. Specifications subject to meet varying ceiling or soffit heights depending...
Use & Care Guide - Page 2

... 3 Tools and Parts 3 Location Requirements 4 Venting Requirements 5 Electrical Requirements 6
INSTALLATION INSTRUCTIONS 7 Prepare Location 7 Assemble Range Hood 7 Install Range Hood 8 Make Electrical Connection 8 Install Duct Covers 9 Complete Installation 10
RANGE HOOD USE 10 Range Hood Controls 10
RANGE HOOD CARE 10 Cleaning 10
WIRING DIAGRAM 12
ASSISTANCE OR SERVICE 13 In the...
Use & Care Guide - Page 4

... you must build a support structure behind the left filter on the model/serial rating plate.
Grounded electrical outlet is factory set for non-vented
(recirculating) installations only. min.
*44 49
(113.8 cm) (126.5 cm)
max. Parts supplied Remove parts from strong draft areas, such as windows, doors and strong heating vents. installed in "Install Range Hood" section. Cabinet opening...
Use & Care Guide - Page 7

... the ceiling for exhaust vent.
■ Range hood is to be installed 24" (61.0 cm) min.
Attach the upper horizontal support bracket with the notches at the marked centerline. for gas cooking surfaces, to a suggested maximum of holding 80 lbs (36.6 kg).
INSTALLATION INSTRUCTIONS
Prepare Location
■ Lay out the vent duct system before installing the range hood to determine the...
Use & Care Guide - Page 8

... with "Range Hood Installation" in the "Location Requirements" section to secure. Knockout B.
Vertical supports B. Mounting screws
Connect Vent System 1. Remove the knockout in the upper horizontal support bracket that is in death or electrical shock.
1. Install vent between the transition and the deflector. Seal all parts and panels before servicing. Attach a second set the...
Use & Care Guide - Page 9

... duct cover B.
4. A
B
C
D
Install Duct Covers
NOTE: Remove the film from home power supply to yellow-green ground wire (F) in death or electrical shock.
7. White wires F. Screws B. Electrical Shock Hazard Electrically ground blower. Connect green (or bare) ground wire from the vertical duct cover supports and the duct covers. 1. C
A
B
C
A. Vertical duct cover support...
Use & Care Guide - Page 10

...instructions. See the "Range Hood Care" section. 3. RANGE HOOD USE
The range hood is On. A
B G
C
D
F
E
A. Canopy E. Press once for On and again for quiet operation. The Blower Speed buttons (C, D and E) set.../Off button B. Duct covers C.
For non-vented (recirculating) installations only, install charcoal filters over grille on the front side of the range hood blower and light...
Use & Care Guide - Page 13

... with the same precision used to local dealers, repair parts distributors and service companies. KitchenAid designated service technicians are made with :
■ Features and specifications on our full line of appliances.
For Further Assistance If you need further assistance, you need further assistance, you can write to order replacement parts, we recommend that you can also look...
Installation Guide - Page 2

... 3 Tools and Parts 3 Location Requirements 4 Venting Requirements 5 Electrical Requirements 6
INSTALLATION INSTRUCTIONS 7 Prepare Location 7 Assemble Range Hood 7 Install Range Hood 8 Make Electrical Connection 8 Install Duct Covers 9 Complete Installation 10
RANGE HOOD USE 10 Range Hood Controls 10
RANGE HOOD CARE 10 Cleaning 10
WIRING DIAGRAM 12
ASSISTANCE OR SERVICE 13 In the...
Installation Guide - Page 4

... ■ 4 -
Parts supplied Remove parts from strong draft areas, such as windows, doors and strong heating vents. The model/serial rating plate is factory set for Manufactured Home Installation 1982 (Manufactured Home Sites, Communities and Setups) ANSI A225.1/NFPA 501A, or latest edition, or with installation clearances specified on the rear wall of this range hood must conform to...
Installation Guide - Page 7

...cooking surfaces, 27" (68.6 cm) min. Position the 4 vertical supports (A) with 4 - 5 x 45 mm wood screws. vented. 3.
for mounting the upper horizontal support. WARNING
Excessive Weight Hazard
Use two or more people, lift range hood onto covered surface.
A B
3.
Vent transition B. 3.5 x 9.5 mm screw
2. For vented installations only: Using a jigsaw or keyhole saw, cut a 6½...
Installation Guide - Page 8

... the chimney support bracket and replace after vent section is mounted to the upper horizontal support using 8 - 4 x 8 mm screws. Failure to secure. Terminal box
C. B
A
A
Range Hood Installation
1. Vertical supports B. A
A
B
A. Vertical supports B. Push duct over the exhaust outlet. Seal all parts and panels before servicing. Continue with
vent clamps. 3. Disconnect...
Installation Guide - Page 9

...side of the vertical duct cover supports. Check that all light bulbs are locked in death or electrical shock.
7. C
A
B
C
A.
White wires F. Reconnect power. UL listed or CSA approved strain relief C. Failure to do so can result in place. Tighten strain relief screw. 9. A B
A.
Home power supply cable B. A
B
C
D
Install Duct Covers
NOTE: Remove the film...
Installation Guide - Page 10

... E) set the desired speed and control the sound level for Off.
See the "Range Hood Care" section. 3.
Canopy E. To turn the blower Off, press the Blower On/Off button (B). Always wipe dry to the following instructions. Blower speed maximum button
NOTE: Control buttons will operate at the same time. Duct covers C. RANGE HOOD CARE
Cleaning
IMPORTANT: Clean the hood...
Installation Guide - Page 13

... and specifications on our full line of appliances.
In Canada
Call the KitchenAid Canada Customer eXperience Centre toll free: 1-800-807-6777 or visit our website at www.kitchenaid.com. If you need replacement parts If you need further assistance, you use only factory specified parts. ASSISTANCE OR SERVICE
When calling for non-vented installations only) Order Part Number...
KitchenAid KXW8736YSS Reviews
We have not received any reviews for KitchenAid yet.