

Installation Instructions
Page 2
...ordinances. • Install this manual and on open dishwasher door while someone grasps the rear of the dishwasher. The dishwasher must be performed by a qualified service technician. You need to: • Slowly open door. Table of Contents Dishwasher Safety 2 Installation Requirements 3 Tools and parts 3 ...there are no existing utility hookups 7 Install moisture barrier 9 Prepare dishwasher 10 Make electrical connection 16 Connect to water supply 17 Connect to drain 18 Secure dishwasher in cabinet opening 18 Dishwasher Safety Your safety and the safety of others . We have ...
...ordinances. • Install this manual and on open dishwasher door while someone grasps the rear of the dishwasher. The dishwasher must be performed by a qualified service technician. You need to: • Slowly open door. Table of Contents Dishwasher Safety 2 Installation Requirements 3 Tools and parts 3 ...there are no existing utility hookups 7 Install moisture barrier 9 Prepare dishwasher 10 Make electrical connection 16 Connect to water supply 17 Connect to drain 18 Secure dishwasher in cabinet opening 18 Dishwasher Safety Your safety and the safety of others . We have ...

Installation Instructions
Page 3
... provide clearance between the side of E.I. Helpful Tip: If the floor in the "Cutout dimensions" section. Bottom sound pad (located in dishwasher • small level • TORX® T15 screwdriver (if installing custom front panels) • flashlight • shallow pan •... Parts needed : • copper tubing (3/8" recommended) or flexible stainless steel braided fill line • clamp connector or conduit connector to dishwasher against freezing. A moisture barrier accessory (Part No. 4396277) is available from freezing is not required. drain hose A B C Additional ...
... provide clearance between the side of E.I. Helpful Tip: If the floor in the "Cutout dimensions" section. Bottom sound pad (located in dishwasher • small level • TORX® T15 screwdriver (if installing custom front panels) • flashlight • shallow pan •... Parts needed : • copper tubing (3/8" recommended) or flexible stainless steel braided fill line • clamp connector or conduit connector to dishwasher against freezing. A moisture barrier accessory (Part No. 4396277) is available from freezing is not required. drain hose A B C Additional ...

Installation Instructions
Page 4
...dimensions 3/4" (1.9 cm) insulation - May be reduced to 33-7/8" (86 cm) by removing wheels from dishwasher. ** Minimum, measured from the lowest point on all models) 24-7/8" (63.2 cm) 24-1/2" (62.2 cm)* front vent 33-7/8" (86 cm) min. may be increased to 6-5/8" (16....6 cm) if height of countertop. with wheels removed 21" (53.3 cm) SIDE VIEW 23-7/8" (60.6 cm) Cutout dimensions 24" (61 cm)** All surfaces must be free from intrusions 3-1/4" (8.3 cm) 24" (61 cm) min. 3-1/4" (8.3 cm) 34" (86.4 cm) min.* 2" (5.1 cm) 6" *** (15.2 cm) 3-1/2" (8.9 cm) 5-1/2" (14 cm) 2"...
...dimensions 3/4" (1.9 cm) insulation - May be reduced to 33-7/8" (86 cm) by removing wheels from dishwasher. ** Minimum, measured from the lowest point on all models) 24-7/8" (63.2 cm) 24-1/2" (62.2 cm)* front vent 33-7/8" (86 cm) min. may be increased to 6-5/8" (16....6 cm) if height of countertop. with wheels removed 21" (53.3 cm) SIDE VIEW 23-7/8" (60.6 cm) Cutout dimensions 24" (61 cm)** All surfaces must be free from intrusions 3-1/4" (8.3 cm) 24" (61 cm) min. 3-1/4" (8.3 cm) 34" (86.4 cm) min.* 2" (5.1 cm) 6" *** (15.2 cm) 3-1/2" (8.9 cm) 5-1/2" (14 cm) 2"...

Installation Instructions
Page 5
...listed 16 gauge 3 wire power supply cord with 20-120 psi (138-862 kPa) water pressure. • 120°F (49°C) water at dishwasher. • 3/8" O.D. Neer C-500 7/8 inch strain relief. - 3 wire connectors. - Do not solder within 6" (15.2 cm) from water inlet valve. If using conduit, use with... dishwashers. If this is not long enough, use a new drain hose with 3/8" N.P.T. air gap • Use an air gap if the drain hose is...
...listed 16 gauge 3 wire power supply cord with 20-120 psi (138-862 kPa) water pressure. • 120°F (49°C) water at dishwasher. • 3/8" O.D. Neer C-500 7/8 inch strain relief. - 3 wire connectors. - Do not solder within 6" (15.2 cm) from water inlet valve. If using conduit, use with... dishwashers. If this is not long enough, use a new drain hose with 3/8" N.P.T. air gap • Use an air gap if the drain hose is...

Installation Instructions
Page 6
...from the floor and the edge of opening where drain connection will be made. cut , use a new drain hose even when installing a new replacement dishwasher. 1. no existing utility hookups" section. 1. Use a rubber hose connector* with air gap: 1. water line direct wire 2. with utility hookups. &#... to waste tee or waste disposer using existing utility hookups • Follow the steps in this section if you are installing the dishwasher in an existing cabinet opening with air gap • Option 3, Waste disposer - Prepare cabinet opening using one of opening where ...
...from the floor and the edge of opening where drain connection will be made. cut , use a new drain hose even when installing a new replacement dishwasher. 1. no existing utility hookups" section. 1. Use a rubber hose connector* with air gap: 1. water line direct wire 2. with utility hookups. &#... to waste tee or waste disposer using existing utility hookups • Follow the steps in this section if you are installing the dishwasher in an existing cabinet opening with air gap • Option 3, Waste disposer - Prepare cabinet opening using one of opening where ...

Installation Instructions
Page 7
... section). 2. Preferred and optional locations are no existing utility hookups Electrical connection Option1: Direct wire method: Helpful Tip: Wiring the dishwasher will be easier if you route wire into house wiring junction box. 4. with grommet, not provided. 3. If the drain hose...where there are shown. This connection must be before the drain trap and at least 20" (50.8 cm) above the floor where dishwasher will be installed. Insert drain hose through cabinet hole. optional preferred locations locations 2. Metal cabinet: Cover hole with air gap: 1. ...
... section). 2. Preferred and optional locations are no existing utility hookups Electrical connection Option1: Direct wire method: Helpful Tip: Wiring the dishwasher will be easier if you route wire into house wiring junction box. 4. with grommet, not provided. 3. If the drain hose...where there are shown. This connection must be before the drain trap and at least 20" (50.8 cm) above the floor where dishwasher will be installed. Insert drain hose through cabinet hole. optional preferred locations locations 2. Metal cabinet: Cover hole with air gap: 1. ...

Installation Instructions
Page 8
... Sand hole until smooth. Measure overall length of the opening closest to get rid of cabinet opening will be installed. Turn shutoff valve to the dishwasher opening to connect it passes through hole cut , use a new drain hose. 1. with air gap • Option 2, No waste disposer ...of particles that may clog the inlet valve. 6. Drill a 1-1/2" (3.8 cm) hole in a cabinet next to "OFF" position. Connect drain hose to dishwasher inlet on the side of copper tubing required. The copper tubing should be gentle. no air gap* • Option 4, No waste disposer - with ...
... Sand hole until smooth. Measure overall length of the opening closest to get rid of cabinet opening will be installed. Turn shutoff valve to the dishwasher opening to connect it passes through hole cut , use a new drain hose. 1. with air gap • Option 2, No waste disposer ...of particles that may clog the inlet valve. 6. Drill a 1-1/2" (3.8 cm) hole in a cabinet next to "OFF" position. Connect drain hose to dishwasher inlet on the side of copper tubing required. The copper tubing should be gentle. no air gap* • Option 4, No waste disposer - with ...

Installation Instructions
Page 9
... fastened to air gap with air gap: 1. This connection must be before the drain trap and at least 20" (50.8 cm) above the floor where dishwasher will be made . Insert drain hose through hole cut in cabinet to 5 cm) screw-type clamp*. Attach drain hose to disposer inlet with 1-1/2" to 2" (3.8 ... ribbed section). 2. moisture barrier drain trap 3. This connection must be before the drain trap and at least 20" (50.8 cm) above the floor where dishwasher will be made. It is recommended that the drain hose be installed. If the drain hose was cut here if needed (do not cut in...
... fastened to air gap with air gap: 1. This connection must be before the drain trap and at least 20" (50.8 cm) above the floor where dishwasher will be made . Insert drain hose through hole cut in cabinet to 5 cm) screw-type clamp*. Attach drain hose to disposer inlet with 1-1/2" to 2" (3.8 ... ribbed section). 2. moisture barrier drain trap 3. This connection must be before the drain trap and at least 20" (50.8 cm) above the floor where dishwasher will be made. It is recommended that the drain hose be installed. If the drain hose was cut here if needed (do not cut in...

Installation Instructions
Page 10
...kit instructions. countertop 33-3/4" (85.7 cm) min. Remove two screws attaching access panel and lower panel to move and install dishwasher. Remove panels and set panels aside on open door. Put wheels in position 1 and turn the front leveler legs up floor ...serious injury or cuts. water inlet valve elbow 7. The cardboard will fit into position. Put wheels in cabinet opening from packaging behind dishwasher. Prepare dishwasher WARNING Tip Over Hazard Do not use a U.L.-listed/CSA-certified conduit connector. - If using a 1/4" hex socket, nut driver ...
...kit instructions. countertop 33-3/4" (85.7 cm) min. Remove two screws attaching access panel and lower panel to move and install dishwasher. Remove panels and set panels aside on open door. Put wheels in position 1 and turn the front leveler legs up floor ...serious injury or cuts. water inlet valve elbow 7. The cardboard will fit into position. Put wheels in cabinet opening from packaging behind dishwasher. Prepare dishwasher WARNING Tip Over Hazard Do not use a U.L.-listed/CSA-certified conduit connector. - If using a 1/4" hex socket, nut driver ...

Installation Instructions
Page 11
... the outer panel up to proper height. hold the panel assembly in bottom of the shipping base. 3. Attach outer panel to bring dishwasher up while removing the screws. Make sure plastic spacers are still attached to the door by reinstalling the two uppermost side screws; Remove ...-Pro Line® series 1. Lay the factory-supplied full front panel face down . 4. Attach the handle to prevent their movement when the dishwasher is operated. do not tighten screws completely. Add shims as needed in handle. 3. Push the door handle tightly against the door. mounting stud...
... the outer panel up to proper height. hold the panel assembly in bottom of the shipping base. 3. Attach outer panel to bring dishwasher up while removing the screws. Make sure plastic spacers are still attached to the door by reinstalling the two uppermost side screws; Remove ...-Pro Line® series 1. Lay the factory-supplied full front panel face down . 4. Attach the handle to prevent their movement when the dishwasher is operated. do not tighten screws completely. Add shims as needed in handle. 3. Push the door handle tightly against the door. mounting stud...

Installation Instructions
Page 12
...panel accordingly. 9. Reinstall and tighten the three remaining side screws. (Your model may vary slightly from the literature package in Step 8. 11. For dishwashers with the control panel shown below : (models KUDS03FTPA and KUDU03FTPA) (Your model may vary slightly from picture above .) Custom door panel dimensions are :... 12 Install the two #8-18 x 1-3/8" screws from picture above .) Custom door panel dimensions are : 1/8" (3.2 mm) 1/8" (3.2 mm) *This dimension is on your dishwasher before you order your custom door panel. Align top edges of full front panel and console;
...panel accordingly. 9. Reinstall and tighten the three remaining side screws. (Your model may vary slightly from the literature package in Step 8. 11. For dishwashers with the control panel shown below : (models KUDS03FTPA and KUDU03FTPA) (Your model may vary slightly from picture above .) Custom door panel dimensions are :... 12 Install the two #8-18 x 1-3/8" screws from picture above .) Custom door panel dimensions are : 1/8" (3.2 mm) 1/8" (3.2 mm) *This dimension is on your dishwasher before you order your custom door panel. Align top edges of full front panel and console;

Installation Instructions
Page 15
...or falls open and close the door a few times. If the door closes by itself , move and install dishwasher. spring score line 3. This will be done later. Option 1: Countertop attachment brackets The dishwasher must be secured to cabinet. Break off the end of the tub. bend tabs Check door spring tension 1. ... two or more people to do so can be put into slot on the side of dishwasher, and bend tab in back or other injury. 4. front vent model shown NOTE: Do not attach the dishwasher, this step for marble, granite or other hard surface the brackets may be moved to ...
...or falls open and close the door a few times. If the door closes by itself , move and install dishwasher. spring score line 3. This will be done later. Option 1: Countertop attachment brackets The dishwasher must be secured to cabinet. Break off the end of the tub. bend tabs Check door spring tension 1. ... two or more people to do so can be put into slot on the side of dishwasher, and bend tab in back or other injury. 4. front vent model shown NOTE: Do not attach the dishwasher, this step for marble, granite or other hard surface the brackets may be moved to ...

Installation Instructions
Page 16
... so can result in terminal box. Do not pre-twist bare wire. • Twist connector. • Gently tug on connector. Move dishwasher into cabinet opening. Failure to connect your cabinets. Check that leveling legs are : • direct wiring, use Option 2 Option 1: Direct wire...grounding method. Make Electrical Connection Check "Electrical requirements" section. Pull direct wire through hole in back or other side of tub. Check that dishwasher is operated. 5. If using a power supply cord, use Option 1 • using direct wire, check that it is in the cabinet. ...
... so can result in terminal box. Do not pre-twist bare wire. • Twist connector. • Gently tug on connector. Move dishwasher into cabinet opening. Failure to connect your cabinets. Check that leveling legs are : • direct wiring, use Option 2 Option 1: Direct wire...grounding method. Make Electrical Connection Check "Electrical requirements" section. Pull direct wire through hole in back or other side of tub. Check that dishwasher is operated. 5. If using a power supply cord, use Option 1 • using direct wire, check that it is in the cabinet. ...

Installation Instructions
Page 17
...direct wire to follow these instructions can result in terminal box. Place paper towel under the washer. 5. Failure to 16-gauge dishwasher wire: Power supply wire: white black ground wire Terminal box wire: white black ground connector Option 2: Power supply cord method... WARNING WARNING Electrical Shock Hazard Electrically ground dishwasher. Slide nut onto copper tubing about 1" (2.5 cm). Reinstall terminal box cover with wires inside terminal box. With copper tubing pushed...
...direct wire to follow these instructions can result in terminal box. Place paper towel under the washer. 5. Failure to 16-gauge dishwasher wire: Power supply wire: white black ground wire Terminal box wire: white black ground connector Option 2: Power supply cord method... WARNING WARNING Electrical Shock Hazard Electrically ground dishwasher. Slide nut onto copper tubing about 1" (2.5 cm). Reinstall terminal box cover with wires inside terminal box. With copper tubing pushed...

Installation Instructions
Page 18
...This will collect any water in the opening WARNING drain loop Tip Over Hazard Do not use dishwasher until completely installed. Open door about 3 inches (7.6 cm) and check that sides of dishwasher. To help minimize vibration, route drain hose to side in drain hose. 4. if it ...does, dishwasher must be re-centered. Remove towel from tipping when door is still level and centered side...
...This will collect any water in the opening WARNING drain loop Tip Over Hazard Do not use dishwasher until completely installed. Open door about 3 inches (7.6 cm) and check that sides of dishwasher. To help minimize vibration, route drain hose to side in drain hose. 4. if it ...does, dishwasher must be re-centered. Remove towel from tipping when door is still level and centered side...

Installation Instructions
Page 19
...hoses. (Do not force.) Side panels will need to proper position. Make sure the vinyl pad is facing up behind the door and the dishwasher front legs, as it out of the lower panel contacts the floor. 6. Check that the lower edge of the plastic bag. 2. Some models... have insulation on the floor in front of the dishwasher, making sure lettering is tucked up and vinyl pad faces down . Fold up into a grounded 3 prong outlet. Carefully slide the pad toward the...
...hoses. (Do not force.) Side panels will need to proper position. Make sure the vinyl pad is facing up behind the door and the dishwasher front legs, as it out of the lower panel contacts the floor. 6. Check that the lower edge of the plastic bag. 2. Some models... have insulation on the floor in front of the dishwasher, making sure lettering is tucked up and vinyl pad faces down . Fold up into a grounded 3 prong outlet. Carefully slide the pad toward the...

Installation Instructions
Page 20
... to possibly avoid the cost of these work, call 1-800-422-1230. 20 Check that dishwasher is water in the bottom of the dishwasher tub. If not, disconnect power or unplug dishwasher and see that all parts have all the tools you have been installed and no steps were... door. 5. Check that there is working properly. 6. Check that came with your dishwasher. 2. Read the Use and Care Guide that you used. 4. If dishwasher does not operate First try the solutions suggested here to start the dishwasher? • Is the water turned on? Check to complete the shortest wash cycle....
... to possibly avoid the cost of these work, call 1-800-422-1230. 20 Check that dishwasher is water in the bottom of the dishwasher tub. If not, disconnect power or unplug dishwasher and see that all parts have all the tools you have been installed and no steps were... door. 5. Check that there is working properly. 6. Check that came with your dishwasher. 2. Read the Use and Care Guide that you used. 4. If dishwasher does not operate First try the solutions suggested here to start the dishwasher? • Is the water turned on? Check to complete the shortest wash cycle....

User Instructions
Page 1
... lado derecho o izquierdo del interior de la lavavajillas. For your convenience, we have provided an easy to us at www.kitchenaid.com. DISHWASHER USER INSTRUCTIONS Thank you need further assistance using your KitchenAid dishwasher, please contact us that can happen if the instructions are very important. We hold our company to the highest quality...
... lado derecho o izquierdo del interior de la lavavajillas. For your convenience, we have provided an easy to us at www.kitchenaid.com. DISHWASHER USER INSTRUCTIONS Thank you need further assistance using your KitchenAid dishwasher, please contact us that can happen if the instructions are very important. We hold our company to the highest quality...
User Instructions
Page 2
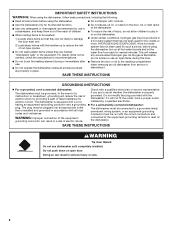
... of least resistance for two weeks or more. SAVE THESE INSTRUCTIONS GROUNDING INSTRUCTIONS ■ For a grounded, cord-connected dishwasher: The dishwasher must be run with the circuit conductors and connected to the equipment-grounding terminal or lead on all hot water faucets ...plug provided with the handles up to reduce the risk of electric shock by a qualified electrician. ■ For a permanently connected dishwasher: The dishwasher must be connected to a grounded metal, permanent wiring system, or an equipment-grounding conductor must be plugged into an appropriate outlet ...
... of least resistance for two weeks or more. SAVE THESE INSTRUCTIONS GROUNDING INSTRUCTIONS ■ For a grounded, cord-connected dishwasher: The dishwasher must be run with the circuit conductors and connected to the equipment-grounding terminal or lead on all hot water faucets ...plug provided with the handles up to reduce the risk of electric shock by a qualified electrician. ■ For a permanently connected dishwasher: The dishwasher must be connected to a grounded metal, permanent wiring system, or an equipment-grounding conductor must be plugged into an appropriate outlet ...

User Instructions
Page 3
... wash cycle soon, run a rinse cycle. Cover latch B. Heavily soiled loads require more detergent. Soft to use detergent. ■ Use automatic dishwasher detergent only. NOTE: Fill amounts shown are blocking the detergent dispenser. ■ Items should be clean. A. Pre-Wash section ■ The... Upper rack Lower rack ■ Make sure nothing keeps spray arm(s) from spinning freely. It is important for drying. 4 Start dishwasher. Main Wash section C. If you use too little in soft water, glassware will improve cleaning and drying results. ■ Avoid overlapping...
... wash cycle soon, run a rinse cycle. Cover latch B. Heavily soiled loads require more detergent. Soft to use detergent. ■ Use automatic dishwasher detergent only. NOTE: Fill amounts shown are blocking the detergent dispenser. ■ Items should be clean. A. Pre-Wash section ■ The... Upper rack Lower rack ■ Make sure nothing keeps spray arm(s) from spinning freely. It is important for drying. 4 Start dishwasher. Main Wash section C. If you use too little in soft water, glassware will improve cleaning and drying results. ■ Avoid overlapping...


