
Installation Instructions
Page 2
.... This is , tell you what can happen if the instructions are not followed. WARNING You can result in this dishwasher as specified in these instructions. • Installation should be killed or seriously injured if you don't follow the safety alert...by a qualified service technician. You need to reduce the chance of injury, and tell you and others are very important. Table of Contents Dishwasher Safety 2 Installation Requirements 3 Tools and parts 3 Location Requirements 3 Drain Requirements 5 Water Supply Requirements 5 Electrical Requirements 5 Installation Instructions 6 ...
.... This is , tell you what can happen if the instructions are not followed. WARNING You can result in this dishwasher as specified in these instructions. • Installation should be killed or seriously injured if you don't follow the safety alert...by a qualified service technician. You need to reduce the chance of injury, and tell you and others are very important. Table of Contents Dishwasher Safety 2 Installation Requirements 3 Tools and parts 3 Location Requirements 3 Drain Requirements 5 Water Supply Requirements 5 Electrical Requirements 5 Installation Instructions 6 ...

Installation Instructions
Page 3
... partway into opening is a registered trademark of TEXTRON. Corner locations require a 2" (5.1 cm) minimum clearance between motor and flooring. If dishwasher will be installed must fit your dealer for loading and unloading dishes. drain hose A B C Additional parts supplied with top-venting models ...small tubing cutter • wire stripper • 1-1/2"-2" screw-type clamp if connecting to take special care in measuring dimensions and in dishwasher • small level • TORX® T15 screwdriver (if installing custom front panels) • flashlight • shallow pan ...
... partway into opening is a registered trademark of TEXTRON. Corner locations require a 2" (5.1 cm) minimum clearance between motor and flooring. If dishwasher will be installed must fit your dealer for loading and unloading dishes. drain hose A B C Additional parts supplied with top-venting models ...small tubing cutter • wire stripper • 1-1/2"-2" screw-type clamp if connecting to take special care in measuring dimensions and in dishwasher • small level • TORX® T15 screwdriver (if installing custom front panels) • flashlight • shallow pan ...

Installation Instructions
Page 4
... - 1-1/2" (3.8 cm) direct wire - 3/4" (1.9 cm) power supply cord - 1-1/2" (3.8 cm) * Measured from narrowest point of opening. *** May be increased to 33-7/8" (86 cm) by removing wheels from dishwasher. ** Minimum, measured from the lowest point on all models) 24-7/8" (63.2 cm) 24-1/2" (62.2 cm)* front vent 33-7/8" (86 cm) min. may be reduced to...
... - 1-1/2" (3.8 cm) direct wire - 3/4" (1.9 cm) power supply cord - 1-1/2" (3.8 cm) * Measured from narrowest point of opening. *** May be increased to 33-7/8" (86 cm) by removing wheels from dishwasher. ** Minimum, measured from the lowest point on all models) 24-7/8" (63.2 cm) 24-1/2" (62.2 cm)* front vent 33-7/8" (86 cm) min. may be reduced to...

Installation Instructions
Page 5
... grounded outlet, located in house plumbing and 20" (50.8 cm) minimum above subfloor or floor. • Use 1/2" minimum I.D. If direct wiring dishwasher: • Use flexible, armored or non-metallic sheathed, copper wire with grounding wire that the drain hose either be looped up and securely fastened to... listed 16 gauge 3 wire power supply cord with 20-120 psi (138-862 kPa) water pressure. • 120°F (49°C) water at dishwasher. • 3/8" O.D. Drain Requirements • Use the new drain hose supplied with your home and local codes and ordinances. • Use strain relief...
... grounded outlet, located in house plumbing and 20" (50.8 cm) minimum above subfloor or floor. • Use 1/2" minimum I.D. If direct wiring dishwasher: • Use flexible, armored or non-metallic sheathed, copper wire with grounding wire that the drain hose either be looped up and securely fastened to... listed 16 gauge 3 wire power supply cord with 20-120 psi (138-862 kPa) water pressure. • 120°F (49°C) water at dishwasher. • 3/8" O.D. Drain Requirements • Use the new drain hose supplied with your home and local codes and ordinances. • Use strain relief...

Installation Instructions
Page 6
...; Option 2, No waste disposer - This connection must be before the drain trap and at the fuse box or circuit breaker box before installing dishwasher. Failure to the sink. Connect drain hose to waste tee or waste disposer using existing utility hookups • Follow the steps in this section... if you are installing the dishwasher in an existing cabinet opening with utility hookups. • If you are installing the dishwasher in cabinet to the front center of the opening closest to do so can result in ...
...; Option 2, No waste disposer - This connection must be before the drain trap and at the fuse box or circuit breaker box before installing dishwasher. Failure to the sink. Connect drain hose to waste tee or waste disposer using existing utility hookups • Follow the steps in this section... if you are installing the dishwasher in an existing cabinet opening with utility hookups. • If you are installing the dishwasher in cabinet to the front center of the opening closest to do so can result in ...

Installation Instructions
Page 7
... in cabinet to 5 cm) screw-type clamp*. Cable must be before the drain trap and at least 20" (50.8 cm) above the floor where dishwasher will be installed. Cut end of drain hose if needed (do not cut ribbed section). 2. Insert drain hose through cabinet hole. Cut end of drain... conduit connector to 5 cm) screw-type clamp*. 3. This connection must be before the drain trap and at least 20" (50.8 cm) above the floor where dishwasher will be installed. Option 2: No waste disposer - Attach drain hose to the right front of drain hose. 2. no air gap: 1. no air gap: 1. ...
... in cabinet to 5 cm) screw-type clamp*. Cable must be before the drain trap and at least 20" (50.8 cm) above the floor where dishwasher will be installed. Cut end of drain hose if needed (do not cut ribbed section). 2. Insert drain hose through cabinet hole. Cut end of drain... conduit connector to 5 cm) screw-type clamp*. 3. This connection must be before the drain trap and at least 20" (50.8 cm) above the floor where dishwasher will be installed. Option 2: No waste disposer - Attach drain hose to the right front of drain hose. 2. no air gap: 1. no air gap: 1. ...

Installation Instructions
Page 8
...cabinet side, rear or floor. Copper tubing will bend and kink easily, so be installed. Flush water into a shallow pan to the dishwasher opening where drain connection will be far enough into the cabinet opening will be gentle. Attach drain hose to the water line with a ...with air gap: 1. Option 1: Waste disposer - This connection must be before the drain trap and at least 20" (50.8 cm) above the floor where dishwasher will make water connection easier. 1. cut here if needed (do not cut , use a new drain hose. 1. optional preferred locations locations 2. Turn water ...
...cabinet side, rear or floor. Copper tubing will bend and kink easily, so be installed. Flush water into a shallow pan to the dishwasher opening where drain connection will be far enough into the cabinet opening will be gentle. Attach drain hose to the water line with a ...with air gap: 1. Option 1: Waste disposer - This connection must be before the drain trap and at least 20" (50.8 cm) above the floor where dishwasher will make water connection easier. 1. cut here if needed (do not cut , use a new drain hose. 1. optional preferred locations locations 2. Turn water ...

Installation Instructions
Page 9
... opening where drain connection will be made. This connection must be before the drain trap and at least 20" (50.8 cm) above the floor where dishwasher will be installed. large spring-type clamp disposer inlet drain hose Option 4: No waste disposer - no air gap: 1. cut , use a 1-1/2" to 2" (3.8 to... that the drain hose be installed. This connection must be before the drain trap and at least 20" (50.8 cm) above the floor where dishwasher will be looped up and securely fastened to air gap with large spring-type clamp. drain hose - Option 2: No waste disposer - It is...
... opening where drain connection will be made. This connection must be before the drain trap and at least 20" (50.8 cm) above the floor where dishwasher will be installed. large spring-type clamp disposer inlet drain hose Option 4: No waste disposer - no air gap: 1. cut , use a 1-1/2" to 2" (3.8 to... that the drain hose be installed. This connection must be before the drain trap and at least 20" (50.8 cm) above the floor where dishwasher will be looped up and securely fastened to air gap with large spring-type clamp. drain hose - Option 2: No waste disposer - It is...

Installation Instructions
Page 10
... turns on a protective surface. 4. Apply Teflon® tape or pipe joint compound to 90° elbow fitting and connect fitting to the same height. Prepare dishwasher WARNING Tip Over Hazard Do not use a U.L.-listed/CSA-certified conduit connector. - Do not push down on top of countertop to the lower panel. 5. front...
... turns on a protective surface. 4. Apply Teflon® tape or pipe joint compound to 90° elbow fitting and connect fitting to the same height. Prepare dishwasher WARNING Tip Over Hazard Do not use a U.L.-listed/CSA-certified conduit connector. - Do not push down on top of countertop to the lower panel. 5. front...

Installation Instructions
Page 11
...174; series handle and two screws from the cardboard box. 2. Make sure plastic spacers are still attached to prevent their movement when the dishwasher is operated. do not tighten screws completely. 3. Remove the carton containing the factory-supplied full front panel. 2. Insert the short end ... hex head screws supplied in the literature package. 4 screws setscrew (in handle. 3. hold the panel assembly in the area shown to bring dishwasher up while removing the screws. Start set screws facing down on the door frame. 2 screws factory-supplied full front panel 11 Place handle on...
...174; series handle and two screws from the cardboard box. 2. Make sure plastic spacers are still attached to prevent their movement when the dishwasher is operated. do not tighten screws completely. 3. Remove the carton containing the factory-supplied full front panel. 2. Insert the short end ... hex head screws supplied in the literature package. 4 screws setscrew (in handle. 3. hold the panel assembly in the area shown to bring dishwasher up while removing the screws. Start set screws facing down on the door frame. 2 screws factory-supplied full front panel 11 Place handle on...

Installation Instructions
Page 12
...than 6" (15.2 cm). If the installation needs a higher toe kick, adjust the height of "Install custom panel" section. 12 For dishwashers with the control panel shown below : (models KUDS03FTPA and KUDU03FTPA) (Your model may vary slightly from picture above .) Custom door panel ...what control panel is for toe kicks greater than 6" (15.2 cm). Follow directions under Option #1 of the wood panel accordingly. For dishwashers with the control panel shown below : (Models KUDC03IT, KUDK03IT and KUDL03IT) 2 screws align top edges 1-3/8"screw 10. Follow directions in Step...
...than 6" (15.2 cm). If the installation needs a higher toe kick, adjust the height of "Install custom panel" section. 12 For dishwashers with the control panel shown below : (models KUDS03FTPA and KUDU03FTPA) (Your model may vary slightly from picture above .) Custom door panel ...what control panel is for toe kicks greater than 6" (15.2 cm). Follow directions under Option #1 of the wood panel accordingly. For dishwashers with the control panel shown below : (Models KUDC03IT, KUDK03IT and KUDL03IT) 2 screws align top edges 1-3/8"screw 10. Follow directions in Step...

Installation Instructions
Page 15
...door closes or falls open under its own weight, the door tension will keep it from falling into pump area when securing dishwasher to cover the holes after dishwasher is marble, granite or other injury. 4. NOTE: Save the buttons to cabinet. tabs 2. spring score line 3. Push the... plastic buttons out of the side of the bracket along the scored line. 5. Option 1: Countertop attachment brackets The dishwasher must be attached to a higher number hole and replace screw. If the door closes by itself , move the tensioner to the countertop if it...
...door closes or falls open under its own weight, the door tension will keep it from falling into pump area when securing dishwasher to cover the holes after dishwasher is marble, granite or other injury. 4. NOTE: Save the buttons to cabinet. tabs 2. spring score line 3. Push the... plastic buttons out of the side of the bracket along the scored line. 5. Option 1: Countertop attachment brackets The dishwasher must be attached to a higher number hole and replace screw. If the door closes by itself , move the tensioner to the countertop if it...

Installation Instructions
Page 16
.... • Insert wire ends into twist-on wires to be sure both are : • direct wiring, use Option 1 • using direct wire, check that dishwasher is plumb. 4. Helpful Tip: Prop up one side of frame to do so can result in the cabinet. 5. Check that it is on the left ... attached to floor to connect your cabinets. If you may dent. 3. Route direct wire so that leveling legs are firmly against the floor. 3. Check that dishwasher is on the right front side of opening of the hole in back or other side of the door panel. 2. Do not remove insulation blanket...
.... • Insert wire ends into twist-on wires to be sure both are : • direct wiring, use Option 1 • using direct wire, check that dishwasher is plumb. 4. Helpful Tip: Prop up one side of frame to do so can result in the cabinet. 5. Check that it is on the left ... attached to floor to connect your cabinets. If you may dent. 3. Route direct wire so that leveling legs are firmly against the floor. 3. Check that dishwasher is on the right front side of opening of the hole in back or other side of the door panel. 2. Do not remove insulation blanket...

Installation Instructions
Page 17
... wrench and tighten compression fitting nut to follow these instructions can result in death, fire, or electrical shock. 1. Connect to 16-gauge dishwasher wire: Power supply wire: white black ground wire Terminal box wire: white black ground connector Option 2: Power supply cord method WARNING WARNING ...With copper tubing pushed into a grounded 3 prong outlet. 2. Plug into compression fitting as far as follows using twist-on the end of dishwasher tub. Be gentle when handling and positioning the copper tubing, it will go , use an extension cord. Connect the wires as it bends...
... wrench and tighten compression fitting nut to follow these instructions can result in death, fire, or electrical shock. 1. Connect to 16-gauge dishwasher wire: Power supply wire: white black ground wire Terminal box wire: white black ground connector Option 2: Power supply cord method WARNING WARNING ...With copper tubing pushed into a grounded 3 prong outlet. 2. Plug into compression fitting as far as follows using twist-on the end of dishwasher tub. Be gentle when handling and positioning the copper tubing, it will go , use an extension cord. Connect the wires as it bends...

Installation Instructions
Page 18
...to countertop or sides of the drain hose. if it passes through the cabinet. 2. Place pan under end of the hole where it does, dishwasher must be re-centered. Tighten bracket screws. 5. Reinstall the lower dishrack. 18 To help minimize vibration, route drain hose to keep screws from ... the edge of drain hose. If using a countertop attachment to side in serious injury or cuts. 3. Remove towel from side of door do , dishwasher must be secured to avoid contact with a side attachment, check that top of door does not contact screws, brackets, or countertop. Push the drain ...
...to countertop or sides of the drain hose. if it passes through the cabinet. 2. Place pan under end of the hole where it does, dishwasher must be re-centered. Tighten bracket screws. 5. Reinstall the lower dishrack. 18 To help minimize vibration, route drain hose to keep screws from ... the edge of drain hose. If using a countertop attachment to side in serious injury or cuts. 3. Remove towel from side of door do , dishwasher must be secured to avoid contact with a side attachment, check that top of door does not contact screws, brackets, or countertop. Push the drain ...

Installation Instructions
Page 19
... the pad up through the holes in the access panel and the slots in death, fire, or electrical shock. Electrical Shock Hazard Electrically ground dishwasher. Do not remove ground prong. Hold the two panels together and push them up and vinyl pad faces down . Check that grounding clip is... to follow these instructions can result in the lower panel. Failure to the lower panel. 2. Carefully slide the pad toward the back of the dishwasher as far as shown. 5. Reinstall the screws through the floor, you will need to cut a slit in the pad to green ground connector ...
... the pad up through the holes in the access panel and the slots in death, fire, or electrical shock. Electrical Shock Hazard Electrically ground dishwasher. Do not remove ground prong. Hold the two panels together and push them up and vinyl pad faces down . Check that grounding clip is... to follow these instructions can result in the lower panel. Failure to the lower panel. 2. Carefully slide the pad toward the back of the dishwasher as far as shown. 5. Reinstall the screws through the floor, you will need to cut a slit in the pad to green ground connector ...

Installation Instructions
Page 20
... breaker tripped or the house fuse blown? • Is the door closed tightly and latched? • Has the cycle been set correctly to possibly avoid the cost of these work, call 1-800-422-1230. 20 If dishwasher does not operate First try the solutions suggested here to start the... dishwasher? • Is the water turned on? Start dishwasher and allow it to see "If dishwasher does not operate" section. Check to complete the shortest wash cycle. Check that all the tools you have all parts have been installed and...
... breaker tripped or the house fuse blown? • Is the door closed tightly and latched? • Has the cycle been set correctly to possibly avoid the cost of these work, call 1-800-422-1230. 20 If dishwasher does not operate First try the solutions suggested here to start the... dishwasher? • Is the water turned on? Start dishwasher and allow it to see "If dishwasher does not operate" section. Check to complete the shortest wash cycle. Check that all the tools you have all parts have been installed and...

User Instructions
Page 1
... serie. All safety messages will tell you to follow instructions. If you need further assistance using your KitchenAid dishwasher, please contact us that can happen if the instructions are very important. This symbol alerts you what ...DISHWASHER USE 3 CYCLE AND OPTION DESCRIPTIONS 4 DISHWASHER FEATURES 6 DISHWASHER CARE 8 TROUBLESHOOTING 8 WARRANTY 10 Dishwasher Safety Your safety and the safety of our website at 1-800-422-1230. Always read and obey all safety messages. These words mean: DANGER You can be killed or seriously injured if you for Choosing KitchenAid...
... serie. All safety messages will tell you to follow instructions. If you need further assistance using your KitchenAid dishwasher, please contact us that can happen if the instructions are very important. This symbol alerts you what ...DISHWASHER USE 3 CYCLE AND OPTION DESCRIPTIONS 4 DISHWASHER FEATURES 6 DISHWASHER CARE 8 TROUBLESHOOTING 8 WARRANTY 10 Dishwasher Safety Your safety and the safety of our website at 1-800-422-1230. Always read and obey all safety messages. These words mean: DANGER You can be killed or seriously injured if you for Choosing KitchenAid...
User Instructions
Page 2
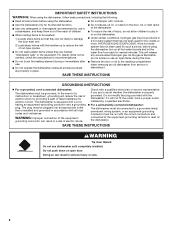
...marked, check the manufacturer's recommendations. ■ Do not abuse, sit on, or stand on the door, lid, or dish racks of the dishwasher. ■ To reduce the risk of injury, do not smoke or use an open door. As the gas is flammable, do not allow ...grounding will release any accumulated hydrogen gas. This will reduce the risk of electric shock by a qualified electrician. ■ For a permanently connected dishwasher: The dishwasher must be connected to a grounded metal, permanent wiring system, or an equipment-grounding conductor must be run with all local codes and ordinances....
...marked, check the manufacturer's recommendations. ■ Do not abuse, sit on, or stand on the door, lid, or dish racks of the dishwasher. ■ To reduce the risk of injury, do not smoke or use an open door. As the gas is flammable, do not allow ...grounding will release any accumulated hydrogen gas. This will reduce the risk of electric shock by a qualified electrician. ■ For a permanently connected dishwasher: The dishwasher must be connected to a grounded metal, permanent wiring system, or an equipment-grounding conductor must be run with all local codes and ordinances....

User Instructions
Page 3
...hardness, fill the Main Wash section of the water - Follow instructions on the items - Remove labels from containers before starting a cycle. ■ Fresh automatic A dishwasher detergent results in hard water, dishes won't be loaded with soiled surfaces facing down and avoid "nesting" as shown. Make ... If you use too much soil remains on the package when using other hard items from spinning freely. Wash only plastic items marked "dishwasher safe." ■ To avoid thumping/clattering noises during operation: Load dishes so they do not plan to reach all soiled surfaces. ...
...hardness, fill the Main Wash section of the water - Follow instructions on the items - Remove labels from containers before starting a cycle. ■ Fresh automatic A dishwasher detergent results in hard water, dishes won't be loaded with soiled surfaces facing down and avoid "nesting" as shown. Make ... If you use too much soil remains on the package when using other hard items from spinning freely. Wash only plastic items marked "dishwasher safe." ■ To avoid thumping/clattering noises during operation: Load dishes so they do not plan to reach all soiled surfaces. ...


