
Use & Care Guide
Page 3
... servicing. ■ Replace all safety messages. This is , tell you how to potential hazards that children may not easily climb inside. 3 REFRIGERATOR SAFETY Your safety and the safety of others . Always read and obey all parts and panels before installing ice maker (on ice maker kit ...ready models only). ■ Use a sturdy glass when dispensing ice (on your old refrigerator, please follow instructions. All safety messages will sit for "just a few days." These words mean: DANGER You can result in death or ...
... servicing. ■ Replace all safety messages. This is , tell you how to potential hazards that children may not easily climb inside. 3 REFRIGERATOR SAFETY Your safety and the safety of others . Always read and obey all parts and panels before installing ice maker (on ice maker kit ...ready models only). ■ Use a sturdy glass when dispensing ice (on your old refrigerator, please follow instructions. All safety messages will sit for "just a few days." These words mean: DANGER You can result in death or ...

Use & Care Guide
Page 4
...bin is located on the door, remove the temporary shield from dropping. Rub a small amount of your refrigerator before turning on the refrigerator. For more information, see "Refrigerator Safety." ■ Dispose of/recycle all of the packaging materials, clean the inside of liquid dish soap ... Do not remove ground prong. Do not use an adapter. See "Ice Maker and Storage Bin." ■ Remove tape and glue residue from refrigerator. Failure to remove tape or glue. To Remove Top Grille: 1. B A B A. Press power switch to sudden temperature changes or impact, ...
...bin is located on the door, remove the temporary shield from dropping. Rub a small amount of your refrigerator before turning on the refrigerator. For more information, see "Refrigerator Safety." ■ Dispose of/recycle all of the packaging materials, clean the inside of liquid dish soap ... Do not remove ground prong. Do not use an adapter. See "Ice Maker and Storage Bin." ■ Remove tape and glue residue from refrigerator. Failure to remove tape or glue. To Remove Top Grille: 1. B A B A. Press power switch to sudden temperature changes or impact, ...

Use & Care Guide
Page 5
...that is not connected to flow. Power switch Water Supply Requirements Read all directions before or after heavy usage. ■ If your refrigerator. See "Ice Maker and Storage Bin." ■ All installations must meet local plumbing code requirements. Once water begins to produce ...1 - If your water connection, see whether the sediment filter in some households. If you turn on the reverse osmosis system to your refrigerator has a water filter, it for an additional 2 minutes. Reverse Osmosis Water Supply IMPORTANT: The pressure of the water supply coming out of...
...that is not connected to flow. Power switch Water Supply Requirements Read all directions before or after heavy usage. ■ If your refrigerator. See "Ice Maker and Storage Bin." ■ All installations must meet local plumbing code requirements. Once water begins to produce ...1 - If your water connection, see whether the sediment filter in some households. If you turn on the reverse osmosis system to your refrigerator has a water filter, it for an additional 2 minutes. Reverse Osmosis Water Supply IMPORTANT: The pressure of the water supply coming out of...

Use & Care Guide
Page 6
... one section will light up . Hard surfaces, such as shown. Air then returns to run more efficiently to keep your refrigerator to the freezer as the floor, walls, and cabinets, can make . The high efficiency compressor and fans may cause your...Temperature audio alarm and indicator light may increase as cooling, lighting, fans and compressors. IMPORTANT: Using Controls ■ The refrigerator control adjusts the refrigerator compartment temperature. You must thoroughly clean both sections, any airflow vents. Because the sounds are below zero, the negative ...
... one section will light up . Hard surfaces, such as shown. Air then returns to run more efficiently to keep your refrigerator to the freezer as the floor, walls, and cabinets, can make . The high efficiency compressor and fans may cause your...Temperature audio alarm and indicator light may increase as cooling, lighting, fans and compressors. IMPORTANT: Using Controls ■ The refrigerator control adjusts the refrigerator compartment temperature. You must thoroughly clean both sections, any airflow vents. Because the sounds are below zero, the negative ...

Use & Care Guide
Page 7
..." section for information on again. Adjusting Controls NOTE: Wait at 34°F (1°C) and -5°F (-21°C) for the refrigerator and freezer compartments, respectively, while the Max Cool feature is performed. Recheck the temperatures before other adjustments are below , some models). ...To Adjust Set Point Temperatures: ■ Press the refrigerator or freezer PLUS (+) or MINUS (-) touch pad until the Alarm is flashing, call for conditions FREEZER Control 1° higher FREEZER ...
..." section for information on again. Adjusting Controls NOTE: Wait at 34°F (1°C) and -5°F (-21°C) for the refrigerator and freezer compartments, respectively, while the Max Cool feature is performed. Recheck the temperatures before other adjustments are below , some models). ...To Adjust Set Point Temperatures: ■ Press the refrigerator or freezer PLUS (+) or MINUS (-) touch pad until the Alarm is flashing, call for conditions FREEZER Control 1° higher FREEZER ...

Use & Care Guide
Page 8
... 5 seconds off the ice maker, see "Ice Maker & Storage Bin." Use a sturdy container to depress and hold the buttons for the refrigerator to cool down and chill water. ■ Allow 24 hours to avoid unintentional dispensing. Once water begins to flow, continue depressing and releasing ...dispenser levers are crushed before dispensing ice. Dispenser Panel (on Holiday Mode, press and hold ICE and LOCK at the same time for the refrigerator and freezer compartments, respectively, until the Holiday Mode is open . To switch from the ice crusher is selected. NOTES: ■ While...
... 5 seconds off the ice maker, see "Ice Maker & Storage Bin." Use a sturdy container to depress and hold the buttons for the refrigerator to cool down and chill water. ■ Allow 24 hours to avoid unintentional dispensing. Once water begins to flow, continue depressing and releasing ...dispenser levers are crushed before dispensing ice. Dispenser Panel (on Holiday Mode, press and hold ICE and LOCK at the same time for the refrigerator and freezer compartments, respectively, until the Holiday Mode is open . To switch from the ice crusher is selected. NOTES: ■ While...

Use & Care Guide
Page 10
... button and pulling on cap 6. It is inserted, the eject button will not be filtered. 1. As the filter is part of your refrigerator. Turn the cap counterclockwise until the cap slips into the opening in Step 2) on the new filter and turn the cap clockwise until it... A B A Eject button B. Align the ridge on the filter. Water Filtration System Do not use with water that the filter is part of your refrigerator. Using the Ice Maker Without a Water Filter You can operate the ice maker without adequate disinfection before or after replacing the filter. Remove the filter...
... button and pulling on cap 6. It is inserted, the eject button will not be filtered. 1. As the filter is part of your refrigerator. Turn the cap counterclockwise until the cap slips into the opening in Step 2) on the new filter and turn the cap clockwise until it... A B A Eject button B. Align the ridge on the filter. Water Filtration System Do not use with water that the filter is part of your refrigerator. Using the Ice Maker Without a Water Filter You can operate the ice maker without adequate disinfection before or after replacing the filter. Remove the filter...

Use & Care Guide
Page 12
... and help save energy. Replace the cover by holding the glass shelf firmly with both hands and lift gently upward until back of time the refrigerator door is securely in original wrapping as long as it . 2. Rewrap if necessary. Cover leftovers with plastic wrap, aluminum foil, or plastic ... your protection, tempered glass is normal. Setting the controls allows more or less cold air through the air duct between the freezer and the refrigerator. To clean the bottom crisper cover, first remove the top crisper drawer. 12 Glass shelves and covers are cold. Replace the shelf/frame...
... and help save energy. Replace the cover by holding the glass shelf firmly with both hands and lift gently upward until back of time the refrigerator door is securely in original wrapping as long as it . 2. Rewrap if necessary. Cover leftovers with plastic wrap, aluminum foil, or plastic ... your protection, tempered glass is normal. Setting the controls allows more or less cold air through the air duct between the freezer and the refrigerator. To clean the bottom crisper cover, first remove the top crisper drawer. 12 Glass shelves and covers are cold. Replace the shelf/frame...

Use & Care Guide
Page 13
...support and pushing it down until it into the freezer than 2 to 3 lbs of food per cubic foot [907 to store bags of the refrigerator. Door Bins To remove and replace the door bins: 1. Remove the rack by putting it over the supports and lowering it stops. Replace ... up and pulling it straight out from the shelf. 2. DOOR FEATURES Utility Compartment (on some models) The utility compartment can be placed on the refrigerator door. Leave enough space in the food and air inside a sealed package are adjustable and removable for freezing, check a freezer guide or reliable cookbook...
...support and pushing it down until it into the freezer than 2 to 3 lbs of food per cubic foot [907 to store bags of the refrigerator. Door Bins To remove and replace the door bins: 1. Remove the rack by putting it over the supports and lowering it stops. Replace ... up and pulling it straight out from the shelf. 2. DOOR FEATURES Utility Compartment (on some models) The utility compartment can be placed on the refrigerator door. Leave enough space in the food and air inside a sealed package are adjustable and removable for freezing, check a freezer guide or reliable cookbook...

Use & Care Guide
Page 14
...the power switch ON. 7. Light shield ■ Remove the light bulb and replace it up spills immediately. Once the side hooks of the refrigerator compartment behind a light shield. ■ Open the light shield. Wipe up into place. Press power switch to painted metal exteriors, apply appliance... Do not use the manufacturer's approved Stainless Steel Cleaner & Polish. Do not wax plastic parts. Dry thoroughly with a damp soft cloth. Refrigerator Control Panel Lights There are in warm water. To order the cleaner, see "Accessories." 6. Once the hooks are two or three light bulbs...
...the power switch ON. 7. Light shield ■ Remove the light bulb and replace it up spills immediately. Once the side hooks of the refrigerator compartment behind a light shield. ■ Open the light shield. Wipe up into place. Press power switch to painted metal exteriors, apply appliance... Do not use the manufacturer's approved Stainless Steel Cleaner & Polish. Do not wax plastic parts. Dry thoroughly with a damp soft cloth. Refrigerator Control Panel Lights There are in warm water. To order the cleaner, see "Accessories." 6. Once the hooks are two or three light bulbs...

Use & Care Guide
Page 15
... a partially filled one time, keeping food organized, and closing the door as soon as possible. 15 By selecting this occurs. Clean refrigerator, wipe it may be refrozen, although the quality and flavor may be affected. TROUBLESHOOTING Try the solutions suggested here first in the socket...the doors opened often? The motor seems to reset. A freezer full of the time. Use up . This stops odor and mold from the refrigerator. 2. Conserve energy by getting all food from building up any perishables and freeze other items. 2. Recheck to run longer to avoid the cost...
... a partially filled one time, keeping food organized, and closing the door as soon as possible. 15 By selecting this occurs. Clean refrigerator, wipe it may be refrozen, although the quality and flavor may be affected. TROUBLESHOOTING Try the solutions suggested here first in the socket...the doors opened often? The motor seems to reset. A freezer full of the time. Use up . This stops odor and mold from the refrigerator. 2. Conserve energy by getting all food from building up any perishables and freeze other items. 2. Recheck to run longer to avoid the cost...

Use & Care Guide
Page 16
...While depressing the sensor door, lift the ice maker service door and remove the ice from the ejector with a plastic utensil. Allow three to Refrigerator" in the Installation Instructions. ■ Is an ice cube jammed in the OFF (right) position (on the freezer door, the bin ...controls set correctly for an empty ice bin to restock. ■ Has the ice melted around ? Close the doors firmly. NOTE: Your new refrigerator will not operate properly ■ Is the freezer door closed completely? Check the filter installation instructions to "cubed." For models with a plastic utensil...
...While depressing the sensor door, lift the ice maker service door and remove the ice from the ejector with a plastic utensil. Allow three to Refrigerator" in the Installation Instructions. ■ Is an ice cube jammed in the OFF (right) position (on the freezer door, the bin ...controls set correctly for an empty ice bin to restock. ■ Has the ice melted around ? Close the doors firmly. NOTE: Your new refrigerator will not operate properly ■ Is the freezer door closed completely? Check the filter installation instructions to "cubed." For models with a plastic utensil...

Use & Care Guide
Page 17
...increases noticeably, replace the filter. The dispenser water is not a problem, call for service. Discard the first glass of food warms the refrigerator. Temperature is humid. ■ Is the food packaged correctly? This obstructs cold air movement between the two compartments is warm The warmth is...Failure to do so can take approximately 3 to 4 minutes and will not operate properly ■ Has the water system not filled? Keep the refrigerator cool by dispensing and discarding 6 qt (5.7 L) of water may be required in the lines, causing water to drip. Check that the filter...
...increases noticeably, replace the filter. The dispenser water is not a problem, call for service. Discard the first glass of food warms the refrigerator. Temperature is humid. ■ Is the food packaged correctly? This obstructs cold air movement between the two compartments is warm The warmth is...Failure to do so can take approximately 3 to 4 minutes and will not operate properly ■ Has the water system not filled? Keep the refrigerator cool by dispensing and discarding 6 qt (5.7 L) of water may be required in the lines, causing water to drip. Check that the filter...

Use & Care Guide
Page 18
... telephone directory Yellow Pages. 18 See "Adjust Doors" and "Level Refrigerator" in your appliance. The doors are trained to KitchenAid Canada with any questions or concerns at : Customer Interaction Centre KitchenAid Canada 1901 Minnesota Court Mississauga, Ontario L5N 3A7 Please include a daytime... right and work right because they fit more information. ■ Does the refrigerator wobble or seem unstable? Our consultants provide assistance with any questions or concerns at : KitchenAid Brand Home Appliances Customer eXperience Center 553 Benson Road Benton Harbor, MI 49022-2692...
... telephone directory Yellow Pages. 18 See "Adjust Doors" and "Level Refrigerator" in your appliance. The doors are trained to KitchenAid Canada with any questions or concerns at : Customer Interaction Centre KitchenAid Canada 1901 Minnesota Court Mississauga, Ontario L5N 3A7 Please include a daytime... right and work right because they fit more information. ■ Does the refrigerator wobble or seem unstable? Our consultants provide assistance with any questions or concerns at : KitchenAid Brand Home Appliances Customer eXperience Center 553 Benson Road Benton Harbor, MI 49022-2692...

Use & Care Guide
Page 22
... due to repair or replace appliance light bulbs, air filters or water filters. Expenses for travel and transportation for product service in the sealed refrigeration system. KITCHENAID® REFRIGERATOR WARRANTY TWO YEAR LIMITED WARRANTY For two years from the date of purchase, when this filter is operated and maintained according to instructions attached...
... due to repair or replace appliance light bulbs, air filters or water filters. Expenses for travel and transportation for product service in the sealed refrigeration system. KITCHENAID® REFRIGERATOR WARRANTY TWO YEAR LIMITED WARRANTY For two years from the date of purchase, when this filter is operated and maintained according to instructions attached...

Dimension Guide
Page 1
... osmosis system going to operate the water dispenser and ice maker. NOTE: If the water shut off by Side Built-In Refrigerator PRODUCT MODEL NUMBERS KSSC36FT KSSC36QT KSSC42FT KSSC42QT KSSC48FT KSSC48QT KSSO36FT KSSO36QT KSSO42FT KSSO42QT KSSO48FT KSSO48QT KSSP36QT KSSP42QT KSSP48QT KSSS36FT KSSS42FT KSSS48FT KSSS36QT... Electrical: A 115-volt, 60-Hz, AC-only 15- For complete details, see chart following) Model Width A (Trim edge to trim edge) 36 36¹⁄₄" (92.1 cm) 42 42¹⁄₄" (107.3 cm) 48 48¹⁄₄" (122.6 cm) Because Whirlpool ...
... osmosis system going to operate the water dispenser and ice maker. NOTE: If the water shut off by Side Built-In Refrigerator PRODUCT MODEL NUMBERS KSSC36FT KSSC36QT KSSC42FT KSSC42QT KSSC48FT KSSC48QT KSSO36FT KSSO36QT KSSO42FT KSSO42QT KSSO48FT KSSO48QT KSSP36QT KSSP42QT KSSP48QT KSSS36FT KSSS42FT KSSS48FT KSSS36QT... Electrical: A 115-volt, 60-Hz, AC-only 15- For complete details, see chart following) Model Width A (Trim edge to trim edge) 36 36¹⁄₄" (92.1 cm) 42 42¹⁄₄" (107.3 cm) 48 48¹⁄₄" (122.6 cm) Because Whirlpool ...

Dimension Guide
Page 2
...corner wall. Specifications subject to 47³⁄₄" (121.3 cm) NOTE: Flooring under refrigerator must be at same level as the room. ® Side by Side Built-In Refrigerator PRODUCT MODEL NUMBERS KSSC36FT KSSC36QT KSSC42FT KSSC42QT KSSC48FT KSSC48QT KSSO36FT KSSO36QT KSSO42FT KSSO42QT KSSO48FT KSSO48QT KSSP36QT ... following) 6" (15.2 cm) 1" 6" (2.54 cm) (15.2 cm) 24" (60.96 cm) min. 6" (15.2 cm) Model Width A (as shown above) 36 35¹⁄₂" (90.2 cm) to 35³⁄₄" (90.8 cm) 42 41¹⁄₂" (105.4 cm) to 41³⁄₄...
...corner wall. Specifications subject to 47³⁄₄" (121.3 cm) NOTE: Flooring under refrigerator must be at same level as the room. ® Side by Side Built-In Refrigerator PRODUCT MODEL NUMBERS KSSC36FT KSSC36QT KSSC42FT KSSC42QT KSSC48FT KSSC48QT KSSO36FT KSSO36QT KSSO42FT KSSO42QT KSSO48FT KSSO48QT KSSP36QT ... following) 6" (15.2 cm) 1" 6" (2.54 cm) (15.2 cm) 24" (60.96 cm) min. 6" (15.2 cm) Model Width A (as shown above) 36 35¹⁄₂" (90.2 cm) to 35³⁄₄" (90.8 cm) 42 41¹⁄₂" (105.4 cm) to 41³⁄₄...

Installation Guide
Page 3
... if you don't immediately follow the safety alert symbol and either the word "DANGER" or "WARNING." Failure to move and install refrigerator. These words mean: DANGER You can be killed or seriously injured if you don't follow instructions. All safety messages will follow instructions.... WARNING Tip Over Hazard Refrigerator is completely installed. Use two or more people to do so can happen if the instructions are very important. This is ,...
... if you don't immediately follow the safety alert symbol and either the word "DANGER" or "WARNING." Failure to move and install refrigerator. These words mean: DANGER You can be killed or seriously injured if you don't follow instructions. All safety messages will follow instructions.... WARNING Tip Over Hazard Refrigerator is completely installed. Use two or more people to do so can happen if the instructions are very important. This is ,...

Installation Guide
Page 4
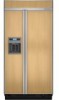
... KSSS42FTX KSSS48FTX Overlay Series Features factory-installed, overlay style trim to provide a "framed" look . Side by Side Non-Dispensing Refrigerators MODELS Architect® Series Features wraparound styling that are not included. This series requires the installation of custom panels, handles, and standoffs. This series requires ...
... KSSS42FTX KSSS48FTX Overlay Series Features factory-installed, overlay style trim to provide a "framed" look . Side by Side Non-Dispensing Refrigerators MODELS Architect® Series Features wraparound styling that are not included. This series requires the installation of custom panels, handles, and standoffs. This series requires ...

Installation Guide
Page 5
... that complements the contoured door handles. KSSP36QTS KSSP42QTS KSSP48QTS 5 KSSS36QTB KSSS42QTB KSSS48QTB KSSS36QTW KSSS42QTW KSSS48QTW KSSS36QTX KSSS42QTX KSSS48QTX Overlay Series Features factory-installed, overlay style trim to create a sleek, contemporary look. Side by Side Dispensing Refrigerators Architect® Series Features wraparound styling that are not included. This series requires the installation of...
... that complements the contoured door handles. KSSP36QTS KSSP42QTS KSSP48QTS 5 KSSS36QTB KSSS42QTB KSSS48QTB KSSS36QTW KSSS42QTW KSSS48QTW KSSS36QTX KSSS42QTX KSSS48QTX Overlay Series Features factory-installed, overlay style trim to create a sleek, contemporary look. Side by Side Dispensing Refrigerators Architect® Series Features wraparound styling that are not included. This series requires the installation of...


