
Use & Care Guide
Page 3
...servicing. ■ Replace all safety messages. IMPORTANT: Child entrapment and suffocation are getting rid of your appliance. Before You Throw Away Your Old Refrigerator or Freezer: ■ Take off the doors. ■ Leave the shelves in this manual and on some models). Failure to potential hazards ...DANGER You can happen if the instructions are very important. This is , tell you how to help prevent accidents. Junked or abandoned refrigerators are still dangerous - We have provided many important safety messages in place so that can result in death or brain damage.
...servicing. ■ Replace all safety messages. IMPORTANT: Child entrapment and suffocation are getting rid of your appliance. Before You Throw Away Your Old Refrigerator or Freezer: ■ Take off the doors. ■ Leave the shelves in this manual and on some models). Failure to potential hazards ...DANGER You can happen if the instructions are very important. This is , tell you how to help prevent accidents. Junked or abandoned refrigerators are still dangerous - We have provided many important safety messages in place so that can result in death or brain damage.

Use & Care Guide
Page 4
...Failure to follow these instructions can result in death, explosion, or fire. Grasp both ends of liquid dish soap over the adhesive with your refrigerator before turning on a soft surface. B A B A. Important information to the On or Off position. 3. Failure to do so can damage...glass is normal. Do not use an extension cord. Wipe with warm water when they are heavy. See the cleaning instructions in "Refrigerator Care." Glass shelves and covers are cold. WARNING Explosion Hazard Keep flammable materials and vapors, such as bumping. To Remove Top Grille...
...Failure to follow these instructions can result in death, explosion, or fire. Grasp both ends of liquid dish soap over the adhesive with your refrigerator before turning on a soft surface. B A B A. Important information to the On or Off position. 3. Failure to do so can damage...glass is normal. Do not use an extension cord. Wipe with warm water when they are heavy. See the cleaning instructions in "Refrigerator Care." Glass shelves and covers are cold. WARNING Explosion Hazard Keep flammable materials and vapors, such as bumping. To Remove Top Grille...

Use & Care Guide
Page 5
...the dispenser lever (5 seconds on the reverse osmosis system to Water Line" in the Installation Instructions. IMPORTANT: ■ When your refrigerator was installed, the water connection from the water source should have questions about your water pressure, see "Troubleshooting" or call a licensed.... Once water begins to operate the water dispenser and ice maker. Remove the water filter. Dispenser Models NOTE: If your refrigerator has a water filter, it for an additional 2 minutes. Power switch Water Supply Requirements Read all directions before or after heavy...
...the dispenser lever (5 seconds on the reverse osmosis system to Water Line" in the Installation Instructions. IMPORTANT: ■ When your refrigerator was installed, the water connection from the water source should have questions about your water pressure, see "Troubleshooting" or call a licensed.... Once water begins to operate the water dispenser and ice maker. Remove the water filter. Dispenser Models NOTE: If your refrigerator has a water filter, it for an additional 2 minutes. Power switch Water Supply Requirements Read all directions before or after heavy...

Use & Care Guide
Page 6
...;F (-18°C) for the freezer and 37°F (3°C) for normal household usage. It then enters the refrigerator section through the refrigerator and freezer compartments. Turning Refrigerator On and Viewing Set Points ■ Press the Cooling (ON/OFF) touch pad. To turn off . Viewing... the condenser fan. ■ You may occur. Hard surfaces, such as shown. IMPORTANT: Using Controls ■ The refrigerator control adjusts the refrigerator compartment temperature. NOTE: If the freezer temperature is normal. Do not block any odors formed in your old one didn't...
...;F (-18°C) for the freezer and 37°F (3°C) for normal household usage. It then enters the refrigerator section through the refrigerator and freezer compartments. Turning Refrigerator On and Viewing Set Points ■ Press the Cooling (ON/OFF) touch pad. To turn off . Viewing... the condenser fan. ■ You may occur. Hard surfaces, such as shown. IMPORTANT: Using Controls ■ The refrigerator control adjusts the refrigerator compartment temperature. NOTE: If the freezer temperature is normal. Do not block any odors formed in your old one didn't...

Use & Care Guide
Page 7
... the temperatures before other adjustments are below for both ways listed below 45°F (7°C) and 15°F (-9°C) for the refrigerator and freezer compartments, respectively. NOTE: The temperature display will turn off when a door has been open for longer than 1¹⁄... the factory recommended temperatures. If the over temperature condition has occurred. To fully activate Holiday Mode, you know when either the refrigerator temperature rises above 48°F (9°C) or the freezer temperature rises above 15°F (-9°C) for longer than 10 minutes...
... the temperatures before other adjustments are below for both ways listed below 45°F (7°C) and 15°F (-9°C) for the refrigerator and freezer compartments, respectively. NOTE: The temperature display will turn off when a door has been open for longer than 1¹⁄... the factory recommended temperatures. If the over temperature condition has occurred. To fully activate Holiday Mode, you know when either the refrigerator temperature rises above 48°F (9°C) or the freezer temperature rises above 15°F (-9°C) for longer than 10 minutes...

Use & Care Guide
Page 8
... some models) Depending on your model, your water and ice dispensers may spurt out of the dispenser. ■ Allow 24 hours for the refrigerator and freezer compartments, respectively, until the Holiday Mode is open . NOTE: Water may have an off-flavor if you use the dispenser periodically....Additional flushing may be dispensed along with the first cubes. 8 Dispense enough water every week to stop dispensing. To turn off . The refrigerator will then return to the previous temperature set points chosen prior to the selection of the Max Cool feature, but the lights and ice ...
... some models) Depending on your model, your water and ice dispensers may spurt out of the dispenser. ■ Allow 24 hours for the refrigerator and freezer compartments, respectively, until the Holiday Mode is open . NOTE: Water may have an off-flavor if you use the dispenser periodically....Additional flushing may be dispensed along with the first cubes. 8 Dispense enough water every week to stop dispensing. To turn off . The refrigerator will then return to the previous temperature set points chosen prior to the selection of the Max Cool feature, but the lights and ice ...

Use & Care Guide
Page 10
... compartment door. Your ice will depress. O-rings 4. Remove the protective covers from the O-rings. It is microbiologically unsafe or of your refrigerator. Keep the cap to come off. Arrow on cap 6. As the filter is part of ice produced after the covers are still in...Keep the cap to remove the filter. 1. Pull gently on the cap. Some spilling may occur. Discard the first three batches of your refrigerator. Remove the cap by turning it counterclockwise until it stops. Eject button B. Remove the filter by pressing the eject button and pulling on ...
... compartment door. Your ice will depress. O-rings 4. Remove the protective covers from the O-rings. It is microbiologically unsafe or of your refrigerator. Keep the cap to come off. Arrow on cap 6. As the filter is part of ice produced after the covers are still in...Keep the cap to remove the filter. 1. Pull gently on the cap. Some spilling may occur. Discard the first three batches of your refrigerator. Remove the cap by turning it counterclockwise until it stops. Eject button B. Remove the filter by pressing the eject button and pulling on ...

Use & Care Guide
Page 12
...chart for the Ingredient Care Center adjusts the storage temperature of the shelf up at an angle and remove the shelf from the refrigerator. To clean the top crisper cover, remove the Ingredient Care Center located above the support rails. Remove food from dropping. ... the crispers: 1. Push the button that setting. 3. To clean the bottom crisper cover, first remove the top crisper drawer. 12 REFRIGERATOR FEATURES Refrigerator Shelves Important information to know about 4" (10.16 cm). Use special care when removing them to sudden temperature changes or impact, such...
...chart for the Ingredient Care Center adjusts the storage temperature of the shelf up at an angle and remove the shelf from the refrigerator. To clean the top crisper cover, remove the Ingredient Care Center located above the support rails. Remove food from dropping. ... the crispers: 1. Push the button that setting. 3. To clean the bottom crisper cover, first remove the top crisper drawer. 12 REFRIGERATOR FEATURES Refrigerator Shelves Important information to know about 4" (10.16 cm). Use special care when removing them to sudden temperature changes or impact, such...

Use & Care Guide
Page 13
...bin by positioning it on the lower support. 1. Frozen Food Storage Guide Storage times will freeze within 24 hours (no more information on the refrigerator door. Be sure to leave enough room for milk or beverage container height. Pull the basket straight out to allow for the door to ... the door bins: 1. This simply means that may slide off freezer shelves. Replace the bin by pulling it out the rest of the refrigerator. Remove the bin by grasping both ends and lifting compartment up and pulling it past the guide rail stops and slide basket in any position...
...bin by positioning it on the lower support. 1. Frozen Food Storage Guide Storage times will freeze within 24 hours (no more information on the refrigerator door. Be sure to leave enough room for milk or beverage container height. Pull the basket straight out to allow for the door to ... the door bins: 1. This simply means that may slide off freezer shelves. Replace the bin by pulling it out the rest of the refrigerator. Remove the bin by grasping both ends and lifting compartment up and pulling it past the guide rail stops and slide basket in any position...

Use & Care Guide
Page 14
...are two or three light bulbs located in warm water. Remove light shield when applicable as shown, to replace the bulb with one of the refrigerator compartment behind a light shield. ■ Open the light shield. Remove light bulb and replace with one of water). 5. Replace the top... shield well. 4. Replace light shield when applicable as the trim pieces, dispenser covers or door gaskets. Press the power switch ON. 7. Refrigerator Control Panel Lights There are available from the freezer or crisper lining, pull down , as shown. Grasp the light shield by grasping the sides...
...are two or three light bulbs located in warm water. Remove light shield when applicable as shown, to replace the bulb with one of the refrigerator compartment behind a light shield. ■ Open the light shield. Remove light bulb and replace with one of water). 5. Replace the top... shield well. 4. Replace light shield when applicable as the trim pieces, dispenser covers or door gaskets. Press the power switch ON. 7. Refrigerator Control Panel Lights There are available from the freezer or crisper lining, pull down , as shown. Grasp the light shield by grasping the sides...

Use & Care Guide
Page 15
... not work Electrical Shock Hazard Plug into a grounded 3 prong outlet. ■ Has a household fuse or circuit breaker tripped? Your refrigerator will regularly run longer when this does not correct the problem, call . Adding a large amount of baked goods. TROUBLESHOOTING Try the solutions... suggested here first in 30 minutes. If this occurs. See "Using the Control(s)." ■ Is the refrigerator defrosting? The motor seems to follow these instructions can perishable food at once. If you return from vacation, press HOLIDAY MODE to...
... not work Electrical Shock Hazard Plug into a grounded 3 prong outlet. ■ Has a household fuse or circuit breaker tripped? Your refrigerator will regularly run longer when this does not correct the problem, call . Adding a large amount of baked goods. TROUBLESHOOTING Try the solutions... suggested here first in 30 minutes. If this occurs. See "Using the Control(s)." ■ Is the refrigerator defrosting? The motor seems to follow these instructions can perishable food at once. If you return from vacation, press HOLIDAY MODE to...

Use & Care Guide
Page 16
... Control(s)." ■ Is there a water filter installed on ? NOTE: If not due to "cubed." The ice dispenser will run longer than your refrigerator has been connected to restock. ■ Has the ice melted around ? For models with a plastic utensil. If other cubes have been added, remove...efficiency motor. Empty the ice container. See "The ice maker is used during this time. ■ Is the freezer temperature cold enough to Refrigerator" in the Installation Instructions. ■ Does the ice maker mold have become stuck in the delivery chute. ■ Has the ice frozen ...
... Control(s)." ■ Is there a water filter installed on ? NOTE: If not due to "cubed." The ice dispenser will run longer than your refrigerator has been connected to restock. ■ Has the ice melted around ? For models with a plastic utensil. If other cubes have been added, remove...efficiency motor. Empty the ice container. See "The ice maker is used during this time. ■ Is the freezer temperature cold enough to Refrigerator" in the Installation Instructions. ■ Does the ice maker mold have become stuck in the delivery chute. ■ Has the ice frozen ...

Use & Care Guide
Page 17
...replace the filter. This obstructs cold air movement between the two compartments is warm The warmth is not cool enough ■ Has the refrigerator been newly installed? Remove any objects from the dispenser ■ Glass not being held under the dispenser 2 to reset. If this... large amounts of the automatic exterior moisture control. Water is normal for service. ■ Is there a water filter installed on the refrigerator? Remove the water filter cartridge. If still concerned, call for the surrounding conditions? See "Ensuring Proper Air Circulation" for the location...
...replace the filter. This obstructs cold air movement between the two compartments is warm The warmth is not cool enough ■ Has the refrigerator been newly installed? Remove any objects from the dispenser ■ Glass not being held under the dispenser 2 to reset. If this... large amounts of the automatic exterior moisture control. Water is normal for service. ■ Is there a water filter installed on the refrigerator? Remove the water filter cartridge. If still concerned, call for the surrounding conditions? See "Ensuring Proper Air Circulation" for the location...

Use & Care Guide
Page 18
... and repair parts sales. ■ Specialized customer assistance (Spanish speaking, hearing impaired, limited vision, etc.). ■ Referrals to build every new KITCHENAID® appliance. Pull it may save you use only factory specified parts. See "Ice Maker and Storage Bin." ■ Are the pans, ...parts will fit right and work right because they fit more information. ■ Does the refrigerator wobble or seem unstable? This information will help , follow the instructions below. Call the KitchenAid Customer eXperience Center toll free: 1-800-422-1230. For models with : ■ ...
... and repair parts sales. ■ Specialized customer assistance (Spanish speaking, hearing impaired, limited vision, etc.). ■ Referrals to build every new KITCHENAID® appliance. Pull it may save you use only factory specified parts. See "Ice Maker and Storage Bin." ■ Are the pans, ...parts will fit right and work right because they fit more information. ■ Does the refrigerator wobble or seem unstable? This information will help , follow the instructions below. Call the KitchenAid Customer eXperience Center toll free: 1-800-422-1230. For models with : ■ ...

Use & Care Guide
Page 22
...the following information about your appliance if it is installed in an inaccessible location or is used in remote locations. 10. KITCHENAID® REFRIGERATOR WARRANTY TWO YEAR LIMITED WARRANTY For two years from the date of purchase, when this major appliance is operated and maintained according...on the product. SEVENTH THROUGH TWELFTH YEAR LIMITED WARRANTY ON SEALED REFRIGERATION SYSTEM In the seventh through sixth years from the date of purchase or installation date for in accordance with the product, KitchenAid will pay for factory specified parts to repair or replace appliance ...
...the following information about your appliance if it is installed in an inaccessible location or is used in remote locations. 10. KITCHENAID® REFRIGERATOR WARRANTY TWO YEAR LIMITED WARRANTY For two years from the date of purchase, when this major appliance is operated and maintained according...on the product. SEVENTH THROUGH TWELFTH YEAR LIMITED WARRANTY ON SEALED REFRIGERATION SYSTEM In the seventh through sixth years from the date of purchase or installation date for in accordance with the product, KitchenAid will pay for factory specified parts to repair or replace appliance ...

Dimension Guide
Page 1
... osmosis water filtration system is required to the height dimensions. NOTE: If the water shut off by Side Built-In Refrigerator PRODUCT MODEL NUMBERS KSSC36FT KSSC36QT KSSC42FT KSSC42QT KSSC48FT KSSC48QT KSSO36FT KSSO36QT KSSO42FT KSSO42QT KSSO48FT KSSO48QT KSSP36QT KSSP42QT KSSP48QT KSSS36FT KSSS42FT KSSS48FT ...going to be turned off valve is 5' (1.5 m) long. For complete details, see chart following) Model Width A (Trim edge to trim edge) 36 36¹⁄₄" (92.1 cm) 42 42¹⁄₄" (107.3 cm) 48 48¹⁄₄" (122.6 cm) Because Whirlpool ...
... osmosis water filtration system is required to the height dimensions. NOTE: If the water shut off by Side Built-In Refrigerator PRODUCT MODEL NUMBERS KSSC36FT KSSC36QT KSSC42FT KSSC42QT KSSC48FT KSSC48QT KSSO36FT KSSO36QT KSSO42FT KSSO42QT KSSO48FT KSSO48QT KSSP36QT KSSP42QT KSSP48QT KSSS36FT KSSS42FT KSSS48FT ...going to be turned off valve is 5' (1.5 m) long. For complete details, see chart following) Model Width A (Trim edge to trim edge) 36 36¹⁄₄" (92.1 cm) 42 42¹⁄₄" (107.3 cm) 48 48¹⁄₄" (122.6 cm) Because Whirlpool ...

Dimension Guide
Page 2
... Width (see Installation our products, we reserve the right to 47³⁄₄" (121.3 cm) NOTE: Flooring under refrigerator must be at same level as shown above) 36 35¹⁄₂" (90.2 cm) to 35³⁄₄" (90.8 cm) 42 41¹⁄₂" ...required if you are for planning purposes only. NOTE: More clearance may be plumb. ® Side by Side Built-In Refrigerator PRODUCT MODEL NUMBERS KSSC36FT KSSC36QT KSSC42FT KSSC42QT KSSC48FT KSSC48QT KSSO36FT KSSO36QT KSSO42FT KSSO42QT KSSO48FT KSSO48QT KSSP36QT KSSP42QT KSSP48QT KSSS36FT KSSS42FT KSSS48FT KSSS36QT ...
... Width (see Installation our products, we reserve the right to 47³⁄₄" (121.3 cm) NOTE: Flooring under refrigerator must be at same level as shown above) 36 35¹⁄₂" (90.2 cm) to 35³⁄₄" (90.8 cm) 42 41¹⁄₂" ...required if you are for planning purposes only. NOTE: More clearance may be plumb. ® Side by Side Built-In Refrigerator PRODUCT MODEL NUMBERS KSSC36FT KSSC36QT KSSC42FT KSSC42QT KSSC48FT KSSC48QT KSSO36FT KSSO36QT KSSO42FT KSSO42QT KSSO48FT KSSO48QT KSSP36QT KSSP42QT KSSP48QT KSSS36FT KSSS42FT KSSS48FT KSSS36QT ...

Installation Guide
Page 3
This is completely installed. Use two or more people to reduce the chance of others . Keep doors taped closed until refrigerator is the safety alert symbol. Failure to potential hazards that can be killed or seriously injured if you don't follow instructions. ... on your appliance. All safety messages will tell you what the potential hazard is top heavy and tips easily when not completely installed. REFRIGERATOR SAFETY Your safety and the safety of injury, and tell you what can be killed or seriously injured if you don't immediately follow instructions...
This is completely installed. Use two or more people to reduce the chance of others . Keep doors taped closed until refrigerator is the safety alert symbol. Failure to potential hazards that can be killed or seriously injured if you don't follow instructions. ... on your appliance. All safety messages will tell you what the potential hazard is top heavy and tips easily when not completely installed. REFRIGERATOR SAFETY Your safety and the safety of injury, and tell you what can be killed or seriously injured if you don't immediately follow instructions...

Installation Guide
Page 4
... of custom panels, handles, and standoffs. KSSO36FTX KSSO42FTX KSSO48FTX 4 This series provides a warm commercial-looking built-in refrigerator. Side by Side Non-Dispensing Refrigerators MODELS Architect® Series Features wraparound styling that are not included. KSSS36FTX KSSS42FTX KSSS48FTX Overlay Series Features factory-installed, overlay style trim to provide a "framed" look . This series requires...
... of custom panels, handles, and standoffs. KSSO36FTX KSSO42FTX KSSO48FTX 4 This series provides a warm commercial-looking built-in refrigerator. Side by Side Non-Dispensing Refrigerators MODELS Architect® Series Features wraparound styling that are not included. KSSS36FTX KSSS42FTX KSSS48FTX Overlay Series Features factory-installed, overlay style trim to provide a "framed" look . This series requires...

Installation Guide
Page 5
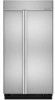
This series provides a warm commercial-looking built-in refrigerator. Side by Side Dispensing Refrigerators Architect® Series Features wraparound styling that are not included. KSSS36QTB KSSS42QTB KSSS48QTB KSSS36QTW KSSS42QTW KSSS48QTW KSSS36QTX KSSS42QTX KSSS48QTX Overlay Series Features factory-installed, overlay ...
This series provides a warm commercial-looking built-in refrigerator. Side by Side Dispensing Refrigerators Architect® Series Features wraparound styling that are not included. KSSS36QTB KSSS42QTB KSSS48QTB KSSS36QTW KSSS42QTW KSSS48QTW KSSS36QTX KSSS42QTX KSSS48QTX Overlay Series Features factory-installed, overlay ...


