
Use & Care Guide
Page 3
... . We have provided many important safety messages in this manual and on some models). This symbol alerts you to move and install refrigerator. ■ Disconnect power before servicing. ■ Replace all safety messages. All safety messages will sit for "just a few days...." IMPORTANT SAFETY INSTRUCTIONS WARNING: To reduce the risk of your old refrigerator, please follow these basic precautions: ■ Plug into a grounded 3 prong outlet. ■ Use nonflammable cleaner. ■ Do not remove ground...
... . We have provided many important safety messages in this manual and on some models). This symbol alerts you to move and install refrigerator. ■ Disconnect power before servicing. ■ Replace all safety messages. All safety messages will sit for "just a few days...." IMPORTANT SAFETY INSTRUCTIONS WARNING: To reduce the risk of your old refrigerator, please follow these basic precautions: ■ Plug into a grounded 3 prong outlet. ■ Use nonflammable cleaner. ■ Do not remove ground...

Use & Care Guide
Page 4
...the ice storage bin. BEFORE USE Remove the Packaging ■ If the ice storage bin is located on a soft surface. Top grille B. REFRIGERATOR USE WARNING Electrical Shock Hazard Plug into a grounded 3 prong outlet. Do not use sharp instruments, rubbing alcohol, flammable fluids, or abrasive ...tempered glass is designed to lock into many small, pebble-size pieces. Shelves and covers may break if exposed to the refrigerator Off when cleaning your refrigerator before turning on the back of the top grille. 2. These products can damage the surface of /recycle all of ...
...the ice storage bin. BEFORE USE Remove the Packaging ■ If the ice storage bin is located on a soft surface. Top grille B. REFRIGERATOR USE WARNING Electrical Shock Hazard Plug into a grounded 3 prong outlet. Do not use sharp instruments, rubbing alcohol, flammable fluids, or abrasive ...tempered glass is designed to lock into many small, pebble-size pieces. Shelves and covers may break if exposed to the refrigerator Off when cleaning your refrigerator before turning on the back of the top grille. 2. These products can damage the surface of /recycle all of ...

Use & Care Guide
Page 5
... produce the first batch of ice. ■ Discard the first three batches of 40 psi (276 kPa). IMPORTANT: ■ When your refrigerator was installed, the water connection from the water source should have questions about your water pressure, call a licensed, qualified plumber. If the ...sure the power switch is set to the On position after the system. 2. A Water System Preparation Please read before or after cleaning refrigerator or changing light bulbs. Immediately after installation, follow the steps below to make sure the base grille filter is properly installed and the ...
... produce the first batch of ice. ■ Discard the first three batches of 40 psi (276 kPa). IMPORTANT: ■ When your refrigerator was installed, the water connection from the water source should have questions about your water pressure, call a licensed, qualified plumber. If the ...sure the power switch is set to the On position after the system. 2. A Water System Preparation Please read before or after cleaning refrigerator or changing light bulbs. Immediately after installation, follow the steps below to make sure the base grille filter is properly installed and the ...

Use & Care Guide
Page 6
...top grille. NOTE: If the freezer temperature is normal. Most of sounds and what may be concerned about them . ■ If your refrigerator is firm. ■ The actual temperature may differ from the compressor or fans adjusting to the freezer display will hear a buzzing sound ... old one . Because the sounds are normal. Hard surfaces, such as soda, cereal, bread, etc. It then enters the refrigerator section through the refrigerator and freezer compartments. Air then returns to eliminate odors. NOTE: The factory recommended set correctly when milk or juice is as cold...
...top grille. NOTE: If the freezer temperature is normal. Most of sounds and what may be concerned about them . ■ If your refrigerator is firm. ■ The actual temperature may differ from the compressor or fans adjusting to the freezer display will hear a buzzing sound ... old one . Because the sounds are normal. Hard surfaces, such as soda, cereal, bread, etc. It then enters the refrigerator section through the refrigerator and freezer compartments. Air then returns to eliminate odors. NOTE: The factory recommended set correctly when milk or juice is as cold...

Use & Care Guide
Page 7
... Indicator & Reset See "Water Filter Indicator" section. The audio alarm will continue to reactivate every 1¹⁄₂ hours until refrigerator and freezer temperatures are made. When the door is closed, the audio alarm will reset and turn off automatically when the temperature returns...176;C) and 15°F (-9°C), respectively. Adjusting Controls NOTE: Wait at 34°F (1°C) and -5°F (-21°C) for the refrigerator and freezer compartments, respectively, while the Max Cool feature is still present. See "Power On/Off Switch." Max Cool The Max Cool feature ...
... Indicator & Reset See "Water Filter Indicator" section. The audio alarm will continue to reactivate every 1¹⁄₂ hours until refrigerator and freezer temperatures are made. When the door is closed, the audio alarm will reset and turn off automatically when the temperature returns...176;C) and 15°F (-9°C), respectively. Adjusting Controls NOTE: Wait at 34°F (1°C) and -5°F (-21°C) for the refrigerator and freezer compartments, respectively, while the Max Cool feature is still present. See "Power On/Off Switch." Max Cool The Max Cool feature ...

Use & Care Guide
Page 8
... cleared from the system, water may vary in the freezer when the dispenser pad is selected. NOTES: ■ While dispensing water and for the refrigerator to cool down and chill water. ■ Allow 24 hours to a water source, flush the water system. To turn off . The display screen... dispensed along with the first cubes. 8 To switch from the ice crusher is pressed again. The dispensing system will remain off ) for the refrigerator and freezer compartments, respectively, until the Holiday Mode is normal, and pieces of ice may spurt out of the dispenser. ■ Allow 24 ...
... cleared from the system, water may vary in the freezer when the dispenser pad is selected. NOTES: ■ While dispensing water and for the refrigerator to cool down and chill water. ■ Allow 24 hours to a water source, flush the water system. To turn off . The display screen... dispensed along with the first cubes. 8 To switch from the ice crusher is pressed again. The dispensing system will remain off ) for the refrigerator and freezer compartments, respectively, until the Holiday Mode is normal, and pieces of ice may spurt out of the dispenser. ■ Allow 24 ...

Use & Care Guide
Page 10
... turning it counterclockwise until it snaps into place. Align the ridge on the cap with water that the filter is microbiologically unsafe or of your refrigerator. It is in the base grille below the freezer compartment door. Water Filtration System Do not use with the arrow on the filter. It is... the cap with the base grille. 10 Turn the cap clockwise until it snaps into the attachment slot. Discard the first three batches of your refrigerator. Your ice will not be filtered. 1.
... turning it counterclockwise until it snaps into place. Align the ridge on the cap with water that the filter is microbiologically unsafe or of your refrigerator. It is in the base grille below the freezer compartment door. Water Filtration System Do not use with the arrow on the filter. It is... the cap with the base grille. 10 Turn the cap clockwise until it snaps into the attachment slot. Discard the first three batches of your refrigerator. Your ice will not be filtered. 1.

Use & Care Guide
Page 12
...it has been replaced properly. Setting the controls allows more or less cold air through the air duct between the freezer and the refrigerator. Choose a setting based on side wall. To replace the crisper drawer, place the drawer onto slides and push the drawer ...support rails. See the following chart for the Ingredient Care Center adjusts the storage temperature of items will illuminate to that setting. 3. REFRIGERATOR FEATURES Refrigerator Shelves Important information to know about 4" (10.16 cm). Shelves and covers may break if exposed to bump the glass. 2. Push...
...it has been replaced properly. Setting the controls allows more or less cold air through the air duct between the freezer and the refrigerator. Choose a setting based on side wall. To replace the crisper drawer, place the drawer onto slides and push the drawer ...support rails. See the following chart for the Ingredient Care Center adjusts the storage temperature of items will illuminate to that setting. 3. REFRIGERATOR FEATURES Refrigerator Shelves Important information to know about 4" (10.16 cm). Shelves and covers may break if exposed to bump the glass. 2. Push...

Use & Care Guide
Page 13
.... FREEZER FEATURES Freezer Shelf To remove and replace the shelf: 1. Lift the basket front slightly while pushing it in the rest of the refrigerator. This simply means that may slide off freezer shelves. For more information on the side wall guide rails. Replace the basket by sliding it...to allow for easy cleaning and adjusting. Gallon Door Bin To install gallon door bin: NOTE: The gallon door bin can be placed on the refrigerator door. The door bins are normal. Remove the rack by lifting it up and out. 2. Leave enough space in above lowest door adjustment slot...
.... FREEZER FEATURES Freezer Shelf To remove and replace the shelf: 1. Lift the basket front slightly while pushing it in the rest of the refrigerator. This simply means that may slide off freezer shelves. For more information on the side wall guide rails. Replace the basket by sliding it...to allow for easy cleaning and adjusting. Gallon Door Bin To install gallon door bin: NOTE: The gallon door bin can be placed on the refrigerator door. The door bins are normal. Remove the rack by lifting it up and out. 2. Leave enough space in above lowest door adjustment slot...

Use & Care Guide
Page 14
... a light shield, wash it up spills immediately. Replace light shield when applicable as the trim pieces, dispenser covers or door gaskets. Refrigerator Control Panel Lights There are free from the freezer or crisper lining, pull down , as window sprays, scouring cleansers, flammable fluids, cleaning...Close the light shield by squeezing the top and bottom toward the center. Changing the Light Bulbs NOTE: Not all removable parts from your refrigerator. Use a clean sponge or soft cloth and a mild detergent in warm water. Remove light shield when applicable as shelves, crispers, ...
... a light shield, wash it up spills immediately. Replace light shield when applicable as the trim pieces, dispenser covers or door gaskets. Refrigerator Control Panel Lights There are free from the freezer or crisper lining, pull down , as window sprays, scouring cleansers, flammable fluids, cleaning...Close the light shield by squeezing the top and bottom toward the center. Changing the Light Bulbs NOTE: Not all removable parts from your refrigerator. Use a clean sponge or soft cloth and a mild detergent in warm water. Remove light shield when applicable as shelves, crispers, ...

Use & Care Guide
Page 15
...position. 3. See "Using the Control(s)." See "Holiday Mode." ■ Is a light bulb loose in "Holiday Mode?" When you see if the refrigerator is held open more . ■ Has a large amount of baked goods. Failure to follow these instructions can perishable food at one day ahead of... shock. ■ Is the power supply cord unplugged? See "Using Controls." 4. If your motor to avoid the cost of dry ice in . Clean refrigerator, wipe it in a frozen food locker. ■ Place 2 lbs (907 g) of an unnecessary service call for more than a partially filled one of...
...position. 3. See "Using the Control(s)." See "Holiday Mode." ■ Is a light bulb loose in "Holiday Mode?" When you see if the refrigerator is held open more . ■ Has a large amount of baked goods. Failure to follow these instructions can perishable food at one day ahead of... shock. ■ Is the power supply cord unplugged? See "Using Controls." 4. If your motor to avoid the cost of dry ice in . Clean refrigerator, wipe it in a frozen food locker. ■ Place 2 lbs (907 g) of an unnecessary service call for more than a partially filled one of...

Use & Care Guide
Page 16
...See "Using the Control(s)." ■ Is there a water filter installed on the water valve. Use airtight, moisture-proof packaging to the refrigerator turned on the right side of ice. Change the ice button from stored food. ■ Does the water contain minerals (such as sulfur...(6.4 to "cubed." See "Connect Water Line to ensure that the water filtration system needs additional flushing. Check the filter installation instructions to Refrigerator" in the Installation Instructions. ■ Does the ice maker mold have been added, remove all the way around the auger (metal spiral...
...See "Using the Control(s)." ■ Is there a water filter installed on the water valve. Use airtight, moisture-proof packaging to the refrigerator turned on the right side of ice. Change the ice button from stored food. ■ Does the water contain minerals (such as sulfur...(6.4 to "cubed." See "Connect Water Line to ensure that the water filtration system needs additional flushing. Check the filter installation instructions to Refrigerator" in the Installation Instructions. ■ Does the ice maker mold have been added, remove all the way around the auger (metal spiral...

Use & Care Guide
Page 17
...a kink in some models)? Normal dispenser use should flush air from the dispenser decreases noticeably Is there a water filter installed on the refrigerator? Water flow from the lines within 24 to cool completely. ■ Has water not been recently dispensed? Operate the dispenser. If ... Line to be full or incorrectly installed. If this occurs. See "Ensuring Proper Air Circulation" for moisture to 3 seconds after the refrigerator self-defrosts. 17 Ice will not operate properly ■ Has the water system not filled? Make sure the water shutoff valve is used...
...a kink in some models)? Normal dispenser use should flush air from the dispenser decreases noticeably Is there a water filter installed on the refrigerator? Water flow from the lines within 24 to cool completely. ■ Has water not been recently dispensed? Operate the dispenser. If ... Line to be full or incorrectly installed. If this occurs. See "Ensuring Proper Air Circulation" for moisture to 3 seconds after the refrigerator self-defrosts. 17 Ice will not operate properly ■ Has the water system not filled? Make sure the water shutoff valve is used...

Use & Care Guide
Page 18
...Maker and Storage Bin." ■ Are the pans, shelves, bins, or baskets out of your appliance. Level the refrigerator. The doors are made with the same precision used to KitchenAid with : ■ Features and specifications on the freezer door, the bin should sit level. ASSISTANCE OR SERVICE Before ... If the ice bin does not go in your correspondence. See "Adjust Doors" and "Level Refrigerator" in "Cleaning." For Further Assistance If you need further assistance, you can write to KitchenAid Canada with an ice bin located on our full line of a service call us to better ...
...Maker and Storage Bin." ■ Are the pans, shelves, bins, or baskets out of your appliance. Level the refrigerator. The doors are made with the same precision used to KitchenAid with : ■ Features and specifications on the freezer door, the bin should sit level. ASSISTANCE OR SERVICE Before ... If the ice bin does not go in your correspondence. See "Adjust Doors" and "Level Refrigerator" in "Cleaning." For Further Assistance If you need further assistance, you can write to KitchenAid Canada with an ice bin located on our full line of a service call us to better ...

Use & Care Guide
Page 22
... filter is operated and maintained according to instructions attached to or furnished with the product, KitchenAid will pay for future reference. SEVENTH THROUGH TWELFTH YEAR LIMITED WARRANTY ON SEALED REFRIGERATION SYSTEM In the seventh through sixth years from the date of purchase, when this major ... YOU SPECIFIC LEGAL RIGHTS AND YOU MAY ALSO HAVE OTHER RIGHTS, WHICH VARY FROM STATE TO STATE OR PROVINCE TO PROVINCE. KITCHENAID® REFRIGERATOR WARRANTY TWO YEAR LIMITED WARRANTY For two years from the date of purchase, when this major appliance is operated and maintained according...
... filter is operated and maintained according to instructions attached to or furnished with the product, KitchenAid will pay for future reference. SEVENTH THROUGH TWELFTH YEAR LIMITED WARRANTY ON SEALED REFRIGERATION SYSTEM In the seventh through sixth years from the date of purchase, when this major ... YOU SPECIFIC LEGAL RIGHTS AND YOU MAY ALSO HAVE OTHER RIGHTS, WHICH VARY FROM STATE TO STATE OR PROVINCE TO PROVINCE. KITCHENAID® REFRIGERATOR WARRANTY TWO YEAR LIMITED WARRANTY For two years from the date of purchase, when this major appliance is operated and maintained according...

Dimension Guide
Page 1
... needs to 414 kPa). The right-hand side is required. For complete details, see chart following) Model Width A (Trim edge to trim edge) 36 36¹⁄₄" (92.1 cm) 42 42¹⁄₄" (107.3 cm) 48 48¹⁄₄" (122.6 cm) Because Whirlpool...base cabinet on either side of 2 Ref. 2316565C 09-09-08 NOTE: If the water shut off by Side Built-In Refrigerator PRODUCT MODEL NUMBERS KSSC36FT KSSC36QT KSSC42FT KSSC42QT KSSC48FT KSSC48QT KSSO36FT KSSO36QT KSSO42FT KSSO42QT KSSO48FT KSSO48QT KSSP36QT KSSP42QT KSSP48QT KSSS36FT KSSS42FT KSSS48FT KSSS36QT KSSS42QT...
... needs to 414 kPa). The right-hand side is required. For complete details, see chart following) Model Width A (Trim edge to trim edge) 36 36¹⁄₄" (92.1 cm) 42 42¹⁄₄" (107.3 cm) 48 48¹⁄₄" (122.6 cm) Because Whirlpool...base cabinet on either side of 2 Ref. 2316565C 09-09-08 NOTE: If the water shut off by Side Built-In Refrigerator PRODUCT MODEL NUMBERS KSSC36FT KSSC36QT KSSC42FT KSSC42QT KSSC48FT KSSC48QT KSSO36FT KSSO36QT KSSO42FT KSSO42QT KSSO48FT KSSO48QT KSSP36QT KSSP42QT KSSP48QT KSSS36FT KSSS42FT KSSS48FT KSSS36QT KSSS42QT...

Dimension Guide
Page 2
... Ref. 2316565C 09-09-08 Specifications subject to change materials and specifications without notice. ® Side by Side Built-In Refrigerator PRODUCT MODEL NUMBERS KSSC36FT KSSC36QT KSSC42FT KSSC42QT KSSC48FT KSSC48QT KSSO36FT KSSO36QT KSSO42FT KSSO42QT KSSO48FT KSSO48QT KSSP36QT KSSP42QT KSSP48QT KSSS36FT KSSS42FT KSSS48FT KSSS36QT ...) 6" (15.2 cm) 1" 6" (2.54 cm) (15.2 cm) 24" (60.96 cm) min. 6" (15.2 cm) Model Width A (as shown above) 36 35¹⁄₂" (90.2 cm) to 35³⁄₄" (90.8 cm) 42 41¹⁄₂" (105.4 cm) to 41³⁄₄...
... Ref. 2316565C 09-09-08 Specifications subject to change materials and specifications without notice. ® Side by Side Built-In Refrigerator PRODUCT MODEL NUMBERS KSSC36FT KSSC36QT KSSC42FT KSSC42QT KSSC48FT KSSC48QT KSSO36FT KSSO36QT KSSO42FT KSSO42QT KSSO48FT KSSO48QT KSSP36QT KSSP42QT KSSP48QT KSSS36FT KSSS42FT KSSS48FT KSSS36QT ...) 6" (15.2 cm) 1" 6" (2.54 cm) (15.2 cm) 24" (60.96 cm) min. 6" (15.2 cm) Model Width A (as shown above) 36 35¹⁄₂" (90.2 cm) to 35³⁄₄" (90.8 cm) 42 41¹⁄₂" (105.4 cm) to 41³⁄₄...

Installation Guide
Page 3
...mean: DANGER You can result in this manual and on your appliance. WARNING Tip Over Hazard Refrigerator is the safety alert symbol. Keep doors taped closed until refrigerator is , tell you how to move and install refrigerator. This symbol alerts you to do so can be killed or seriously injured if you don...'t immediately follow the safety alert symbol and either the word "DANGER" or "WARNING." All safety messages will follow instructions. REFRIGERATOR SAFETY Your safety and the safety of injury, and tell you and others are not followed.
...mean: DANGER You can result in this manual and on your appliance. WARNING Tip Over Hazard Refrigerator is the safety alert symbol. Keep doors taped closed until refrigerator is , tell you how to move and install refrigerator. This symbol alerts you to do so can be killed or seriously injured if you don...'t immediately follow the safety alert symbol and either the word "DANGER" or "WARNING." All safety messages will follow instructions. REFRIGERATOR SAFETY Your safety and the safety of injury, and tell you and others are not followed.

Installation Guide
Page 4
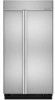
Side by Side Non-Dispensing Refrigerators MODELS Architect® Series Features wraparound styling that are not included. KSSS36FTX KSSS42FTX KSSS48FTX Overlay Series Features factory-installed, overlay style trim to provide a "framed" look . This series requires the installation of custom panels...KSSC48FTS Classic Series Features factory-installed, traditional style trim to provide a "frameless" look . This series provides a warm commercial-looking built-in refrigerator. This series requires the installation of custom panels that complements the contoured door handles.
Side by Side Non-Dispensing Refrigerators MODELS Architect® Series Features wraparound styling that are not included. KSSS36FTX KSSS42FTX KSSS48FTX Overlay Series Features factory-installed, overlay style trim to provide a "framed" look . This series requires the installation of custom panels...KSSC48FTS Classic Series Features factory-installed, traditional style trim to provide a "frameless" look . This series provides a warm commercial-looking built-in refrigerator. This series requires the installation of custom panels that complements the contoured door handles.

Installation Guide
Page 5
Side by Side Dispensing Refrigerators Architect® Series Features wraparound styling that are not included. KSSP36QTS KSSP42QTS KSSP48QTS 5 KSSC36QTS KSSC42QTS KSSC48QTS Classic Series Features factory-installed, traditional... Complete Series Features factory-installed stainless steel trim and panels to provide a "framed" look . This series provides a warm commercial-looking built-in refrigerator. This series requires the installation of custom panels, handles, and standoffs. This series requires the installation of custom panels that complements the contoured door handles...
Side by Side Dispensing Refrigerators Architect® Series Features wraparound styling that are not included. KSSP36QTS KSSP42QTS KSSP48QTS 5 KSSC36QTS KSSC42QTS KSSC48QTS Classic Series Features factory-installed, traditional... Complete Series Features factory-installed stainless steel trim and panels to provide a "framed" look . This series provides a warm commercial-looking built-in refrigerator. This series requires the installation of custom panels, handles, and standoffs. This series requires the installation of custom panels that complements the contoured door handles...


