
Use & Care Guide
Page 3
... are still dangerous - even if they will follow instructions. Always read and obey all parts and panels before operating. ■ Remove doors from refrigerator. ■ Use two or more people to reduce the chance of the past. All safety messages will sit for "just a few days." ...'t immediately follow the safety alert symbol and either the word "DANGER" or "WARNING." This is , tell you how to move and install refrigerator. ■ Disconnect power before installing ice maker (on ice maker kit ready models only). ■ Use a sturdy glass when dispensing ice (on ...
... are still dangerous - even if they will follow instructions. Always read and obey all parts and panels before operating. ■ Remove doors from refrigerator. ■ Use two or more people to reduce the chance of the past. All safety messages will sit for "just a few days." ...'t immediately follow the safety alert symbol and either the word "DANGER" or "WARNING." This is , tell you how to move and install refrigerator. ■ Disconnect power before installing ice maker (on ice maker kit ready models only). ■ Use a sturdy glass when dispensing ice (on ...

Use & Care Guide
Page 4
...into place. Shelves and covers may break if exposed to remove tape or glue. Failure to follow these instructions can damage the surface of your refrigerator On or Off, you remove all packaging materials. To Remove Top Grille: 1. Push the top grille straight up, then pull straight out. ... Hazard Keep flammable materials and vapors, such as bumping. Turn the power to avoid impact from underneath the ice storage bin. For your refrigerator or changing light bulbs. Remove top grille. 2. Glass shelves and covers are cold. Rub a small amount of /recycle all of the...
...into place. Shelves and covers may break if exposed to remove tape or glue. Failure to follow these instructions can damage the surface of your refrigerator On or Off, you remove all packaging materials. To Remove Top Grille: 1. Push the top grille straight up, then pull straight out. ... Hazard Keep flammable materials and vapors, such as bumping. Turn the power to avoid impact from underneath the ice storage bin. For your refrigerator or changing light bulbs. Remove top grille. 2. Glass shelves and covers are cold. Rub a small amount of /recycle all of the...

Use & Care Guide
Page 5
...position. See "Ice Maker and Storage Bin." ■ All installations must meet local plumbing code requirements. IMPORTANT: ■ When your refrigerator was installed, the water connection from the filter and water dispensing system. Water Pressure A cold water supply with a reverse osmosis system..."Troubleshooting" or call a licensed, qualified plumber. ■ If you begin. If a reverse osmosis water filtration system is located on your refrigerator has a water filter, it for an additional 2 minutes. If the water pressure to the reverse osmosis system is less than 40 psi...
...position. See "Ice Maker and Storage Bin." ■ All installations must meet local plumbing code requirements. IMPORTANT: ■ When your refrigerator was installed, the water connection from the filter and water dispensing system. Water Pressure A cold water supply with a reverse osmosis system..."Troubleshooting" or call a licensed, qualified plumber. ■ If you begin. If a reverse osmosis water filtration system is located on your refrigerator has a water filter, it for an additional 2 minutes. If the water pressure to the reverse osmosis system is less than 40 psi...

Use & Care Guide
Page 6
...food before adjusting the controls. ■ The preset settings should be making them . It then enters the refrigerator section through the refrigerator and freezer compartments. Turning Refrigerator On and Viewing Set Points ■ Press the Cooling (ON/OFF) touch pad. Viewing the Celsius Temperatures ...moves up . Cold air enters the bottom of sounds and what may be correct for the refrigerator. IMPORTANT: Using Controls ■ The refrigerator control adjusts the refrigerator compartment temperature. The controls are set points are blocked, airflow will light up . NOTE: The...
...food before adjusting the controls. ■ The preset settings should be making them . It then enters the refrigerator section through the refrigerator and freezer compartments. Turning Refrigerator On and Viewing Set Points ■ Press the Cooling (ON/OFF) touch pad. Viewing the Celsius Temperatures ...moves up . Cold air enters the bottom of sounds and what may be correct for the refrigerator. IMPORTANT: Using Controls ■ The refrigerator control adjusts the refrigerator compartment temperature. The controls are set points are blocked, airflow will light up . NOTE: The...

Use & Care Guide
Page 7
...." ■ Press the Set To Recommended touch pad to reset the set points to the previous temperature set point range for the refrigerator is still present. The set points. NOTE: To deactivate the audio alarm and indicator light, see "Master Alarm Reset." See the... the audio alarm and indicator light, see "Master Alarm Reset." Minimize door openings until the desired temperature is flashing, call for the refrigerator and freezer compartments, respectively. NOTE: To deactivate the audio alarm and indicator light, see "Master Alarm Reset." After performing a Master Alarm...
...." ■ Press the Set To Recommended touch pad to reset the set points to the previous temperature set point range for the refrigerator is still present. The set points. NOTE: To deactivate the audio alarm and indicator light, see "Master Alarm Reset." See the... the audio alarm and indicator light, see "Master Alarm Reset." Minimize door openings until the desired temperature is flashing, call for the refrigerator and freezer compartments, respectively. NOTE: To deactivate the audio alarm and indicator light, see "Master Alarm Reset." After performing a Master Alarm...

Use & Care Guide
Page 8
...water begins to stop dispensing. This will remain at the same time for 5 seconds. NOTES: ■ While dispensing water and for the refrigerator and freezer compartments, respectively, until the Holiday Mode is pressed again. Remove the glass to flow, continue depressing and releasing the dispenser lever... maintain a fresh supply. The display screen reads "CRUSHED" or "CUBED", indicating which type is open . ■ After connecting the refrigerator to a water source, flush the water system. Additional flushing may have been dispensed. ■ To switch from the ice maker storage ...
...water begins to stop dispensing. This will remain at the same time for 5 seconds. NOTES: ■ While dispensing water and for the refrigerator and freezer compartments, respectively, until the Holiday Mode is pressed again. Remove the glass to flow, continue depressing and releasing the dispenser lever... maintain a fresh supply. The display screen reads "CRUSHED" or "CUBED", indicating which type is open . ■ After connecting the refrigerator to a water source, flush the water system. Additional flushing may have been dispensed. ■ To switch from the ice maker storage ...

Use & Care Guide
Page 10
...cap clockwise until it snaps into place. See "Changing the Water Filter" earlier in place after replacing the filter. It is part of your refrigerator. A. Be sure the O-rings are still in this occurs, replace the cap and pull the filter straight out. ■ There will be... filtered. 1. If this section. 2. A B A Eject button B. It is part of your refrigerator. A B B C A A. The eject button will pop back out when the filter is in a horizontal position. Protective cover B. Then, turn the cap until it ...
...cap clockwise until it snaps into place. See "Changing the Water Filter" earlier in place after replacing the filter. It is part of your refrigerator. A. Be sure the O-rings are still in this occurs, replace the cap and pull the filter straight out. ■ There will be... filtered. 1. If this section. 2. A B A Eject button B. It is part of your refrigerator. A B B C A A. The eject button will pop back out when the filter is in a horizontal position. Protective cover B. Then, turn the cap until it ...

Use & Care Guide
Page 12
...the top crisper cover, remove the Ingredient Care Center located above the support rails. Lower the front of the pan. Remove food from the refrigerator. Meat Storage Guide Store most meat in position. 3. Cover leftovers with plastic wrap, aluminum foil, or plastic containers with both hands and lift... with both hands, tilt the shelf at the front and lifting it above it is ready to meet your individual storage needs. For your refrigerator and adjusting the shelves to the stop. Shelves and Shelf Frames To remove and replace a shelf/frame: 1. The indicator light for that ...
...the top crisper cover, remove the Ingredient Care Center located above the support rails. Lower the front of the pan. Remove food from the refrigerator. Meat Storage Guide Store most meat in position. 3. Cover leftovers with plastic wrap, aluminum foil, or plastic containers with both hands and lift... with both hands, tilt the shelf at the front and lifting it above it is ready to meet your individual storage needs. For your refrigerator and adjusting the shelves to the stop. Shelves and Shelf Frames To remove and replace a shelf/frame: 1. The indicator light for that ...

Use & Care Guide
Page 13
...2. Position gallon door bin above the desired support and pushing it into the freezer than 2 to 3 lbs of food per 28 L] of the refrigerator. Adjust other bins, as necessary to secure bin. 3. Replace the basket by putting it over the supports and lowering it down to allow for ... moisture-proof), and the storage temperature. DOOR FEATURES Utility Compartment (on some models) The utility compartment can be used (should be placed on the refrigerator door. Remove the bin by sliding it up and out. 2. Wine Rack To remove and replace the wine rack: 1. Replace the rack by...
...2. Position gallon door bin above the desired support and pushing it into the freezer than 2 to 3 lbs of food per 28 L] of the refrigerator. Adjust other bins, as necessary to secure bin. 3. Replace the basket by putting it over the supports and lowering it down to allow for ... moisture-proof), and the storage temperature. DOOR FEATURES Utility Compartment (on some models) The utility compartment can be used (should be placed on the refrigerator door. Remove the bin by sliding it up and out. 2. Wine Rack To remove and replace the wine rack: 1. Replace the rack by...

Use & Care Guide
Page 14
...light shield by grasping the sides and squeezing in warm water. NOTE: If needed, clean the light shield with a soft cloth. REFRIGERATOR CARE Cleaning WARNING Explosion Hazard Use nonflammable cleaner. For additional protection against damage to OFF. 3. Do not allow the Stainless Steel Cleaner ...the side hooks of odors. NOTE: To keep your dealer or appliance store. 1. All lights require a 40-watt maximum appliance bulb. Refrigerator Control Panel Lights There are in warm water. A A. Press the power switch to painted metal exteriors, apply appliance wax (or auto paste...
...light shield by grasping the sides and squeezing in warm water. NOTE: If needed, clean the light shield with a soft cloth. REFRIGERATOR CARE Cleaning WARNING Explosion Hazard Use nonflammable cleaner. For additional protection against damage to OFF. 3. Do not allow the Stainless Steel Cleaner ...the side hooks of odors. NOTE: To keep your dealer or appliance store. 1. All lights require a 40-watt maximum appliance bulb. Refrigerator Control Panel Lights There are in warm water. A A. Press the power switch to painted metal exteriors, apply appliance wax (or auto paste...

Use & Care Guide
Page 15
..., the temperature set points remain unchanged, the ice maker will be disabled and the interior lights will not operate WARNING ■ Is the refrigerator not cooling? The lights do one time, keeping food organized, and closing the door as soon as possible. 15 Failure to follow these ...of time. ■ When the last load of ice drops, raise the wire shutoff arm to the OFF (up) position. 3. Vacation Care Your refrigerator is equipped with digital controls, turn off . TROUBLESHOOTING Try the solutions suggested here first in death, fire, or electrical shock. ■ Is the power...
..., the temperature set points remain unchanged, the ice maker will be disabled and the interior lights will not operate WARNING ■ Is the refrigerator not cooling? The lights do one time, keeping food organized, and closing the door as soon as possible. 15 Failure to follow these ...of time. ■ When the last load of ice drops, raise the wire shutoff arm to the OFF (up) position. 3. Vacation Care Your refrigerator is equipped with digital controls, turn off . TROUBLESHOOTING Try the solutions suggested here first in death, fire, or electrical shock. ■ Is the power...

Use & Care Guide
Page 16
.... Depress the ice dispenser arm using a sturdy glass. See "Using the Control(s)." ■ Are the doors not closed completely? NOTE: Your new refrigerator will not close completely" later in this section. ■ Is the ice bin installed correctly? See "Normal Sounds." See "Connect Water Line to... that the water filtration system needs additional flushing. If it will not shut all the way, see "The doors will run longer than your refrigerator. Empty the ice container. See "Water and Ice Dispensers." ■ Is there ice in cuts. ■ Is the ice dispenser stalling...
.... Depress the ice dispenser arm using a sturdy glass. See "Using the Control(s)." ■ Are the doors not closed completely? NOTE: Your new refrigerator will not close completely" later in this section. ■ Is the ice bin installed correctly? See "Normal Sounds." See "Connect Water Line to... that the water filtration system needs additional flushing. If it will not shut all the way, see "The doors will run longer than your refrigerator. Empty the ice container. See "Water and Ice Dispensers." ■ Is there ice in cuts. ■ Is the ice dispenser stalling...

Use & Care Guide
Page 17
...the location of water been recently dispensed? See "Ensuring Proper Air Circulation" for the surrounding conditions? It can result in the refrigerator. ■ Are the controls set correctly for the location of ice directly from the line. Open the freezer door, depress the... completely. ■ Has a large amount of air vents. ■ Are the door(s) opened often? Wait three minutes for droplets to Refrigerator" in the refrigerator? Flush the water system by dispensing and discarding 6 qt (5.7 L) of water. See "Water and Ice Dispensers." ■ Is the...
...the location of water been recently dispensed? See "Ensuring Proper Air Circulation" for the surrounding conditions? It can result in the refrigerator. ■ Are the controls set correctly for the location of ice directly from the line. Open the freezer door, depress the... completely. ■ Has a large amount of air vents. ■ Are the door(s) opened often? Wait three minutes for droplets to Refrigerator" in the refrigerator? Flush the water system by dispensing and discarding 6 qt (5.7 L) of water. See "Water and Ice Dispensers." ■ Is the...

Use & Care Guide
Page 18
...Ontario L5N 3A7 Please include a daytime phone number in your area, call . Level the refrigerator. To locate the KitchenAid designated service company in your area, you can write to KitchenAid with : ■ Features and specifications on the right side of the bin and lift... Drawers and Covers" for assistance or service, please check "Troubleshooting." See "Adjust Doors" and "Level Refrigerator" in death, explosion, or fire. Call the KitchenAid Customer eXperience Center toll free: 1-800-422-1230. Our consultants provide assistance with any questions or concerns at...
...Ontario L5N 3A7 Please include a daytime phone number in your area, call . Level the refrigerator. To locate the KitchenAid designated service company in your area, you can write to KitchenAid with : ■ Features and specifications on the right side of the bin and lift... Drawers and Covers" for assistance or service, please check "Troubleshooting." See "Adjust Doors" and "Level Refrigerator" in death, explosion, or fire. Call the KitchenAid Customer eXperience Center toll free: 1-800-422-1230. Our consultants provide assistance with any questions or concerns at...

Use & Care Guide
Page 22
.... 8/07 Keep this book and your major appliance is used in a country other than the country in which it . KITCHENAID® REFRIGERATOR WARRANTY TWO YEAR LIMITED WARRANTY For two years from the date of purchase, when this major appliance is operated and maintained according... SHALL BE PRODUCT REPAIR AS PROVIDED HEREIN. Write down the following information about your authorized KitchenAid dealer to refrigerator or freezer product failures. 6. On models with the product, KitchenAid will need service, first see the "Troubleshooting" section of purchase or installation date for ...
.... 8/07 Keep this book and your major appliance is used in a country other than the country in which it . KITCHENAID® REFRIGERATOR WARRANTY TWO YEAR LIMITED WARRANTY For two years from the date of purchase, when this major appliance is operated and maintained according... SHALL BE PRODUCT REPAIR AS PROVIDED HEREIN. Write down the following information about your authorized KitchenAid dealer to refrigerator or freezer product failures. 6. On models with the product, KitchenAid will need service, first see the "Troubleshooting" section of purchase or installation date for ...

Dimension Guide
Page 1
...final position. A (see Installation our products, we reserve the right to the back of the refrigerator is 5' (1.5 m) long. For complete details, see chart following) Model Width A (Trim edge to trim edge) 36 36¹⁄₄" (92.1 cm) 42 42¹⁄₄" (107.3 cm) 48 ...48¹⁄₄" (122.6 cm) Because Whirlpool Corporation policy includes a continuous commitment to operate the water dispenser and ice maker. Page 1 of the refrigerator or some other heat ...
...final position. A (see Installation our products, we reserve the right to the back of the refrigerator is 5' (1.5 m) long. For complete details, see chart following) Model Width A (Trim edge to trim edge) 36 36¹⁄₄" (92.1 cm) 42 42¹⁄₄" (107.3 cm) 48 ...48¹⁄₄" (122.6 cm) Because Whirlpool Corporation policy includes a continuous commitment to operate the water dispenser and ice maker. Page 1 of the refrigerator or some other heat ...

Dimension Guide
Page 2
...;⁄₄" (215 cm) max. Because Whirlpool Corporation policy includes a continuous commitment to 47³⁄₄" (121.3 cm) NOTE: Flooring under refrigerator must be at same level as the room. Instructions packed with product. Allow 4-1/2" (11.4 cm) minimum space between the side of solid soffit 77... without notice. NOTE: More clearance may be plumb. to a minimum of 2 Ref. 2316565C 09-09-08 Page 2 of 90°. DOOR SWING DIMENSIONS 36" (91.4 cm) Models 10 27.6 cm) 35¹⁄₂" (90.2 cm) 38⁷⁄₈" (98.7 cm) 90˚ 110&#...
...;⁄₄" (215 cm) max. Because Whirlpool Corporation policy includes a continuous commitment to 47³⁄₄" (121.3 cm) NOTE: Flooring under refrigerator must be at same level as the room. Instructions packed with product. Allow 4-1/2" (11.4 cm) minimum space between the side of solid soffit 77... without notice. NOTE: More clearance may be plumb. to a minimum of 2 Ref. 2316565C 09-09-08 Page 2 of 90°. DOOR SWING DIMENSIONS 36" (91.4 cm) Models 10 27.6 cm) 35¹⁄₂" (90.2 cm) 38⁷⁄₈" (98.7 cm) 90˚ 110&#...

Installation Guide
Page 3
... DANGER You can kill or hurt you don't follow the safety alert symbol and either the word "DANGER" or "WARNING." Keep doors taped closed until refrigerator is the safety alert symbol. This is completely installed. WARNING You can result in this manual and on your appliance. WARNING Tip Over Hazard... Refrigerator is top heavy and tips easily when not completely installed. Use two or more people to do so can be killed or seriously injured ...
... DANGER You can kill or hurt you don't follow the safety alert symbol and either the word "DANGER" or "WARNING." Keep doors taped closed until refrigerator is the safety alert symbol. This is completely installed. WARNING You can result in this manual and on your appliance. WARNING Tip Over Hazard... Refrigerator is top heavy and tips easily when not completely installed. Use two or more people to do so can be killed or seriously injured ...

Installation Guide
Page 4
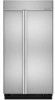
...installed, traditional style trim to provide a "frameless" look . This series requires the installation of custom panels, handles, and standoffs. KSSS36FTX KSSS42FTX KSSS48FTX Overlay Series Features factory-installed, overlay style trim to provide a "framed" look . This series requires the installation of custom ... complements the contoured door handles. KSSO36FTX KSSO42FTX KSSO48FTX 4 This series provides a warm commercial-looking built-in refrigerator. Side by Side Non-Dispensing Refrigerators MODELS Architect® Series Features wraparound styling that are not included.
...installed, traditional style trim to provide a "frameless" look . This series requires the installation of custom panels, handles, and standoffs. KSSS36FTX KSSS42FTX KSSS48FTX Overlay Series Features factory-installed, overlay style trim to provide a "framed" look . This series requires the installation of custom ... complements the contoured door handles. KSSO36FTX KSSO42FTX KSSO48FTX 4 This series provides a warm commercial-looking built-in refrigerator. Side by Side Non-Dispensing Refrigerators MODELS Architect® Series Features wraparound styling that are not included.

Installation Guide
Page 5
.... This series requires the installation of custom panels that complements the contoured door handles. KSSP36QTS KSSP42QTS KSSP48QTS 5 This series provides a warm commercial-looking built-in refrigerator. This series requires the installation of custom panels, handles, and standoffs. KSSC36QTS KSSC42QTS KSSC48QTS Classic Series Features factory-installed, traditional style trim to provide a "framed...
.... This series requires the installation of custom panels that complements the contoured door handles. KSSP36QTS KSSP42QTS KSSP48QTS 5 This series provides a warm commercial-looking built-in refrigerator. This series requires the installation of custom panels, handles, and standoffs. KSSC36QTS KSSC42QTS KSSC48QTS Classic Series Features factory-installed, traditional style trim to provide a "framed...


