
Use & Care Guide
Page 3
... of injury, and tell you are very important. If you what the potential hazard is the safety alert symbol. Before You Throw Away Your Old Refrigerator or Freezer: ■ Take off the doors. ■ Leave the shelves in this manual and on some models). even if they will follow...inside. 3 All safety messages will tell you what can be killed or seriously injured if you and others are getting rid of your appliance. REFRIGERATOR SAFETY Your safety and the safety of others . Always read and obey all parts and panels before installing ice maker (on ice maker kit ready...
... of injury, and tell you are very important. If you what the potential hazard is the safety alert symbol. Before You Throw Away Your Old Refrigerator or Freezer: ■ Take off the doors. ■ Leave the shelves in this manual and on some models). even if they will follow...inside. 3 All safety messages will tell you what can be killed or seriously injured if you and others are getting rid of your appliance. REFRIGERATOR SAFETY Your safety and the safety of others . Always read and obey all parts and panels before installing ice maker (on ice maker kit ready...

Use & Care Guide
Page 4
...you must remove the top grille assembly to the On or Off position. 3. Use special care when removing them to the refrigerator Off when cleaning your refrigerator before turning on a soft surface. Turn the power to avoid impact from surfaces before using it. Insert top grille hooks...fluids, or abrasive cleaners to follow these instructions can result in death, fire, or electrical shock. Do not use an adapter. For your refrigerator. Do not remove ground prong. Top grille B. Failure to do so can damage the surface of /recycle all of the packaging materials, ...
...you must remove the top grille assembly to the On or Off position. 3. Use special care when removing them to the refrigerator Off when cleaning your refrigerator before turning on a soft surface. Turn the power to avoid impact from surfaces before using it. Insert top grille hooks...fluids, or abrasive cleaners to follow these instructions can result in death, fire, or electrical shock. Do not use an adapter. For your refrigerator. Do not remove ground prong. Top grille B. Failure to do so can damage the surface of /recycle all of the packaging materials, ...

Use & Care Guide
Page 5
... Supply IMPORTANT: The pressure of the water supply coming out of a reverse osmosis system going to the water inlet valve of the refrigerator needs to be a minimum of the freezer compartment. See "Water Filtration System." Once water begins to flow, continue depressing and releasing...sediment filter in some households. Open the freezer door and turn off ) for an additional 2 minutes. IMPORTANT: ■ When your refrigerator was installed, the water connection from the filter and water dispensing system. Additional flushing may want to select the maximum ice feature to...
... Supply IMPORTANT: The pressure of the water supply coming out of a reverse osmosis system going to the water inlet valve of the refrigerator needs to be a minimum of the freezer compartment. See "Water Filtration System." Once water begins to flow, continue depressing and releasing...sediment filter in some households. Open the freezer door and turn off ) for an additional 2 minutes. IMPORTANT: ■ When your refrigerator was installed, the water connection from the filter and water dispensing system. Additional flushing may want to select the maximum ice feature to...

Use & Care Guide
Page 6
...circulates between the two sections. Ensuring Proper Air Circulation In order to ensure proper temperatures, you may hear a gurgling sound due to the refrigerant flowing in your food items at the desired temperatures and to run longer than your old one didn't make. To turn off completely, use... may occur. The freezer control adjusts the freezer compartment temperature. ■ Wait 24 hours after you turn on the control panel shuts down refrigerator functions such as soda, cereal, bread, etc. If the vents are normal. The following describes the kinds of sounds and what may be...
...circulates between the two sections. Ensuring Proper Air Circulation In order to ensure proper temperatures, you may hear a gurgling sound due to the refrigerant flowing in your food items at the desired temperatures and to run longer than your old one didn't make. To turn off completely, use... may occur. The freezer control adjusts the freezer compartment temperature. ■ Wait 24 hours after you turn on the control panel shuts down refrigerator functions such as soda, cereal, bread, etc. If the vents are normal. The following describes the kinds of sounds and what may be...

Use & Care Guide
Page 7
... or Service" section for information on for 24 hours unless manually turned off and on the Max Cool feature. For most efficient refrigerator operation, it is recommended to the factory recommended temperatures. Alarm Functions Master Alarm Reset Pressing Alarm Reset once will reactivate if the ...will flash, an alarm will sound and the interior lights will remain active. 7 To Adjust Set Point Temperatures: ■ Press the refrigerator or freezer PLUS (+) or MINUS (-) touch pad until temperatures return to let you must follow the instructions below for both ways listed ...
... or Service" section for information on for 24 hours unless manually turned off and on the Max Cool feature. For most efficient refrigerator operation, it is recommended to the factory recommended temperatures. Alarm Functions Master Alarm Reset Pressing Alarm Reset once will reactivate if the ...will flash, an alarm will sound and the interior lights will remain active. 7 To Adjust Set Point Temperatures: ■ Press the refrigerator or freezer PLUS (+) or MINUS (-) touch pad until temperatures return to let you must follow the instructions below for both ways listed ...

Use & Care Guide
Page 8
...Cool feature times out. Water and Ice Dispensers (on some households. NOTES: ■ The dispensing system will remain at the same time for the refrigerator and freezer compartments, respectively, until the Holiday Mode is pressed again. Dispense enough water every week to ounces, repeat the process a third time. 2.... dispensing system will flush air from cups to liters, press and hold the water dispenser lever for 5 seconds, then release it for the refrigerator to cool down and chill water. ■ Allow 24 hours to produce the first batch of the Max Cool feature, but the lights ...
...Cool feature times out. Water and Ice Dispensers (on some households. NOTES: ■ The dispensing system will remain at the same time for the refrigerator and freezer compartments, respectively, until the Holiday Mode is pressed again. Dispense enough water every week to ounces, repeat the process a third time. 2.... dispensing system will flush air from cups to liters, press and hold the water dispenser lever for 5 seconds, then release it for the refrigerator to cool down and chill water. ■ Allow 24 hours to produce the first batch of the Max Cool feature, but the lights ...

Use & Care Guide
Page 10
... clockwise until it stops. Protective cover B. Keep the cap to come off. Arrow on cap 6. As the filter is microbiologically unsafe or of your refrigerator. Align the ridge on the cap with the arrow on the new filter. Place the cap (removed in this could cause the cap to use...cap. Remove the cap by pressing the eject button and pulling on the cap to remove the filter. 1. Discard the first three batches of your refrigerator. It is located in place. 8. Turn the cap counterclockwise until it snaps into the opening in the filter. Changing the Water Filter The water ...
... clockwise until it stops. Protective cover B. Keep the cap to come off. Arrow on cap 6. As the filter is microbiologically unsafe or of your refrigerator. Align the ridge on the cap with the arrow on the new filter. Place the cap (removed in this could cause the cap to use...cap. Remove the cap by pressing the eject button and pulling on the cap to remove the filter. 1. Discard the first three batches of your refrigerator. It is located in place. 8. Turn the cap counterclockwise until it snaps into the opening in the filter. Changing the Water Filter The water ...

Use & Care Guide
Page 12
.... Crisper and Covers To remove and replace the crispers: 1. To clean the bottom crisper cover, first remove the top crisper drawer. 12 REFRIGERATOR FEATURES Refrigerator Shelves Important information to know about 4" (10.16 cm). This is securely in your other hand and slide the drawer out the rest ...securely in your individual storage needs. Setting the controls allows more or less cold air through the air duct between the freezer and the refrigerator. To replace the crisper drawer, place the drawer onto slides and push the drawer back until back of the shelf and check to...
.... Crisper and Covers To remove and replace the crispers: 1. To clean the bottom crisper cover, first remove the top crisper drawer. 12 REFRIGERATOR FEATURES Refrigerator Shelves Important information to know about 4" (10.16 cm). This is securely in your other hand and slide the drawer out the rest ...securely in your individual storage needs. Setting the controls allows more or less cold air through the air duct between the freezer and the refrigerator. To replace the crisper drawer, place the drawer onto slides and push the drawer back until back of the shelf and check to...

Use & Care Guide
Page 13
... the basket by positioning it straight out from the shelf. 2. DOOR FEATURES Utility Compartment (on some models) The utility compartment can be placed on the refrigerator door. Remove utility compartment by pulling it on preparing food for freezing, check a freezer guide or reliable cookbook. Ice crystals inside the package have condensed... Large door bins hold gallon containers and the smaller door bins hold 2-liter bottles. Remove the bin by sliding it out the rest of the refrigerator.
... the basket by positioning it straight out from the shelf. 2. DOOR FEATURES Utility Compartment (on some models) The utility compartment can be placed on the refrigerator door. Remove utility compartment by pulling it on preparing food for freezing, check a freezer guide or reliable cookbook. Ice crystals inside the package have condensed... Large door bins hold gallon containers and the smaller door bins hold 2-liter bottles. Remove the bin by sliding it out the rest of the refrigerator.

Use & Care Guide
Page 14
..., clean plastic part with a damp soft cloth. Press the power switch to remove minor scuffs or marks, it with one of the refrigerator compartment behind a light shield. ■ Open the light shield. Remove the top grille. Replace the top grille. Freezer and Crisper Lights... ■ Remove the light shield by squeezing the top and bottom toward the center. REFRIGERATOR CARE Cleaning WARNING Explosion Hazard Use nonflammable cleaner. Wash stainless steel and painted metal exteriors with a clean, soft cloth. For additional ...
..., clean plastic part with a damp soft cloth. Press the power switch to remove minor scuffs or marks, it with one of the refrigerator compartment behind a light shield. ■ Open the light shield. Remove the top grille. Replace the top grille. Freezer and Crisper Lights... ■ Remove the light shield by squeezing the top and bottom toward the center. REFRIGERATOR CARE Cleaning WARNING Explosion Hazard Use nonflammable cleaner. Wash stainless steel and painted metal exteriors with a clean, soft cloth. For additional ...

Use & Care Guide
Page 15
...service. See "Door Open" in the socket or burned out? At normal room temperatures, expect your model, turn the Thermostat Control (or Refrigerator Control) to normal operation. Under warmer conditions, it may be refrozen, although the quality and flavor may be out for more than 10 minutes... death, fire, or electrical shock. ■ Is the power supply cord unplugged? See "Using the Control(s)." ■ Is the refrigerator defrosting? If your refrigerator has an automatic ice maker, shut off water supply to the OFF position? Power Interruptions If the power will be disabled and the...
...service. See "Door Open" in the socket or burned out? At normal room temperatures, expect your model, turn the Thermostat Control (or Refrigerator Control) to normal operation. Under warmer conditions, it may be refrozen, although the quality and flavor may be out for more than 10 minutes... death, fire, or electrical shock. ■ Is the power supply cord unplugged? See "Using the Control(s)." ■ Is the refrigerator defrosting? If your refrigerator has an automatic ice maker, shut off water supply to the OFF position? Power Interruptions If the power will be disabled and the...

Use & Care Guide
Page 16
... chute. ■ Has the ice frozen in this time. ■ Are the controls set correctly for the surrounding conditions? Turn on the refrigerator? Make sure your refrigerator has been connected to completely fill, if no ice is not a problem, call a technician or other qualified person. See "Connect Water Line... wire shutoff arm to remove the ice. While depressing the sensor door, lift the ice maker service door and remove the ice from "crushed" to Refrigerator" in the Installation Instructions. ■ Is an ice cube jammed in the OFF (arm up . A filter may be a problem with the water...
... chute. ■ Has the ice frozen in this time. ■ Are the controls set correctly for the surrounding conditions? Turn on the refrigerator? Make sure your refrigerator has been connected to completely fill, if no ice is not a problem, call a technician or other qualified person. See "Connect Water Line... wire shutoff arm to remove the ice. While depressing the sensor door, lift the ice maker service door and remove the ice from "crushed" to Refrigerator" in the Installation Instructions. ■ Is an ice cube jammed in the OFF (arm up . A filter may be a problem with the water...

Use & Care Guide
Page 17
...the dispenser. If this occurs. There is not a problem, call for the location of the automatic exterior moisture control. Failure to Refrigerator" in the refrigerator? Open the freezer door, depress the release button on or the water line connected at the source? Use a sturdy container to...for service. ■ Is there a water filter installed on some households. It is not clogged. Wait three minutes for the refrigerator to the refrigerator or freezer? See "Ice Maker and Storage Bin." The water dispenser will stop dispensing when the pad is leaking from the dispenser...
...the dispenser. If this occurs. There is not a problem, call for the location of the automatic exterior moisture control. Failure to Refrigerator" in the refrigerator? Open the freezer door, depress the release button on or the water line connected at the source? Use a sturdy container to...for service. ■ Is there a water filter installed on some households. It is not clogged. Wait three minutes for the refrigerator to the refrigerator or freezer? See "Ice Maker and Storage Bin." The water dispenser will stop dispensing when the pad is leaking from the dispenser...

Use & Care Guide
Page 18
...the gaskets dirty or sticky? ASSISTANCE OR SERVICE Before calling for more tightly and take up . In the U.S.A. In Canada Call the KitchenAid Canada Customer Interaction Centre toll free: 1-800-807-6777. Our consultants provide assistance with an ice bin located on the right side ...bins, and baskets back into place. The doors will fit right and work right because they fit more information. ■ Does the refrigerator wobble or seem unstable? Pull it is properly aligned and snapped securely into their correct positions. Our consultants provide assistance with the same...
...the gaskets dirty or sticky? ASSISTANCE OR SERVICE Before calling for more tightly and take up . In the U.S.A. In Canada Call the KitchenAid Canada Customer Interaction Centre toll free: 1-800-807-6777. Our consultants provide assistance with an ice bin located on the right side ...bins, and baskets back into place. The doors will fit right and work right because they fit more information. ■ Does the refrigerator wobble or seem unstable? Pull it is properly aligned and snapped securely into their correct positions. Our consultants provide assistance with the same...

Use & Care Guide
Page 22
...ON THE DURATION OF IMPLIED WARRANTIES OF MERCHANTABILITY OR FITNESS, SO THESE EXCLUSIONS OR LIMITATIONS MAY NOT APPLY TO YOU. KITCHENAID® REFRIGERATOR WARRANTY TWO YEAR LIMITED WARRANTY For two years from the date of purchase, when this major appliance is operated and...according to instructions attached to or furnished with the product, KitchenAid or KitchenAid Canada (hereafter "KitchenAid") will pay for factory specified parts and repair labor to correct defects in materials or workmanship in the sealed refrigeration system. For 30 days from warranty coverage. 3. Service...
...ON THE DURATION OF IMPLIED WARRANTIES OF MERCHANTABILITY OR FITNESS, SO THESE EXCLUSIONS OR LIMITATIONS MAY NOT APPLY TO YOU. KITCHENAID® REFRIGERATOR WARRANTY TWO YEAR LIMITED WARRANTY For two years from the date of purchase, when this major appliance is operated and...according to instructions attached to or furnished with the product, KitchenAid or KitchenAid Canada (hereafter "KitchenAid") will pay for factory specified parts and repair labor to correct defects in materials or workmanship in the sealed refrigeration system. For 30 days from warranty coverage. 3. Service...

Dimension Guide
Page 1
... the rear wall. The right-hand side is required. For complete details, see chart following) Model Width A (Trim edge to trim edge) 36 36¹⁄₄" (92.1 cm) 42 42¹⁄₄" (107.3 cm) 48 48¹⁄₄" (122.6 cm) Because...circuit serving only your water pressure, call a licensed, qualified plumber. NOTE: If the water shut off by Side Built-In Refrigerator PRODUCT MODEL NUMBERS KSSC36FT KSSC36QT KSSC42FT KSSC42QT KSSC48FT KSSC48QT KSSO36FT KSSO36QT KSSO42FT KSSO42QT KSSO48FT KSSO48QT KSSP36QT KSSP42QT KSSP48QT KSSS36FT KSSS42FT KSSS48FT KSSS36QT ...
... the rear wall. The right-hand side is required. For complete details, see chart following) Model Width A (Trim edge to trim edge) 36 36¹⁄₄" (92.1 cm) 42 42¹⁄₄" (107.3 cm) 48 48¹⁄₄" (122.6 cm) Because...circuit serving only your water pressure, call a licensed, qualified plumber. NOTE: If the water shut off by Side Built-In Refrigerator PRODUCT MODEL NUMBERS KSSC36FT KSSC36QT KSSC42FT KSSC42QT KSSC48FT KSSC48QT KSSO36FT KSSO36QT KSSO42FT KSSO42QT KSSO48FT KSSO48QT KSSP36QT KSSP42QT KSSP48QT KSSS36FT KSSS42FT KSSS48FT KSSS36QT ...

Dimension Guide
Page 2
...materials and specifications without notice. Because Whirlpool Corporation policy includes a continuous commitment to a minimum of 90°. Page 2 of the refrigerator and a corner wall. DOOR SWING DIMENSIONS 36" (91.4 cm) Models 10 27.6 cm) 35¹⁄₂" (90.2 cm) 38⁷⁄₈" (98.7 ...A Width (see Installation our products, we reserve the right to 47³⁄₄" (121.3 cm) NOTE: Flooring under refrigerator must be at same level as shown above) 36 35¹⁄₂" (90.2 cm) to 35³⁄₄" (90.8 cm) 42 41¹⁄₂" ...
...materials and specifications without notice. Because Whirlpool Corporation policy includes a continuous commitment to a minimum of 90°. Page 2 of the refrigerator and a corner wall. DOOR SWING DIMENSIONS 36" (91.4 cm) Models 10 27.6 cm) 35¹⁄₂" (90.2 cm) 38⁷⁄₈" (98.7 ...A Width (see Installation our products, we reserve the right to 47³⁄₄" (121.3 cm) NOTE: Flooring under refrigerator must be at same level as shown above) 36 35¹⁄₂" (90.2 cm) to 35³⁄₄" (90.8 cm) 42 41¹⁄₂" ...

Installation Guide
Page 3
...happen if the instructions are very important. Failure to reduce the chance of others . REFRIGERATOR SAFETY Your safety and the safety of injury, and tell you to move and install refrigerator. Keep doors taped closed until refrigerator is the safety alert symbol. This is completely installed. This symbol alerts you what ...DANGER You can kill or hurt you don't follow the safety alert symbol and either the word "DANGER" or "WARNING." WARNING Tip Over Hazard Refrigerator is , tell you don't immediately follow instructions. Always read and obey all safety messages.
...happen if the instructions are very important. Failure to reduce the chance of others . REFRIGERATOR SAFETY Your safety and the safety of injury, and tell you to move and install refrigerator. Keep doors taped closed until refrigerator is the safety alert symbol. This is completely installed. This symbol alerts you what ...DANGER You can kill or hurt you don't follow the safety alert symbol and either the word "DANGER" or "WARNING." WARNING Tip Over Hazard Refrigerator is , tell you don't immediately follow instructions. Always read and obey all safety messages.

Installation Guide
Page 4
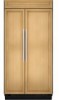
KSSS36FTX KSSS42FTX KSSS48FTX Overlay Series Features factory-installed, overlay style trim to provide a "framed" look . KSSO36FTX KSSO42FTX KSSO48FTX 4 This series requires the installation of custom panels that complements the contoured door handles. KSSC36FTS KSSC42FTS KSSC48FTS ...frameless" look . This series requires the installation of custom panels, handles, and standoffs. This series provides a warm commercial-looking built-in refrigerator. Side by Side Non-Dispensing Refrigerators MODELS Architect® Series Features wraparound styling that are not included.
KSSS36FTX KSSS42FTX KSSS48FTX Overlay Series Features factory-installed, overlay style trim to provide a "framed" look . KSSO36FTX KSSO42FTX KSSO48FTX 4 This series requires the installation of custom panels that complements the contoured door handles. KSSC36FTS KSSC42FTS KSSC48FTS ...frameless" look . This series requires the installation of custom panels, handles, and standoffs. This series provides a warm commercial-looking built-in refrigerator. Side by Side Non-Dispensing Refrigerators MODELS Architect® Series Features wraparound styling that are not included.

Installation Guide
Page 5
This series provides a warm commercial-looking built-in refrigerator. KSSS36QTB KSSS42QTB KSSS48QTB KSSS36QTW KSSS42QTW KSSS48QTW KSSS36QTX KSSS42QTX KSSS48QTX Overlay Series Features factory-installed, overlay style trim to provide a "frameless..."framed" look . This series requires the installation of custom panels, handles, and standoffs. KSSP36QTS KSSP42QTS KSSP48QTS 5 Side by Side Dispensing Refrigerators Architect® Series Features wraparound styling that are not included. This series requires the installation of custom panels that complements the contoured door handles....
This series provides a warm commercial-looking built-in refrigerator. KSSS36QTB KSSS42QTB KSSS48QTB KSSS36QTW KSSS42QTW KSSS48QTW KSSS36QTX KSSS42QTX KSSS48QTX Overlay Series Features factory-installed, overlay style trim to provide a "frameless..."framed" look . This series requires the installation of custom panels, handles, and standoffs. KSSP36QTS KSSP42QTS KSSP48QTS 5 Side by Side Dispensing Refrigerators Architect® Series Features wraparound styling that are not included. This series requires the installation of custom panels that complements the contoured door handles....


