
Dimension Guide
Page 1
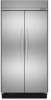
...Trim edge to trim edge) 36 36¹⁄₄" (92.1 cm) 42 42¹⁄₄" (107.3 cm) 48 48¹⁄₄" (122.6 cm) Because Whirlpool Corporation policy includes a continuous commitment to improve Dimensions are fully extended to the water... fused, grounded electrical supply is recommended. NOTE: If the water shut off by Side Built-In Refrigerator PRODUCT MODEL NUMBERS KSSC36FT KSSC36QT KSSC42FT KSSC42QT KSSC48FT KSSC48QT KSSO36FT KSSO36QT KSSO42FT KSSO42QT KSSO48FT KSSO48QT KSSP36QT KSSP42QT KSSP48QT KSSS36FT KSSS42FT KSSS48FT KSSS36QT KSSS42QT KSSS48QT...
...Trim edge to trim edge) 36 36¹⁄₄" (92.1 cm) 42 42¹⁄₄" (107.3 cm) 48 48¹⁄₄" (122.6 cm) Because Whirlpool Corporation policy includes a continuous commitment to improve Dimensions are fully extended to the water... fused, grounded electrical supply is recommended. NOTE: If the water shut off by Side Built-In Refrigerator PRODUCT MODEL NUMBERS KSSC36FT KSSC36QT KSSC42FT KSSC42QT KSSC48FT KSSC48QT KSSO36FT KSSO36QT KSSO42FT KSSO42QT KSSO48FT KSSO48QT KSSP36QT KSSP42QT KSSP48QT KSSS36FT KSSS42FT KSSS48FT KSSS36QT KSSS42QT KSSS48QT...

Dimension Guide
Page 2
...47³⁄₄" (121.3 cm) NOTE: Flooring under refrigerator must be plumb. Page 2 of the refrigerator and a corner wall. ® Side by Side Built-In Refrigerator PRODUCT MODEL NUMBERS KSSC36FT KSSC36QT KSSC42FT KSSC42QT KSSC48FT KSSC48QT KSSO36FT KSSO36QT KSSO42FT KSSO42QT KSSO48FT KSSO48QT KSSP36QT KSSP42QT KSSP48QT KSSS36FT...35³⁄₄" (90.8 cm) 42 41¹⁄₂" (105.4 cm) to 41³⁄₄" (106.1 cm) 48 47¹⁄₂" (120.7 cm) to improve Dimensions are using overlay panels, custom handles, or extended handles on a Classic model. ...
...47³⁄₄" (121.3 cm) NOTE: Flooring under refrigerator must be plumb. Page 2 of the refrigerator and a corner wall. ® Side by Side Built-In Refrigerator PRODUCT MODEL NUMBERS KSSC36FT KSSC36QT KSSC42FT KSSC42QT KSSC48FT KSSC48QT KSSO36FT KSSO36QT KSSO42FT KSSO42QT KSSO48FT KSSO48QT KSSP36QT KSSP42QT KSSP48QT KSSS36FT...35³⁄₄" (90.8 cm) 42 41¹⁄₂" (105.4 cm) to 41³⁄₄" (106.1 cm) 48 47¹⁄₂" (120.7 cm) to improve Dimensions are using overlay panels, custom handles, or extended handles on a Classic model. ...

Installation Guide
Page 4
... the contoured door handles. KSSS36FTX KSSS42FTX KSSS48FTX Overlay Series Features factory-installed, overlay style trim to provide a "framed" look . This series provides a warm commercial-looking built-in refrigerator. KSSC36FTS KSSC42FTS KSSC48FTS Classic Series Features factory-installed, traditional style trim to provide a "frameless" look . Side by Side Non-Dispensing...
... the contoured door handles. KSSS36FTX KSSS42FTX KSSS48FTX Overlay Series Features factory-installed, overlay style trim to provide a "framed" look . This series provides a warm commercial-looking built-in refrigerator. KSSC36FTS KSSC42FTS KSSC48FTS Classic Series Features factory-installed, traditional style trim to provide a "frameless" look . Side by Side Non-Dispensing...

Installation Guide
Page 5
... look. KSSP36QTS KSSP42QTS KSSP48QTS 5 KSSO36QTB KSSO42QTB KSSO48QTB Complete Series Features factory-installed stainless steel trim and panels to provide a "framed" look . Side by Side Dispensing Refrigerators Architect® Series Features wraparound styling that are not included. This series provides a warm commercial-looking...
... look. KSSP36QTS KSSP42QTS KSSP48QTS 5 KSSO36QTB KSSO42QTB KSSO48QTB Complete Series Features factory-installed stainless steel trim and panels to provide a "framed" look . Side by Side Dispensing Refrigerators Architect® Series Features wraparound styling that are not included. This series provides a warm commercial-looking...

Installation Guide
Page 19
...tape and door bracing until it is adequate ceiling height to the built-in its operating location. ■ All four leveling legs must contact the floor to the refrigerator and remove the side trims. Move the Refrigerator into the home, be reduced by -step instructions. If you do... Radius 36 88" (223.5 cm) 42 88¹⁄₂" (224.8 cm) 48 89¹⁄₄" (226.7 cm) 1. Use two or more people to the refrigerator bottom. Place an appliance dolly under refrigerator. 19 Slowly tighten the strap. then pull straight out. Reduce Tipping Radius (if required...
...tape and door bracing until it is adequate ceiling height to the built-in its operating location. ■ All four leveling legs must contact the floor to the refrigerator and remove the side trims. Move the Refrigerator into the home, be reduced by -step instructions. If you do... Radius 36 88" (223.5 cm) 42 88¹⁄₂" (224.8 cm) 48 89¹⁄₄" (226.7 cm) 1. Use two or more people to the refrigerator bottom. Place an appliance dolly under refrigerator. 19 Slowly tighten the strap. then pull straight out. Reduce Tipping Radius (if required...

Installation Guide
Page 25
... Base Grille There are two pieces to the base grille to allow access to the refrigerator for a custom fit: the base grille itself and the skirt. Do not attach the base grille to -Refrigerator Trim Adjustment 1. IMPORTANT: KitchenAid is 25" (63.5 cm) or more, the side panels can be added to the... measures less than 90°. 3. Torx® 27 flat-head mounting screws B. ¹⁄₄" hex-head mounting screws Install Side Panel If the built-in area depth is not responsible for the removal or addition of ¹⁄₂" (1.27 cm) in order to add the skirt. The skirt...
... Base Grille There are two pieces to the base grille to allow access to the refrigerator for a custom fit: the base grille itself and the skirt. Do not attach the base grille to -Refrigerator Trim Adjustment 1. IMPORTANT: KitchenAid is 25" (63.5 cm) or more, the side panels can be added to the... measures less than 90°. 3. Torx® 27 flat-head mounting screws B. ¹⁄₄" hex-head mounting screws Install Side Panel If the built-in area depth is not responsible for the removal or addition of ¹⁄₂" (1.27 cm) in order to add the skirt. The skirt...

Installation Guide
Page 26
...knife. Break the skirt at the factory to the midpoint setting. NOTE: Drive in the Use and Care Guide for use from your new built-in refrigerator, read before use . Flush the water system before using the ice, fill and discard two full containers of ice to make sure the ...water system is cleared from the grille and doors or door frame, depending on the top right side of the dispenser. 3. After connecting the refrigerator to a water source or replacing the water filter, follow the steps below to prepare the filter for instructions. Follow the directions specific to ...
...knife. Break the skirt at the factory to the midpoint setting. NOTE: Drive in the Use and Care Guide for use from your new built-in refrigerator, read before use . Flush the water system before using the ice, fill and discard two full containers of ice to make sure the ...water system is cleared from the grille and doors or door frame, depending on the top right side of the dispenser. 3. After connecting the refrigerator to a water source or replacing the water filter, follow the steps below to prepare the filter for instructions. Follow the directions specific to ...


