User Instructions
Page 1
In Canada, visit our website at www.kitchenaid.ca or call us at www.kitchenaid.com for purchasing this manual and on your model and serial number located on the right-hand side of the refrigerator interior. Tenga listo su número de modelo ...; DU RÉFRIGÉRATEUR 16 INSTALLATION INSTRUCTIONS 2 INSTRUCTIONS D'INSTALLATION 17 REFRIGERATOR USE 5 UTILISATION DU RÉFRIGÉRATEUR 20 REFRIGERATOR CARE 9 ENTRETIEN DU RÉFRIGÉRATEUR 25 TROUBLESHOOTING 10 DÉPANNAGE 26 ACCESSORIES 12 ACCESSOIRES 28 WATER FILTER CERTIFICATIONS 12 FEUILLES...
In Canada, visit our website at www.kitchenaid.ca or call us at www.kitchenaid.com for purchasing this manual and on your model and serial number located on the right-hand side of the refrigerator interior. Tenga listo su número de modelo ...; DU RÉFRIGÉRATEUR 16 INSTALLATION INSTRUCTIONS 2 INSTRUCTIONS D'INSTALLATION 17 REFRIGERATOR USE 5 UTILISATION DU RÉFRIGÉRATEUR 20 REFRIGERATOR CARE 9 ENTRETIEN DU RÉFRIGÉRATEUR 25 TROUBLESHOOTING 10 DÉPANNAGE 26 ACCESSORIES 12 ACCESSOIRES 28 WATER FILTER CERTIFICATIONS 12 FEUILLES...
User Instructions
Page 5
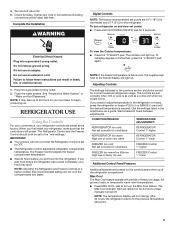
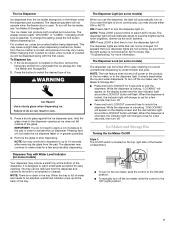
... first install your food may take up . CONDITION/REASON: TEMPERATURE ADJUSTMENT: REFRIGERATOR too cold Not set correctly for 24 hours unless manually turned off. The Max Cool indicator light will light up to adjust temperatures in the refrigerator or freezer, press the refrigerator or freezer PLUS (+) or MINUS (-) pad until the desired temperature is...
... first install your food may take up . CONDITION/REASON: TEMPERATURE ADJUSTMENT: REFRIGERATOR too cold Not set correctly for 24 hours unless manually turned off. The Max Cool indicator light will light up to adjust temperatures in the refrigerator or freezer, press the refrigerator or freezer PLUS (+) or MINUS (-) pad until the desired temperature is...
User Instructions
Page 6
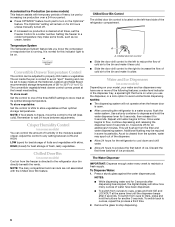
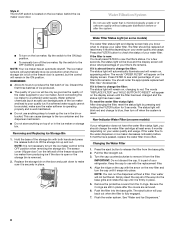
...water begins to flow, continue depressing and releasing the dispenser lever (5 seconds on some models) Cool air from the freezer is directed to the refrigerator door bin directly beneath the vents. The Water Dispenser IMPORTANT: Dispense enough water every week to ounces, repeat the process a third time. ... control comes preset at their optimal storage temperatures. Chilled Door Bin Control The chilled door bin control is located on for 24 hours unless manually turned off ) for 3 seconds after 3 seconds. To switch from the system, water may have been dispensed. ■ To switch...
...water begins to flow, continue depressing and releasing the dispenser lever (5 seconds on some models) Cool air from the freezer is directed to the refrigerator door bin directly beneath the vents. The Water Dispenser IMPORTANT: Dispense enough water every week to ounces, repeat the process a third time. ... control comes preset at their optimal storage temperatures. Chilled Door Bin Control The chilled door bin control is located on for 24 hours unless manually turned off ) for 3 seconds after 3 seconds. To switch from the system, water may have been dispensed. ■ To switch...
User Instructions
Page 7
... dispenser lights are crushed before dispensing ice. While the dispenser is located on continuously, you want the light to the ON (left) position. ■ To manually turn the dispenser light on . Your ice maker can be turned off the ice maker, slide the control to the dispenser light. If the ice...
... dispenser lights are crushed before dispensing ice. While the dispenser is located on continuously, you want the light to the ON (left) position. ■ To manually turn the dispenser light on . Your ice maker can be turned off the ice maker, slide the control to the dispenser light. If the ice...
User Instructions
Page 8
... to produce the first batch of the way into the base grille and rotate the cap until it is removed. 2. Align the ridge on your refrigerator. Remove the protective covers from the base grille. 2. REMEMBER: ■ Allow 24 hours to release the filter from the O-rings. Water Filter Status Light (on... your water quality and usage. The words "ORDER FILTER" will appear on the ice maker, flip the switch to the ON (top) position. ■ To manually turn off the ice maker, flip the switch to poor quality ice. If it is opened, but the control will not be only as good...
... to produce the first batch of the way into the base grille and rotate the cap until it is removed. 2. Align the ridge on your refrigerator. Remove the protective covers from the base grille. 2. REMEMBER: ■ Allow 24 hours to release the filter from the O-rings. Water Filter Status Light (on... your water quality and usage. The words "ORDER FILTER" will appear on the ice maker, flip the switch to the ON (top) position. ■ To manually turn off the ice maker, flip the switch to poor quality ice. If it is opened, but the control will not be only as good...
Parts Diagram
Page 2
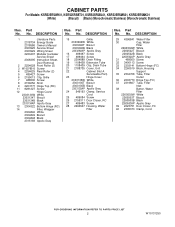
Part No. No. DESCRIPTION 1 Literature Parts 2318734 Energy Guide 2318586 Owner's Manual 2303925 Service Sheet 2303929 Wiring Sheet 2220407 Modular Icemaker Service Sheet 2308395 Instruction Sheet, Door Removal 2 2254628 Front Roller (2) 3 W10079910 Screw 4 ... Unit 22 Cabinet (Not A Serviceable Part) 23 Hinge Cover 2303135W White 2303135T Biscuit 2303135B Black 2303135AP Apollo Gray 24 549193 Clamp, Service Cord 25 489084 Screw 26 2155311 Door Closer, RC 27 489483 Screw 28 2260507 Housing, Water Filter Illus. No. CABINET PARTS For Models: KSRS25RSWH01, KSRS25RSBT01...
Part No. No. DESCRIPTION 1 Literature Parts 2318734 Energy Guide 2318586 Owner's Manual 2303925 Service Sheet 2303929 Wiring Sheet 2220407 Modular Icemaker Service Sheet 2308395 Instruction Sheet, Door Removal 2 2254628 Front Roller (2) 3 W10079910 Screw 4 ... Unit 22 Cabinet (Not A Serviceable Part) 23 Hinge Cover 2303135W White 2303135T Biscuit 2303135B Black 2303135AP Apollo Gray 24 549193 Clamp, Service Cord 25 489084 Screw 26 2155311 Door Closer, RC 27 489483 Screw 28 2260507 Housing, Water Filter Illus. No. CABINET PARTS For Models: KSRS25RSWH01, KSRS25RSBT01...

