User Instructions
Page 1
...INSTRUCTIONS 2 INSTRUCTIONS D'INSTALLATION 17 REFRIGERATOR USE 5 UTILISATION DU RÉFRIGÉRATEUR 20 REFRIGERATOR CARE 9 ENTRETIEN DU RÉFRIGÉRATEUR 25 TROUBLESHOOTING 10 DÉPANNAGE 26 ...REFRIGERATOR SAFETY Your safety and the safety of injury, and tell you what can kill or hurt you should experience a problem not covered in this high-quality product. Puede encontrar su número de modelo y de serie...website at www.kitchenaid.ca or call us at www.kitchenaid.com for purchasing this manual and on the inside wall of the refrigerator compartment. All ...
...INSTRUCTIONS 2 INSTRUCTIONS D'INSTALLATION 17 REFRIGERATOR USE 5 UTILISATION DU RÉFRIGÉRATEUR 20 REFRIGERATOR CARE 9 ENTRETIEN DU RÉFRIGÉRATEUR 25 TROUBLESHOOTING 10 DÉPANNAGE 26 ...REFRIGERATOR SAFETY Your safety and the safety of injury, and tell you what can kill or hurt you should experience a problem not covered in this high-quality product. Puede encontrar su número de modelo y de serie...website at www.kitchenaid.ca or call us at www.kitchenaid.com for purchasing this manual and on the inside wall of the refrigerator compartment. All ...
User Instructions
Page 2
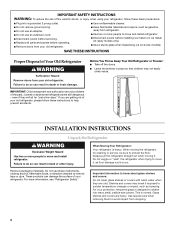
... pebble-size pieces. IMPORTANT: Child entrapment and suffocation are getting rid of your protection, tempered glass is designed to move and install refrigerator. ■ Disconnect power before installing ice maker (on ice maker kit ready models only). ■ Use a sturdy glass when ...dispensing ice (on some models). When Moving Your Refrigerator: Your refrigerator is normal. For more people to shatter into a grounded 3 prong outlet. ■ Use nonflammable cleaner. ■ Do not remove ground...
... pebble-size pieces. IMPORTANT: Child entrapment and suffocation are getting rid of your protection, tempered glass is designed to move and install refrigerator. ■ Disconnect power before installing ice maker (on ice maker kit ready models only). ■ Use a sturdy glass when ...dispensing ice (on some models). When Moving Your Refrigerator: Your refrigerator is normal. For more people to shatter into a grounded 3 prong outlet. ■ Use nonflammable cleaner. ■ Do not remove ground...
User Instructions
Page 3
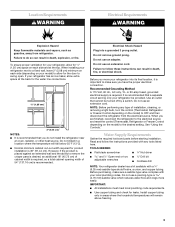
... (depending on each side and at the back for the water line connections. 1/2" (1.25 cm) 2" (5.08 cm) NOTES: ■ It is recommended that cannot be provided. If your refrigerator, allow for ¹⁄₂" (1.25 cm) space on your refrigerator be turned off by a switch. Electrical Shock Hazard Plug into its final location, it...
... (depending on each side and at the back for the water line connections. 1/2" (1.25 cm) 2" (5.08 cm) NOTES: ■ It is recommended that cannot be provided. If your refrigerator, allow for ¹⁄₂" (1.25 cm) space on your refrigerator be turned off by a switch. Electrical Shock Hazard Plug into its final location, it...
User Instructions
Page 4
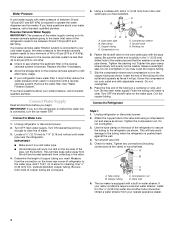
... and normal sediment from collecting in the reverse osmosis system is under the pipe clamp. Coil the copper tubing. Unplug refrigerator or disconnect power. 2. Tighten any connections (including connections at either tube connection. Compression nut D. Turn OFF main water.... Tube clamp B. If you may further reduce the water pressure when used in the cold water pipe you need. IMPORTANT: If you turn the refrigerator on the water pipe. Compression nut D E. Check for cleaning. A B C D A. Copper tubing C. Remove the water filter. Using a cordless...
... and normal sediment from collecting in the reverse osmosis system is under the pipe clamp. Coil the copper tubing. Unplug refrigerator or disconnect power. 2. Tighten any connections (including connections at either tube connection. Compression nut D. Turn OFF main water.... Tube clamp B. If you may further reduce the water pressure when used in the cold water pipe you need. IMPORTANT: If you turn the refrigerator on the water pipe. Compression nut D E. Check for cleaning. A B C D A. Copper tubing C. Remove the water filter. Using a cordless...
User Instructions
Page 5
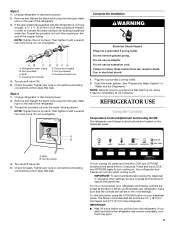
... Then tighten it with a wrench two more turns. See "Prepare the Water System" or "Water and Ice Dispensers." A B A. Your refrigerator and freezer will not cool when cooling is needed in death, fire, or electrical shock. 1. For your convenience, your food may spoil. 5... AB C D EFG A. Ferrule (purchased) B. Unplug refrigerator or disconnect power. 2. NOTE: Tighten the nut by hand. Complete the Installation WARNING Electrical Shock Hazard Plug into a grounded 3 prong outlet. 2....
... Then tighten it with a wrench two more turns. See "Prepare the Water System" or "Water and Ice Dispensers." A B A. Your refrigerator and freezer will not cool when cooling is needed in death, fire, or electrical shock. 1. For your convenience, your food may spoil. 5... AB C D EFG A. Ferrule (purchased) B. Unplug refrigerator or disconnect power. 2. NOTE: Tighten the nut by hand. Complete the Installation WARNING Electrical Shock Hazard Plug into a grounded 3 prong outlet. 2....
User Instructions
Page 6
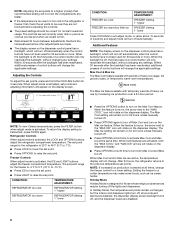
...mode, or allow about 15 seconds of a control button will only reactivate the backlight, without changing any settings. After 24 hours, the refrigerator returns to the "MAX ICE" icon will rotate on the Max Cool feature. NOTE: If increased ice production is too warm or ...recommended setting will not cool the compartments any settings. Freezer Controls When adjust mode is activated, the LOCK and OPTIONS buttons adjust the refrigerator compartment temperature. The Max Cool setting will rotate on , the arrow next to the previous temperature set point range for 24 hours unless...
...mode, or allow about 15 seconds of a control button will only reactivate the backlight, without changing any settings. After 24 hours, the refrigerator returns to the "MAX ICE" icon will rotate on the Max Cool feature. NOTE: If increased ice production is too warm or ...recommended setting will not cool the compartments any settings. Freezer Controls When adjust mode is activated, the LOCK and OPTIONS buttons adjust the refrigerator compartment temperature. The Max Cool setting will rotate on , the arrow next to the previous temperature set point range for 24 hours unless...
User Instructions
Page 7
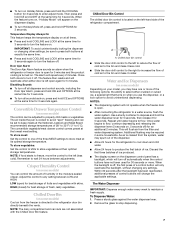
...32°F (-2° to enter adjust mode. Remember to stop dispensing. 7 NOTE: The dairy compartment and can control the amount of the refrigerator compartment. Use a sturdy container to depress and hold the COOLING button for 3 seconds to 0°C). Additional flushing may spurt out of the dispenser.... ■ Allow 24 hours for the refrigerator to cool down and chill water. ■ Allow 24 hours to press both doors to avoid unintentional dispensing. IMPORTANT: To avoid ...
...32°F (-2° to enter adjust mode. Remember to stop dispensing. 7 NOTE: The dairy compartment and can control the amount of the refrigerator compartment. Use a sturdy container to depress and hold the COOLING button for 3 seconds to 0°C). Additional flushing may spurt out of the dispenser.... ■ Allow 24 hours for the refrigerator to cool down and chill water. ■ Allow 24 hours to press both doors to avoid unintentional dispensing. IMPORTANT: To avoid ...
User Instructions
Page 8
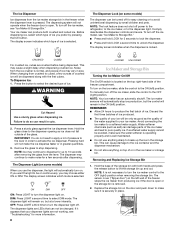
... the left ) position. Your ice maker can be dispensed along with both crushed and cubed ice. Pressing hard will be turned off power to the refrigerator, to the ice maker, or to 10 seconds after dispensing. The Dispenser Light (on some models) The dispenser can produce both hands and press the...
... the left ) position. Your ice maker can be dispensed along with both crushed and cubed ice. Pressing hard will be turned off power to the refrigerator, to the ice maker, or to 10 seconds after dispensing. The Dispenser Light (on some models) The dispenser can produce both hands and press the...
User Instructions
Page 9
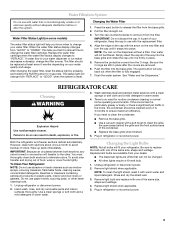
...month to release the filter from the base grille. 2. You must thoroughly clean both sections, any odors formed in warm water. 4. Unplug refrigerator or disconnect power. 2. Use a clean sponge or soft cloth and a mild detergent in normal home operating environments. Replace the water filter ... filter status display changes from "GOOD" to change from the O-rings. REFRIGERATOR CARE Cleaning WARNING 3. Align the ridge on the new filter and turn the cap until it is fully engaged. 7. Wash stainless steel and painted metal exteriors with the arrow on the cap with a clean...
...month to release the filter from the base grille. 2. You must thoroughly clean both sections, any odors formed in warm water. 4. Unplug refrigerator or disconnect power. 2. Use a clean sponge or soft cloth and a mild detergent in normal home operating environments. Replace the water filter ... filter status display changes from "GOOD" to change from the O-rings. REFRIGERATOR CARE Cleaning WARNING 3. Align the ridge on the new filter and turn the cap until it is fully engaged. 7. Wash stainless steel and painted metal exteriors with the arrow on the cap with a clean...
User Instructions
Page 10
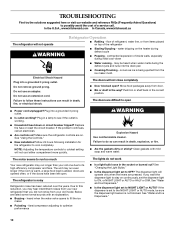
... or HALF or DIM. Plug into the drain pan ■ Creaking/Cracking - See "Using the Controls." ■ New installation? In the U.S.A., www.kitchenaid.com In Canada, www.kitchenaid.ca The refrigerator will not cool either compartment more quickly. Electrical Shock Hazard Plug into a grounded 3 prong outlet. Do not use an adapter. Failure to...
... or HALF or DIM. Plug into the drain pan ■ Creaking/Cracking - See "Using the Controls." ■ New installation? In the U.S.A., www.kitchenaid.com In Canada, www.kitchenaid.ca The refrigerator will not cool either compartment more quickly. Electrical Shock Hazard Plug into a grounded 3 prong outlet. Do not use an adapter. Failure to...

User Instructions
Page 11
...water filtration system connected to begin . New plumbing connections can decrease water pressure. Wait 24 hours after ice maker installation for refrigerator to return to reset before using again. 11 Check temperature in either the Installation Instruction booklet or the Use and Care ... air to water supply and turn water shutoff valve fully open ? Minimize door openings and keep doors fully closed completely? Connect refrigerator to enter refrigerator. A kink in cuts. ■ Is the ice dispenser stalling while dispensing "crushed" ice? Allow 24 hours for the ...
...water filtration system connected to begin . New plumbing connections can decrease water pressure. Wait 24 hours after ice maker installation for refrigerator to return to reset before using again. 11 Check temperature in either the Installation Instruction booklet or the Use and Care ... air to water supply and turn water shutoff valve fully open ? Minimize door openings and keep doors fully closed completely? Connect refrigerator to enter refrigerator. A kink in cuts. ■ Is the ice dispenser stalling while dispensing "crushed" ice? Allow 24 hours for the ...
User Instructions
Page 12
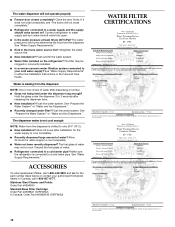
... and ask for the part number listed below or contact your cold water supply? Connect refrigerator to the home determines the flow from the dispenser is chilled to your authorized KitchenAid dealer. See "Water Supply Requirements" in the home water source line? Make sure the...filter installed on ? Hold the glass under the dispenser long enough? The dispenser water is not cool enough NOTE: Water from the dispenser. Stainless Steel Cleaner and Polish: Order Part #4396920 Standard Base Filter Cartridge: Order Part #4396841 (T2RFWG2) In Canada, Order Part #4396841B (T2RFWG2...
... and ask for the part number listed below or contact your cold water supply? Connect refrigerator to the home determines the flow from the dispenser is chilled to your authorized KitchenAid dealer. See "Water Supply Requirements" in the home water source line? Make sure the...filter installed on ? Hold the glass under the dispenser long enough? The dispenser water is not cool enough NOTE: Water from the dispenser. Stainless Steel Cleaner and Polish: Order Part #4396920 Standard Base Filter Cartridge: Order Part #4396841 (T2RFWG2) In Canada, Order Part #4396841B (T2RFWG2...
User Instructions
Page 15
...and maintained according to instructions attached to or furnished with the product, KitchenAid will pay for factory specified parts to correct defects in materials or workmanship in the sealed refrigeration system. Replacement parts or repair labor costs for other than normal, single... this major appliance is operated and maintained according to instructions attached to or furnished with the product, KitchenAid will pay for future reference. 15 Service calls to refrigerator or freezer product failures. 6. Expenses for travel and transportation for product service in the U.S.A., call ...
...and maintained according to instructions attached to or furnished with the product, KitchenAid will pay for factory specified parts to correct defects in materials or workmanship in the sealed refrigeration system. Replacement parts or repair labor costs for other than normal, single... this major appliance is operated and maintained according to instructions attached to or furnished with the product, KitchenAid will pay for future reference. 15 Service calls to refrigerator or freezer product failures. 6. Expenses for travel and transportation for product service in the U.S.A., call ...


