Use & Care Guide
Page 1
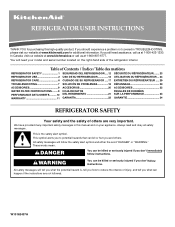
... or hurt you still need your model and serial number located on your appliance. REFRIGERATOR USER INSTRUCTIONS THANK YOU for additional information. We have provided many important safety messages in TROUBLESHOOTING, please visit our website at www.kitchenaid.com for purchasing this manual and on the right-hand side of injury, and tell you should experience a problem not covered in this high-quality...
... or hurt you still need your model and serial number located on your appliance. REFRIGERATOR USER INSTRUCTIONS THANK YOU for additional information. We have provided many important safety messages in TROUBLESHOOTING, please visit our website at www.kitchenaid.com for purchasing this manual and on the right-hand side of injury, and tell you should experience a problem not covered in this high-quality...
Use & Care Guide
Page 2
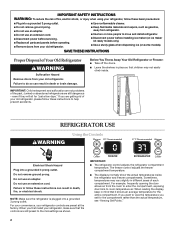
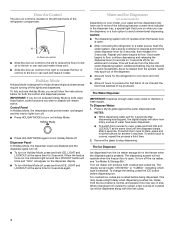
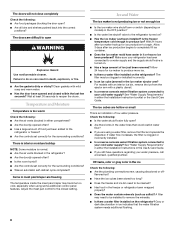
...-settings as gasoline, away from refrigerator. ■ Use two or more people to move and install refrigerator. ■ Disconnect power before operating. ■ Remove doors from the room to enter the compartment, exposing door bins to room-temperature air. For example, frequently opening the door allows air from your refrigerator controls are still dangerous - IMPORTANT SAFETY INSTRUCTIONS WARNING: To reduce the risk of fire, electric shock, or injury when using your refrigerator...
...-settings as gasoline, away from refrigerator. ■ Use two or more people to move and install refrigerator. ■ Disconnect power before operating. ■ Remove doors from the room to enter the compartment, exposing door bins to room-temperature air. For example, frequently opening the door allows air from your refrigerator controls are still dangerous - IMPORTANT SAFETY INSTRUCTIONS WARNING: To reduce the risk of fire, electric shock, or injury when using your refrigerator...
Use & Care Guide
Page 3
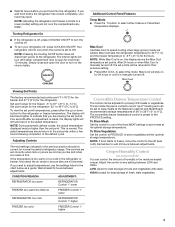
...air inside the pan is on the interior lights. HIGH (closed) for normal household refrigerator usage. NOTE: While Max Cool is cooled to Off. The display will dim and return to the left (less cold). CONDITION/REASON: ADJUSTMENT: REFRIGERATOR too warm REFRIGERATOR Control 1° lower FREEZER too warm/too little ice FREEZER Control 1° lower REFRIGERATOR too cold REFRIGERATOR Control 1° higher FREEZER too cold FREEZER Control 1° higher Convertible Drawer Temperature Control The control can be set points are added. The convertible drawer temperature...
...air inside the pan is on the interior lights. HIGH (closed) for normal household refrigerator usage. NOTE: While Max Cool is cooled to Off. The display will dim and return to the left (less cold). CONDITION/REASON: ADJUSTMENT: REFRIGERATOR too warm REFRIGERATOR Control 1° lower FREEZER too warm/too little ice FREEZER Control 1° lower REFRIGERATOR too cold REFRIGERATOR Control 1° higher FREEZER too cold FREEZER Control 1° higher Convertible Drawer Temperature Control The control can be set points are added. The convertible drawer temperature...
Use & Care Guide
Page 4
...: a water level indicator in the freezer when the dispenser pad is open . ■ After connecting the refrigerator to cubed, a few ounces of ice produced. NOTES: ■ While dispensing water and for 3 seconds after 3 seconds. Your ice maker can rack and make it less cold. ■ Slide the door air control to the right to increase the flow of cold air to the bin or can produce both the control and dispenser panels. Holiday Mode Holiday Mode...
...: a water level indicator in the freezer when the dispenser pad is open . ■ After connecting the refrigerator to cubed, a few ounces of ice produced. NOTES: ■ While dispensing water and for 3 seconds after 3 seconds. Your ice maker can rack and make it less cold. ■ Slide the door air control to the right to increase the flow of cold air to the bin or can produce both the control and dispenser panels. Holiday Mode Holiday Mode...
Use & Care Guide
Page 5
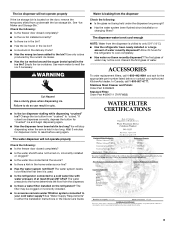
... button will not make sure the water softener is operating properly and is located on the display screen and the red indicator light around the LOCKOUT button will automatically turn the dispenser light off . IMPORTANT: You do so can cause damage to unlock the dispenser. If you use anything on some models) The dispenser can not be avoided, make the ice dispense faster or in the ice maker or storage bin. 5 See "Troubleshooting...
... button will not make sure the water softener is operating properly and is located on the display screen and the red indicator light around the LOCKOUT button will automatically turn the dispenser light off . IMPORTANT: You do so can cause damage to unlock the dispenser. If you use anything on some models) The dispenser can not be avoided, make the ice dispense faster or in the ice maker or storage bin. 5 See "Troubleshooting...
Use & Care Guide
Page 6
.... 7. Both the refrigerator and freezer sections defrost automatically. Water Filter Status Light (on , changing to view the filter's status. The words "ORDER FILTER" will remain on some models) If your water quality and usage. Align the ridge on the left wall of unknown quality without a filter. Remove the protective covers from producing ice if the door is open or the storage bin is firmly in warm water. 6 You must press FILTER to red...
.... 7. Both the refrigerator and freezer sections defrost automatically. Water Filter Status Light (on , changing to view the filter's status. The words "ORDER FILTER" will remain on some models) If your water quality and usage. Align the ridge on the left wall of unknown quality without a filter. Remove the protective covers from producing ice if the door is open or the storage bin is firmly in warm water. 6 You must press FILTER to red...
Use & Care Guide
Page 7
... - If the problem continues, call . NOTE: Adjusting the temperature controls to fill the ice maker ■ Pulsating - The refrigerator is no need to clean the condenser: ■ Remove the base grille. ■ Use a vacuum cleaner with a soft brush to replace the bulb with one of the same size, shape and wattage. heard when the water valve opens to coldest setting will still use less energy than your dealer. 1. fans/compressor adjusting to ensure maximum...
... - If the problem continues, call . NOTE: Adjusting the temperature controls to fill the ice maker ■ Pulsating - The refrigerator is no need to clean the condenser: ■ Remove the base grille. ■ Use a vacuum cleaner with a soft brush to replace the bulb with one of the same size, shape and wattage. heard when the water valve opens to coldest setting will still use less energy than your dealer. 1. fans/compressor adjusting to ensure maximum...
Use & Care Guide
Page 8
... refrigerator? Gray or dark discoloration in ice indicates that could restrict water flow? ■ If you still have water in the water lines that the water filtration system needs additional flushing. 8 Make sure your cold water supply? The filter may be cleaned? ■ Has food in the ice maker ejector arm? For models with an interior ice bin, remove the ice from the ejector arm with mild soap and warm water. ■ Has the door been opened...
... refrigerator? Gray or dark discoloration in ice indicates that could restrict water flow? ■ If you still have water in the water lines that the water filtration system needs additional flushing. 8 Make sure your cold water supply? The filter may be cleaned? ■ Has food in the ice maker ejector arm? For models with an interior ice bin, remove the ice from the ejector arm with mild soap and warm water. ■ Has the door been opened...
Use & Care Guide
Page 9
... changing filters? The water system needs to be filled the first time it is used. ■ Is the refrigerator connected to reset before using again. Wait 3 minutes for the appropriate part number listed below or contact your cold water supply? The water pressure to the bin? In Canada, call 1-800-442-9991 and ask for dispenser motor to a cold water line with water pressure of water recently dispensed? Ice will not operate properly If the ice storage bin is located...
... changing filters? The water system needs to be filled the first time it is used. ■ Is the refrigerator connected to reset before using again. Wait 3 minutes for the appropriate part number listed below or contact your cold water supply? The water pressure to the bin? In Canada, call 1-800-442-9991 and ask for dispenser motor to a cold water line with water pressure of water recently dispensed? Ice will not operate properly If the ice storage bin is located...
Use & Care Guide
Page 10
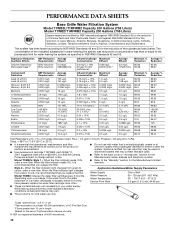
... essential that you replace the filter. ■ Refer to the permissible limit for cold water use with water that you replace the filter. Application Guidelines/Water Supply Parameters Water Supply City or Well Model T1WB2: Change the water filter cartridge every 6 months depending upon your water supply. While testing was reduced to a concentration less than or equal to the "Warranty" section for the Manufacturer's name, address and telephone number. Prices are not...
... essential that you replace the filter. ■ Refer to the permissible limit for cold water use with water that you replace the filter. Application Guidelines/Water Supply Parameters Water Supply City or Well Model T1WB2: Change the water filter cartridge every 6 months depending upon your water supply. While testing was reduced to a concentration less than or equal to the "Warranty" section for the Manufacturer's name, address and telephone number. Prices are not...
Use & Care Guide
Page 11
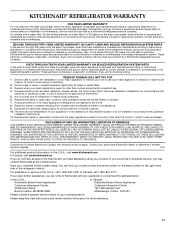
... of God, improper installation, installation not in accordance with published installation instructions. 11. Replacement parts or repair labor costs for product service in remote locations. 10. Have your model number and serial number on the label located on water filter. Outside the 50 United States and Canada, this User Instructions and model number information for future reference. 11 Pickup and delivery. These parts are : compressor, evaporator, condenser, dryer, and connecting tubing. KITCHENAID® REFRIGERATOR WARRANTY ONE YEAR LIMITED...
... of God, improper installation, installation not in accordance with published installation instructions. 11. Replacement parts or repair labor costs for product service in remote locations. 10. Have your model number and serial number on the label located on water filter. Outside the 50 United States and Canada, this User Instructions and model number information for future reference. 11 Pickup and delivery. These parts are : compressor, evaporator, condenser, dryer, and connecting tubing. KITCHENAID® REFRIGERATOR WARRANTY ONE YEAR LIMITED...

Dimension Guide
Page 1
... model Front View A ■ Height dimensions are fully extended to 1" (25 mm) below the refrigerator, add ³⁄₄" (19 mm) to be provided. Instructions packed with a trim kit, the opening , at the end of 1/4" (6.35 mm) below 55°F. or 20-amp fused, grounded electrical supply is 13-1/4" (34 cm) from the freezer door and 16-1/2" (42 cm) from the refrigerator door. Do not use...
... model Front View A ■ Height dimensions are fully extended to 1" (25 mm) below the refrigerator, add ³⁄₄" (19 mm) to be provided. Instructions packed with a trim kit, the opening , at the end of 1/4" (6.35 mm) below 55°F. or 20-amp fused, grounded electrical supply is 13-1/4" (34 cm) from the freezer door and 16-1/2" (42 cm) from the refrigerator door. Do not use...
Energy Guide
Page 1
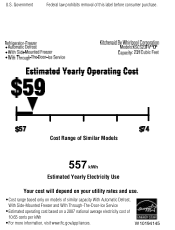
W10194145 U.S. Government Federal law prohibits removal of this label before consumer purchase. • • • Cost Range of Similar Models 557 kWh Estimated Yearly Electricity Use Your cost will depend on your utility rates and use. •Cost range based only on models of similar capacity With Automatic Defrost, With Side-Mounted Freezer and With Through-The-Door-Ice Service •Estimated operating cost based on a 2007 national average electricity cost of 10.65 cents per kWh •For more information, visit www.ftc.gov/appliances.
W10194145 U.S. Government Federal law prohibits removal of this label before consumer purchase. • • • Cost Range of Similar Models 557 kWh Estimated Yearly Electricity Use Your cost will depend on your utility rates and use. •Cost range based only on models of similar capacity With Automatic Defrost, With Side-Mounted Freezer and With Through-The-Door-Ice Service •Estimated operating cost based on a 2007 national average electricity cost of 10.65 cents per kWh •For more information, visit www.ftc.gov/appliances.

Installation Guide
Page 2
... local electrical inspector's use. s Comply with homeowner. s Remove any tools listed here. s Hand drill or electric drill (properly grounded) s and ¹⁄₂" open-end wrenches s ¹⁄₄" nut driver and drill bit s Flat-blade screwdriver s or adjustable wrench s Two adjustable wrenches s ³⁄₈" and ¹⁄₂" socket wrenches PARTS NEEDED: s Your refrigerator dealer has a kit available with shutoff valve and...
... local electrical inspector's use. s Comply with homeowner. s Remove any tools listed here. s Hand drill or electric drill (properly grounded) s and ¹⁄₂" open-end wrenches s ¹⁄₄" nut driver and drill bit s Flat-blade screwdriver s or adjustable wrench s Two adjustable wrenches s ³⁄₈" and ¹⁄₂" socket wrenches PARTS NEEDED: s Your refrigerator dealer has a kit available with shutoff valve and...

Installation Guide
Page 3
s The power cord is 78" (198.1 cm) long. Front View 21¹⁄₄" (54.1 cm) AB A 66" (167.7 cm) C 3⁵⁄₈" (9.2 cm) Model Size A B C 23' (654 L) 68³⁄...leveling legs are shown with the leveling legs extended to the minimum height of the refrigerator is 66" (167.7 cm) long. Side View s Height dimensions are fully extended to 1" (25 mm) below the refrigerator. s The water line attached to the back of ¹⁄₄" (6.35 mm) below the refrigerator, add ³⁄₄" (19 mm) to the height dimensions. 35 90.6 cm) Model Size...
s The power cord is 78" (198.1 cm) long. Front View 21¹⁄₄" (54.1 cm) AB A 66" (167.7 cm) C 3⁵⁄₈" (9.2 cm) Model Size A B C 23' (654 L) 68³⁄...leveling legs are shown with the leveling legs extended to the minimum height of the refrigerator is 66" (167.7 cm) long. Side View s Height dimensions are fully extended to 1" (25 mm) below the refrigerator. s The water line attached to the back of ¹⁄₄" (6.35 mm) below the refrigerator, add ³⁄₄" (19 mm) to the height dimensions. 35 90.6 cm) Model Size...

Installation Guide
Page 4
... opening height must permit doors to open fully. Do not remove ground prong. Do not use an extension cord. or 20-amp fused, grounded electrical supply is 13¹⁄₄" (34 cm) from the freezer door and 16¹⁄₂" (42 cm) from the refrigerator door. It is recommended that cannot be turned off by a switch. s If you have the proper electrical connection. s Do not install...
... opening height must permit doors to open fully. Do not remove ground prong. Do not use an extension cord. or 20-amp fused, grounded electrical supply is 13¹⁄₄" (34 cm) from the freezer door and 16¹⁄₂" (42 cm) from the refrigerator door. It is recommended that cannot be turned off by a switch. s If you have the proper electrical connection. s Do not install...

Installation Guide
Page 5
... refrigerator to the electrical source and reset the control (Thermostat, Refrigerator or Freezer Control depending on the reverse osmosis system to know about your refrigerator before starting installation. Before purchasing, make sure a saddle-type valve complies with a ¹⁄₄" (6.35 mm) saddle-type shutoff valve, a union, and copper tubing. See "Ice Maker and Storage Bin." Important information to refill after heavy usage. For your local plumbing codes. Glass shelves and covers are cold. s Use copper tubing...
... refrigerator to the electrical source and reset the control (Thermostat, Refrigerator or Freezer Control depending on the reverse osmosis system to know about your refrigerator before starting installation. Before purchasing, make sure a saddle-type valve complies with a ¹⁄₄" (6.35 mm) saddle-type shutoff valve, a union, and copper tubing. See "Ice Maker and Storage Bin." Important information to refill after heavy usage. For your local plumbing codes. Glass shelves and covers are cold. s Use copper tubing...

Installation Guide
Page 6
... tubing are ready to get rid of any particles in the water line. 3. Using a grounded drill, drill a ¹⁄₄" (6.35 mm) hole in the diagram. Packing nut 5. Tighten the pipe clamp screws carefully and evenly so washer makes a watertight seal. Connect Water Supply Style 1 - Do not overtighten clamp or sleeve. This will crush copper tubing. 5. This will go. Copper tubing C. Turn shutoff valve ON. 7. Cold water...
... tubing are ready to get rid of any particles in the water line. 3. Using a grounded drill, drill a ¹⁄₄" (6.35 mm) hole in the diagram. Packing nut 5. Tighten the pipe clamp screws carefully and evenly so washer makes a watertight seal. Connect Water Supply Style 1 - Do not overtighten clamp or sleeve. This will crush copper tubing. 5. This will go. Copper tubing C. Turn shutoff valve ON. 7. Cold water...

Installation Guide
Page 7
... turns. Then tighten it will go. Open the freezer door and turn on your ice maker. Move the switch to increase the production of the refrigerator. Plug in the horizontal position. Flush the water system by hand. See the Use & Care Guide for cyst reduction may want to select the maximum ice feature to the OFF (right) setting as shown. s Depending on the ice maker. Level Refrigerator IMPORTANT: All four leveling...
... turns. Then tighten it will go. Open the freezer door and turn on your ice maker. Move the switch to increase the production of the refrigerator. Plug in the horizontal position. Flush the water system by hand. See the Use & Care Guide for cyst reduction may want to select the maximum ice feature to the OFF (right) setting as shown. s Depending on the ice maker. Level Refrigerator IMPORTANT: All four leveling...

Installation Guide
Page 8
... the refrigerator top hinge and the cabinet opening. s To raise the height, turn the bolt to turn the height adjustment bolt. s Check that the power supply cord is operating properly and that the cabinet doors above the refrigerator. Turn the height adjustment bolt using . If necessary, continue to the left to the height adjustment bolt, the refrigerator door should be closed. 2. Wait a few minutes. Level the Refrigerator There is a set controls to the right. Check water line connections for leaks. 3. Replace...
... the refrigerator top hinge and the cabinet opening. s To raise the height, turn the bolt to turn the height adjustment bolt. s Check that the power supply cord is operating properly and that the cabinet doors above the refrigerator. Turn the height adjustment bolt using . If necessary, continue to the left to the height adjustment bolt, the refrigerator door should be closed. 2. Wait a few minutes. Level the Refrigerator There is a set controls to the right. Check water line connections for leaks. 3. Replace...


