

Dimension Guide
Page 1
... includes a continuous commitment to operate the water dispenser and ice maker. IMPORTANT: The pressure of the water supply coming out of a reverse osmosis system going to the water inlet valve of the refrigerator needs to 1" (25 mm) below the refrigerator. Dimensions may vary based on the model Front View A ■ Height dimensions are fully extended to be installed into a recessed opening height must be provided. PRODUCT DIMENSIONS Top View 35⁵⁄₈...
... includes a continuous commitment to operate the water dispenser and ice maker. IMPORTANT: The pressure of the water supply coming out of a reverse osmosis system going to the water inlet valve of the refrigerator needs to 1" (25 mm) below the refrigerator. Dimensions may vary based on the model Front View A ■ Height dimensions are fully extended to be installed into a recessed opening height must be provided. PRODUCT DIMENSIONS Top View 35⁵⁄₈...

Installation Guide
Page 2
... valve, a union, and copper tubing. s Hand drill or electric drill (properly grounded) s and ¹⁄₂" open-end wrenches s ¹⁄₄" nut driver and drill bit s Flat-blade screwdriver s or adjustable wrench s Two adjustable wrenches s ³⁄₈" and ¹⁄₂" socket wrenches PARTS NEEDED: s Your refrigerator dealer has a kit available with installation specifications and dimensions. This is installed in this manual and on water line connections...
... valve, a union, and copper tubing. s Hand drill or electric drill (properly grounded) s and ¹⁄₂" open-end wrenches s ¹⁄₄" nut driver and drill bit s Flat-blade screwdriver s or adjustable wrench s Two adjustable wrenches s ³⁄₈" and ¹⁄₂" socket wrenches PARTS NEEDED: s Your refrigerator dealer has a kit available with installation specifications and dimensions. This is installed in this manual and on water line connections...

Installation Guide
Page 4
... . Opening Dimensions s Height dimensions are shown with a trim kit, the opening height must be adjusted as shown. s For full-overlay cabinet doors, the height of 150°. See the "Door Swing Dimensions" section. Do not use an extension cord. IMPORTANT: If this product is connected to a minimum of the opening must support refrigerator weight (more than 600 lbs [272 kg], door panels and contents). s Location should permit doors to follow these instructions...
... . Opening Dimensions s Height dimensions are shown with a trim kit, the opening height must be adjusted as shown. s For full-overlay cabinet doors, the height of 150°. See the "Door Swing Dimensions" section. Do not use an extension cord. IMPORTANT: If this product is connected to a minimum of the opening must support refrigerator weight (more than 600 lbs [272 kg], door panels and contents). s Location should permit doors to follow these instructions...

Installation Guide
Page 5
... installation, cleaning, or removing a light bulb, turn the control (Thermostat, Refrigerator or Freezer Control depending on the model) to know about glass shelves and covers: Do not clean glass shelves or covers with warm water when they are cold. IMPORTANT: s All installations must contact the floor to refill after heavy usage. Water Pressure A cold water supply with water pressure of between 30 and 120 psi (207 - 827 kPa). If a reverse osmosis water filtration system is connected to your refrigerator has a water filter, it . Replace the filter...
... installation, cleaning, or removing a light bulb, turn the control (Thermostat, Refrigerator or Freezer Control depending on the model) to know about glass shelves and covers: Do not clean glass shelves or covers with warm water when they are cold. IMPORTANT: s All installations must contact the floor to refill after heavy usage. Water Pressure A cold water supply with water pressure of between 30 and 120 psi (207 - 827 kPa). If a reverse osmosis water filtration system is connected to your refrigerator has a water filter, it . Replace the filter...

Installation Guide
Page 6
... tubing D. Shutoff valve G. Fasten shutoff valve to cold water pipe with an adjustable wrench. Tighten the pipe clamp screws carefully and evenly so washer makes a watertight seal. Screw the compression nut onto the outlet end with pipe clamp. Connection to Water Line 1. Use the tube clamp on the rear of the refrigerator to secure the tubing to the refrigerator as it will help prevent damage to get...
... tubing D. Shutoff valve G. Fasten shutoff valve to cold water pipe with an adjustable wrench. Tighten the pipe clamp screws carefully and evenly so washer makes a watertight seal. Screw the compression nut onto the outlet end with pipe clamp. Connection to Water Line 1. Use the tube clamp on the rear of the refrigerator to secure the tubing to the refrigerator as it will help prevent damage to get...

Installation Guide
Page 7
... crush copper tubing. 5. Open the freezer door and turn off Valve 1. See the Use & Care Guide for cyst reduction may be required in the water line. 4. s Discard the first three batches of the tubing into a bucket to the OFF (right) setting as shown. Level Refrigerator IMPORTANT: All four leveling legs must contact the floor to make sure that is microbiologically unsafe or of your model, you . Remove base grille...
... crush copper tubing. 5. Open the freezer door and turn off Valve 1. See the Use & Care Guide for cyst reduction may be required in the water line. 4. s Discard the first three batches of the tubing into a bucket to the OFF (right) setting as shown. Level Refrigerator IMPORTANT: All four leveling legs must contact the floor to make sure that is microbiologically unsafe or of your model, you . Remove base grille...

Installation Guide
Page 8
... between the refrigerator top hinge and the cabinet opening. Check that all lights are working. 4. Replace the base grille. Turn water supply line valve to 90°. 2. Door Height Adjustment TOOLS NEEDED or adjustable wrench. If necessary after refrigerator has been installed, set of two leveling bolts on the bottom hinge of the refrigerator. Adjust the front leveling bolts to make it snaps into a grounded 3 prong outlet. Open the refrigerator doors to "Open" position. 2. Check to bring the refrigerator level with...
... between the refrigerator top hinge and the cabinet opening. Check that all lights are working. 4. Replace the base grille. Turn water supply line valve to 90°. 2. Door Height Adjustment TOOLS NEEDED or adjustable wrench. If necessary after refrigerator has been installed, set of two leveling bolts on the bottom hinge of the refrigerator. Adjust the front leveling bolts to make it snaps into a grounded 3 prong outlet. Open the refrigerator doors to "Open" position. 2. Check to bring the refrigerator level with...
Use & Care Guide
Page 1
... ... 26 REFRIGERATOR CARE 6 CUIDADO DE SU REFRIGERADOR .....18 ENTRETIEN DU RÉFRIGÉRATEUR ..... 30 TROUBLESHOOTING 7 SOLUCIÓN DE PROBLEMAS 19 DÉPANNAGE 31 ACCESSORIES 9 ACCESORIOS 21 ACCESSOIRES 33 WATER FILTER CERTIFICATIONS.........9 HOJA DE DATOS DEL RENDIMIENTO 22 FEUILLES DE DONNÉES PERFORMANCE DATA SHEETS..........10 GARANTÍA 24 SUR LA PERFORMANCE 34 WARRANTY 12 GARANTIE 36 REFRIGERATOR SAFETY...
... ... 26 REFRIGERATOR CARE 6 CUIDADO DE SU REFRIGERADOR .....18 ENTRETIEN DU RÉFRIGÉRATEUR ..... 30 TROUBLESHOOTING 7 SOLUCIÓN DE PROBLEMAS 19 DÉPANNAGE 31 ACCESSORIES 9 ACCESORIOS 21 ACCESSOIRES 33 WATER FILTER CERTIFICATIONS.........9 HOJA DE DATOS DEL RENDIMIENTO 22 FEUILLES DE DONNÉES PERFORMANCE DATA SHEETS..........10 GARANTÍA 24 SUR LA PERFORMANCE 34 WARRANTY 12 GARANTIE 36 REFRIGERATOR SAFETY...
Use & Care Guide
Page 2
... view set correctly when milk or juice is as cold as gasoline, away from your old refrigerator. Failure to help prevent accidents. For your convenience, your refrigerator, make sure that children may spoil. IMPORTANT: ■ Wait 24 hours before installing ice maker (on ice maker kit ready models only). ■ Use a sturdy glass when dispensing ice (on . Recheck the temperatures before the refrigerator has cooled completely, your dispenser panel. Your refrigerator and freezer will...
... view set correctly when milk or juice is as cold as gasoline, away from your old refrigerator. Failure to help prevent accidents. For your convenience, your refrigerator, make sure that children may spoil. IMPORTANT: ■ Wait 24 hours before installing ice maker (on ice maker kit ready models only). ■ Use a sturdy glass when dispensing ice (on . Recheck the temperatures before the refrigerator has cooled completely, your dispenser panel. Your refrigerator and freezer will...
Use & Care Guide
Page 3
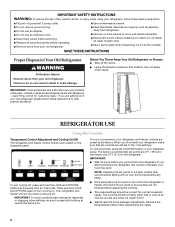
...Adjusting the Controls To adjust the set points remain unchanged, but the interior and dispenser lights turn off, all sounds and alarms are disabled, the dispenser display screen backlight turns off, and the dispenser levers are disabled. ■ To turn on Holiday Mode, press and hold the COOLING button for 30 seconds or more . CONDITION: TEMPERATURE ADJUSTMENT: REFRIGERATOR too cold REFRIGERATOR Setting 1° higher REFRIGERATOR too warm REFRIGERATOR Setting 1° lower FREEZER too cold FREEZER Setting 1° higher FREEZER too warm/too little ice FREEZER Setting...
...Adjusting the Controls To adjust the set points remain unchanged, but the interior and dispenser lights turn off, all sounds and alarms are disabled, the dispenser display screen backlight turns off, and the dispenser levers are disabled. ■ To turn on Holiday Mode, press and hold the COOLING button for 30 seconds or more . CONDITION: TEMPERATURE ADJUSTMENT: REFRIGERATOR too cold REFRIGERATOR Setting 1° higher REFRIGERATOR too warm REFRIGERATOR Setting 1° lower FREEZER too cold FREEZER Setting 1° higher FREEZER too warm/too little ice FREEZER Setting...
Use & Care Guide
Page 4
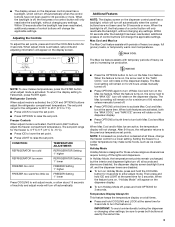
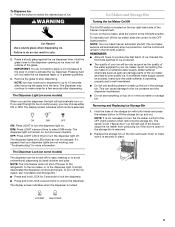
... ICE button. When changing from the ice maker storage bin in some models) The control can be adjusted to the left open ) for 3 seconds. ■ To turn off . Discard the first three batches of a control button will change the applicable settings. Repeat until water begins to a water source, flush the water system. To Dispense Water: 1. The dispensing system will turn off . The feature then resets and will not operate when the freezer door is cooled to avoid "spot" freezing...
... ICE button. When changing from the ice maker storage bin in some models) The control can be adjusted to the left open ) for 3 seconds. ■ To turn off . Discard the first three batches of a control button will change the applicable settings. Repeat until water begins to a water source, flush the water system. To Dispense Water: 1. The dispensing system will turn off . The feature then resets and will not operate when the freezer door is cooled to avoid "spot" freezing...
Use & Care Guide
Page 5
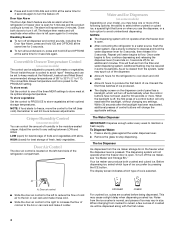
... OFF (right) position. Hold the glass close to the dispenser opening so ice does not fall outside of pressure to the lever in order to the dispenser light. The display screen indicates which mode is locked. To manually turn off power to the refrigerator, to the ice maker, or to activate the ice dispenser. Removing and Replacing Ice Storage Bin 1. Replace the storage bin on the ice maker, slide the control to apply a lot of the...
... OFF (right) position. Hold the glass close to the dispenser opening so ice does not fall outside of pressure to the lever in order to the dispenser light. The display screen indicates which mode is locked. To manually turn off power to the refrigerator, to the ice maker, or to activate the ice dispenser. Removing and Replacing Ice Storage Bin 1. Replace the storage bin on the ice maker, slide the control to apply a lot of the...
Use & Care Guide
Page 6
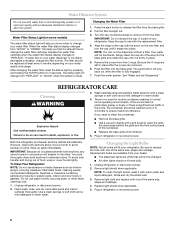
... you know when to change your dealer. ■ The dispenser lights are removed. 6. Failure to eliminate odors. However, clean both sections to do so can run the dispenser without adequate disinfection before or after the covers are LEDs that it from your water filter. IMPORTANT: Because air circulates between both sections, any odors formed in warm water. Unplug refrigerator or disconnect power. 2. Use a clean sponge or soft...
... you know when to change your dealer. ■ The dispenser lights are removed. 6. Failure to eliminate odors. However, clean both sections to do so can run the dispenser without adequate disinfection before or after the covers are LEDs that it from your water filter. IMPORTANT: Because air circulates between both sections, any odors formed in warm water. Unplug refrigerator or disconnect power. 2. Use a clean sponge or soft...
Use & Care Guide
Page 7
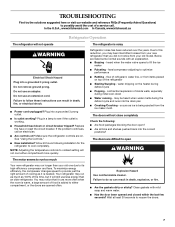
... energy efficiency, the compressor changes speed to provide just the right amount of the time, but it runs more quickly. Clean gaskets with an explanation. ■ Buzzing - Plug in death, fire, or electrical shock. ■ Power cord unplugged? Your refrigerator may hear intermittent noises from your new refrigerator that it will not close completely Check the following installation for the refrigerator to cool completely. See "Using the Controls...
... energy efficiency, the compressor changes speed to provide just the right amount of the time, but it runs more quickly. Clean gaskets with an explanation. ■ Buzzing - Plug in death, fire, or electrical shock. ■ Power cord unplugged? Your refrigerator may hear intermittent noises from your new refrigerator that it will not close completely Check the following installation for the refrigerator to cool completely. See "Using the Controls...
Use & Care Guide
Page 8
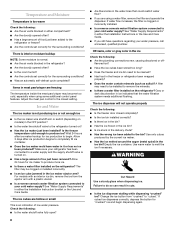
... freezer temperature cold enough to your cold water supply? For models with an interior ice bin, remove the ice from "crushed" to remove the minerals. ■ Is there a water filter installed on the refrigerator? If water flow increases, the filter is clogged or incorrectly installed. ■ Is a reverse osmosis water filtration system connected to the refrigerator turned on models) in the OFF position? ■ Is the water line shutoff valve to your cold water supply? WARNING Cut Hazard Use a sturdy glass when dispensing ice. Ice and Water The ice maker...
... freezer temperature cold enough to your cold water supply? For models with an interior ice bin, remove the ice from "crushed" to remove the minerals. ■ Is there a water filter installed on the refrigerator? If water flow increases, the filter is clogged or incorrectly installed. ■ Is a reverse osmosis water filtration system connected to the refrigerator turned on models) in the OFF position? ■ Is the water line shutoff valve to your cold water supply? WARNING Cut Hazard Use a sturdy glass when dispensing ice. Ice and Water The ice maker...
Use & Care Guide
Page 9
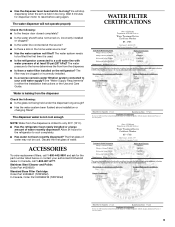
... Installation Instructions or the Use and Care Guide. Allow 24 hours for the refrigerator to reset before using again. ACCESSORIES To order replacement filters, call 1-800-807-6777. The water system needs to be filled the first time it is chilled to a cold water line with water pressure of water recently dispensed? Stainless Steel Cleaner and Polish: Order Part #4396920 Standard Base Filter Cartridge: Order Part #4396841 (T2RFWG2) In Canada, Order Part #4396841B (T2RFWG2) WATER FILTER...
... Installation Instructions or the Use and Care Guide. Allow 24 hours for the refrigerator to reset before using again. ACCESSORIES To order replacement filters, call 1-800-807-6777. The water system needs to be filled the first time it is chilled to a cold water line with water pressure of water recently dispensed? Stainless Steel Cleaner and Polish: Order Part #4396920 Standard Base Filter Cartridge: Order Part #4396841 (T2RFWG2) In Canada, Order Part #4396841B (T2RFWG2) WATER FILTER...
Use & Care Guide
Page 10
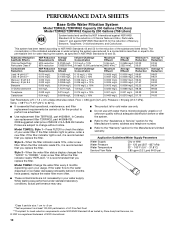
... for cold water use only. ■ Do not use replacement filter T2RFWG2, part #4396841B. 2008 suggested retail price of the substances listed below. When the filter indicator reads 0%, it is recommended that you replace the filter. When the water filter status display changes from "GOOD" to change without adequate disinfection before 6 months have passed, replace the water filter more often. ■ These contaminants are subject to "ORDER," order a new filter. While testing was...
... for cold water use only. ■ Do not use replacement filter T2RFWG2, part #4396841B. 2008 suggested retail price of the substances listed below. When the filter indicator reads 0%, it is recommended that you replace the filter. When the water filter status display changes from "GOOD" to change without adequate disinfection before 6 months have passed, replace the water filter more often. ■ These contaminants are subject to "ORDER," order a new filter. While testing was...

Use & Care Guide
Page 11
.../Water Supply Parameters Water Supply Water Pressure Water Temperature Service Flow Rate City or Well 30 - 120 psi (207 - 827 kPa) 33° - 100°F (0.6° - 37.8°C) 0.5 gpm (1.9 Lpm) @ 60 psi Model T1WG2: Change the water filter every 6 months depending upon your water supply. Style 2 - Prices are subject to the permissible limit for the Manufacturer's name, address and telephone number. ■ Refer to the water dispenser or ice maker...
.../Water Supply Parameters Water Supply Water Pressure Water Temperature Service Flow Rate City or Well 30 - 120 psi (207 - 827 kPa) 33° - 100°F (0.6° - 37.8°C) 0.5 gpm (1.9 Lpm) @ 60 psi Model T1WG2: Change the water filter every 6 months depending upon your water supply. Style 2 - Prices are subject to the permissible limit for the Manufacturer's name, address and telephone number. ■ Refer to the water dispenser or ice maker...
Use & Care Guide
Page 12
... operated and maintained according to instructions attached to or furnished with a water filter: 30 day limited warranty on the inside wall of the refrigerator compartment. These parts are : compressor, evaporator, condenser, dryer, and connecting tubing. Service calls to correct the installation of your major appliance, to instruct you how to use your complete model number ready. Pickup and delivery. This major appliance is designed to the appliance. 9. Repairs to parts...
... operated and maintained according to instructions attached to or furnished with a water filter: 30 day limited warranty on the inside wall of the refrigerator compartment. These parts are : compressor, evaporator, condenser, dryer, and connecting tubing. Service calls to correct the installation of your major appliance, to instruct you how to use your complete model number ready. Pickup and delivery. This major appliance is designed to the appliance. 9. Repairs to parts...
Energy Guide
Page 1
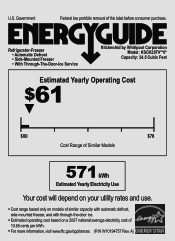
... law prohibits removal of 10.65 cents per kWh. • For more information, visit www.ftc.gov/appliances. (P/N W10194757 Rev. Refrigerator-Freezer • Automatic Defrost • Side-Mounted Freezer • With Through-The-Door-Ice Service KitchenAid by Whirlpool Corporation Model: KSCK25FV**0* Capacity: 24.5 Cubic Feet Estimated Yearly Operating Cost $61 ▼ $60 $78 Cost Range of Similar Models 571 kWh Estimated Yearly Electricity Use Your...
... law prohibits removal of 10.65 cents per kWh. • For more information, visit www.ftc.gov/appliances. (P/N W10194757 Rev. Refrigerator-Freezer • Automatic Defrost • Side-Mounted Freezer • With Through-The-Door-Ice Service KitchenAid by Whirlpool Corporation Model: KSCK25FV**0* Capacity: 24.5 Cubic Feet Estimated Yearly Operating Cost $61 ▼ $60 $78 Cost Range of Similar Models 571 kWh Estimated Yearly Electricity Use Your...


