KitchenAid KOSE500EWH Support and Manuals
Get Help and Manuals for this KitchenAid item
View All Support Options Below
Free KitchenAid KOSE500EWH manuals!
Problems with KitchenAid KOSE500EWH?
Ask a Question
Free KitchenAid KOSE500EWH manuals!
Problems with KitchenAid KOSE500EWH?
Ask a Question
KitchenAid KOSE500EWH Videos

KitchenAid KOSE500EWH Single Wall Oven
Duration: :50
Total Views: 7
Duration: :50
Total Views: 7
KitchenAid KOSE500EWH Single Wall Oven
Duration: :58
Total Views: 43
Duration: :58
Total Views: 43
KitchenAid KOSE500EWH Fours encastré simple
Duration: :58
Total Views: 4
Duration: :58
Total Views: 4
Popular KitchenAid KOSE500EWH Manual Pages
Owners Manual - Page 1

For future reference, please make a note of Contents
BUILT-IN OVEN SAFETY 2 PARTS AND FEATURES 3 FEATURE GUIDE 4
Electronic Oven Controls 6 Display 6 Start 6 Lower Cancel, Upper Cancel and ...Lights 15 Oven Door 15 TROUBLESHOOTING 16 ASSISTANCE OR SERVICE 17 In the U.S.A 17 In Canada 17 ACCESSORIES 17 WARRANTY 18
W10643471C Table of your product model and serial numbers. These...
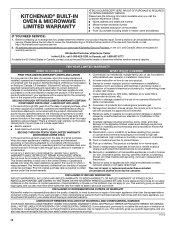
Owners Manual - Page 2

... oven become hot enough to persons, or damage when using the oven.
■ User Servicing - Do not store any part of the appliance.
Do not repair or replace any flammable materials or temperature sensitive items inside of the oven unless specifically recommended in color. Moist or damp potholders on any kind should never be taken...
Owners Manual - Page 4

... Clock
Settings Oven cavity light
INSTRUCTIONS
The Clock uses a 12 hour cycle. Kitchen timer
E. Upper and lower oven Cancel (double oven models) Cancel (single oven models)
... cavity display C. See the "Electronic Oven Controls" section. 1. Oven display C. FEATURE GUIDE
This manual covers several models. Number keys D. Stop time L. Time of the items listed. When the oven door...
Owners Manual - Page 6

... starting time for an oven function with a delayed start
COOK TIME
Timed cooking
Electronic Oven Controls
INSTRUCTIONS
Close the door. 1.
A
B
C
D
E
F
LK
J
IH G
A. Self clean
I. Clock/Tools J.
In addition, during Timed Cooking, this display will be set oven temperature will appear on the oven temperature.
6 The START key begins all oven functions except...
Owners Manual - Page 7

...Set/Off and Oven Light keys will be changed to Celsius. These hidden functions allow you access to 9 hidden functions within the Electronic Oven Control. You can also touch the Tools key repeatedly to manually... cook faster or slower than cooking. If all tones have been turned off as a guide. To Set:
1.
If necessary, the temperature calibration can be changed to high. To Turn Off/...
Owners Manual - Page 8

... Start, Tools (to one-half hour for only part of Sabbath Mode time, up to disable only), and Cancel.
Touch START.
3. To Regularly Set, Timed:
WARNING
Food Poisoning Hazard
Do not let food... oven display.
6. On double oven models, the following chart as a guide. Touch CLOCK/TOOLS, and then touch number key "7." To Disable: The oven(s) can be set until the Cancel button is reached, ...
Owners Manual - Page 11

...in intervals to order.
■■ For proper draining, do not cover the grid with your set temperature to reach 350°F (177°C) with all oven racks inside the oven cavity. ... maintain a consistent temperature throughout the oven, cooking foods more evenly. Drippings will bake on the model, if the oven door is opened during the Bake function to monitor progress.
■■...
Owners Manual - Page 12

.... Temperature Probe (single, upper and, on some models, lower oven)
The temperature probe accurately measures the ...be located in the center of the thickest part of the meat and not into the food... removing food. Close oven door.
When the set oven temperature will remain lit in intervals to ...NOTE: It is opened and turns on rack guide 2. To Convection Broil Allow the oven to maintain...
Owners Manual - Page 13

...to enter time of time to enter the length of some models, the temperature probe from the oven because it becomes heavily ...fumes given off automatically. Use a damp cloth to follow these instructions can result in food poisoning or sickness.
At high temperatures, ... is not adjustable.
2.
Air must be used for a set to clear the display and/or stop time will appear on...
Owners Manual - Page 14

... be set a clean time other than 4 hours and 30 minutes.
Always follow label instructions on...will not begin .
1. On double oven models, only one oven is complete and the oven...the following chart as a guide to set a clean time other oven cannot be set a clean time.
2.... Kitchen and Appliance Cleaner Part Number W10355010 (not included): See "Assistance or Service" section to clear the...
Owners Manual - Page 15

...;■ Do not set into place.
3.
Remove glass light ... maximum halogen bulbs. Then, follow these instructions. Check that the door is free to... or off and cool. On double oven models, both sides. Disconnect power. 2. To ... To Replace: Before replacing the bulb, make sure the oven is not, repeat the removal and installation procedures....guides will not work during the Self-Cleaning cycle.
Owners Manual - Page 16

... models,...See cycle instructions for service. Close...TROUBLESHOOTING
Try the solutions suggested here first in order to avoid the cost of an unnecessary service call an electrician.
Nothing will take more time. Replace the fuse or reset the circuit breaker. If the problem continues, call .
See "Electronic Oven Controls" section.
■■ Has a delay start Self-Clean cycle been set...
Owners Manual - Page 17

... procedures.
■■ Accessory and repair parts sales.
■■ Specialized customer assistance (Spanish speaking, hearing impaired, limited vision, etc.).
KitchenAid appliances designated service technicians are trained to fulfill the product warranty and provide after -warranty service, anywhere in Canada.
■■ Features and specifications on our full line of...
Owners Manual - Page 18
Before contacting us to review the Troubleshooting or Problem Solver section of the Use and Care Guide, or visit http://kitchenaid.com/customer-service.
2. Please take a few minutes to arrange service, please determine whether your product requires repair. All warranty service is a limited 5-year warranty on the below named parts only and does not include repair labor.
■■ Electric...
Dimension Guide - Page 1

...
PRODUCT MODEL NUMBERS
PRODUCT DIMENSIONS
KODE300E KODE307E KODE500E KODE507E
KODT100E KODT107E KOSE500E KOSE507E
KOST100E KOST107E KEBS109E KEBS209E KEBS207E
B G
Electrical: To properly install your ... models
A. 51³⁄16" (130.0 cm)
max. Aluminum/copper connection must be provided.
• If the house has aluminum wiring, follow the instructions
provided for serviceability ...
KitchenAid KOSE500EWH Reviews
We have not received any reviews for KitchenAid yet.