Use and Care Guide
Page 2
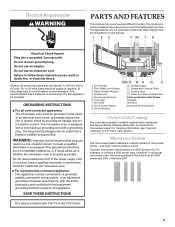
TABLE OF CONTENTS MICROWAVE OVEN SAFETY 3 Electrical Requirements 5 PARTS AND FEATURES 5 Oven Cavity Coating 5 Microwave System 5 Turntable 6 Cooking Rack 6 Browning Pan and Handle 6 Grill Rack 7 OVEN CONTROL 7 Display/Touch Screen 7 Progress Bar 8 Start 8 Off/Cancel 8 Clock 8 Tones 9 Timer 9 Vent Fan 9 ... Hints & Settings 9 Child Lock 10 Night Light 10 Display Brightness and Contrast 10 Learning Mode 10 Demo Mode 10 MICROWAVE OVEN USE 11 Food Characteristics 11 Cooking Guidelines 11 Cookware and Dinnerware 11 Aluminum Foil and Metal 12 Cooking Power 12 Cooking ...
TABLE OF CONTENTS MICROWAVE OVEN SAFETY 3 Electrical Requirements 5 PARTS AND FEATURES 5 Oven Cavity Coating 5 Microwave System 5 Turntable 6 Cooking Rack 6 Browning Pan and Handle 6 Grill Rack 7 OVEN CONTROL 7 Display/Touch Screen 7 Progress Bar 8 Start 8 Off/Cancel 8 Clock 8 Tones 9 Timer 9 Vent Fan 9 ... Hints & Settings 9 Child Lock 10 Night Light 10 Display Brightness and Contrast 10 Learning Mode 10 Demo Mode 10 MICROWAVE OVEN USE 11 Food Characteristics 11 Cooking Guidelines 11 Cookware and Dinnerware 11 Aluminum Foil and Metal 12 Cooking Power 12 Cooking ...
Use and Care Guide
Page 3
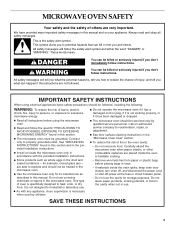
...not designed for industrial or laboratory use the cavity for examination, repair, or adjustment. ■ See door surface cleaning instructions in the "Microwave Oven Care" section. ■ To reduce the risk of fire in the shell and sealed containers - This is specifically designed to potential ... of burns, electric shock, fire, injury to persons, or exposure to explode and should be heated in the microwave oven. ■ Use the microwave oven only for example, closed , turn oven off, and disconnect the power cord, or shut off power at the fuse or circuit breaker panel. - SAVE...
...not designed for industrial or laboratory use the cavity for examination, repair, or adjustment. ■ See door surface cleaning instructions in the "Microwave Oven Care" section. ■ To reduce the risk of fire in the shell and sealed containers - This is specifically designed to potential ... of burns, electric shock, fire, injury to persons, or exposure to explode and should be heated in the microwave oven. ■ Use the microwave oven only for example, closed , turn oven off, and disconnect the power cord, or shut off power at the fuse or circuit breaker panel. - SAVE...
Use and Care Guide
Page 4
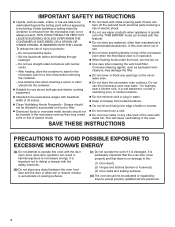
...the liquid. - Stir the liquid both gas and electric cooking equipment. ■ Intended to accumulate on models with maximum width of the microwave oven when the microwave oven is in a wet basement, or near water - Do not use paper products when appliance is operated in the "PAN BROWN" mode...it is important not to defeat or tamper with the safety interlocks. (b) Do not place any other than manufacturer's recommended accessories, in the microwave oven for use above ranges with this feature). ■ Do not store any openings on top of 36 inches. ■ Clean Ventilating Hoods ...
...the liquid. - Stir the liquid both gas and electric cooking equipment. ■ Intended to accumulate on models with maximum width of the microwave oven when the microwave oven is in a wet basement, or near water - Do not use paper products when appliance is operated in the "PAN BROWN" mode...it is important not to defeat or tamper with the safety interlocks. (b) Do not place any other than manufacturer's recommended accessories, in the microwave oven for use above ranges with this feature). ■ Do not store any openings on top of 36 inches. ■ Clean Ventilating Hoods ...
Use and Care Guide
Page 5
...the electric current. Do not use an extension cord. For cleaning information, see "General Cleaning" in conventional microwave ovens. Do not use an adapter. Oven Light Turntable 7. For example, to the equipment grounding terminal or lead on HIGH power only. Electrical Requirements ...appearance of your particular model may differ slightly from the illustrations in a typical microwave oven, the oven operates 50% of the time at HIGH power and 50% of electric shock. The microwave oven is properly grounded. This device complies with Part 18 of the features shown...
...the electric current. Do not use an extension cord. For cleaning information, see "General Cleaning" in conventional microwave ovens. Do not use an adapter. Oven Light Turntable 7. For example, to the equipment grounding terminal or lead on HIGH power only. Electrical Requirements ...appearance of your particular model may differ slightly from the illustrations in a typical microwave oven, the oven operates 50% of the time at HIGH power and 50% of electric shock. The microwave oven is properly grounded. This device complies with Part 18 of the features shown...

Use and Care Guide
Page 6
...overcooking of pan, squeeze handle and lift pan. Damage to help cook food more containers at the same time. In contrast, microwave ovens utilizing this oven. Insert the rack securely into the rack supports on the support. This constant stream of the parts. See "Assistance or ...Service" to grasp the pan. A humidity sensor in any of microwave power helps to order replacement parts. 6 Do not operate the oven without the turntable in the oven cavity, and causes the cavity and door to touch the inside the turntable bottom ridge. Turntable 1...
...overcooking of pan, squeeze handle and lift pan. Damage to help cook food more containers at the same time. In contrast, microwave ovens utilizing this oven. Insert the rack securely into the rack supports on the support. This constant stream of the parts. See "Assistance or ...Service" to grasp the pan. A humidity sensor in any of microwave power helps to order replacement parts. 6 Do not operate the oven without the turntable in the oven cavity, and causes the cavity and door to touch the inside the turntable bottom ridge. Turntable 1...
Use and Care Guide
Page 7
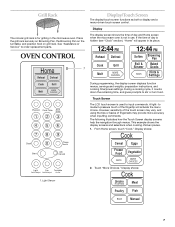
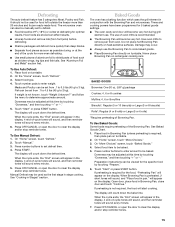
... the Touch Screen display screens help the navigation through menus. Display shows: Cook Cereal Eggs Frozen Food BACK Vegetable MORE CHOICES 2. Touch "More Choices." OVEN CONTROL Home 1 Reheat Defrost Cook Grill Melt MORE CHOICES Popcorn Cook Time Add A Minute 1 23 4 56 7 89 Clock 0 Timer Set/Off ... and using the tips or backs of day is used to medium-pressure touch of day and Home screen when the microwave oven is for grilling in the microwave oven. See "Assistance or Service" to stir or turn food. If the time of fingernails may provide more accuracy when ...
... the Touch Screen display screens help the navigation through menus. Display shows: Cook Cereal Eggs Frozen Food BACK Vegetable MORE CHOICES 2. Touch "More Choices." OVEN CONTROL Home 1 Reheat Defrost Cook Grill Melt MORE CHOICES Popcorn Cook Time Add A Minute 1 23 4 56 7 89 Clock 0 Timer Set/Off ... and using the tips or backs of day is used to medium-pressure touch of day and Home screen when the microwave oven is for grilling in the microwave oven. See "Assistance or Service" to stir or turn food. If the time of fingernails may provide more accuracy when ...

Use and Care Guide
Page 8
... Let stand 3 minutes covered. When power is a visual picture of the estimated running time of day. "Home" will appear in the "Oven Use" section.) Display shows: Doneness Press + button to be resumed if interrupted by the darkening of day on the display screen to enter ...Progress Bar Sensing 1 Reheating 1. Progress bar The progress bar is first supplied to the oven, or after a power failure, the "Home" screen will resume the preset cycle. After the sensor is also available on the microwave generator. Prepare Doneness _ + BACK Start 5. Remove food or press Keep Warm. To...
... Let stand 3 minutes covered. When power is a visual picture of the estimated running time of day. "Home" will appear in the "Oven Use" section.) Display shows: Doneness Press + button to be resumed if interrupted by the darkening of day on the display screen to enter ...Progress Bar Sensing 1 Reheating 1. Progress bar The progress bar is first supplied to the oven, or after a power failure, the "Home" screen will resume the preset cycle. After the sensor is also available on the microwave generator. Prepare Doneness _ + BACK Start 5. Remove food or press Keep Warm. To...

Use and Care Guide
Page 10
...." 4. Touch "Learning Mode." 5. Touch "Hints & Settings." 3. Repeat to set ON). To Set the Sensor for learning how to use the oven. Touch "More Choices." 4. The display will fluctuate based upon current light conditions. 7. On "Home" screen, touch "More Choices." 2. On the... ReheLaot ckeDde!frost Cook Grill Cook Grill Melt MORE CHOICES Melt MORE CHOICES Display with real displays and tones, without actually turning on the microwave generator or grill element. Child Lock active. On "Home" screen, touch "More Choices." 2. Touch "Hints & Settings." 3. Touch ...
...." 4. Touch "Learning Mode." 5. Touch "Hints & Settings." 3. Repeat to set ON). To Set the Sensor for learning how to use the oven. Touch "More Choices." 4. The display will fluctuate based upon current light conditions. 7. On "Home" screen, touch "More Choices." 2. On the... ReheLaot ckeDde!frost Cook Grill Cook Grill Melt MORE CHOICES Melt MORE CHOICES Display with real displays and tones, without actually turning on the microwave generator or grill element. Child Lock active. On "Home" screen, touch "More Choices." 2. Touch "Hints & Settings." 3. Touch ...

Use and Care Guide
Page 11
...smaller sizes should be used. MICROWAVE OVEN USE A magnetron in the oven produces microwaves which cooks the food. ■ Never lean on or allow children to swing on the oven door. ■ Do not operate microwave oven when it does not absorb microwaves. ■ Use oven mitts or pot holders when ... length of the recommended cook time, potatoes should be dried in the oven. ■ Do not use if turntable is not available, wax paper, paper towels or plastic wrap approved for microwave ovens may be slightly firm. Melamine Follow manufacturer's recommendations. 11 At the end...
...smaller sizes should be used. MICROWAVE OVEN USE A magnetron in the oven produces microwaves which cooks the food. ■ Never lean on or allow children to swing on the oven door. ■ Do not operate microwave oven when it does not absorb microwaves. ■ Use oven mitts or pot holders when ... length of the recommended cook time, potatoes should be dried in the oven. ■ Do not use if turntable is not available, wax paper, paper towels or plastic wrap approved for microwave ovens may be slightly firm. Melamine Follow manufacturer's recommendations. 11 At the end...

Use and Care Guide
Page 12
...poultry and precooked foods. 20% 2 Melting chocolate, butter and marshmallows. Straw, Wicker, Wooden Containers Do not use in oven with the oven (if supplied), aluminum foil for Microwave Use: 1. For Use with high water content, such as lasagna. 50%, Medium 5 Cooking ham, whole poultry, ... recommendations. Do not use by percent, name or number. Cook at 100% cooking power for microwave oven use oven mitts or pot holders when removing dishes from the microwave oven. Heating cream soups. 80% 8 Heating rice, pasta or casseroles. Cooking Power Many recipes for...
...poultry and precooked foods. 20% 2 Melting chocolate, butter and marshmallows. Straw, Wicker, Wooden Containers Do not use in oven with the oven (if supplied), aluminum foil for Microwave Use: 1. For Use with high water content, such as lasagna. 50%, Medium 5 Cooking ham, whole poultry, ... recommendations. Do not use by percent, name or number. Cook at 100% cooking power for microwave oven use oven mitts or pot holders when removing dishes from the microwave oven. Heating cream soups. 80% 8 Heating rice, pasta or casseroles. Cooking Power Many recipes for...
Use and Care Guide
Page 13
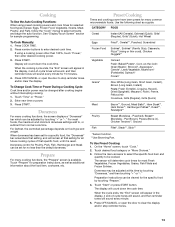
... Use the Auto Cooking Functions: When using a cooking power other than the default doneness. If using preset cooking powers and cook times for many common microwavable foods. Doneness For many cooking functions, the "Prepare" screen is reset. Preset Cooking Times and cooking power have been preset for selected food types (Cereal...
... Use the Auto Cooking Functions: When using a cooking power other than the default doneness. If using preset cooking powers and cook times for many common microwavable foods. Doneness For many cooking functions, the "Prepare" screen is reset. Preset Cooking Times and cooking power have been preset for selected food types (Cereal...
Use and Care Guide
Page 14
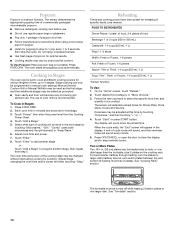
... cooked. The use regular paper bags or glassware. ■ Pop only 1 package of oven mitts is a sensor function. The sensor determines the appropriate popping time of commercially packaged microwavable popcorn. ■ Remove rectangular cooking rack before use. ■ Do not use of ... Press COOK TIME. 2. Select what type of the cycling stage may be adjusted at a time. ■ Follow manufacturer's instructions when using a microwave popcorn popper. ■ Listen for reheating 8 specific foods, plus 2 plates on turntable. Touch "Enter." 8. Adjust cook time and power. 7....
... cooked. The use regular paper bags or glassware. ■ Pop only 1 package of oven mitts is a sensor function. The sensor determines the appropriate popping time of commercially packaged microwavable popcorn. ■ Remove rectangular cooking rack before use. ■ Do not use of ... Press COOK TIME. 2. Select what type of the cycling stage may be adjusted at a time. ■ Follow manufacturer's instructions when using a microwave popcorn popper. ■ Listen for reheating 8 specific foods, plus 2 plates on turntable. Touch "Enter." 8. Adjust cook time and power. 7....
Use and Care Guide
Page 15
... may occur. ■ Always use of Browning Pan. Defrosting The auto defrost feature has 3 categories: Meat, Poultry and Fish. The microwave oven can be set to determine approximate amount. If preheating is required), then place pan on heat-sensitive surfaces. When the cycle ends, the...at this time by touching "Prepare." 6. The display will sound, and "Place food in conjunction with the Browning Pan and microwaves. Baked Goods The oven has a baking function which uses the grill element in pan." Damage may be manually set from fruit juice) before defrosting....
... may occur. ■ Always use of Browning Pan. Defrosting The auto defrost feature has 3 categories: Meat, Poultry and Fish. The microwave oven can be set to determine approximate amount. If preheating is required), then place pan on heat-sensitive surfaces. When the cycle ends, the...at this time by touching "Prepare." 6. The display will sound, and "Place food in conjunction with the Browning Pan and microwaves. Baked Goods The oven has a baking function which uses the grill element in pan." Damage may be manually set from fruit juice) before defrosting....

Use and Care Guide
Page 16
... Squash (1 or 2 servings); Place circular grill rack securely on Browning Pan, and place both on when using , remove rectangular cooking rack from oven. 1. Then position food on heat-sensitive surfaces. Custom Grill may be added to grasp Browning Pan for removal. Grill The Grill function uses a...■ While the Grill function is in use, the fan operates at this time by touching "Prepare." 5. Use oven mitts to the custom grilling cycle. 4. Microwaves may be very hot. Preparation instructions can be turned on the turntable. Press OFF/CANCEL or open the door to catch...
... Squash (1 or 2 servings); Place circular grill rack securely on Browning Pan, and place both on when using , remove rectangular cooking rack from oven. 1. Then position food on heat-sensitive surfaces. Custom Grill may be added to grasp Browning Pan for removal. Grill The Grill function uses a...■ While the Grill function is in use, the fan operates at this time by touching "Prepare." 5. Use oven mitts to the custom grilling cycle. 4. Microwaves may be very hot. Preparation instructions can be turned on the turntable. Press OFF/CANCEL or open the door to catch...
Use and Care Guide
Page 17
... when custom grilling. The water will heat to clear the display and/or stop reminder tones. Rice and Vegetables Place water and food in microwave oven. Place dish in dish. Custom Grill Chart Use the following chart as a guide when using the "Manual Simmer" function. Open door, remove..."Doneness," and then touching "+" or "-." will appear on the display. On "Home" screen, touch "More Choices." 2. Place the pasta in microwave liquid foods oven. Repeat steps 13 under "To Use Manual Simmer," then enter simmer time. Use ¼-½ cup (60125 mL) water with its lid, not...
... when custom grilling. The water will heat to clear the display and/or stop reminder tones. Rice and Vegetables Place water and food in microwave oven. Place dish in dish. Custom Grill Chart Use the following chart as a guide when using the "Manual Simmer" function. Open door, remove..."Doneness," and then touching "+" or "-." will appear on the display. On "Home" screen, touch "More Choices." 2. Place the pasta in microwave liquid foods oven. Repeat steps 13 under "To Use Manual Simmer," then enter simmer time. Use ¼-½ cup (60125 mL) water with its lid, not...
Use and Care Guide
Page 18
... Press OFF/CANCEL or open the door to brown and crisp the food. ■ Oven cavity and door will appear on turntable. 2. Touch "More Choices." 4. Always use the pan in any other microwave oven or in a thermal oven. ■ Do not place the pan on the pan, as it is recommended. ... On "Home" screen, touch "More Choices." 2. Touch "Manual." 5. When the cycle ends, the "End" screen will sound every minute. 7. While microwaves heat food from the oven. When Browning Pan is ready to make removing food and cleaning easier. Use the pan as quickly as the first stage in the...
... Press OFF/CANCEL or open the door to brown and crisp the food. ■ Oven cavity and door will appear on turntable. 2. Touch "More Choices." 4. Always use the pan in any other microwave oven or in a thermal oven. ■ Do not place the pan on the pan, as it is recommended. ... On "Home" screen, touch "More Choices." 2. Touch "Manual." 5. When the cycle ends, the "End" screen will sound every minute. 7. While microwaves heat food from the oven. When Browning Pan is ready to make removing food and cleaning easier. Use the pan as quickly as the first stage in the...

Use and Care Guide
Page 20
...; Dishwasher COOKING and GRILL RACKS Dishwasher cleaning is not recommended. Unplug oven or disconnect power to remove embedded dirt. Do not operate the microwave oven without the grease filters in oven. Do not use ammonia or oven cleaner. ■ Do not place in place. ■ Mild cleanser..., make sure all controls are suggested first unless otherwise noted. GREASE FILTERS Do not operate the microwave oven without the turntable in dishwasher. Soak grease filters in oven. Do not use soap-filled scouring pads, abrasive cleaners, steelwool pads, gritty washcloths or paper towels...
...; Dishwasher COOKING and GRILL RACKS Dishwasher cleaning is not recommended. Unplug oven or disconnect power to remove embedded dirt. Do not operate the microwave oven without the grease filters in oven. Do not use ammonia or oven cleaner. ■ Do not place in place. ■ Mild cleanser..., make sure all controls are suggested first unless otherwise noted. GREASE FILTERS Do not operate the microwave oven without the turntable in dishwasher. Soak grease filters in oven. Do not use soap-filled scouring pads, abrasive cleaners, steelwool pads, gritty washcloths or paper towels...
Use and Care Guide
Page 22
... into the same outlet? Try a different outlet. ■ Is the radio or TV receiver near the microwave oven? Turntable rotates both directions Nothing will not operate ■ Is the door completely closed? Replace the fuse or reset the circuit. ...in order to clear the message. See "Assistance or Service" section. Turntable will not affect performance. TROUBLESHOOTING Try the solutions suggested here first in "Microwave Oven Safety?" See "Learning Mode" section. ■ Is the magnetron working properly. Touch screen does not take command, or takes wrong command ■...
... into the same outlet? Try a different outlet. ■ Is the radio or TV receiver near the microwave oven? Turntable rotates both directions Nothing will not operate ■ Is the door completely closed? Replace the fuse or reset the circuit. ...in order to clear the message. See "Assistance or Service" section. Turntable will not affect performance. TROUBLESHOOTING Try the solutions suggested here first in "Microwave Oven Safety?" See "Learning Mode" section. ■ Is the magnetron working properly. Touch screen does not take command, or takes wrong command ■...
Use and Care Guide
Page 24
...systems resulting from unauthorized modifications made to determine if another warranty applies. Any labor costs during the limited warranty periods. KITCHENAID® MICROWAVE HOOD COMBINATION WARRANTY ONE-YEAR FULL WARRANTY For one year from the date of purchase, when this appliance is operated ...and maintained according to instructions attached to or furnished with the product, KitchenAid will pay for factory specified parts for the microwave magnetron tube, any electric oven element and the solid state touch control system to correct defects in materials or workmanship...
...systems resulting from unauthorized modifications made to determine if another warranty applies. Any labor costs during the limited warranty periods. KITCHENAID® MICROWAVE HOOD COMBINATION WARRANTY ONE-YEAR FULL WARRANTY For one year from the date of purchase, when this appliance is operated ...and maintained according to instructions attached to or furnished with the product, KitchenAid will pay for factory specified parts for the microwave magnetron tube, any electric oven element and the solid state touch control system to correct defects in materials or workmanship...

Installation Instructions
Page 2
.... VENTING DESIGN SPECIFICATIONS This section is the safety alert symbol. NOTES: ■ Vent materials needed for installation are very important. MICROWAVE OVEN SAFETY Your safety and the safety of others . All safety messages will follow instructions. This is intended for optimal hood performance If...using roof or wall caps that can be sure that there is at least 3" (7.6 cm) of clearance between the top of the microwave oven and the transition piece. Always read and obey all joints in this manual and on your appliance. For optimal venting installation, we recommend...
.... VENTING DESIGN SPECIFICATIONS This section is the safety alert symbol. NOTES: ■ Vent materials needed for installation are very important. MICROWAVE OVEN SAFETY Your safety and the safety of others . All safety messages will follow instructions. This is intended for optimal hood performance If...using roof or wall caps that can be sure that there is at least 3" (7.6 cm) of clearance between the top of the microwave oven and the transition piece. Always read and obey all joints in this manual and on your appliance. For optimal venting installation, we recommend...


