
Use & Care Guide
Page 7
... the wall receptacle or junction box to LITE. Simmer HI (High) Simmer LO (Low) ■ Start cooking thicker foods such as a guide when setting heat levels. 15,000 Btu/h Professional Burner SETTING RECOMMENDED USE LITE (Light) ■ Light the burner. Use the following charts as.../h burner reaches a low of 500 Btu/h, and is ideal for cooking large quantities of the electric ignition system. If the draft in the Installation Instructions for cooking smaller quantities of burners are turned to LITE will produce a flame. 2. Failure to provide the highest heat and is ideal for...
... the wall receptacle or junction box to LITE. Simmer HI (High) Simmer LO (Low) ■ Start cooking thicker foods such as a guide when setting heat levels. 15,000 Btu/h Professional Burner SETTING RECOMMENDED USE LITE (Light) ■ Light the burner. Use the following charts as.../h burner reaches a low of 500 Btu/h, and is ideal for cooking large quantities of the electric ignition system. If the draft in the Installation Instructions for cooking smaller quantities of burners are turned to LITE will produce a flame. 2. Failure to provide the highest heat and is ideal for...

Use & Care Guide
Page 10
... A A. Insert front tabs of the flame spreader into slots at the front of the drip tray. B A. A A. When the 2 grease trays are guides to 4 seconds. To Use: 1. Turn knob to MED and allow grill to desired cook setting. Large grease tray B. 3. Place the grill grate into the...the small grease tray all the way under the front of the grill basin, then the rear tabs into position. A 4. Clean basin. There are installed properly, the small grease tray will ignite in and turn knob to grill grate. 3. Rear tabs and slots 6. B A A. Slots 3. Drip ...
... A A. Insert front tabs of the flame spreader into slots at the front of the drip tray. B A. A A. When the 2 grease trays are guides to 4 seconds. To Use: 1. Turn knob to MED and allow grill to desired cook setting. Large grease tray B. 3. Place the grill grate into the...the small grease tray all the way under the front of the grill basin, then the rear tabs into position. A 4. Clean basin. There are installed properly, the small grease tray will ignite in and turn knob to grill grate. 3. Rear tabs and slots 6. B A A. Slots 3. Drip ...

Use & Care Guide
Page 16
..." section or by the customer. Major appliances with published installation instructions. 10. After checking "Troubleshooting," you may find this book and your major appliance. You must provide proof of the Use & Care Guide. KITCHENAID SHALL NOT BE LIABLE FOR INCIDENTAL OR CONSEQUENTIAL DAMAGES. If... you ever need it is installed in an inaccessible location or is not installed in accordance with original model/serial numbers that have been ...
..." section or by the customer. Major appliances with published installation instructions. 10. After checking "Troubleshooting," you may find this book and your major appliance. You must provide proof of the Use & Care Guide. KITCHENAID SHALL NOT BE LIABLE FOR INCIDENTAL OR CONSEQUENTIAL DAMAGES. If... you ever need it is installed in an inaccessible location or is not installed in accordance with original model/serial numbers that have been ...
Installation Guide
Page 4
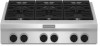
... CFM or larger vent hood be mounted above 6,560 ft (1999.5 m), order a High Altitude Conversion Kit. ■ Part Number W10237848 - Additional Installation Requirements The installation of the Use and Care Guide. Check local codes and consult gas supplier. Location Requirements IMPORTANT: Observe all parts are included. ■ Gas pressure regulator ■ It is...
... CFM or larger vent hood be mounted above 6,560 ft (1999.5 m), order a High Altitude Conversion Kit. ■ Part Number W10237848 - Additional Installation Requirements The installation of the Use and Care Guide. Check local codes and consult gas supplier. Location Requirements IMPORTANT: Observe all parts are included. ■ Gas pressure regulator ■ It is...

Installation Guide
Page 11
...front of the drip tray. Insert the orifice tube on top of burner assembly. Front tabs and slots B. When the 2 grease trays are guides to release the tabs from rear of the flame spreader. Cut and remove tie strap from the rear slots and lift out. 6. Grease ... Remove flame spreader. Tie strap 3. Lift burner assembly up and out to "Electronic Ignition System" in the "Complete Installation" section. 10. Check the surface burner and grill flames. Install Grill Grease Trays (on the flame spreader to assure correct placement of the grill basin and hook it into place....
...front of the drip tray. Insert the orifice tube on top of burner assembly. Front tabs and slots B. When the 2 grease trays are guides to release the tabs from rear of the flame spreader. Cut and remove tie strap from the rear slots and lift out. 6. Grease ... Remove flame spreader. Tie strap 3. Lift burner assembly up and out to "Electronic Ignition System" in the "Complete Installation" section. 10. Check the surface burner and grill flames. Install Grill Grease Trays (on the flame spreader to assure correct placement of the grill basin and hook it into place....

Installation Guide
Page 12
... light properly: ■ Turn cooktop control knob to expose the control console screws on each control knob to the Use and Care Guide. Pull cooktop forward to the "OFF" position. ■ Check that hold the control console in the gas line. Grill indicator ... of air in place. A A. Refer to the "LITE" position. A Flame Height The cooktop flame should light within 4 seconds. Complete Installation Electronic Ignition System Initial lighting and gas flame adjustments Cooktop burners use electronic igniters in the middle with one arm and disconnect the grill indicator...
... light properly: ■ Turn cooktop control knob to expose the control console screws on each control knob to the Use and Care Guide. Pull cooktop forward to the "OFF" position. ■ Check that hold the control console in the gas line. Grill indicator ... of air in place. A A. Refer to the "LITE" position. A Flame Height The cooktop flame should light within 4 seconds. Complete Installation Electronic Ignition System Initial lighting and gas flame adjustments Cooktop burners use electronic igniters in the middle with one arm and disconnect the grill indicator...


