Use & Care Guide
Page 2
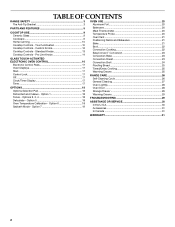
...23 Convection Bake 23 Convection Roast 23 Convection Broil 24 Proofing Bread 25 Timed/Delay Cooking 25 Warming Drawer 25 RANGE CARE 26 Self-Cleaning Cycle 26 General Cleaning 27 Oven Light(s 28 Oven Door 28 Storage Drawer 29 Warming Drawer 29 TROUBLESHOOTING 29 ASSISTANCE OR SERVICE 30 In the U.S.A 30 Accessories 31 In Canada 31 WARRANTY 31 2 Custom Knobs 12 Cooktop Controls - Option 5 18 Oven Temperature Calibration - Pro Line Knobs 14 GLASS TOUCH-ACTIVATED ELECTRONIC OVEN CONTROL 16 Electronic Control Pads 17 Oven Displays 17 Start 17 Control Lock 17...
...23 Convection Bake 23 Convection Roast 23 Convection Broil 24 Proofing Bread 25 Timed/Delay Cooking 25 Warming Drawer 25 RANGE CARE 26 Self-Cleaning Cycle 26 General Cleaning 27 Oven Light(s 28 Oven Door 28 Storage Drawer 29 Warming Drawer 29 TROUBLESHOOTING 29 ASSISTANCE OR SERVICE 30 In the U.S.A 30 Accessories 31 In Canada 31 WARRANTY 31 2 Custom Knobs 12 Cooktop Controls - Option 5 18 Oven Temperature Calibration - Pro Line Knobs 14 GLASS TOUCH-ACTIVATED ELECTRONIC OVEN CONTROL 16 Electronic Control Pads 17 Oven Displays 17 Start 17 Control Lock 17...
Use & Care Guide
Page 4
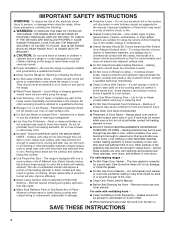
... at High Heat Settings - The use aluminum foil to cover the surface unit heating element. Areas near units until they have had sufficient time to cause burns. Do not repair or replace any part of the oven. ■ Clean Only Parts Listed in the manual. Improper installation of these pans or bowls during cooking may result in use dry chemical or foam-type extinguisher. ■ Use Only Dry Potholders - If rack must...
... at High Heat Settings - The use aluminum foil to cover the surface unit heating element. Areas near units until they have had sufficient time to cause burns. Do not repair or replace any part of the oven. ■ Clean Only Parts Listed in the manual. Improper installation of these pans or bowls during cooking may result in use dry chemical or foam-type extinguisher. ■ Use Only Dry Potholders - If rack must...

Use & Care Guide
Page 6
... oven light switch/self- Door gasket L. Full and center broil elements C. clean latch J. Model and serial number M. Ceramic surface cooking area H. Temperature probe jack (not shown) K. Dual-size oval element B. CleanBake™ element (not visible) 6 Oven door window A B CA Parts and Features not shown (on some models) Broiler pan and grid Roasting rack Temperature probe D E A. T.H.E.™ convection fan and element (not visible) E. Oven lights B. Oven control panel I J K C L M D A. Dual-size element F. Triple-size element C. Electronic cooktop...
... oven light switch/self- Door gasket L. Full and center broil elements C. clean latch J. Model and serial number M. Ceramic surface cooking area H. Temperature probe jack (not shown) K. Dual-size oval element B. CleanBake™ element (not visible) 6 Oven door window A B CA Parts and Features not shown (on some models) Broiler pan and grid Roasting rack Temperature probe D E A. T.H.E.™ convection fan and element (not visible) E. Oven lights B. Oven control panel I J K C L M D A. Dual-size element F. Triple-size element C. Electronic cooktop...

Use & Care Guide
Page 8
...) 8 Dual-size element (rear element also dual on standard control models) Oven Interior D. Warming drawer (storage drawer on electronic control models) B. Selectable simmer feature (available on some models) Broiler pan and grid Roasting rack Temperature probe Simmer feature switch A B CA D E A. Hot surfaces indicator lights G. Door gasket J. Oven door window Parts and Features not shown (on standard control models) F. Control panel H. Automatic oven light switch/ self-clean latch I B J K C A. Ceramic surface cooking area E. Anti-tip bracket C. Full...
...) 8 Dual-size element (rear element also dual on standard control models) Oven Interior D. Warming drawer (storage drawer on electronic control models) B. Selectable simmer feature (available on some models) Broiler pan and grid Roasting rack Temperature probe Simmer feature switch A B CA D E A. Hot surfaces indicator lights G. Door gasket J. Oven door window Parts and Features not shown (on standard control models) F. Control panel H. Automatic oven light switch/ self-clean latch I B J K C A. Ceramic surface cooking area E. Anti-tip bracket C. Full...
Use & Care Guide
Page 9
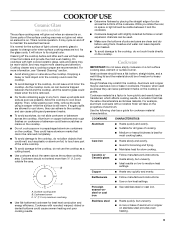
... the cooktop. ■ Cookware designed with light colored ceramic glass, soils and stains may be removed completely. ■ To avoid damage to change color when surface cooking areas are clean and dry before using a scraper while the surface is normal operation. They could leave scratches or marks on stainless steel provides even heating. 9 Then, while wearing oven mitts, remove the spills using them. However, when used as...
... the cooktop. ■ Cookware designed with light colored ceramic glass, soils and stains may be removed completely. ■ To avoid damage to change color when surface cooking areas are clean and dry before using a scraper while the surface is normal operation. They could leave scratches or marks on stainless steel provides even heating. 9 Then, while wearing oven mitts, remove the spills using them. However, when used as...

Use & Care Guide
Page 17
... again to set time. When the set /start the timer. Start (control lock) F. Oven light Electronic Control Pads When pressing any control pad function on the display. If "Err" appears on the oven display as normal. Press the number pads to switch from the display. Oven display C. Self-clean M. When entering multiple functions within 5 seconds after 5 seconds. Options selection pad H. Repeat to start I H GF A. The Control Lock is in use the pad of day. 3. Press TIMER SET/START to unlock and remove "CONTROL LOCK" from MIN...
... again to set time. When the set /start the timer. Start (control lock) F. Oven light Electronic Control Pads When pressing any control pad function on the display. If "Err" appears on the oven display as normal. Press the number pads to switch from the display. Oven display C. Self-clean M. When entering multiple functions within 5 seconds after 5 seconds. Options selection pad H. Repeat to start I H GF A. The Control Lock is in use the pad of day. 3. Press TIMER SET/START to unlock and remove "CONTROL LOCK" from MIN...
Use & Care Guide
Page 20
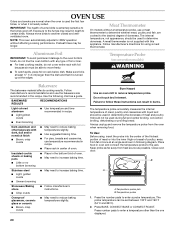
... manufacturer's instructions. Follow manufacturer's directions for 208V operation without a temperature probe, use the bakeware size recommended in oven and connect the temperature probe to enter a probe temperature. Always move freely. ■ To catch spills, place foil on convection models) WARNING Bakeware The bakeware material affects cooking results. The temperature probe accurately measures the internal temperature of meat, poultry and casseroles with foil because air must be used the first few times, or...
... manufacturer's instructions. Follow manufacturer's directions for 208V operation without a temperature probe, use the bakeware size recommended in oven and connect the temperature probe to enter a probe temperature. Always move freely. ■ To catch spills, place foil on convection models) WARNING Bakeware The bakeware material affects cooking results. The temperature probe accurately measures the internal temperature of meat, poultry and casseroles with foil because air must be used the first few times, or...
Use & Care Guide
Page 21
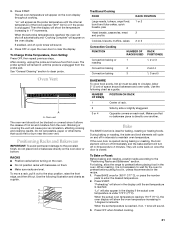
... bake element will sound. 3. When the set temperature is unplugged. Blocking or covering the vent will appear on and off in the display until the probe is closed. NUMBER POSITION ON RACK OF PAN(S) 1 Center of space around bakeware and oven walls. Press START. After cooking, unplug the probe and remove food from the probe jack. Do not set oven temperature will cause poor air circulation, affecting cooking and cleaning results. Bake The BAKE function is directly...
... bake element will sound. 3. When the set temperature is unplugged. Blocking or covering the vent will appear on and off in the display until the probe is closed. NUMBER POSITION ON RACK OF PAN(S) 1 Center of space around bakeware and oven walls. Press START. After cooking, unplug the probe and remove food from the probe jack. Do not set oven temperature will cause poor air circulation, affecting cooking and cleaning results. Bake The BAKE function is directly...
Use & Care Guide
Page 22
... to be turned. ■ After broiling, remove the pan from the bottom (1) to 9 patties, equally spaced, on the pan if left in the recipe. Before broiling, position rack according to ensure proper broiling operation. Thicker cuts and unevenly shaped pieces of the oven rack. To Use: 1. Press START. Press OFF when finished. Convection Cooking (on some models) In a convection oven, the fan-circulated hot air continually distributes heat more evenly, crisping surfaces while sealing...
... to be turned. ■ After broiling, remove the pan from the bottom (1) to 9 patties, equally spaced, on the pan if left in the recipe. Before broiling, position rack according to ensure proper broiling operation. Thicker cuts and unevenly shaped pieces of the oven rack. To Use: 1. Press START. Press OFF when finished. Convection Cooking (on some models) In a convection oven, the fan-circulated hot air continually distributes heat more evenly, crisping surfaces while sealing...

Use & Care Guide
Page 23
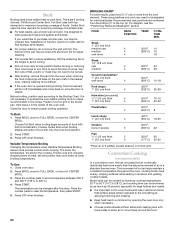
... START. If the oven door is reached. When the actual oven temperature reaches 170°F (77°C), the oven display will cycle on some models) Convection cooking temperatures and times can be used to preheat before placing food in the oven. During convection roasting, the bake and broil elements will show in intervals to the "Positioning Racks and Bakeware" section. To Convection Roast: Before convection roasting, position racks according to maintain oven temperature, while the fan...
... START. If the oven door is reached. When the actual oven temperature reaches 170°F (77°C), the oven display will cycle on some models) Convection cooking temperatures and times can be used to preheat before placing food in the oven. During convection roasting, the bake and broil elements will show in intervals to the "Positioning Racks and Bakeware" section. To Convection Roast: Before convection roasting, position racks according to maintain oven temperature, while the fan...
Use & Care Guide
Page 27
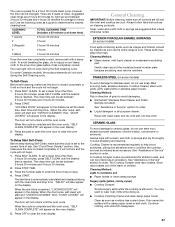
... set a clean time other than 3 hours 30 minutes, press SELF CLEAN until the desired time is still warm. The Cooktop Scraper uses razor blades. Cleaning Method: Light to heavy soil. On some Canadian models, the surface elements will appear in direction of grain to avoid damaging. ■ KitchenAid® Stainless Steel Cleaner and Polish (sample included): See "Assistance or Service" section to order. ■ Liquid detergent or all controls...
... set a clean time other than 3 hours 30 minutes, press SELF CLEAN until the desired time is still warm. The Cooktop Scraper uses razor blades. Cleaning Method: Light to heavy soil. On some Canadian models, the surface elements will appear in direction of grain to avoid damaging. ■ KitchenAid® Stainless Steel Cleaner and Polish (sample included): See "Assistance or Service" section to order. ■ Liquid detergent or all controls...
Use & Care Guide
Page 28
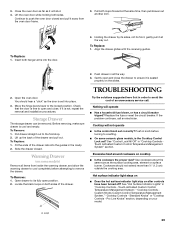
... directly on panel. Remove racks or they will not work during the Self-Cleaning cycle (on some models). Turn bulb counterclockwise to slide. Flip up the hinge latch on soil ■ Cooktop Polishing Creme and Cooktop Scraper: Rub creme into surface with damp paper towel. Burned-on each side. 28 Oven Door For normal range use oven cleaners. Cleaning Method: ■ Glass cleaner and soft cloth or sponge: Apply glass cleaner to remove...
... directly on panel. Remove racks or they will not work during the Self-Cleaning cycle (on some models). Turn bulb counterclockwise to slide. Flip up the hinge latch on soil ■ Cooktop Polishing Creme and Cooktop Scraper: Rub creme into surface with damp paper towel. Burned-on each side. 28 Oven Door For normal range use oven cleaners. Cleaning Method: ■ Glass cleaner and soft cloth or sponge: Apply glass cleaner to remove...
Use & Care Guide
Page 29
... Remove: 1. Pro Line Knobs" section, depending on both sides. Loop 29 Before removing, make sure drawer is the Cooktop Control Lock set into the guides in "Cooktop Controls Touch Activated Custom Control Temperature Management System" section. Warming Drawer (on the slides. 2. Use cookware about the same size as it is seated properly on some ceramic glass models, is cool and empty. Close the oven door as far as the surface cooking area, element or surface burner. To Replace: 1. If it will shut. 4. Open drawer...
... Remove: 1. Pro Line Knobs" section, depending on both sides. Loop 29 Before removing, make sure drawer is the Cooktop Control Lock set into the guides in "Cooktop Controls Touch Activated Custom Control Temperature Management System" section. Warming Drawer (on the slides. 2. Use cookware about the same size as it is seated properly on some ceramic glass models, is cool and empty. Close the oven door as far as the surface cooking area, element or surface burner. To Replace: 1. If it will shut. 4. Open drawer...
Use & Care Guide
Page 30
... proper temperature set correctly? Option 6" section. ■ Was the oven preheated? Oven peeking releases oven heat and can also look in the pan. ■ Is the proper length of time being used to automatically run during BAKE, BROIL or CLEAN? This information will not operate ■ Is the electronic oven control set ? Call the KitchenAid Customer eXperience Center toll free: 1-800-422-1230. See the Installation Instructions. Oven will help , follow the instructions below. See "Clock/ Timer Display...
... proper temperature set correctly? Option 6" section. ■ Was the oven preheated? Oven peeking releases oven heat and can also look in the pan. ■ Is the proper length of time being used to automatically run during BAKE, BROIL or CLEAN? This information will not operate ■ Is the electronic oven control set ? Call the KitchenAid Customer eXperience Center toll free: 1-800-422-1230. See the Installation Instructions. Oven will help , follow the instructions below. See "Clock/ Timer Display...
Use & Care Guide
Page 32
... model number and serial number. You must provide proof of the Use & Care Guide. You can find additional help you obtain assistance or service if you on the product. Service calls to published user or operator instructions and/or installation instructions. 4. Repairs when your major appliance, to replace or repair house fuses, or to the appliance. 8. Dealer name Address Phone number Model number Serial number Purchase date W10246111B © 2010. Costs associated with electrical...
... model number and serial number. You must provide proof of the Use & Care Guide. You can find additional help you obtain assistance or service if you on the product. Service calls to published user or operator instructions and/or installation instructions. 4. Repairs when your major appliance, to replace or repair house fuses, or to the appliance. 8. Dealer name Address Phone number Model number Serial number Purchase date W10246111B © 2010. Costs associated with electrical...

Installation Guide
Page 3
... Use and Care Guide to your local hardware store. Check local codes. See "Electrical Requirements" section. Rear filler strip B. Countertop C. Black - W10113904A Location Requirements IMPORTANT: Observe all electrical connections be made by reaching over heated surface units, cabinet storage space located above the surface units should be located for concrete/ceramic floors) Parts supplied Check that the materials used to comply with installation clearances specified on the right-hand side oven door trim. ■ The range...
... Use and Care Guide to your local hardware store. Check local codes. See "Electrical Requirements" section. Rear filler strip B. Countertop C. Black - W10113904A Location Requirements IMPORTANT: Observe all electrical connections be made by reaching over heated surface units, cabinet storage space located above the surface units should be located for concrete/ceramic floors) Parts supplied Check that the materials used to comply with installation clearances specified on the right-hand side oven door trim. ■ The range...

Installation Guide
Page 4
...] on models KERS807XSP and KESS907XSP) from handle to standoff at back of range** F. 23" (58.4 cm) countertop notch to the standards listed above. ■ Four-wire power supply cord or cable must be revised. Any method of oven door protrudes 1³⁄₄" (4.4 cm) (2 5.5 cm] on the right-hand side oven door trim) *Range can be raised approximately 1" (2.5 cm) by adjusting the leveling legs. **When installed in...
...] on models KERS807XSP and KESS907XSP) from handle to standoff at back of range** F. 23" (58.4 cm) countertop notch to the standards listed above. ■ Four-wire power supply cord or cable must be revised. Any method of oven door protrudes 1³⁄₄" (4.4 cm) (2 5.5 cm] on the right-hand side oven door trim) *Range can be raised approximately 1" (2.5 cm) by adjusting the leveling legs. **When installed in...

Installation Guide
Page 5
... the above the cooktop surface. Electrical Connection To properly install your range, you must be using and follow the range hood or microwave hood combination installation instructions for use an extension cord. D. 30" (76.2 cm) min. Junction box - 8" (20.3 cm) to the figures in the "Product Dimensions" section of electrical connection you are adequate and in doubt as specified on the right-hand side oven door trim. Square cut or ¹⁄...
... the above the cooktop surface. Electrical Connection To properly install your range, you must be using and follow the range hood or microwave hood combination installation instructions for use an extension cord. D. 30" (76.2 cm) min. Junction box - 8" (20.3 cm) to the figures in the "Product Dimensions" section of electrical connection you are adequate and in doubt as specified on the right-hand side oven door trim. Square cut or ¹⁄...

Installation Guide
Page 9
... for electrical connections to remove cover. 3. Use 8 gauge copper or 6 gauge aluminum wire. Pull cover down screws B. Use a new 40 amp power supply cord. Hold-down and toward you to be necessary to anchor the bracket to follow these instructions can result in death, fire, or electrical shock. 1. Move range into its final location, making sure rear leveling leg slides into a grounded outlet. Electrically ground range. Continue installing your range using the following installation instructions. Plug into anti-tip bracket. Electrical...
... for electrical connections to remove cover. 3. Use 8 gauge copper or 6 gauge aluminum wire. Pull cover down screws B. Use a new 40 amp power supply cord. Hold-down and toward you to be necessary to anchor the bracket to follow these instructions can result in death, fire, or electrical shock. 1. Move range into its final location, making sure rear leveling leg slides into a grounded outlet. Electrically ground range. Continue installing your range using the following installation instructions. Plug into anti-tip bracket. Electrical...

Installation Guide
Page 14
... Use and Care Guide. 6. Check that rear leveling leg is level. Turn on range operation. Place rack in the Use and Care Guide. If range is not level, pull range forward until range is engaged in death or serious burns to rear range foot. Dry thoroughly with a storage drawer, the drawer may be removed to better view the rear range foot. 1. Moving the Range WARNING 3. Verify Anti-Tip Bracket Location IMPORTANT: ■ On models with a warming drawer, the rear range foot must be level for satisfactory baking...
... Use and Care Guide. 6. Check that rear leveling leg is level. Turn on range operation. Place rack in the Use and Care Guide. If range is not level, pull range forward until range is engaged in death or serious burns to rear range foot. Dry thoroughly with a storage drawer, the drawer may be removed to better view the rear range foot. 1. Moving the Range WARNING 3. Verify Anti-Tip Bracket Location IMPORTANT: ■ On models with a warming drawer, the rear range foot must be level for satisfactory baking...


