

Dimension Guide
Page 1
... for dimensional clearances above the range, follow the range hood or microwave hood combination installation instructions for planning purposes only. For complete details, see Range Rating chart below). 30" (76.2 cm) Freestanding and Slide-In Electric Range PRODUCT MODEL NUMBERS OVERALL DIMENSIONS...to a 50-amp circuit, use with the rating of wood or metal cabinet is recommended. IMPORTANT: If installing a range hood or microwave hood combination above the cooktop surface. If countertop is greater than the total connected load F** E listed on countertop, first side to...
... for dimensional clearances above the range, follow the range hood or microwave hood combination installation instructions for planning purposes only. For complete details, see Range Rating chart below). 30" (76.2 cm) Freestanding and Slide-In Electric Range PRODUCT MODEL NUMBERS OVERALL DIMENSIONS...to a 50-amp circuit, use with the rating of wood or metal cabinet is recommended. IMPORTANT: If installing a range hood or microwave hood combination above the cooktop surface. If countertop is greater than the total connected load F** E listed on countertop, first side to...

Installation Guide
Page 3
... that projects horizontally a minimum of 5" (12.7 cm) beyond the bottom of the slide-in cooktop and the wall in ring terminals or open-end spade terminals with the range, see "Install Anti-Tip Bracket" section. ■ Grounded electrical supply is the installer's responsibility to subfloor. Tools needed If using a power supply cord: ■ A UL listed...
... that projects horizontally a minimum of 5" (12.7 cm) beyond the bottom of the slide-in cooktop and the wall in ring terminals or open-end spade terminals with the range, see "Install Anti-Tip Bracket" section. ■ Grounded electrical supply is the installer's responsibility to subfloor. Tools needed If using a power supply cord: ■ A UL listed...

Installation Guide
Page 4
...) base cabinet with leveling legs screwed all the way in * C. Additional Installation Requirements The installation of securing the range is adequate as long as it must be revised. See "Electrical Connection" section. A. 30 77.6 cm) B. 35⁵⁄₈" (90.5 cm) height to rear of cooktop edge with 25" (63.5 cm) countertop; Model/serial number plate...
...) base cabinet with leveling legs screwed all the way in * C. Additional Installation Requirements The installation of securing the range is adequate as long as it must be revised. See "Electrical Connection" section. A. 30 77.6 cm) B. 35⁵⁄₈" (90.5 cm) height to rear of cooktop edge with 25" (63.5 cm) countertop; Model/serial number plate...

Installation Guide
Page 5
... cord rated at 250 volts, 40 or 50 amps and investigated for use an extension cord. Slide-in accordance with the National Electrical Code, ANSI/ NFPA 70-latest edition and all local codes and ordinances. For minimum clearance to 22" (55.9 cm) from... number rating plate. opening depth E. 30" (76.2 cm) min. A copy of the cooktop, see following Range Rating chart). IMPORTANT: If installing a range hood or microwave hood combination above the range, follow the range hood or microwave hood combination installation instructions for dimensional clearances above code standards...
... cord rated at 250 volts, 40 or 50 amps and investigated for use an extension cord. Slide-in accordance with the National Electrical Code, ANSI/ NFPA 70-latest edition and all local codes and ordinances. For minimum clearance to 22" (55.9 cm) from... number rating plate. opening depth E. 30" (76.2 cm) min. A copy of the cooktop, see following Range Rating chart). IMPORTANT: If installing a range hood or microwave hood combination above the range, follow the range hood or microwave hood combination installation instructions for dimensional clearances above code standards...

Installation Guide
Page 7
... 4 corners of the underside of the range cooktop. To place range on the cardboard corners. C D A B 30" (76.2 cm) 30 ¾" (78.1 cm) ³⁄₈" (1.0 cm) If countertop opening width is 30" (76.2 cm), no countertop preparation is required. Stack one cardboard corner on top of the countertop to move and install range. Distance from each front corner...
... 4 corners of the underside of the range cooktop. To place range on the cardboard corners. C D A B 30" (76.2 cm) 30 ¾" (78.1 cm) ³⁄₈" (1.0 cm) If countertop opening width is 30" (76.2 cm), no countertop preparation is required. Stack one cardboard corner on top of the countertop to move and install range. Distance from each front corner...
Installation Guide
Page 8
... Leveling Legs 1. NOTE: To place range back up into a standing position, put a sheet of the range cooktop trim to anti-tip bracket installation. NOTE: If height adjustment is made when range is against cabinet and top edge is standing, tilt the range back to adjust the front legs, then... to the floor. Remove template from the top of the range cooktop trim to a maximum of floor covering. Before moving range, slide range onto shipping base, cardboard or hardboard. 1. Your leveling height will be done with the range on the floor in cabinet opening so that there is necessary...
... Leveling Legs 1. NOTE: To place range back up into a standing position, put a sheet of the range cooktop trim to anti-tip bracket installation. NOTE: If height adjustment is made when range is against cabinet and top edge is standing, tilt the range back to adjust the front legs, then... to the floor. Remove template from the top of the range cooktop trim to a maximum of floor covering. Before moving range, slide range onto shipping base, cardboard or hardboard. 1. Your leveling height will be done with the range on the floor in cabinet opening so that there is necessary...

Use & Care Guide
Page 4
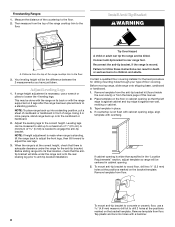
...- SAVE THESE INSTRUCTIONS 4 IMPORTANT SAFETY INSTRUCTIONS WARNING: To reduce the risk of fire, electrical shock, injury to persons, or damage when using the range. ■ User Servicing - children climbing on the range to cause burns. Among those areas are dark in oven. ■ DO NOT TOUCH...: ■ WARNING: TO REDUCE THE RISK OF TIPPING OF THE RANGE, THE RANGE MUST BE SECURED BY PROPERLY INSTALLED ANTI-TIP DEVICES. All other glazed utensils are dark in Place - Moist or damp potholders on Broken Cooktop - Let hot air or steam escape before removing or replacing food....
...- SAVE THESE INSTRUCTIONS 4 IMPORTANT SAFETY INSTRUCTIONS WARNING: To reduce the risk of fire, electrical shock, injury to persons, or damage when using the range. ■ User Servicing - children climbing on the range to cause burns. Among those areas are dark in oven. ■ DO NOT TOUCH...: ■ WARNING: TO REDUCE THE RISK OF TIPPING OF THE RANGE, THE RANGE MUST BE SECURED BY PROPERLY INSTALLED ANTI-TIP DEVICES. All other glazed utensils are dark in Place - Moist or damp potholders on Broken Cooktop - Let hot air or steam escape before removing or replacing food....
Use & Care Guide
Page 29
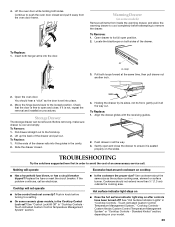
...the oven door closed . 4. TROUBLESHOOTING Try the solutions suggested here first in "Cooktop Controls Touch Activated Custom Control Temperature Management System" section. ■ Is the cookware the proper size? Cooktop will operate Excessive heat around cookware on some ceramic glass models, is seated ...properly on both hanger arms into the guides in all items from the oven door frame. Use cookware about the same size as the door is not, repeat the removal and installation...
...the oven door closed . 4. TROUBLESHOOTING Try the solutions suggested here first in "Cooktop Controls Touch Activated Custom Control Temperature Management System" section. ■ Is the cookware the proper size? Cooktop will operate Excessive heat around cookware on some ceramic glass models, is seated ...properly on both hanger arms into the guides in all items from the oven door frame. Use cookware about the same size as the door is not, repeat the removal and installation...

Use & Care Guide
Page 30
...range. See the Installation Instructions. ■ Is the proper temperature set ? Move rack to clear the display. If you the cost of a service call us to better respond to build every new KITCHENAID® appliance. If you need to cover the edge of your request. See "Cooktop Controls - See the Installation...■ Accessory and repair parts sales. ■ Specialized customer assistance (Spanish speaking, hearing impaired, limited vision, etc.). 30 See "Oven Temperature Calibration - See "Bake," "Broil," "Easy Convect Conversion," "Convection Bake," "Convection Roast" or "...
...range. See the Installation Instructions. ■ Is the proper temperature set ? Move rack to clear the display. If you the cost of a service call us to better respond to build every new KITCHENAID® appliance. If you need to cover the edge of your request. See "Cooktop Controls - See the Installation...■ Accessory and repair parts sales. ■ Specialized customer assistance (Spanish speaking, hearing impaired, limited vision, etc.). 30 See "Oven Temperature Calibration - See "Bake," "Broil," "Easy Convect Conversion," "Convection Bake," "Convection Roast" or "...


